

That unmistakable fried-food smell hits you the moment you walk back into your kitchen—hours after you finished cooking. Whether it’s yesterday’s fish dinner or this morning’s bacon, stubborn kitchen odors have a way of clinging to every surface and refusing to leave. These persistent smells don’t just fade away on their own; they require targeted action to eliminate completely.
The good news? You don’t need harsh chemicals or expensive gadgets to reclaim your fresh-smelling kitchen. This guide reveals proven techniques that actually eliminate odors rather than just masking them, from immediate fixes you can implement right now to long-term strategies that prevent smells from forming in the first place. Let’s transform your kitchen from a lingering odor zone to a fresh, inviting space.
Neutralize Cooking Odors Within Minutes
Boil Vinegar and Water for Instant Odor Elimination
When fishy or greasy smells invade your kitchen, white vinegar works like odor-seeking missiles, binding with volatile compounds and neutralizing them completely. For immediate relief, combine one cup white vinegar with one cup water in a saucepan. Bring to a boil and let it bubble for 15 minutes while the steam penetrates every corner of your kitchen.
The temporary vinegar scent dissipates within minutes, taking the fried-food odors with it. Pro tip: Add lemon peels, cinnamon sticks, or star anise to soften the vinegar aroma while maintaining its odor-fighting power. This simple method works especially well for stubborn fish smells that seem impossible to remove.
Deploy Used Coffee Grounds for Overnight Odor Absorption

Your morning coffee grounds pull double duty as odor absorbers. After brewing, spread used grounds on a baking sheet to dry for eight hours. Place these dried grounds in small bowls around the kitchen overnight—they’ll absorb stubborn smells while releasing a pleasant coffee aroma.
Critical note: Never use fresh coffee grounds for this purpose. The nitrogen-rich used grounds have already released their volatile compounds, making them more effective at absorbing rather than emitting odors. Replace the grounds every 24 hours until odors disappear completely.
Stop Kitchen Odors Before They Start
Control Oil Splatter That Causes Lingering Smells
Prevent odors at the source by containing airborne grease particles before they spread. Use deep, heavy pots with high sides when frying—these create natural barriers that trap greasy mist. Position a mesh splatter screen over pans to reduce airborne oil droplets by up to 80%.
Time-saving tip: Clean surfaces immediately while still warm. A quick wipe with a damp, soapy cloth removes oily residue before it cools and hardens, which prevents it from creating lasting smells. This takes less than two minutes but saves you hours of deep cleaning later.
Maximize Ventilation During Cooking Sessions
Your range hood isn’t just for smoke—it’s your primary odor defense system. Turn it on before heating oil and keep it running 15-20 minutes after cooking finishes. For weak hoods, position a box fan in a window blowing outward to create a temporary exhaust system that pulls odors outside.
Warning: Never skip ventilation when cooking with oils that reach high temperatures. When oil breaks down, it releases microscopic particles that cling to fabrics and walls, causing odors to persist for days.
Deep Clean Your Major Odor Hotspots
Eliminate Trash Can Odors in 3 Steps
Kitchen garbage cans harbor more odor-causing bacteria than most realize. Take the can outside and spray the interior with a vinegar solution (one part distilled white vinegar to four parts water). Let it sit for five minutes, then scrub away stuck-on debris.
Follow with hot, soapy water, then disinfect with a bleach solution (four teaspoons bleach per quart of room-temperature water). Crucial step: Let everything dry completely before bringing it back inside—moisture encourages bacterial growth that creates new odors.
Purge Refrigerator Odors That Spread Through Your Kitchen
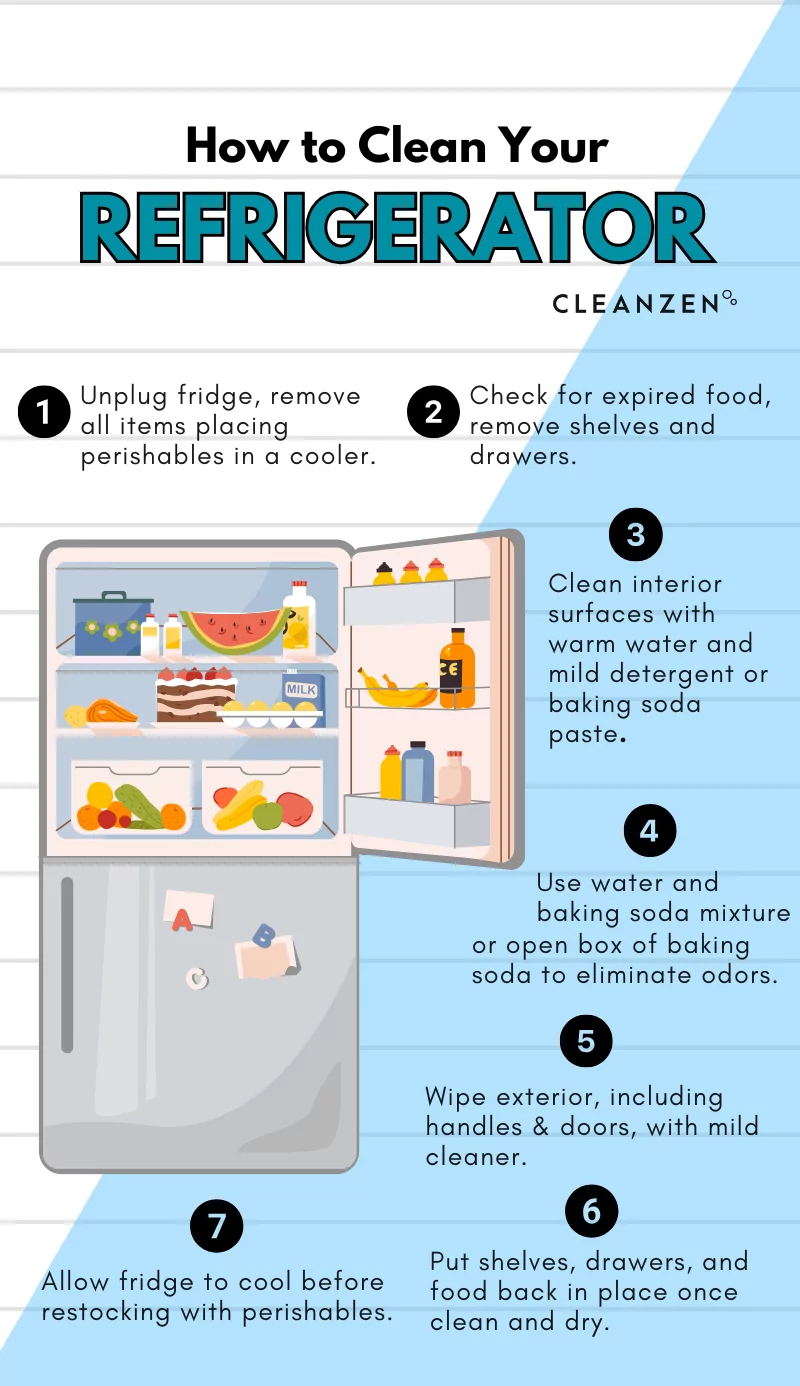
Expired food releases odors that permeate your entire kitchen space. Remove everything from your refrigerator and check expiration dates ruthlessly. Toss anything questionable, especially meat, dairy, or produce past its prime.
Wipe down all surfaces with baking soda solution (two tablespoons per quart of warm water) to neutralize absorbed odors. Place an open box of baking soda in the back—it continues absorbing smells for up to eighteen months. Pro tip: Store strong-smelling foods in airtight containers to prevent future odor transfer.
Fix Smelly Sink and Garbage Disposal Drains
Food particles trapped in your drain create persistent odors that waft throughout your home. Pour half cup baking soda followed by one cup white vinegar down the drain. Let the fizzing action work for 15 minutes, then flush with boiling water.
For garbage disposals, grind lemon rinds with ice cubes. The citrus cuts through grease while the ice sharpens blades and dislodges trapped debris. Maintenance schedule: Perform this treatment weekly to prevent odor buildup.
Long-Term Odor Prevention Strategies
Strategic Baking Soda Placement for Continuous Protection
Baking soda’s odor-absorbing properties last for months when positioned correctly. Place small bowls on countertops overnight to neutralize stubborn smells. Keep an open box in the refrigerator’s back section, replacing every eighteen months.
For trash cans, sprinkle baking soda in the bottom before inserting new bags. This creates an odor-absorbing barrier between garbage and the can itself. Note: Baking soda works best when undisturbed for at least eight hours, so deploy it overnight for maximum effectiveness.
Activated Charcoal for Persistent Odor Problems
Activated charcoal provides slow, steady deodorizing over extended periods. Leave small bowls around the kitchen overnight to absorb lingering odors. While not providing immediate results, charcoal effectively reduces smells over time and works particularly well in adjacent rooms where cooking aromas drift.
Timeframe: Expect noticeable improvement after 24-48 hours of continuous use. For severe odor problems, combine charcoal with other methods for comprehensive odor elimination.
Specialized Cleaning for Problematic Kitchen Items
Restore Wooden Cutting Boards That Trap Odors
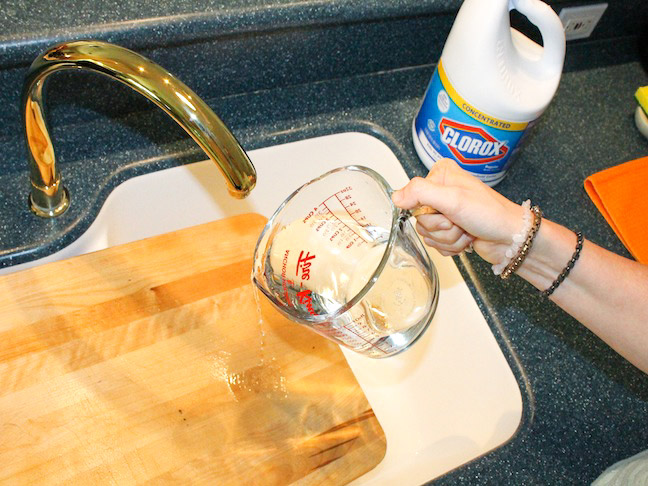
Wood’s porous nature traps odors and breeds mildew. Create a sanitizing solution of one tablespoon unscented liquid chlorine bleach per gallon of water. Cover the cutting board surface completely, let stand for several minutes, then flip and repeat on the opposite side.
Rinse thoroughly with clean water and pat dry immediately with paper towels. Critical warning: Never leave wooden boards soaking—this encourages mold growth and further odor retention.
Deodorize Silicone Ice Trays That Transfer Smells
Ice cubes can absorb refrigerator odors through porous silicone trays. Place trays in a 350-degree oven for one hour (silicone withstands temperatures up to 500 degrees). This baking process eliminates absorbed odors, ensuring fragrance-free ice cubes.
Clean Spice Grinders Without Water Damage
Pungent spices leave behind oils that muddy future flavors and create lingering odors. Dry-clean your grinder by blitzing raw rice into fine powder. The rice picks up residue and absorbs excess oils from previous spices.
Pro tip: Run the rice through two or three times for thorough cleaning, then wipe interior with a dry cloth before next use.
Eliminate Garlic and Onion Smells from Hands
Garlic’s sulfur-containing molecules create persistent hand odors that normal washing won’t remove. After chopping garlic, rub your hands on any stainless steel surface—your faucet, a spoon, or specialized stainless steel “soap” bars. The steel transfers sulfur molecules from your skin to the metal.
Visual cue: You’ll notice the smell transferring to the steel. Wash the steel with soap and water to complete the removal process. This works in under 30 seconds and beats the alternative of smelling like garlic for hours.
Avoid These Kitchen Odor Mistakes
Skip Ineffective Cover-Up Methods
Candles, simmer pots with cinnamon and citrus, and room sprays provide pleasant aromas but prove ineffective for actual odor removal. These methods merely mask odors temporarily, with cooking scents returning immediately after stopping the fragrance source.
Expert insight: True odor elimination requires neutralizing the source compounds, not covering them with competing scents. Focus on vinegar, baking soda, and charcoal solutions that chemically bind with odor molecules.
Never Neglect Kitchen Sponges
Kitchen sponges breed bacteria that create foul odors. Replace them weekly, or sanitize using these proven methods:
- Microwave: Dampen sponge and microwave for two minutes
- Dishwasher: Run through sanitizing cycle with heated dry
- Bleach solution: Soak in ¾ cup bleach per gallon water for five minutes
Critical reminder: Always allow sponges to dry completely between uses—constantly moist sponges breed smelly and potentially dangerous bacteria.
Implement Your Complete Kitchen Odor Management System
Create a Pre-Cooking Odor Defense Setup
Before turning on the stove, prepare your kitchen for odor defense. Turn on range hoods, set up vinegar simmer pots, and gather deep pots with splatter screens. This proactive approach prevents odors from establishing themselves.
Time commitment: Just 60 seconds of preparation saves you hours of odor fighting later. Keep your vinegar solution ready in a labeled container for quick access.
Maintain During Cooking to Prevent Odor Buildup
Keep ventilation running constantly while cooking. Monitor oil freshness—old oil breaks down and creates stronger odors. Wipe warm surfaces immediately after use to prevent grease from hardening.
Expert tip: Keep a spray bottle of vinegar solution nearby for quick counter wipes while surfaces are still warm and grease hasn’t set.
Establish Post-Cooking Odor Elimination Protocol
Continue ventilation for 15-20 minutes after finishing cooking. Implement vinegar steam treatments immediately while odors are fresh. Deploy baking soda or charcoal bowls for overnight absorption.
Quick checklist:
1. Run vinegar steam for 15 minutes
2. Wipe down all surfaces
3. Place odor absorbers in key locations
4. Take out trash if containing strong-smelling items
By combining these immediate prevention tactics with thorough elimination techniques, you can enjoy delicious, aromatic cooking without enduring days of unwanted kitchen odors. Your kitchen will smell as fresh as it looks, making every cooking session more enjoyable from start to finish. Implement these methods consistently, and you’ll wonder how you ever managed without them.

