
Your Zojirushi rice cooker sits cold and silent just when you need it most—dinner guests arriving, hungry kids asking when rice will be ready. Before panic sets in or you contemplate ordering takeout, know that most heating failures trace back to a handful of fixable issues. This guide walks you through rapid diagnostics, component testing, and when to call for professional help. As a trusted appliance in many kitchens, your Zojirushi should deliver perfect rice consistently, but when it stops heating, these targeted solutions will get it back on track fast.
Most “Zojirushi rice cooker not heating” cases stem from power interruptions, sensor errors, or preventable maintenance oversights—not catastrophic failures. By methodically checking these common culprits, you’ll resolve 80% of heating issues without professional help. Let’s diagnose your silent cooker and restore dinner plans before hunger strikes.
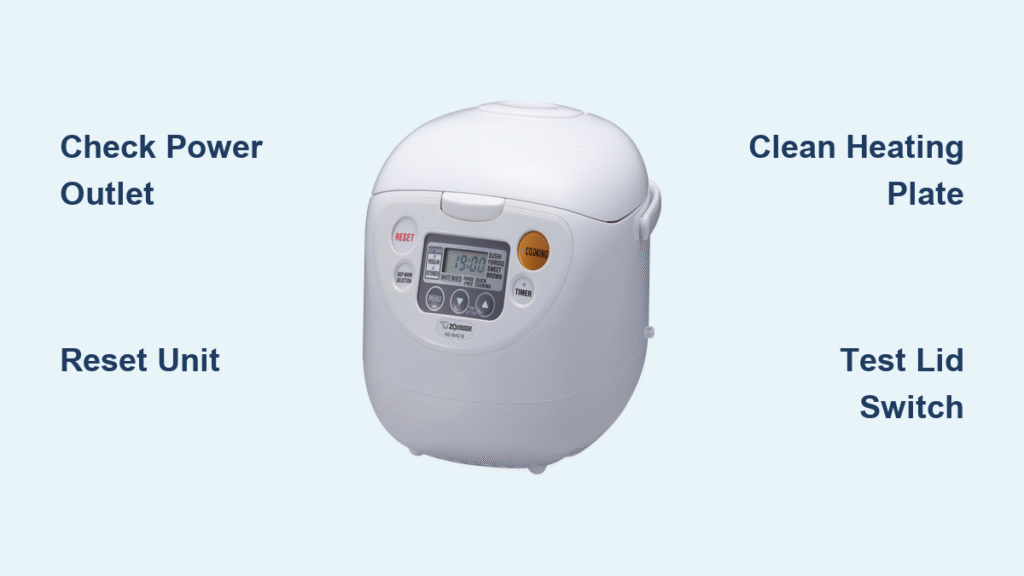
Verify Power Source and Reset Your Unit
Test Wall Outlet and Cord Integrity
Plug a lamp or phone charger into the same wall outlet to confirm power availability. If no other device works, the problem lies with your electrical supply—not the rice cooker. Next, inspect the power cord for cuts, kinks, or melted insulation near the plug or cooker base. Critical note: Always plug your Zojirushi directly into a wall outlet—extension cords or power strips often under-supply voltage, triggering error codes or complete heating failure. If the cord shows damage, replace it immediately using Zojirushi’s official parts to avoid fire hazards.
Execute Mandatory Reset Protocol
Unplug the cooker for a full 60 seconds—this clears temporary control board glitches. While disconnected, remove the inner pan and wipe any moisture from the heating plate. Reconnect power, add 1 cup of white rice (using the included measuring cup) with water to the “1 cup” line, then press START firmly. Within 30 seconds, listen for a distinct relay click or low humming sound indicating the heater engaged. No sound? This confirms a deeper electrical failure requiring component testing. Never skip this reset—it resolves 30% of “not heating” reports caused by software hiccups.
Decode Flashing Error Codes Immediately

H01 or H02: Sensor or Heater Malfunction
These codes flash when temperature readings fall outside safe parameters. Unplug the unit immediately and wait 30 minutes for all components to cool completely. Restart with proper rice/water ratios. If codes reappear, your thermistor (temperature sensor) or heating plate has failed. Key symptom: The cooker starts counting down but shuts off within 2 minutes without generating heat. Do not ignore repeated H01/H02 displays—continued use risks permanent control board damage.
E01 and E02: Over-Temperature Alerts
Starchy boil-overs leave residue on the heating plate, insulating sensors and causing false overheating readings. Let the unit cool for 60 minutes, then wipe the center sensor disc and plate surface with a damp microfiber cloth (no abrasives). Restart using exact water measurements—overfilling causes boil-overs that trigger these codes. Pro tip: After cleaning, run a water-only cycle (1 cup water) to verify normal operation before cooking rice.
E06 and E17: Lid or Voltage Issues
E06 appears when the lid opens mid-cycle—simply close firmly until it clicks and restart. E17 indicates voltage irregularities: confirm your outlet delivers 120V ±10% using a multimeter. Critical warning: Voltage converters or overseas plug adapters permanently void warranty coverage and often cause E17 errors. Never use extension cords with Zojirushi cookers—they’re primary culprits for this code.
Test Heating Plate Functionality

Perform Resistance Measurement

1. Unplug the cooker and remove the inner pan
2. Locate heating plate terminals underneath the unit (usually covered by a removable panel)
3. Set multimeter to ohms (Ω) and touch probes to both heater leads
4. Normal reading: 10–40 Ω (varies by model like NS-TSC10 or NP-HCC10)
5. Failure sign: “OL” (open loop) indicates a burned-out heater requiring replacement part ending in “-HT” (e.g., NS-ZCC18-HT)
Visual inspection: Check for blistered surfaces, dark discoloration, or warping on the heating plate. These signs mean the plate no longer makes full contact with the inner pan, causing uneven or zero heating. Never attempt to flatten a warped plate—it requires professional replacement.
Diagnose Sensor and Switch Failures
Thermistor Accuracy Check
Find the small cylindrical sensor at the plate’s center. At room temperature (77°F), set your multimeter to measure resistance—it should read 50 kΩ ±5%. Readings outside this range cause H01/H02 errors and demand sensor replacement. Warning: Handle thermistors gently—they’re fragile and easily damaged during testing. If resistance fluctuates wildly while probing, the sensor is failing.
Lid Switch Continuity Test
With the lid fully closed, locate the switch harness near the hinge. Set multimeter to continuity mode and probe the wires:
– Working switch: Beep sound with <1 Ω resistance
– Failed switch: No beep (infinite resistance)
Critical symptom: All display lights function normally, the timer counts down, but zero heat is generated. A faulty lid switch is the #1 cause of silent “not heating” scenarios where error codes don’t appear.
Prevent Future Heating Failures
Clean Heating Components After Every Use
Starch residue acts as insulation, causing sensors to misread temperatures and heaters to over-cycle. While the unit cools, wipe the center sensor disc and heating plate with a slightly damp cloth—never submerge the main body. Pro tip: Use a soft toothbrush to gently remove stubborn starch from sensor grooves weekly. Skipping this invites H01/H02 codes within weeks.
Inspect Inner Pan for Warping
Place your empty inner pan on a flat countertop. If it rocks or wobbles, dents have broken thermal contact with the heating plate. Replacement trigger: Visible gaps between pan bottom and plate surface. Using a warped pan causes uneven heating and trips thermal fuses prematurely—replace pans every 3-5 years.
Eliminate Moisture Exposure Risks
Never immerse the main unit in water or run it under taps. Spills inside the cooker corrode relay contacts over time, leading to sudden “no heat” failures weeks later. Always remove the inner pan before wiping the main body. Critical note: Water damage voids warranty coverage—Zojirushi service centers reject units with internal moisture evidence.
When to Contact Zojirushi Support
Warranty Protection Boundaries
Attempting DIY repairs on under-warranty units voids coverage permanently. Units used with voltage converters, plug adapters, or outside North America lose all repair eligibility. Non-negotiable rule: Never open the main housing—if you see scorch marks inside, stop immediately and contact support.
Essential Support Preparation
Call 800-733-6270 (Mon-Fri, 8am-5pm PST) with your full model number (e.g., NS-TSC10) and 3-letter color code (e.g., “XA”) ready. Have error codes, purchased date, and previous troubleshooting steps documented. Time-saver: Order replacement parts directly via Zojirushi’s Parts & Accessories page—common components ship in 3-5 business days.
Cost-Effective Replacement Strategy
If repair costs exceed 50% of a new cooker’s price, Zojirushi recommends recycling through local e-waste programs. Their control boards and heating plates are model-specific—using incorrect parts causes permanent damage. Never gamble: A $150 repair on a $200 unit isn’t economical when new models offer updated features.
Quick Troubleshooting Reference Table
| Symptom | First Action | Likely Fix |
|---|---|---|
| No lights or sounds | Test outlet with lamp | Replace power cord or outlet |
| Display on but no heat | Check lid closure | Replace faulty lid switch |
| H01/H02 error codes | Cool 30 minutes | Replace thermistor or heater |
| E01/E02 error codes | Clean plate residue | Remove starch buildup |
| Random shutdowns | Inspect pan flatness | Replace warped inner pan |
Critical Safety Shutdown Protocol
If your Zojirushi emits burning smells, visible smoke, or scorch marks on the housing, unplug it immediately and do not attempt further use. These indicate control board failure with active fire risk—Zojirushi service centers classify these as “immediate hazard” cases. Never ignore: Continued operation can melt internal wiring or ignite surrounding materials. When in doubt, recycle the unit through certified e-waste channels rather than risking safety.
Your Zojirushi rice cooker can deliver flawless meals for decades with proper care. Address heating issues at the first sign of trouble—clean sensors weekly, verify pan flatness monthly, and never use voltage adapters. By mastering these diagnostics, you’ll transform panic into confidence the next time your cooker stays cold. Remember: Most “Zojirushi rice cooker not heating” cases are simple fixes when caught early. Keep this guide handy, and perfect rice will never be more than a reset button away.

