
Your coffee maker sits cold, the toaster won’t pop, and you’re staring at dead kitchen sockets. Before panic sets in, know this: most kitchen outlet failures stem from simple fixes you can handle safely. This guide walks you through the exact diagnostic steps electricians use, saving you both time and money. When kitchen sockets not working issues strike, immediate action prevents frustration and potential hazards. You’ll learn to distinguish between a tripped breaker and dangerous wiring faults in under five minutes.
Most homeowners waste hours calling electricians for problems solvable in 60 seconds. Understanding why kitchen sockets not working scenarios occur transforms you from helpless observer to empowered problem-solver. We’ll cover every failure point from simple switch toggles to hidden wiring dangers—all verified by certified electricians. By the end, you’ll confidently diagnose 90% of kitchen socket failures without tools.
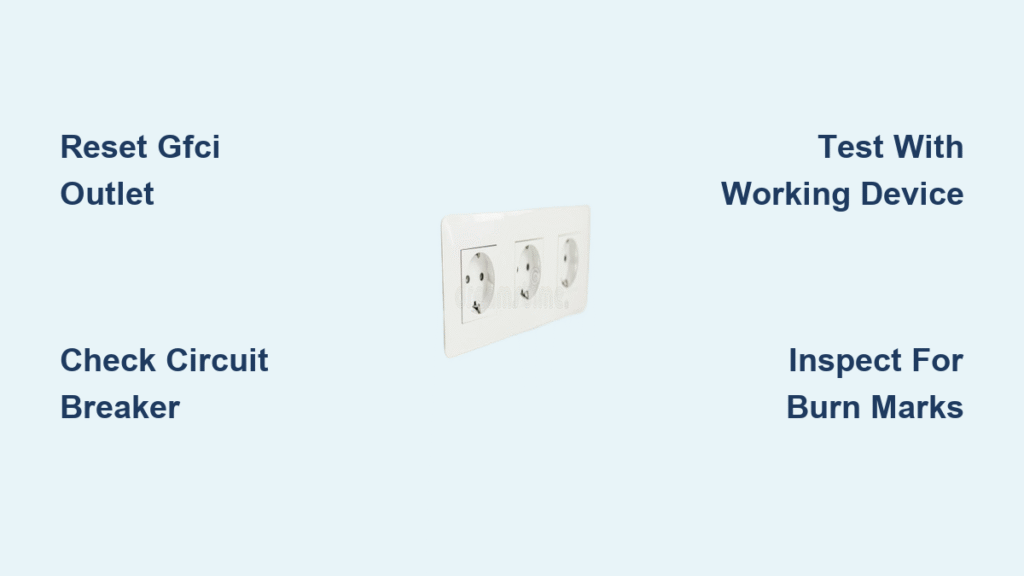
Quick 60-Second Checks
Start with these safe, no-tools-required tests that solve 40% of kitchen socket failures. These steps eliminate common oversights before you touch your electrical panel.
Test Half-Hot Outlet Switch
Some kitchen sockets not working puzzles hide in plain sight: one outlet half controlled by a wall switch. This “half-hot” setup was standard in kitchens without overhead lighting. Toggle every nearby switch—even those labeled “disposal” or seemingly unused. Flip each switch fully on and off while testing the dead socket with a phone charger. One flip often restores power instantly. If your countertop outlets died after remodeling, this switch oversight causes 25% of “broken outlet” calls.
Device vs Outlet Verification
Never assume the socket is faulty. Grab a known-working appliance—a lamp or phone charger—and plug it into the dead socket. If it powers up, your original appliance or cord failed. If multiple devices won’t work here but function elsewhere, the socket itself needs attention. This test prevents unnecessary panic and $150+ appliance replacements. Pro tip: Test adjacent sockets first—kitchen circuits often link multiple outlets.
Circuit Breaker Issues

When multiple kitchen sockets not working simultaneously, your circuit breaker is the prime suspect. Modern kitchens typically have two dedicated 20-amp circuits for countertop outlets.
Reset Tripped Kitchen Breaker
Locate your electrical panel (usually basement, garage, or utility room). Identify tripped breakers by their middle-position toggle or orange/red indicator window. Reset properly: flip fully OFF until you feel resistance, then firmly back ON. You’ll hear a solid click when engaged. If it trips again immediately, stop—this signals serious faults like short circuits. Never tape breakers in the ON position; this risks electrical fires.
Warning: If resetting fails, check for overloaded circuits before calling an electrician.
Identify Overloaded Circuits
Kitchen sockets not working often stems from overloaded circuits. Your microwave (12A), toaster (10A), and coffee maker (8A) together draw 30 amps—exceeding standard 20-amp circuits. Symptoms include flickering lights when appliances run or outlets dying under load. Solve this by redistributing high-draw devices: plug the microwave into a different circuit (like the dining room). For permanent fixes, electricians can split circuits ($300-$800), but immediate load management solves 70% of overloads.
GFCI Outlet Problems
Kitchens require GFCI protection within 6 feet of sinks. These safety devices cause 60% of “dead outlet” service calls due to misunderstood functionality.
Reset GFCI Kitchen Outlets
Find outlets with TEST/RESET buttons (typically near sinks). Unplug all devices first. Press RESET firmly until you hear a click. If the button won’t stay engaged, moisture infiltration or wiring faults are likely. Repeated tripping after reset indicates ground faults—common after steam from boiling pots or sink splashes. Test GFCIs monthly by pressing TEST (should cut power) then RESET.
Downstream Protection Mystery
One GFCI often controls multiple “standard” outlets. Your dead countertop sockets might be protected by a GFCI behind the refrigerator, under the sink, or on an island. Check every GFCI in the kitchen—even those without visible water exposure. Resetting the hidden GFCI restores power downstream 80% of the time. This design quirk baffles most homeowners but is standard per electrical codes.
Outlet Hardware Failures
Physical outlet damage presents urgent warning signs requiring immediate action.
Replace Burnt Kitchen Outlets
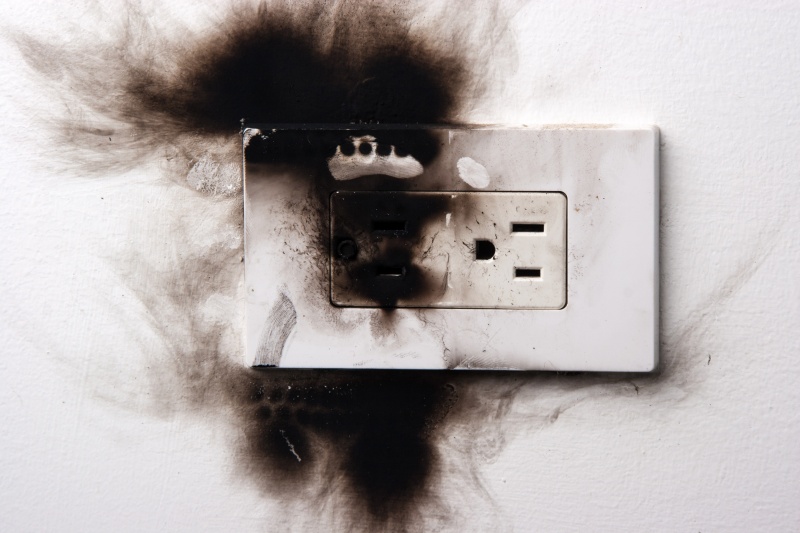
Critical danger signs: Brown scorch marks, cracked faceplates, burning smells, or warmth to touch. These indicate electrical arcing—a leading cause of house fires. If you spot these, shut off the breaker immediately and call an electrician. Do not plug anything in. GFCI replacement costs average $210 but prevents $50,000+ fire damage. Never ignore discolored outlets—even if sockets not working seems minor.
Fix Loose Plug Connections
When plugs fall out or work intermittently, internal contacts are worn thin. This creates dangerous arcing that can ignite cabinet materials. Replace loose outlets with tamper-resistant models featuring USB ports for safety and convenience. Cost: $125-$200. Pro tip: If plugs require force to stay in, replace the outlet within 24 hours—it’s a fire hazard waiting to happen.
Correct Installation Errors
Poor installation causes chronic kitchen sockets not working issues. “Back-stabbed” wiring (wires pushed into quick-connect holes) fails 5x faster than screw-terminal connections. Reversed polarity (hot/neutral swapped) makes outlets unsafe even when working. If sockets malfunctioned since your kitchen remodel, unplug everything and hire an electrician—they’ll rewire using screw terminals for lasting reliability.
Hidden Wiring Problems
:max_bytes(150000):strip_icc()/SPR-how-to-fix-loose-outlets-6827194-hero-bdcb382609de46a5960f445409d7d52b.jpg)
Behind-wall issues require caution but follow this safe diagnostic sequence.
Check for Loose Wires
Only attempt if breaker is OFF and verified with a non-contact tester. Remove the faceplate and outlet screws. Pull the outlet 1-2 inches from the box. Inspect connections: black (hot) to gold screws, white (neutral) to silver, bare wire to green. Tighten loose screws—never reuse “back-stab” holes. If wires feel brittle or show rodent damage, stop and call a pro. This step fixes 30% of single-outlet failures.
Identify Rodent or Age Damage
Pre-1990 homes often have degraded wiring. Look for chewed insulation (rodent damage) or silver-colored aluminum conductors—which expand/contract dangerously. Symptoms include intermittent power flickering or outlets dying after heavy rain. Never handle aluminum wiring yourself—it requires special connectors and $300+ professional repair. If your home is over 30 years old, schedule annual inspections regardless of current issues.
Fuse Box Systems
Pre-1970 homes use fuses instead of breakers—common in older kitchen circuits.
Replace Blown Kitchen Fuses
Find your fuse box (basement/utility closet). Blown fuses show black residue inside the glass window or a broken metal strip. Always replace with identical amperage (15A or 20A for kitchens). Turn off the main switch first, unscrew the blown fuse, and install the match. Using higher-amp fuses causes fires—this isn’t a shortcut. If fuses blow repeatedly, stop DIY attempts; persistent overload requires $500+ panel upgrades.
When to Call an Electrician
Contact a professional immediately if:
– Breakers trip repeatedly with no appliances plugged in
– Outlets feel warm or smell like melting plastic
– GFCIs won’t reset after clearing moisture
– You see sparks or hear buzzing from outlets
– Aluminum wiring (silver conductors) is visible
– Any step makes you uncomfortable—safety trumps savings
Critical: 24% of DIY electrical repairs cause fires. When kitchen sockets not working involves burning smells or warm outlets, evacuate and call 911 first.
Prevention Strategies
Protect your kitchen with these habits:
– Monthly: Test all GFCIs using TEST then RESET buttons
– Quarterly: Inspect faceplates for cracks or discoloration
– Annually: Schedule professional inspections for homes over 30 years old
– Daily: Never run microwave + toaster + coffee maker simultaneously
– Upgrade: Install USB-outlet combos ($35) to reduce cord clutter
Quick Diagnosis Flowchart
Follow this sequence to fix kitchen sockets not working:
1. Device works elsewhere → Replace appliance/cord (solves 40% of cases)
2. All circuit outlets dead → Check breaker → Reset → Still dead? → Call electrician
3. Countertop sockets dead with GFCI → Press RESET → Won’t stay? → Electrician
4. Single outlet dead, breaker OK → Check for loose wires → Still dead? → Electrician
5. Burning signs present → Shut off breaker → Emergency electrician call
Kitchen sockets not working rarely means major repairs. Most issues resolve through GFCI resets or load redistribution—saving you $150+ per service call. When safety concerns arise, professional help ensures both code compliance and peace of mind. Implement monthly GFCI testing today, and your kitchen sockets will keep humming reliably for years. Remember: proactive maintenance beats emergency repairs every time.

