
That stubborn crust of rice clinging to your cooker’s inner pot isn’t just unsightly—it’s a breeding ground for bacteria that taints your next meal with stale flavors. When steam vents clog with starch residue, your perfectly fluffy jasmine rice turns into a burnt, uneven mess. The good news? A thorough how to wash rice cooker session takes only 15 minutes with household items you already own. Skip this critical maintenance, and you’ll face shortened appliance life, weird odors, and rice that sticks like glue. Follow this guide to restore your cooker’s performance and ensure every batch cooks flawlessly.
Most users wait until smoke alarms trigger during cooking before tackling cleaning. But with daily use, starch buildup accelerates—making future scrubbing exponentially harder. Just 5 minutes of post-meal care prevents 30 minutes of elbow grease later. Whether you own a basic $20 model or a high-end Zojirushi, this how to wash rice cooker system works universally. You’ll learn precisely which parts demand gentle handling, how to dissolve rock-hard residue without scratching surfaces, and why skipping steam vent maintenance risks dangerous pressure buildup.
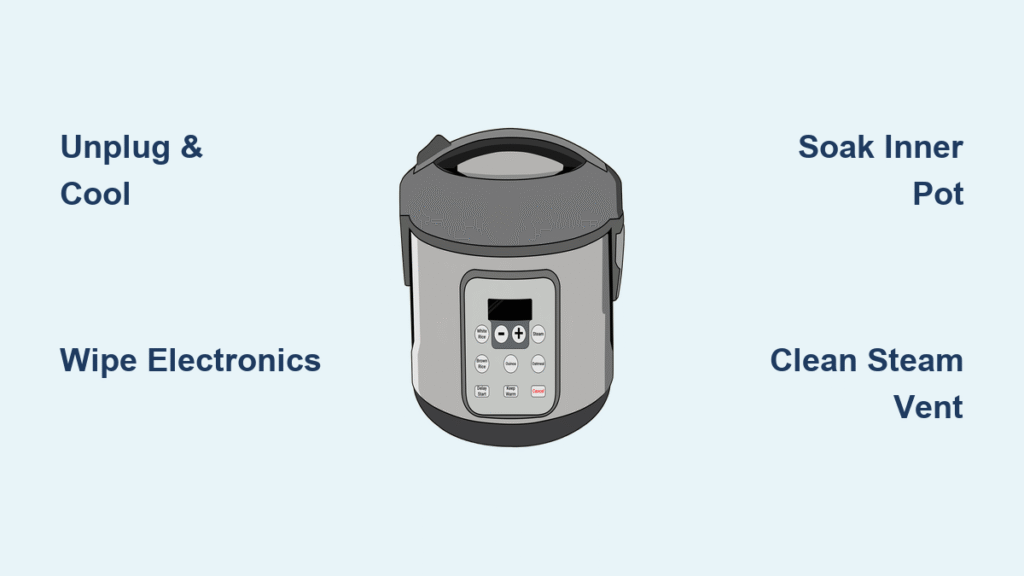
Critical Safety Steps Before Cleaning Your Rice Cooker
Unplug & Cool Down Properly
Never rush cooling—the heating plate retains scorching temperatures for 30+ minutes after cooking. Unplug immediately after your meal finishes, then set a timer. Attempting to clean while warm risks severe burns from the metal hot plate and causes thermal shock that cracks non-stick coatings. For safety, place the cooker near a window during cooldown to prevent accidental contact. If you smell burning during cooking, unplug first before investigating—this avoids electrical hazards from overheated components.
Protect Electrical Components Absolutely
Water and electronics are deadly partners. Never immerse the main body in your sink, even if “waterproof” claims suggest otherwise. The heating element housing, control panel, and power cord inlet are moisture-sensitive zones. When wiping exteriors, spray cleaner only on cloths—never directly on the unit—to prevent liquid seepage. If your model has indicator lights, confirm they’re off before cleaning; residual power means internal components remain live. One drop in the wrong spot can fry circuitry, voiding your warranty instantly.
Must-Have Tools for Safe Rice Cooker Cleaning

Your Essential Toolkit
Gather these before disassembling:
– Non-scratch sponge (blue Scotch-Brite type) for dissolving crust without damaging coatings
– Silicone or plastic spatula (metal alternatives scratch non-stick surfaces permanently)
– Old toothbrush dedicated solely to steam vent cleaning
– Microfiber cloths (paper towels leave lint in crevices)
– White vinegar for odor elimination (skip harsh chemicals that degrade seals)
Items That Destroy Your Cooker
Avoid these at all costs:
– Steel wool pads—even “fine” versions create micro-scratches where bacteria hide
– Bleach-based cleaners that corrode rubber gaskets
– Dishwasher submersion (warps plastic components and damages sensors)
– Dish soap with citrus oils (deteriorates non-stick coatings over time)
Disassemble Without Losing Parts or Patience
Remove Every Piece Systematically
Start by lifting out the inner pot—never yank it sideways, as this misaligns the heating sensor. Next, detach the steam basket (if your model has one) and rice paddle. Premium units like Cuckoo or Tiger often include hidden water drainage trays under the lid; slide these out gently. Place components in order on your counter: inner pot → lid → accessories. This prevents losing small parts and speeds reassembly. If your lid has a rubber seal, note its orientation—it must reinstall correctly to prevent steam leaks.
Identify Model-Specific Components
Basic cookers (like Aroma) have minimal parts: inner pot, lid, and paddle. High-end models add complexity:
– Zojirushi: Remove the inner lid ring and condensation tray
– Instant Pot Duo: Unscrew the sealing ring for deep cleaning
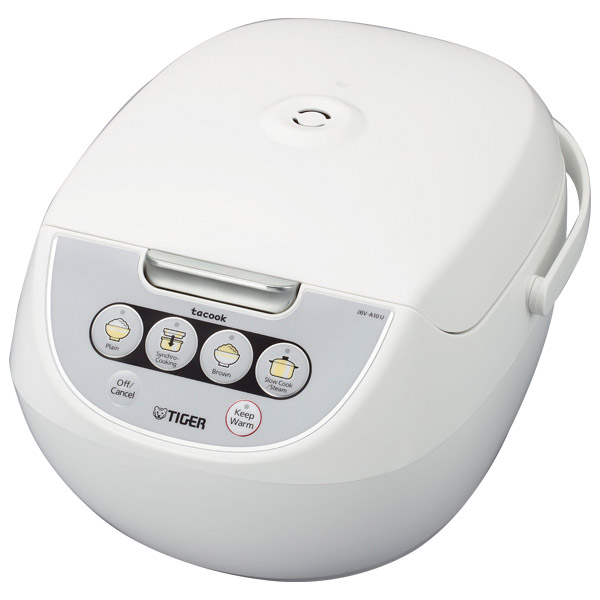
– Tiger JBV-A10U: Slide out the water collector tray beneath the lid
Ignoring these extras leaves hidden mold colonies that contaminate future meals. Consult your manual if unsure—search “[Your Model] + disassembly video” for visual guidance.
Eliminate Crusty Rice From Inner Pot Without Scratches
Soak Strategically Based on Buildup Level
Fill your sink with hot water and 2 tbsp dish soap. Submerge the inner pot for:
– 20 minutes for light residue
– 45 minutes for hardened crust (add ¼ cup baking soda to soften burnt spots)
– 2+ hours for neglected cookers (replace water once when it cools)
Pro tip: Add a tablespoon of rice vinegar to the soak—it breaks down starch faster than soap alone.
Lift Residue, Don’t Scrape It
After soaking, never scrub aggressively. Instead:
1. Use your plastic spatula at a 15-degree angle to lift loosened rice
2. For stubborn spots, rub with a non-scratch sponge using circular motions
3. Focus on corners where starch accumulates fastest
Applying downward pressure gouges non-stick coatings, creating pits where future rice bonds permanently. If residue persists, repeat soaking—patience beats damage every time.
Rinse and Dry to Prevent Flavor Transfer
Rinse under warm water until the surface squeaks clean (no soap film). Dry immediately with a microfiber cloth; air-drying causes mineral spots that affect rice texture. For extra protection, rub the pot with a drop of cooking oil—this fills microscopic scratches and extends coating life. Critical: Never store the pot while damp—it breeds mold between the pot and heating plate.
Fix Clogged Steam Vents Causing Burnt Rice
Clean Detachable Lids Thoroughly
Remove rubber seals (they trap moisture) and wash separately with soapy water. Use your toothbrush to scrub the entire steam channel, not just the visible hole. Pay special attention to the lid’s underside where condensation pools—this is prime mold territory. Rinse seals under running water, squeezing gently to flush internal crevices. Dry completely before reattaching; a damp seal causes steam leaks during cooking.
Maintain Fixed Lids Without Water Damage
For non-removable lids (common on budget models):
1. Wipe interior with a barely damp microfiber cloth
2. Target the steam vent with a toothbrush dipped in vinegar
3. Never spray liquid directly—tilt the cooker to prevent drips into electrical parts
If water enters the hinge mechanism, run the cooker empty for 10 minutes on “keep warm” to evaporate moisture. Blocked vents cause uneven cooking—your next batch will have a burnt bottom layer while the top stays mushy.
Rescue Accessories From Hidden Rice Grains
Deep-Clean the Steam Basket & Paddle
Soak both in your pot-cleaning solution for 10 minutes. Use the toothbrush to probe paddle crevices where grains hide (especially near the handle joint). For steam baskets, focus on the base where rice collects during cooking—this gunk later burns onto your next meal. Rinse baskets upside down to flush trapped water from drainage holes. Warning: Metal paddles can discolor in vinegar solutions—stick to soap for these.
Empty Water Drainage Trays Weekly
Premium cookers collect condensation in hidden trays beneath the lid. Slide these out and dump accumulated water immediately after cooking—it’s a bacterial breeding ground. Wash trays with soapy water weekly, even if you use your cooker daily. Neglecting this causes musty odors in stored rice and promotes mold growth under the lid seal.
Protect the Heating Element From Permanent Damage
Inspect for Burnt Residue Safely
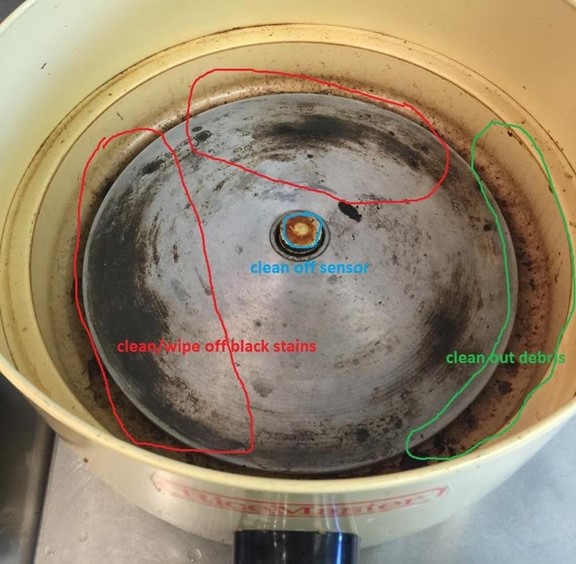
Once the inner pot is removed, check the heating plate for:
– Blackened spots (oil splatters from cooking)
– White crust (mineral deposits from hard water)
– Rice grains stuck in sensor grooves
These cause hot spots that burn rice unevenly. If you see damage (cracks, peeling coating), stop using the cooker—it’s an electrical hazard.
Wipe With Zero Moisture Risk
Dampen a cloth with distilled water only (tap water leaves minerals). Wipe in concentric circles from the center outward. For stuck debris, use a dry toothbrush—never apply pressure. If residue persists, place a vinegar-soaked cloth on the spot for 5 minutes, then wipe. Critical: Run your hand over the plate before reassembly—it must feel bone-dry to prevent short circuits.
Restore Exterior Shine Without Damaging Electronics
Clean Control Panels Safely
Spray all-purpose cleaner onto a microfiber cloth (not the unit!). Wipe buttons and displays vertically to avoid liquid seeping into seams. For sticky residue, use a cotton swab dipped in rubbing alcohol—this evaporates fast without damaging screens. Never use window cleaners; ammonia fumes degrade plastic housings over time.
Remove Stains From Base & Handles
Hard water spots on the base? Rub with a vinegar-dampened cloth. For greasy splatters, use diluted dish soap on a soft sponge. Always dry hinges immediately—trapped moisture causes rust that jams lid mechanisms. Pro tip: Apply a drop of food-safe mineral oil to plastic parts yearly to prevent cracking.
Eliminate Lingering Burnt Smells in 10 Minutes
Run a Vinegar Deodorizing Cycle
Mix equal parts water and white vinegar in the inner pot. Cook on “white rice” mode for 10 minutes, then let it sit for 5. The steam penetrates every crevice, neutralizing odors from burnt batches. Afterward, rinse the pot and run a plain water cycle to remove vinegar taste. For garlic or fish smells, substitute lemon juice—it leaves a fresh scent without acidity.
Prevent Future Odors Proactively
After each use, wipe the lid seal with a vinegar-dampened cloth. Store the cooker with the lid ajar 1 inch to circulate air—this prevents mustiness from trapped moisture. Never store rice inside the cooker; transfer leftovers within 2 hours to avoid bacterial growth.
Stop Crust Before It Starts With Smart Habits
Clean Immediately After Serving
While rice is still warm (but not hot), add soapy water to the pot—it prevents starch hardening. For quick cleanups, fill the pot with 2 cups water and 1 tbsp vinegar, then press “keep warm” for 15 minutes. The gentle heat loosens residue effortlessly. Never let rice sit overnight—it bonds to coatings like industrial glue.
Optimize Cooking Ratios to Reduce Mess
Use 1 cup rice to 1.25 cups water for most white rices (adjust for brown rice). Overfilling causes boil-overs that bake onto the lid; underfilling leads to dry, burnt crust. Always rinse rice 2-3 times before cooking—this removes excess starch that causes sticking. For sticky rices like sushi, add 1 tsp oil to the water—it creates a non-stick barrier.
Reassemble Correctly to Avoid Future Headaches
Verify Complete Dryness Before Storage
Moisture trapped in seals causes mold within 48 hours. Reassemble only when:
– Inner pot squeaks when rubbed
– Steam vents show no condensation
– Rubber seals feel room-temperature (not cool from evaporation)
Place components on a drying rack for 20 minutes if unsure—rushing this step ruins everything.
Store With Moisture-Proofing Tactics
Leave the lid slightly ajar with a folded paper towel inside to absorb humidity. Wrap the cord loosely—tight loops damage wires. Store upright in a cool, dry place; never stack heavy items on top (this warps the housing). For long-term storage, place silica gel packets inside to prevent corrosion.
Your how to wash rice cooker routine now ensures consistently perfect rice while doubling your appliance’s lifespan. By dedicating 5 minutes after each use, you’ll avoid the 30-minute deep cleans caused by neglect. Remember: vinegar solves 90% of odor and crust issues, steam vents require weekly attention, and never let moisture touch electrical parts. Implement these steps, and your cooker will deliver fluffy, unstuck rice for years—no burnt batches, no weird smells, just effortless cooking. Ready for more? Master rice cooker maintenance with our guide to fixing common error codes before they ruin your dinner.

