
Nothing ruins crispy chicken wings faster than finding half your dinner stuck to the basket. Parchment paper solves this common air fryer frustration, but using it wrong can create fire hazards or uneven cooking. Whether you’re air frying frozen French fries or delicate salmon filets, mastering how to use parchment paper in air fryer ensures perfect release every time while keeping your kitchen safe.
This guide covers everything from cutting perfect liners to handling tricky foods, ensuring every meal cooks evenly without the cleanup nightmare. Let’s transform your air frying experience with proper parchment paper techniques that prevent both stuck food and safety issues.
Air Fryer Parchment Paper Safety Rules You Must Follow

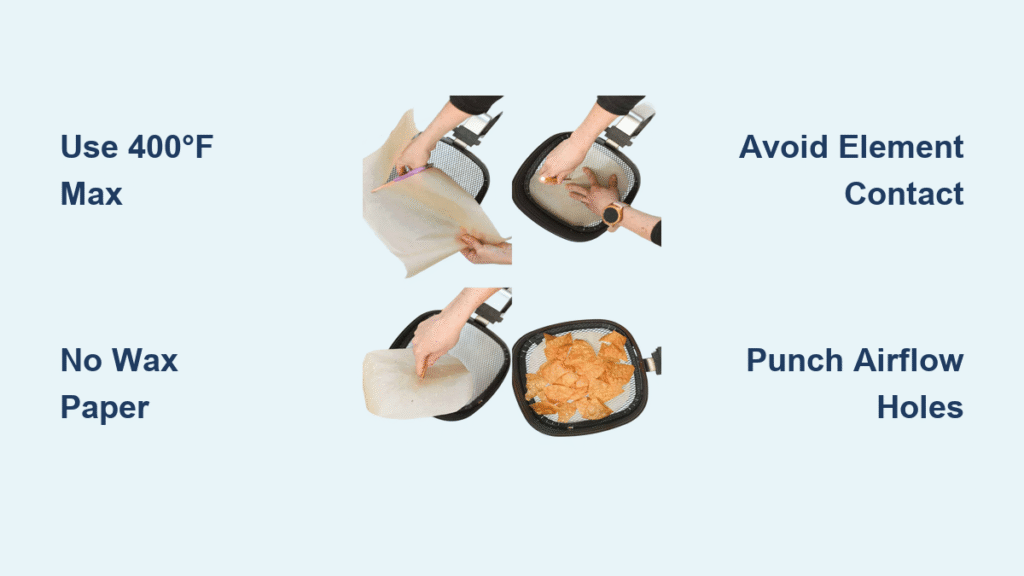
Never Exceed 400°F Temperature Limit
Standard parchment paper handles heat up to 400°F safely—never exceed this threshold. Check your packaging for the exact temperature rating, as some brands vary slightly. Air fryers heat more intensely than ovens, making this limit crucial for preventing ignition. When cooking at maximum air fryer temperatures, always verify your parchment paper’s specific heat tolerance first.
Wax Paper vs. Parchment Paper: Critical Distinction
Wax paper melts at air fryer temperatures, creating permanent messes and potential health hazards. Only use food-grade parchment paper specifically marked as oven-safe. If you’re unsure, check for the distinctive parchment texture—waxy or plastic-feeling papers aren’t safe. The difference between parchment and wax paper could mean the difference between perfectly cooked salmon and a smoky kitchen emergency.
Prevent Direct Heating Element Contact
Air fryers pack powerful heating elements close to the cooking basket. Never let parchment paper touch these elements, as direct contact creates the primary fire risk. This happens more easily in air fryers than conventional ovens due to compact designs. Keep parchment centered on the basket bottom with at least ¼ inch clearance from all sides to maintain safe airflow.
Prepare Perfect Parchment Liners for Air Fryer Success
Choose Between Standard Paper and Pre-Cut Liners
Standard Parchment Paper: Requires manual cutting and hole-punching. Both bleached and unbleached varieties work identically—choose based on preference, not performance. This option works for any air fryer model but needs customization.
Pre-Cut Air Fryer Liners: Feature pre-made holes for optimal airflow. These fit round or square baskets perfectly but won’t work in rectangular or toaster oven-style air fryers. They cost more but save preparation time for frequent users.
Cut to Exact Basket Dimensions
Measure your basket bottom and cut parchment ½ inch smaller on all sides. This gap ensures proper air circulation while preventing bunching. The liner should lay completely flat without folds or wrinkles. For round baskets, trace the bottom on parchment then cut just inside the line for perfect sizing.
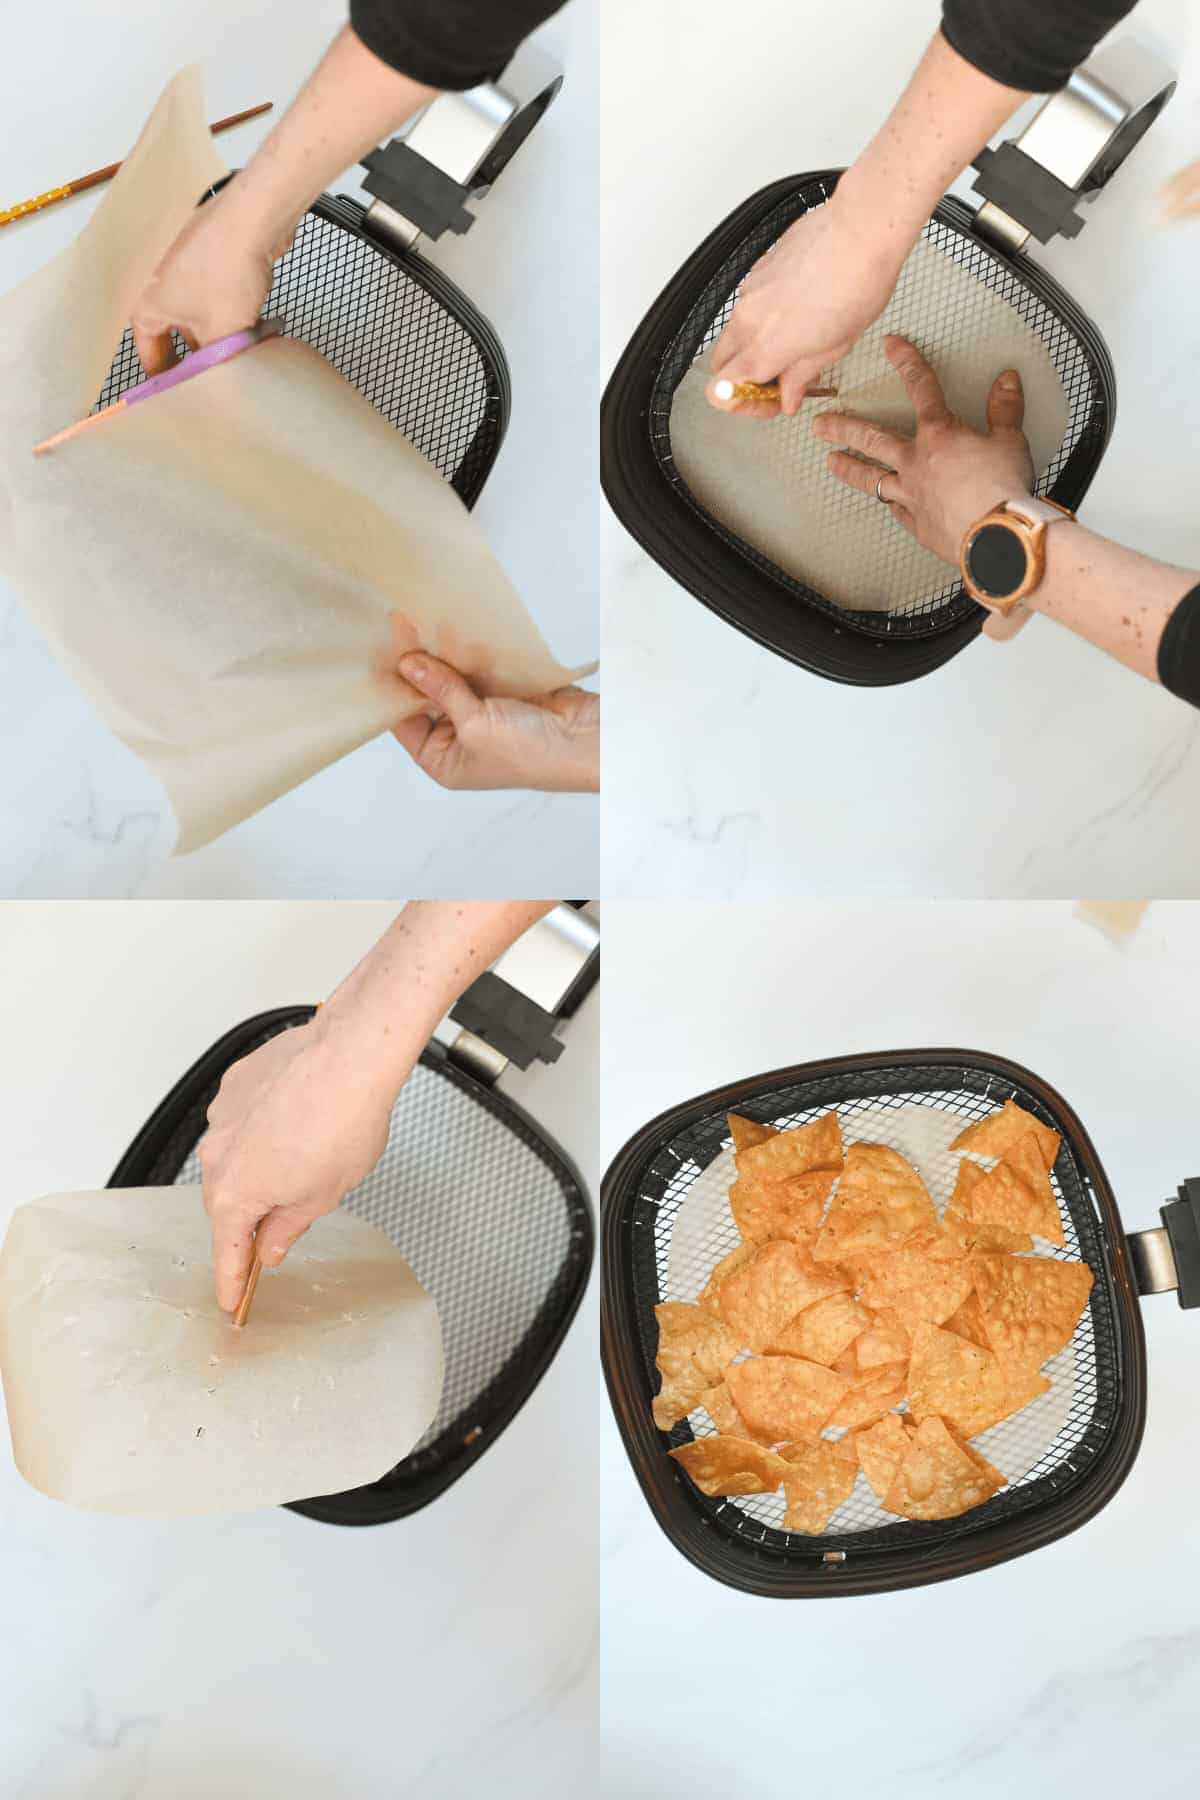
Create Essential Airflow Holes
DIY Perforation Method: Use a standard hole punch to create ¼-inch holes every ½ inch across the paper. This mimics commercial liners and prevents hot spots while maintaining the non-stick surface. For larger baskets, spend 30 seconds punching holes to ensure even cooking.
Quick Alternative: Fold parchment in half multiple times, then make random cuts with scissors. Unfold for evenly distributed holes when you’re in a hurry. This method works well for occasional use but may create uneven airflow.
Air Fryer Parchment Paper Setup Sequence
Critical Preheating Protocol
Never preheat with parchment inside—the lightweight paper will fly around and potentially ignite. Always preheat your air fryer empty, then add parchment and food immediately after preheating. This simple rule prevents 90% of parchment-related air fryer accidents.
Proper Food Placement Technique
- Preheat air fryer to desired temperature without parchment
- Remove hot basket carefully using oven mitts
- Place parchment liner flat on basket bottom
- Immediately add food to weigh down liner
- Arrange in single layer without overcrowding
For lightweight foods like herbs or popcorn, skip parchment entirely—these items will blow around and potentially damage heating elements.
Anchor Lightweight Foods Effectively
Foods like mozzarella sticks or frozen vegetables might not weigh enough to hold parchment in place. For these items, use slightly larger parchment pieces that tuck up the sides slightly, or cook multiple portions simultaneously. If your parchment lifts during cooking, stop the air fryer immediately and add more food weight.
Food-Specific Parchment Paper Techniques
Frozen Foods Made Simple
French Fries and Vegetables: Place frozen items directly on parchment-lined basket. The paper prevents sticking while allowing proper crisping. No need to thaw first—cook at 400°F for 12-15 minutes, shaking basket halfway.
Chicken Tenders and Nuggets: Ensure pieces don’t overlap. Frozen breaded proteins release minimal moisture, making parchment ideal for crispy results. Cook at 380°F for 10-12 minutes until golden brown.
Handle Fresh Proteins Like a Pro
Chicken Wings: Pat completely dry before placing on parchment. Excess moisture creates steam, preventing crisping. Cook at 400°F for 20-25 minutes, flipping halfway. The parchment catches all grease while keeping wings elevated for even cooking.
Salmon Filets: Place skin-side down on parchment. The paper prevents delicate flesh from sticking while allowing fat drainage. Season filets after placement to avoid disturbing placement. Cook at 375°F for 10-12 minutes until flaky.
Protect Delicate Items from Sticking
Empanadas and Dumplings: These fragile items won’t tear or stick when cooked on parchment. Space evenly to prevent crowding—cook at 360°F for 8-10 minutes until golden.
Falafel Balls: Round shape prevents rolling while parchment ensures even browning on all sides. Cook at 375°F for 10-12 minutes, flipping halfway for perfect crispness.
Advanced Air Fryer Parchment Applications
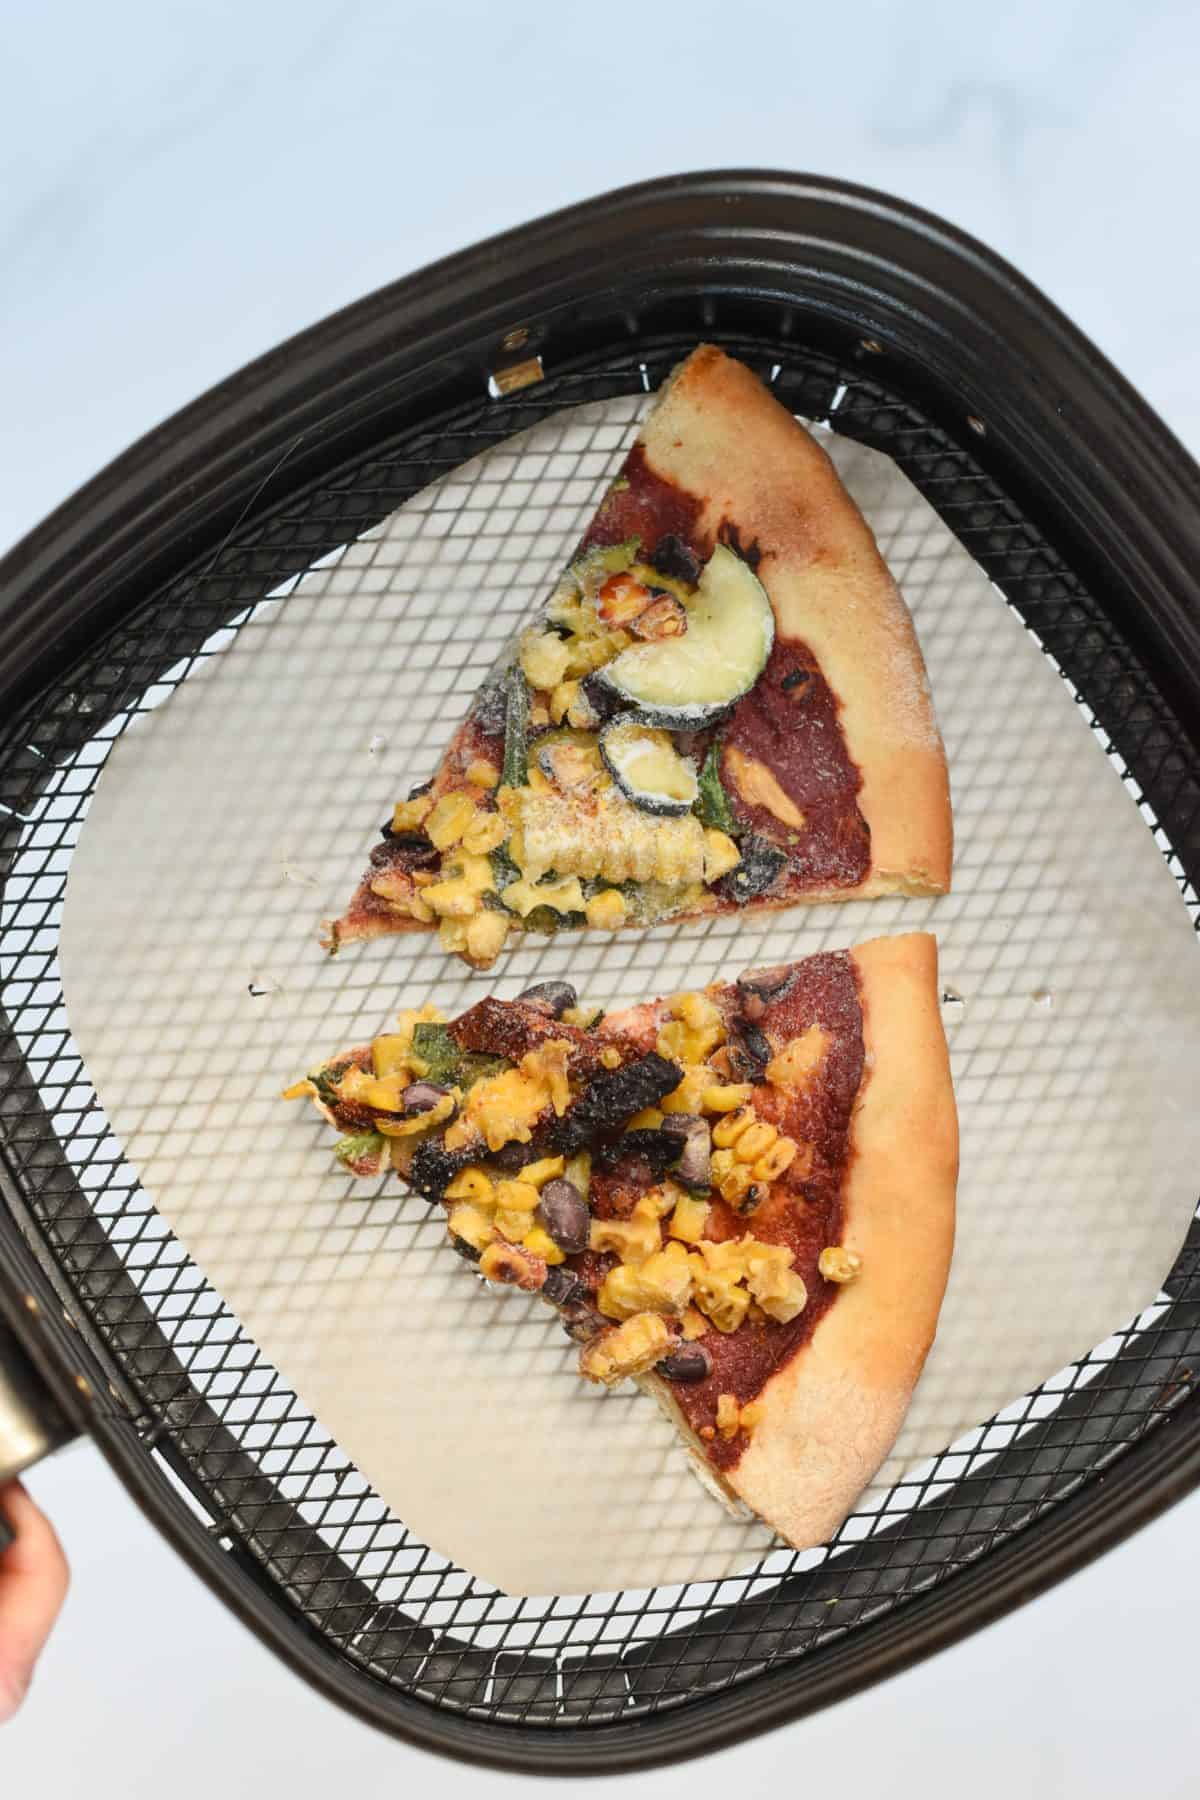
Perfect Air Fryer Pizza Every Time
Using Precooked Crusts:
– Preheat to 350°F
– Place crust on parchment-lined basket
– Add toppings sparingly (overloading causes sogginess)
– Cook 3-4 minutes until cheese melts
Raw Dough Method:
– Precook dough on parchment for 2-3 minutes at 350°F
– Add toppings to partially-cooked crust
– Cook additional 3-4 minutes until golden
– Carefully slide pizza onto cutting board using parchment as a sling
Restaurant-Quality Steak Technique
Bring 1-inch thick steak to room temperature and pat dry thoroughly. Preheat air fryer to 400°F without parchment. After preheating, place liner and steak in basket. Cook 10-12 minutes for medium, flipping once. Internal temperature must reach 145°F minimum. Rest 5-10 minutes on cutting board—never on parchment.
Solve Common Parchment Paper Problems Immediately
Stop Floating Paper Issues
If parchment lifts during cooking, you’re likely using too little food weight. Add more items or use larger paper pieces that extend slightly up basket sides. Never cook single lightweight items without adequate anchor weight. For solo meals, consider skipping parchment and using a light oil spray instead.
Fix Uneven Cooking Results
Check that parchment isn’t blocking air vents along basket sides. Ensure ¼-inch gap around paper edges. Rearrange food if some pieces cook faster than others—this happens most often with irregularly shaped items. Rotate the basket halfway through cooking for perfectly even results.
Prevent Sticking Mishaps
Despite parchment’s non-stick properties, some foods may stick if overcooked or insufficiently oiled. Lightly spray parchment with cooking spray for extra insurance, especially with cheese-based foods. For extra-sticky items like caramelized onions, add a thin oil layer between food and parchment.
Smart Cleanup and Long-Term Maintenance
Quick Disposable Method
After cooking, simply lift parchment with food residue and toss in trash. Most baskets need only a quick rinse—no scrubbing required. This saves significant cleanup time compared to non-lined cooking. For greasy foods like bacon, fold the parchment edges up while still warm to contain drippings before disposal.
Reusable Silicone Alternative
Consider silicone liners for frequent air fryer users. These dishwasher-safe options eliminate waste while providing similar non-stick benefits. They’re more economical long-term for daily cooking but require proper cleaning between uses. Silicone liners work best with foods that don’t leave heavy residue.
Optimize Air Circulation Permanently
Never cover the entire basket bottom—leave breathing room around parchment edges. This gap ensures hot air circulates properly, preventing soggy results. Arrange food with space between pieces for maximum crisping. Proper airflow is why parchment-lined air fryer cooking outperforms conventional oven methods for many foods.
Mastering how to use parchment paper in air fryer transforms frustrating cooking sessions into effortless meals with minimal cleanup. Start with these safety basics, then experiment with your favorite foods. Remember: preheat without paper, use adequate food weight, and always respect temperature limits. With these techniques, every meal releases perfectly while cleanup takes seconds instead of scrubbing sessions. For best results, keep a roll of parchment paper near your air fryer for quick access during meal prep—your future self will thank you when dinner comes out perfect with almost no cleanup required.

