
Your Instant Pot just got a serious upgrade. Whether you’re crisping golden fries or roasting a whole chicken, the air fryer function transforms your countertop pressure cooker into a versatile kitchen powerhouse. But mastering this dual-purpose appliance requires knowing exactly how each component works together—and avoiding the common mistakes that leave food soggy or unevenly cooked.
This guide walks you through every step, from your first batch of fries to advanced pressure-cooking combinations. You’ll learn the specific techniques for both built-in systems and add-on accessories, plus insider tips that most manuals never mention. Discover how to properly use your Instant Pot air fryer to achieve restaurant-quality results without cluttering your kitchen with extra appliances.
Instant Pot Air Fryer System Types
Integrated vs Add-on Solutions
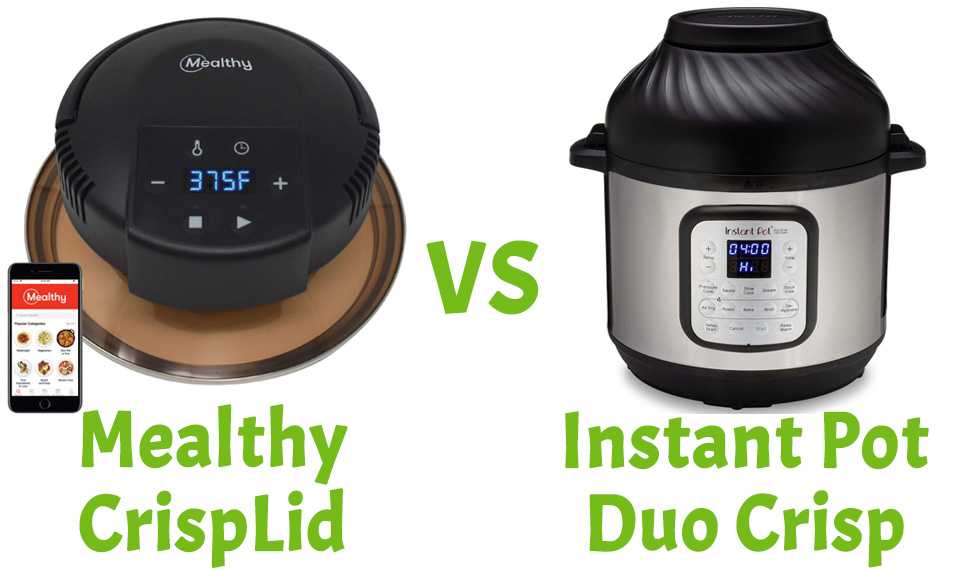
Instant Pot Duo Crisp + Air Fryer features a built-in heating element in the lid, offering seamless switching between pressure cooking and air frying. The Mealthy CrispLid transforms existing 6- or 8-quart Instant Pots with a glass-topped heating unit that sits directly on the inner pot.
Key difference: Integrated systems require zero setup changes, while add-ons need manual switching between cooking modes. Both use rapid convection heat circulation, but integrated systems offer larger capacity and automatic preheating. The Duo Crisp accommodates family-sized portions, while the CrispLid works best for 1-2 servings—perfect for small kitchens where counter space matters.
Component Identification Checklist
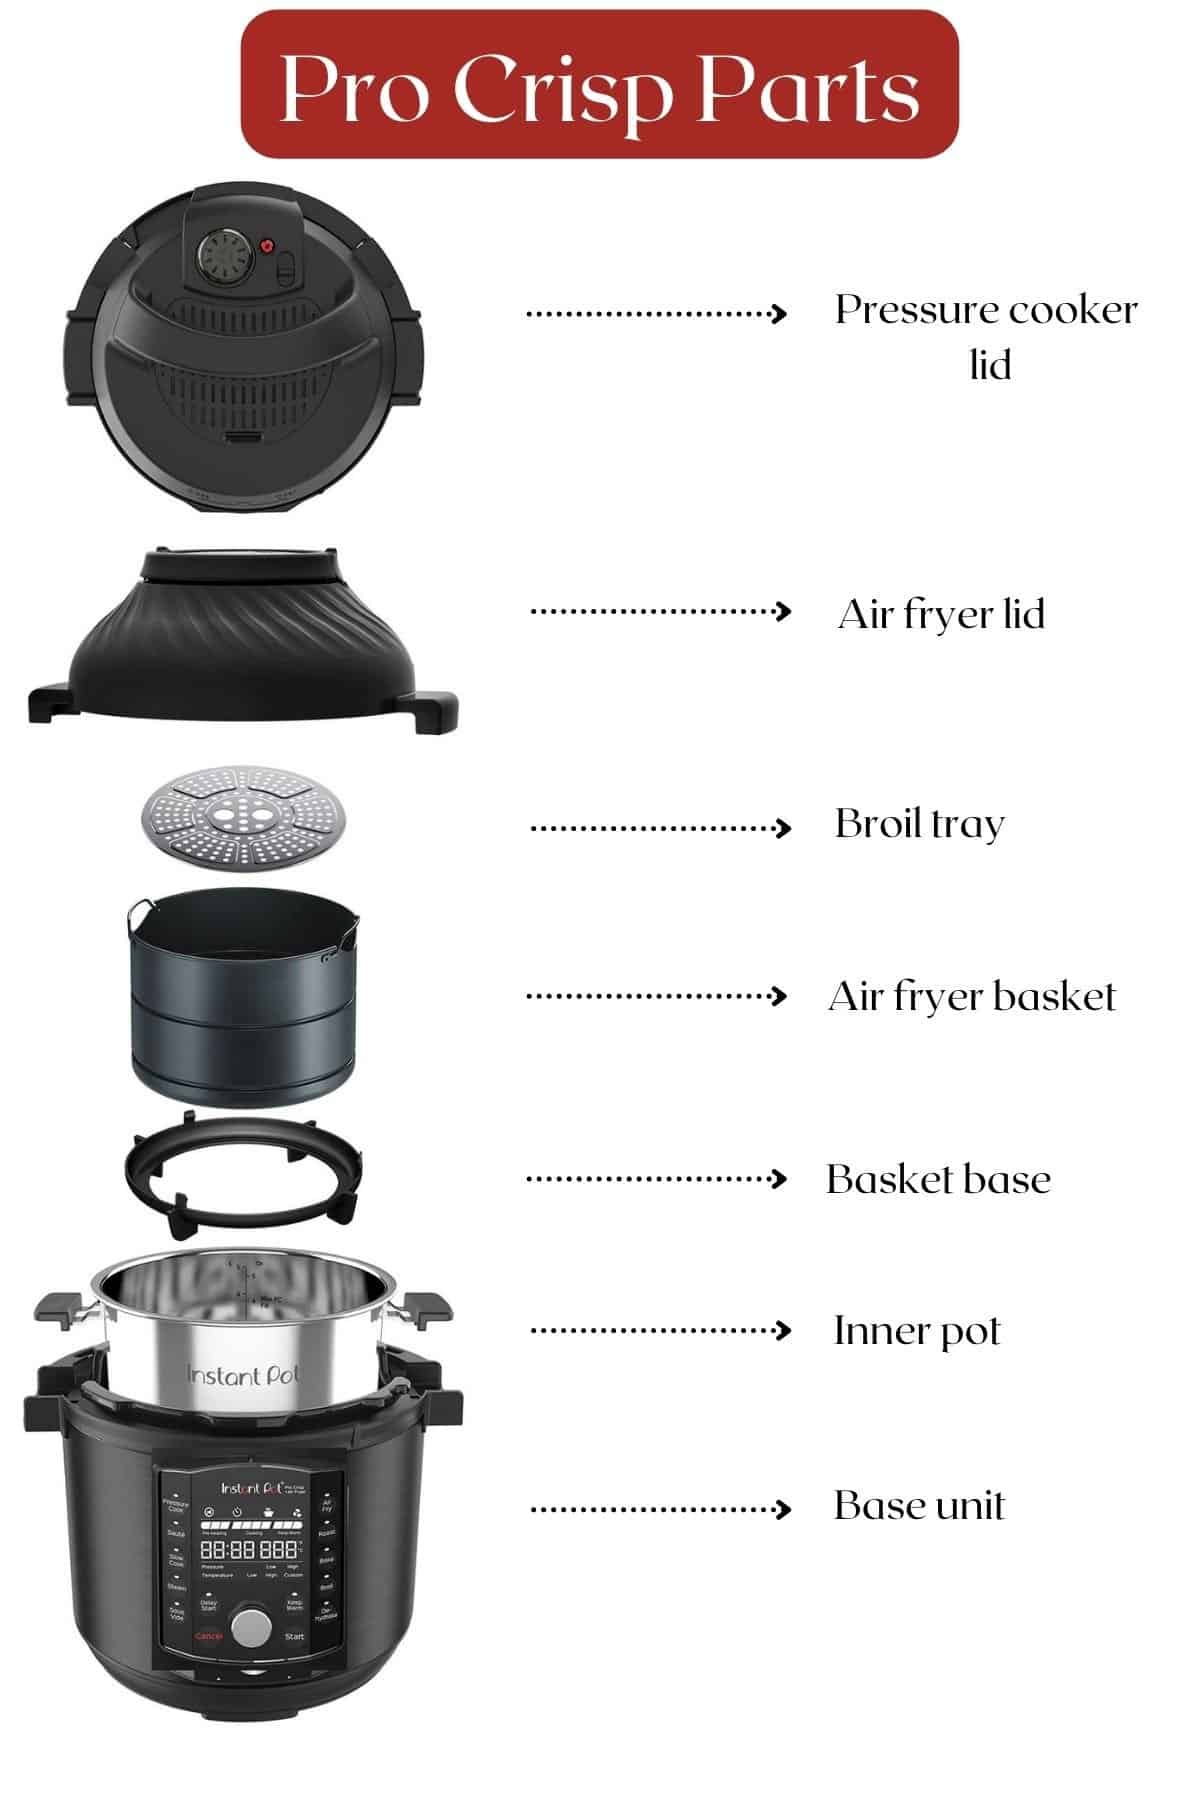
Duo Crisp System includes:
– Stainless steel inner pot
– Multi-level air fry basket with base support
– Broil/dehydrating tray for dual-layer cooking
– Protective heat-resistant pad
– Dedicated air fryer lid with built-in fan
CrispLid Add-on includes:
– Glass-topped heating element unit
– Raised trivet for elevation
– Compact fryer basket (1-2 serving capacity)
– Silicone mat and stainless steel tongs
Pro tip: Keep your protective pad clipped to the air fryer lid handle for instant accessibility. This prevents counter damage and reminds users of safety protocols every time you reach for the lid.
Essential Setup Steps for First-Time Use
Initial Assembly Process
Place the inner pot into the cooker base first—this seems obvious, but forgetting this step damages the heating element. For the Duo Crisp, position the air fry basket base inside the inner pot, then nestle the multi-level basket on top. The basket should sit level without wobbling.
Critical mistake to avoid: Never add food directly to the inner pot without the basket. This prevents proper air circulation and creates uneven cooking. Always use the appropriate basket for air frying functions.
Safety Positioning That Prevents Burns
The protective pad isn’t optional—it’s essential. The air fryer lid reaches temperatures exceeding 400°F on the underside. Place the pad within arm’s reach before starting any cooking cycle. Never set the hot lid directly on countertops.
CrispLid specific warning: The unit emits an intense red glow during operation. This visual cue reminds users of extreme temperatures. Always use oven mitts when handling hot components—every part becomes dangerously hot during and after cooking.
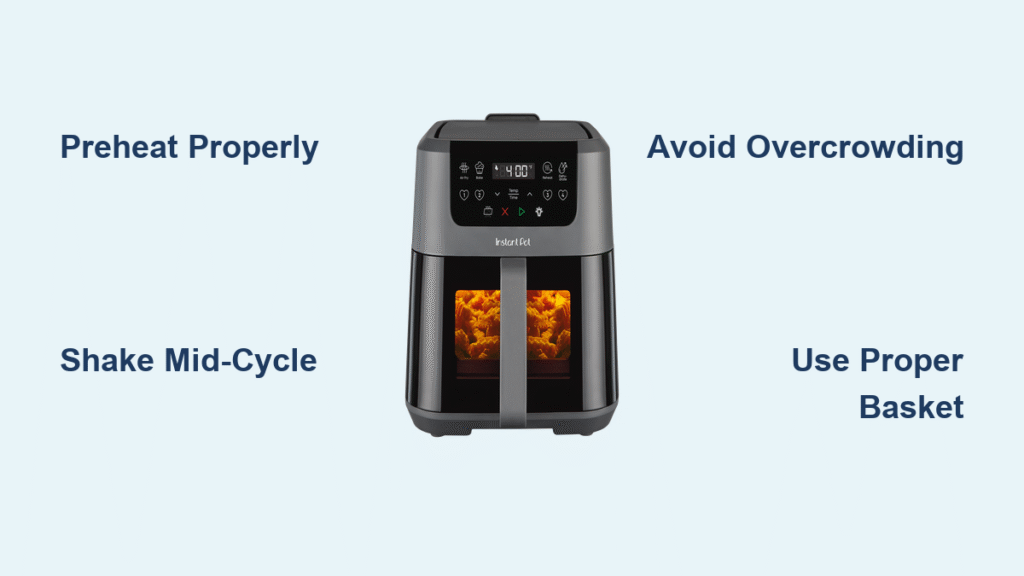
Three Proven Cooking Methods for Perfect Results
Method 1: Multi-Level Basket (Best for Large Batches)
- Load ingredients in a single layer across both basket levels
- Set temperature and time using the Air Fry smart program (defaults to last settings)
- Start cooking – automatic preheating begins before countdown
- Listen for beep – mid-cycle signal indicates flip time
- Shake vigorously for fries or turn larger items
Critical detail: Overcrowding prevents proper air circulation. Leave space between each piece for optimal crisping. Maximum effective load is 70% of basket capacity—resist the urge to fill completely.
Method 2: Basket with Broiling Tray (Perfect for Meats)
This method excels for bone-in chicken thighs or lamb chops. After loading the main basket, add the broiling tray for a second cooking surface. Position meat chops in a single layer on the tray—they’ll develop better crust than in the basket alone.
During the mid-cycle turn, swap ingredients between levels. Bottom items move to the top tray, ensuring even browning throughout. For 1.1-pound lamb chops, set to 374°F for 15 minutes with a single layer essential on the broil tray.
Method 3: Stainless Steel Steamer Baskets (Non-stick Alternative)
When your food tends to stick, stainless steel steamer baskets provide superior release. Use both large and small baskets simultaneously for dual-layer cooking. This setup works particularly well for delicate items like breaded fish or small vegetables.
Pro tip: Lightly spray your basket with olive oil before adding food. This prevents sticking and makes cleanup effortless—especially important for breaded items that tend to adhere to surfaces.
Temperature and Time Mastery
Quick Reference Chart
| Food Item | Weight | Temp | Time | Pro Tip |
|---|---|---|---|---|
| Whole chicken | 4 lbs | 400°F | 60 min | Check 165°F internal |
| Chicken drumsticks | 1.3 lbs | 374°F | 40 min | Turn after 20 min |
| Lamb chops | 1.1 lbs | 374°F | 15 min | Single layer essential |
| French fries | 1.5 lbs | 400°F | 17 min | Shake every 5 min |
| Steak (medium) | 1.25 lbs | 400°F | 16 min | Rest 5 min after |
Temperature adjustment rule: Reduce temperature by 25°F from conventional oven recipes. Air fryers cook more efficiently due to concentrated heat circulation. The Instant Pot automatically preheats when you press Start—no manual preheating required.
Advanced Pressure Cooker + Air Fryer Combinations

Pressure Cook + Air Fry Technique
This game-changing method delivers restaurant-quality results. Start with lasagna as an example:
Pressure cook assembled lasagna for 24 minutes with natural release. Drain excess liquid, then air fry at 500°F for 3-5 minutes. The pressure cooking ensures perfectly cooked pasta and melted cheese, while the air fry creates a golden, bubbling top layer.
Success indicator: Cheese should bubble and brown without burning. Watch closely during final minutes—this stage happens quickly.
Multi-Stage Potato Gratin
Pressure cook sliced potatoes with cream and herbs for 8 minutes. Drain, then layer with cheese and air fry at 375°F for 10 minutes. This method prevents dried-out edges while achieving crispy top surfaces that standalone air frying can’t match.
Safety Protocols That Matter Most
Heat Management Essentials
Every component becomes dangerously hot—use oven mitts religiously. The air fryer lid’s underside reaches temperatures capable of causing third-degree burns. Always use the protective pad, and teach family members never to touch hot components.
Child Safety Guidelines: Store the air fryer lid out of reach when not in use. The integrated system’s lid weighs significantly more than standard Instant Pot lids, creating drop hazards for children. Establish a “no kids in kitchen during air frying” rule.
Cleaning Made Simple (No More Sticky Residue)
Dishwasher-Safe Components
Safe for dishwasher:
– Inner pot and air fry basket
– Broil tray and basket base
– Optional mesh steamer baskets
– CrispLid accessories (except the unit itself)
Hand-wash only:
– Air fryer lid (wipe clean only)
– CrispLid unit (electrical components)
– Cooker base (damp cloth only)
Stubborn Residue Removal
For stuck-on food, soak dishwasher-safe parts in warm, soapy water for 15 minutes. Use a soft brush—never metal scrubbers that damage non-stick coatings. Dry completely before storage to prevent rust on stainless steel components.
Pro tip: Clean immediately after use while components are still warm (but not hot). Food residue hardens as it cools, making cleaning more difficult later.
Troubleshooting Common Issues
Uneven Cooking Solutions
Problem: Food browns on top but remains pale underneath
Solution: Reduce load size and ensure proper layer switching during mid-cycle turn. The top layer naturally cooks faster—rotating positions halfway through evens results.
Problem: Fries stick to basket
Solution: Increase preheating time and shake more frequently. Consider stainless steel baskets for better release, especially with high-moisture vegetables.
Capacity Optimization
The Duo Crisp accommodates family-sized portions, but resist the urge to fill completely. Maximum effective load is 70% of basket capacity. The CrispLid works best for 1-2 servings—upgrade to the deep basket ($14.95) for larger quantities.
Final Performance Tips for Crispy Results Every Time
Storage strategy: Keep the protective pad clipped to the air fryer lid handle for instant accessibility. This prevents counter damage and reminds users of safety protocols.
Batch cooking: Cook proteins first, then vegetables using residual heat. This maximizes efficiency and creates natural flavor layering. The inner pot captures meat drippings—use sauté mode to transform them into quick sauces.
Leftover revival: Air fry at 350°F for 3-4 minutes to restore crispness to yesterday’s fries or reheat pizza without sogginess. This technique outperforms microwaves for texture retention.
Master these techniques and your Instant Pot air fryer becomes your most versatile kitchen tool—delivering everything from weeknight vegetables to impressive dinner party centerpieces with consistent, restaurant-quality results. The key to how to use Instant Pot air fryer successfully lies in understanding its dual nature: pressure cooker by day, air fryer by night, with proper setup and technique making all the difference in your cooking outcomes.

