
That shiny new Gourmia air fryer sitting on your counter promises restaurant-quality crispy food with minimal oil—but if you’re staring at those buttons wondering where to begin, you’re not alone. Many home cooks struggle with the learning curve of air frying, mistakenly treating it like a deep fryer or oven. The reality? Your Gourmia air fryer operates on powerful rapid air circulation that requires specific techniques to maximize results.
Mastering your Gourmia air fryer takes less time than preheating a traditional oven, and once you understand the core principles, you’ll consistently achieve golden, crispy exteriors with tender interiors. Whether you own the compact G15505 2-quart model or the family-sized GAF686 7-quart version, these techniques apply universally across all Gourmia air fryer models. This guide delivers exactly what you need to know—no fluff, just actionable steps to transform your cooking.
Unboxing and Initial Setup for Perfect First Use
Position Your Air Fryer for Optimal Performance
Your Gourmia air fryer needs proper placement to function correctly—this isn’t just about counter space but safety and performance. Place it on a heat-resistant surface with at least 5 inches of clearance on all sides, especially behind the unit where hot air exhausts. The bottom of your Gourmia model may have shipping stabilizers that must be removed before first use—check carefully as these can cause smoke if left in place during operation.
Clean Components Before First Cooking Session
Skip this step and you’ll taste plastic in your first meal. Remove the basket and crisper tray immediately after unboxing and wash both thoroughly in warm, soapy water with a non-abrasive sponge. Pay special attention to the crisper tray’s mesh surface where manufacturing residues hide. Dry completely before reassembling—any moisture creates steam pockets that prevent proper crisping. Wipe the interior chamber with a damp cloth only; never submerge the main unit in water.
Run a Test Cycle to Eliminate Manufacturing Odors
Plug in your Gourmia and press the power button—most models display flashing zeros or a default temperature. Run the unit empty at 400°F for exactly 3 minutes to burn off manufacturing oils. You’ll notice a slight odor during this process; this is normal and disappears after the initial cycle. This critical step ensures your first actual meal doesn’t carry any chemical aftertaste.
Control Panel Mastery for Consistent Results
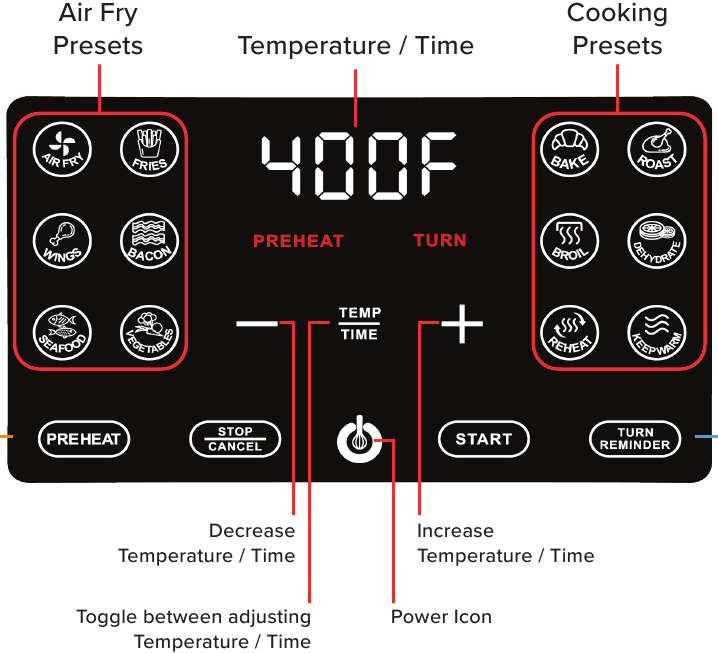
Temperature Settings Decoded for Perfect Crispiness
Gourmia air fryers operate between 180°F and 400°F, but using the right temperature makes or breaks your results. For delicate items like fish fillets or reheating pizza without drying it out, stick to 180-300°F. Most vegetables and chicken breasts achieve optimal texture at 325-375°F. Reserve 400°F exclusively for frozen foods, bacon, or when maximum crispiness is the goal—this high heat creates that signature golden crunch without oil.
Time Adjustment Strategies That Prevent Burned Meals
Turning the time dial or pressing +/- buttons seems simple, but timing errors cause 80% of air fryer failures. Frozen French fries typically need 12-18 minutes at 400°F, while fresh chicken breasts require 12-18 minutes at 375°F. Always start with the lower end of recommended times—you can add minutes, but you can’t undo overcooked food. For smaller portions, reduce cooking time by 25% since there’s less mass to heat through.
Preset Functions Used Correctly for Foolproof Cooking
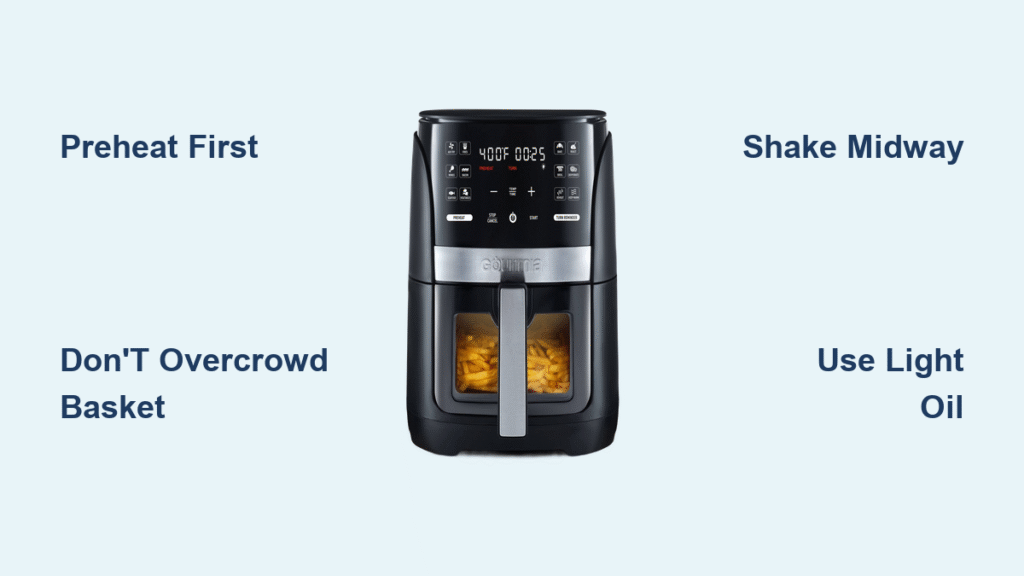
Your Gourmia’s preset buttons (fries, meat, fish, bake) automatically set temperature and time, but they’re not one-size-fits-all. For example, the “fries” setting defaults to 15 minutes, but a half-full basket needs only 12 minutes while a completely full basket requires 18-20. Always shake or flip food halfway through cooking regardless of which preset you use—this simple action ensures even browning that presets alone won’t deliver.
Essential Cooking Techniques for Restaurant-Quality Results
Proper Basket Loading That Actually Crisps Your Food
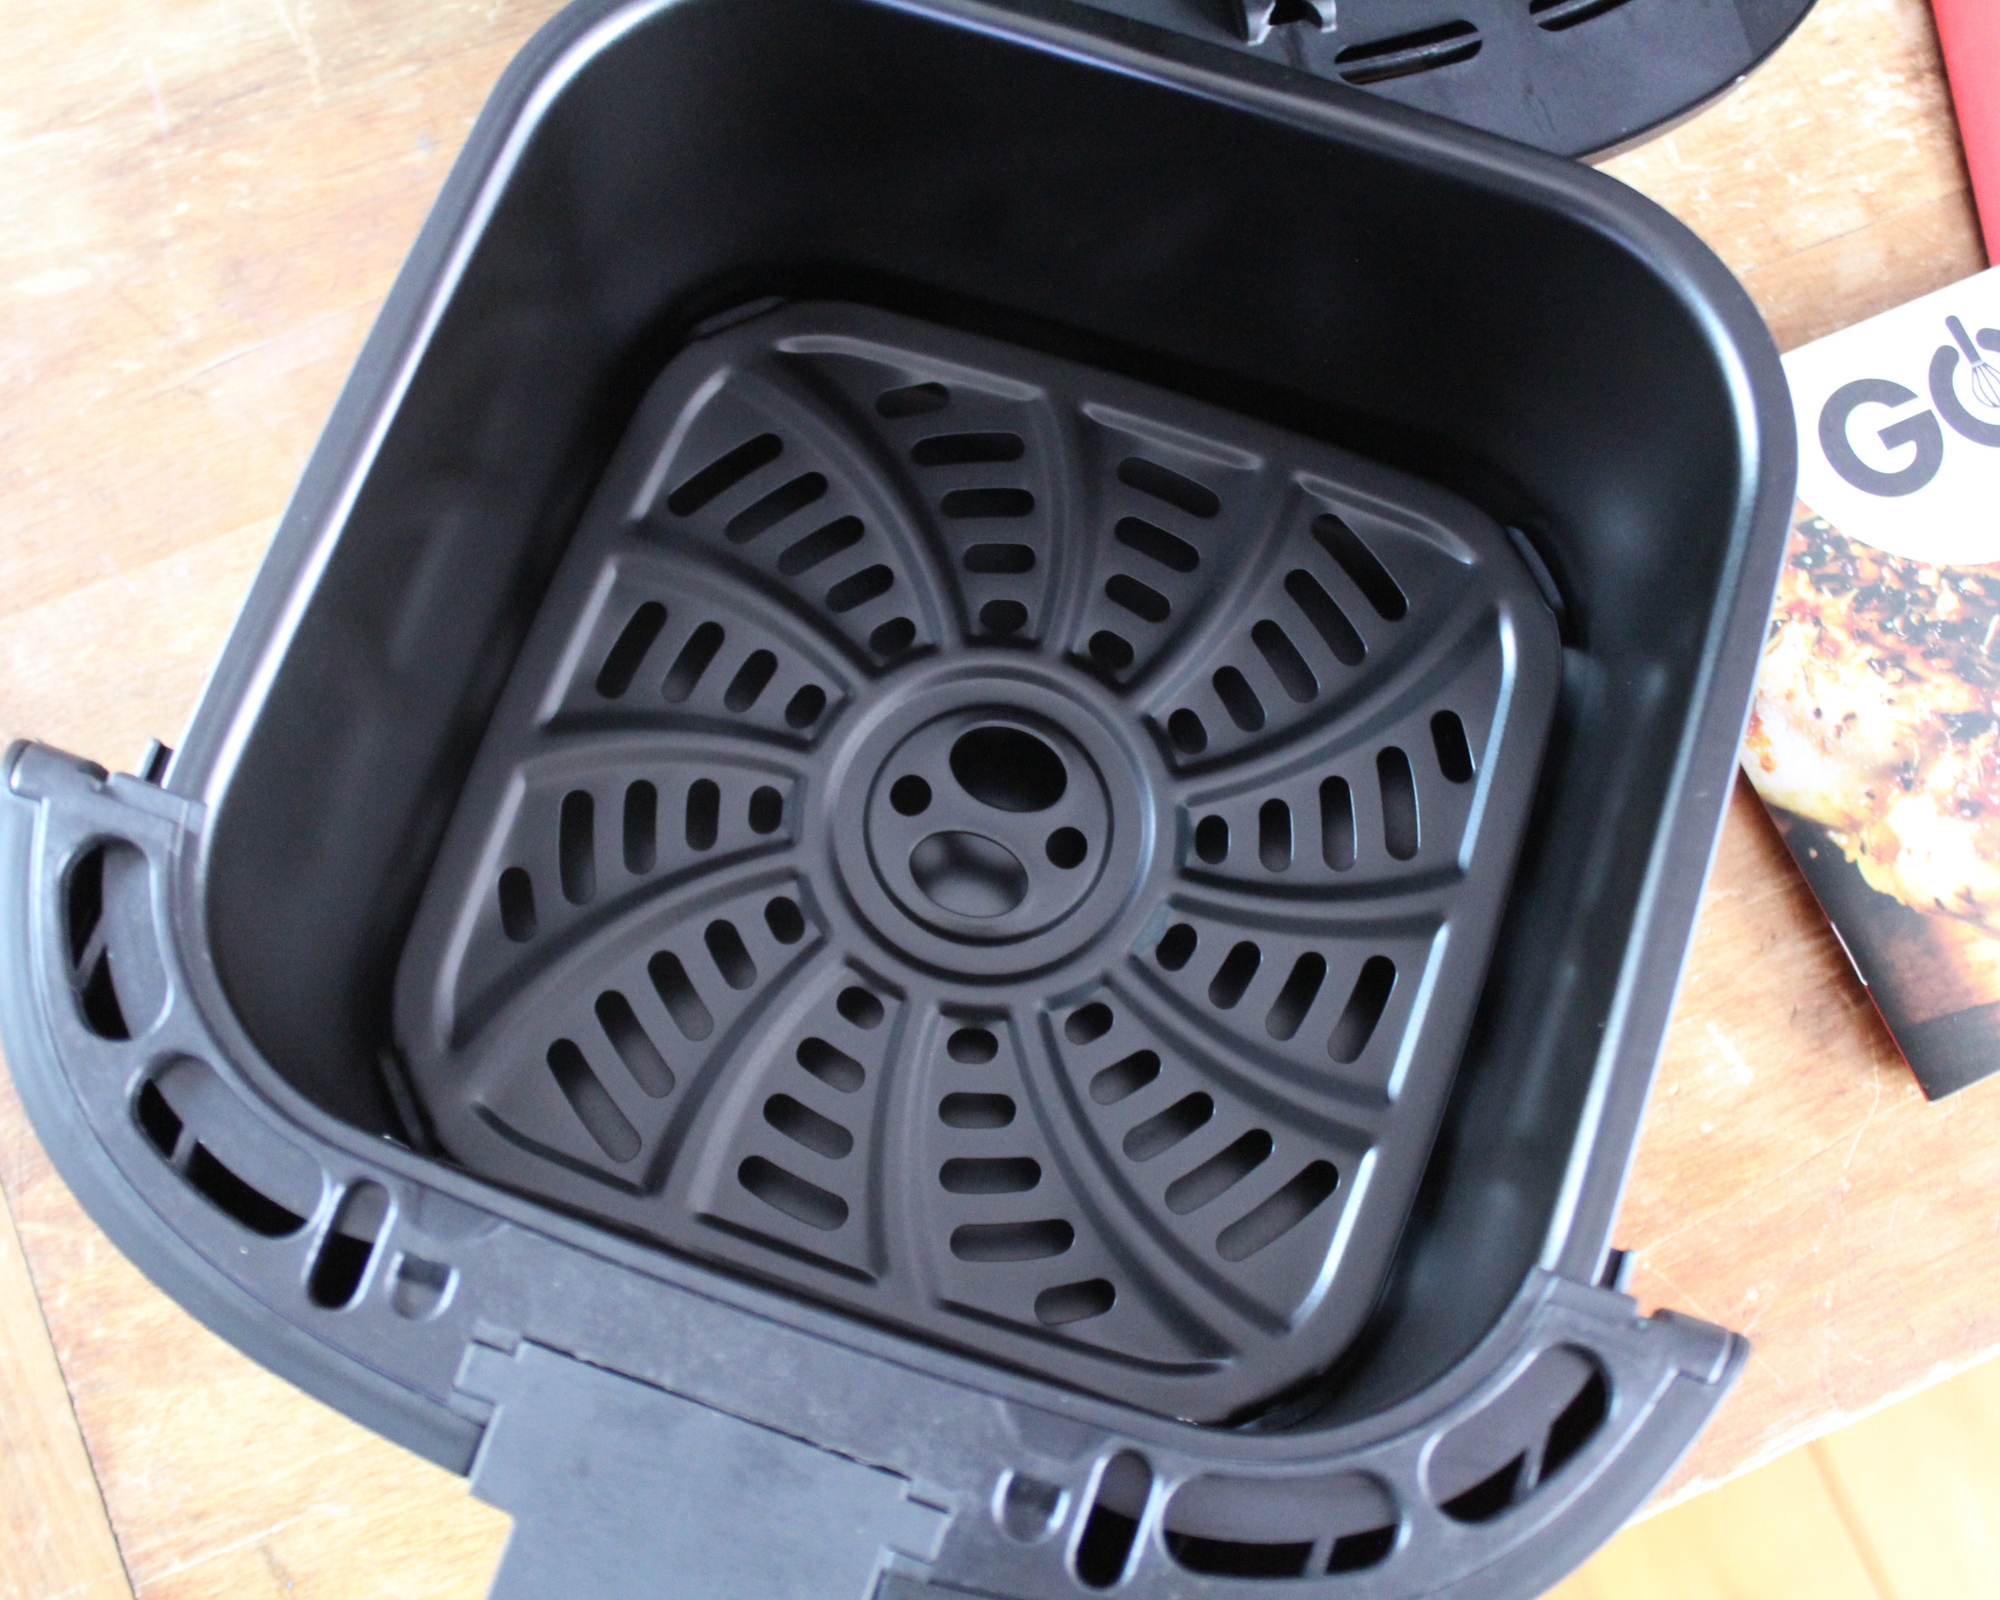
Overcrowding your Gourmia basket is the #1 mistake new users make—this turns air frying into steaming. Food must sit in a single layer with space between pieces for proper air circulation. If you can’t see the basket bottom through your food, it’s too crowded. For large batches, cook in multiple smaller portions; you’ll save time overall because properly spaced food cooks faster and more evenly.
Oil Application Methods That Enhance Crispiness Safely
Despite the “air” in air fryer, a light oil coating dramatically improves results—just 1-2 teaspoons for fresh vegetables or meats. Use a silicone pastry brush or oil mister for even distribution. Never use aerosol cooking sprays with propellants like butane—they degrade the nonstick coating over time, causing flaking and reduced performance. Frozen foods usually contain enough oil already, so skip additional oiling.
Shake and Flip Timing That Creates Perfectly Even Browning
Set an alarm for exactly halfway through cooking time—this isn’t optional for consistent results. Pull the basket out and shake vigorously for fries or toss vegetables. For larger items like chicken breasts, use silicone-tipped tongs to flip each piece. This simple action exposes new surfaces to the heating element, creating uniform crispiness impossible to achieve otherwise.
Common Mistakes That Ruin Air Fryer Results
Overcrowding Consequences and Solutions
When you overload your Gourmia basket, hot air can’t circulate properly, creating steam pockets that make food soggy instead of crispy. The solution? Visualize your food as individual pieces needing personal space—like concertgoers at a show. If pieces touch, they steam each other. For family meals, cook in batches with 2-minute intervals between loads; the residual heat keeps the second batch cooking efficiently.
Temperature Confusion That Dries Out Delicate Foods
Many users automatically select 400°F for everything, turning salmon into rubber and drying out chicken breasts. Delicate proteins need lower temperatures: salmon fillets cook perfectly at 350°F for 7-10 minutes, while chicken breasts need 375°F for 12-18 minutes. Invest in an instant-read thermometer—chicken reaches safe 165°F internally while maintaining juiciness at these moderate temperatures.
Timing Errors From Misjudging Doneness
The dark basket interior makes food appear more done than it actually is, leading to overcooked meals. Always check food 2-3 minutes before the timer ends, especially for smaller portions. For proteins, use a meat thermometer rather than visual cues—this prevents dry, overcooked results. Frozen foods often need 1-2 extra minutes compared to package directions due to air fryer efficiency.
Cleaning Protocol That Extends Your Air Fryer’s Lifespan
Quick Daily Cleaning Routine That Prevents Buildup
Unplug your Gourmia and let cool for 30 minutes—never clean while hot. Remove the basket and wash with warm soapy water using a non-scratch sponge. The crisper tray lifts out separately; most Gourmia models are dishwasher safe on the top rack. For stuck-on debris, soak for 10 minutes before scrubbing. Wipe the interior chamber with a damp cloth; never use abrasive cleaners that damage the nonstick coating.
Preventative Measures That Reduce Cleaning Time
Line the crisper tray with parchment paper or a silicone mat for messy foods like battered items or saucy wings. This creates an instant cleanup solution while maintaining airflow. Empty the drip tray (if your model has one) after each use—accumulated grease causes smoke and affects performance. Regular cleaning after every use prevents the need for intensive deep cleaning sessions.
Advanced Techniques for Gourmia Power Users

Multi-Layer Cooking Strategies With Accessories
Invest in a rack accessory to double your cooking capacity without sacrificing quality. Place longer-cooking foods like potatoes on the bottom rack and quicker items like asparagus on top. Add the top layer halfway through cooking for perfect timing on both components. This technique works exceptionally well for complete meals—roast chicken thighs below with green beans above for a one-cycle dinner.
Dehydrate Mode Secrets for Homemade Snacks
Some Gourmia models include a dehydrate function (125-150°F) that transforms your air fryer into a snack maker. Slice apples or zucchini thinly, arrange in single layers with space between pieces, and dry for 4-8 hours. The result? Crispy, healthy snacks without preservatives. For jerky, marinate lean beef slices overnight, then dehydrate at 165°F for 4-6 hours until chewy but not brittle.
Your Gourmia air fryer will become your most-used kitchen appliance once you master these fundamentals. Start with simple frozen foods to build confidence, then gradually experiment with fresh ingredients and timing adjustments. The key is respecting the air circulation principle—never overcrowd, shake or flip halfway, and clean regularly for consistent results. Within a week, you’ll develop an intuitive sense for timing and temperatures that makes every meal faster, healthier, and more delicious than traditional cooking methods. Remember that perfect air frying combines science and art—each batch teaches you something new about your specific model’s personality. Keep a small notebook of your successful times and temperatures for different foods, and soon you’ll be air frying like a pro without even checking recipes.

