
You just unpacked your new air fryer oven, but those buttons look like they belong in a spaceship cockpit. Don’t worry—learning how to use air fryer oven properly is simpler than you think, and the crispy results will make you wonder how you ever cooked without it. Unlike traditional ovens that slowly bake your food, this powerhouse uses rapid air circulation to create that perfect golden crust with minimal oil.
Most beginners make the same critical mistakes: overcrowding the tray, skipping preheating, or using the wrong cookware. But within minutes, you’ll master the exact rack positions, temperature settings, and food prep techniques that transform frozen fries into restaurant-quality perfection. This guide cuts through the confusion with step-by-step instructions verified by appliance experts—so you can start cooking like a pro from your very first batch.
Air Fryer Oven Mechanics That Actually Matter
Why Your Food Gets Crispy Without Deep Frying
Your air fryer oven works by blasting food with superheated air at high velocity—similar to a convection oven but significantly more powerful. The internal fan circulates hot air (typically between 350-400°F) around your food at speeds that strip away surface moisture while locking in juices. This rapid air movement creates the Maillard reaction—the chemical process responsible for that irresistible golden-brown crust—without submerging food in oil.
Unlike basket-style air fryers that require constant shaking, your oven-style model provides even circulation from all angles. The key difference? You can cook larger quantities simultaneously while maintaining consistent crispiness. Just remember: proper airflow is non-negotiable. Without the perforated crisper tray specifically designed for air frying, your food will steam instead of crisp.
Must-Have Accessories You Probably Didn’t Get
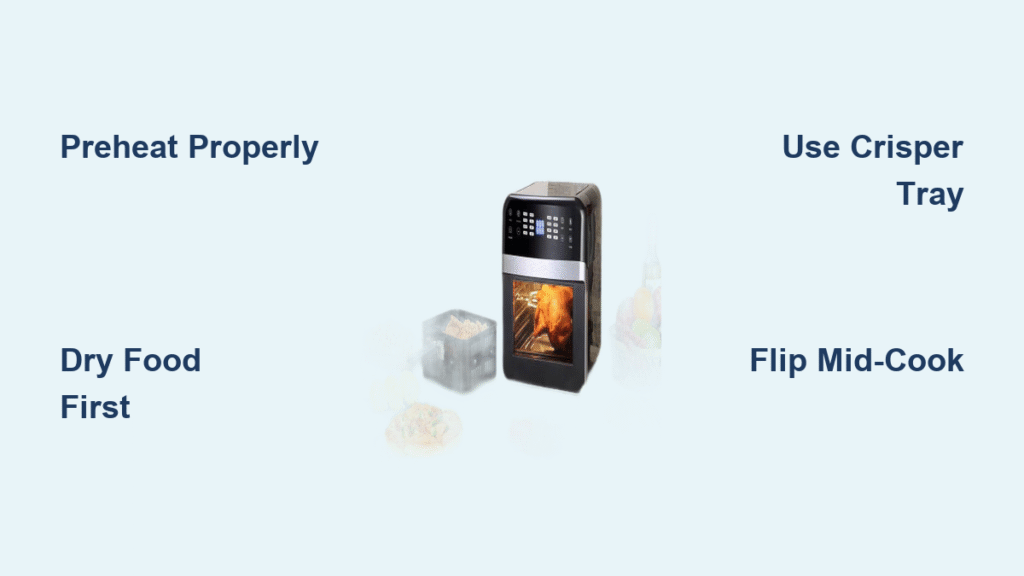
Most wall oven air fryers ship without the essential crisper tray—a critical oversight that leads to soggy disappointment. Immediately track down this perforated metal sheet that looks like a giant colander; it’s your ticket to proper airflow. While you’re at it, grab these three game-changing tools:
- Dark, non-stick baking sheets: These absorb heat better than shiny aluminum, promoting superior browning
- Drip tray alternative: A standard baking sheet placed one rack below catches oil without blocking airflow
- Oil sprayer: Delivers a fine mist that coats food evenly without pooling
Skip the expensive branded accessories—your existing bakeware works perfectly if it’s dark-coated and has low sides. Just avoid glass dishes or anything that blocks the critical air circulation your oven needs.
Perfect Preheating Protocol by Model Type
Preheat or Skip? The Critical First Decision
Your first step depends entirely on your model—getting this wrong guarantees uneven cooking. If your oven requires preheating (most brands except GE Profile), set it to air fry mode at your recipe’s temperature and wait for the indicator light (typically 5-8 minutes). Use this time to prep your food—don’t waste it scrolling through your phone.
If your model doesn’t require preheating (like GE Profile), place food directly in the cold oven and start cooking immediately. But here’s the pro tip: check your food 2-3 minutes earlier than recipe times suggest. Subsequent batches will cook faster as the oven retains heat—this is why your second batch of fries often burns when the first was perfect.
Rack Position Secrets for Perfect Results
Place your crisper tray on the middle rack for 90% of cooking tasks. In a standard 5-rack oven, that’s position 3—too high and food burns on top, too low and stays soggy underneath. Your drip tray goes exactly one slot below to catch drippings without obstructing airflow.
When cooking multiple items (like chicken and vegetables), position proteins on the middle rack and vegetables one level down. The veggies will catch flavorful drippings while still getting enough direct heat. Just ensure both items require similar temperatures—otherwise, stick to single-level cooking.
Food Prep Techniques That Guarantee Crispy Results

The Single Most Important Step Most People Skip
Dry food = crispy results. Before anything touches your crisper tray, pat every item completely dry with paper towels. Moisture creates steam, and steam creates sogginess—this simple step separates air fryer masters from frustrated beginners. Even frozen foods benefit from a quick pat-down to remove ice crystals.
Cut all ingredients to uniform sizes—this isn’t just chef advice, it’s physics. Potatoes should be 1/4-inch thick for fries, Brussels sprouts halved, chicken breasts pounded to even thickness. Uneven pieces mean some parts burn while others stay raw, wasting both food and time.
Oil Application: Less Is More
Forget everything you know about cooking with oil. With your air fryer oven, you need barely any—think mist, not marinade. A quick spritz from an oil sprayer or light brush with olive oil prevents sticking without pooling. Too much oil drips into heating elements, creating smoke and potentially damaging the non-stick coating.
For fresh vegetables, toss with 1 teaspoon of oil per pound. For proteins, a light coating on the presentation side only is sufficient—gravity will help the oil distribute during cooking. Never pour oil directly into the tray; it won’t absorb properly and creates smoking hazards.
Step-by-Step Cooking Process for Foolproof Results
Exact Temperature and Timing Guidelines
Start with these proven settings to avoid common beginner mistakes:
- Frozen fries: 400°F for 15-18 minutes (shake tray at 8 minutes)
- Fresh vegetables: 375°F for 12-15 minutes (flip halfway)
- Chicken breasts: 380°F for 18-22 minutes (use thermometer to 165°F)
- Fish fillets: 400°F for 10-12 minutes (check at 8 minutes)
Wall oven air fryers typically need 1-7 minutes longer than countertop models. Smaller items like Brussels sprouts need just 1-3 extra minutes, while larger items like whole chickens require 5-7 additional minutes. Always check food 2 minutes before the timer ends—better to add time than rescue burnt food.
Critical Mid-Cooking Checkpoints
- At 50% time: Flip all items for even browning (except delicate foods like fish)
- At 75% time: Check for doneness and adjust temperature if cooking too fast/slow
- At expected finish: Verify internal temperature with thermometer
- If underdone: Add 2-3 minute increments until perfect
Never skip the flip step—this is why one side of your chicken burns while the other stays pale. For multiple racks, rotate trays top-to-bottom at the halfway point to compensate for heat distribution differences.
Advanced Techniques for Restaurant-Quality Meals
Convert Any Oven Recipe in 30 Seconds
Transform your favorite recipes using this simple formula:
– Reduce temperature by 25°F
– Reduce cooking time by 20-25%
– Check doneness 2 minutes early
This works for everything from cookies to casseroles. Your air fryer oven’s efficiency means most traditional oven recipes need downward adjustment. For example, a recipe calling for 375°F for 25 minutes becomes 350°F for 19-20 minutes in your air fryer oven.
Batch Cooking Like a Caterer
Subsequent batches cook faster because the oven stays hot—reduce cooking time by 2-3 minutes for each new batch. This makes party prep incredibly efficient: keep finished food warm in a 200°F regular oven while air frying everything else. Just remember to let the oven stabilize for 2 minutes between batches for consistent results.
Emergency Fixes for 3 Common Air Fryer Oven Disasters
My Food Is Soggy—Now What?
Immediate action steps:
– Remove food and pat completely dry
– Increase temperature by 20°F for remaining cook time
– Spread food in thinner layer on clean crisper tray
– Check every 2 minutes until crisp
This usually happens because you skipped preheating or overcrowded the tray. For future success, always leave space between items—your air fryer oven needs room to create that crispy magic.
Why Is My Oven Smoking?
Stop smoking immediately:
– Turn off oven and remove food
– Clean drip tray thoroughly (old grease causes most smoke)
– Reduce oil application for next batch
– Lower temperature by 25°F
Smoking typically means excess oil dripped onto heating elements. Always use the drip tray one rack below your crisper tray—it’s your first line of defense against smoke alarms.
Uneven Browning Driving You Crazy?
Fix in 60 seconds:
– Rotate tray 180 degrees
– Flip all food items
– Move to middle rack position
– Increase airflow by reducing food quantity
This happens when rack position is wrong or food blocks air circulation. For multiple racks, swap upper and lower trays halfway through cooking—your top rack items will thank you.
Your Air Fryer Oven’s Best Friends (and Worst Enemies)
Must-Try Winner Recipes
- Brussels sprouts: Halved, tossed with 1 tsp oil, 425°F for 15 minutes
- Leftover pizza: 350°F for 5-7 minutes (crust revives perfectly)
- Salmon fillets: Skin-side down, 400°F for 10-12 minutes
- Frozen spring rolls: 380°F for 10 minutes (no preheat)
Instant Disasters to Avoid
- Wet-battered foods (tempura, onion rings)
- Delicate cakes and pastries
- Cheese-heavy items (unless contained like mozzarella sticks)
- Leafy greens (they’ll fly around the oven)
Safety Rules That Could Save Your Kitchen
Never use plastic containers—they melt instantly at air frying temperatures. Always use oven mitts; crisper trays get significantly hotter than regular baking sheets. Keep a fire extinguisher nearby (oil fires are rare but possible). Most importantly, trust your nose—if something smells wrong, check immediately rather than assuming it’s “supposed to smell like that.”
Your air fryer oven will become your most-used appliance within weeks. Start with frozen fries—they’re forgiving and build confidence. Once you nail the basics, branch into vegetables and proteins. Remember: every expert was once a beginner who didn’t preheat properly. You’ve got this.

