
Lighting your gas stove shouldn’t feel like a daily gamble with safety. Yet every year, thousands of home cooks struggle with failed ignitions, dangerous gas buildup, or accidental burns from improper lighter technique. Whether you’ve just upgraded to a sleek electric arc model or you’re still using the classic manual spark wheel, mastering how to use a kitchen lighter transforms this routine task from stressful to seamless.
This guide walks you through everything from basic grip mechanics to professional-level multi-burner management, ensuring you can confidently light any burner configuration while keeping your kitchen—and your hands—safe from harm. You’ll learn the exact sequence that prevents gas buildup, the proper hand positioning that avoids burns, and troubleshooting techniques for when your lighter fails at the worst possible moment.
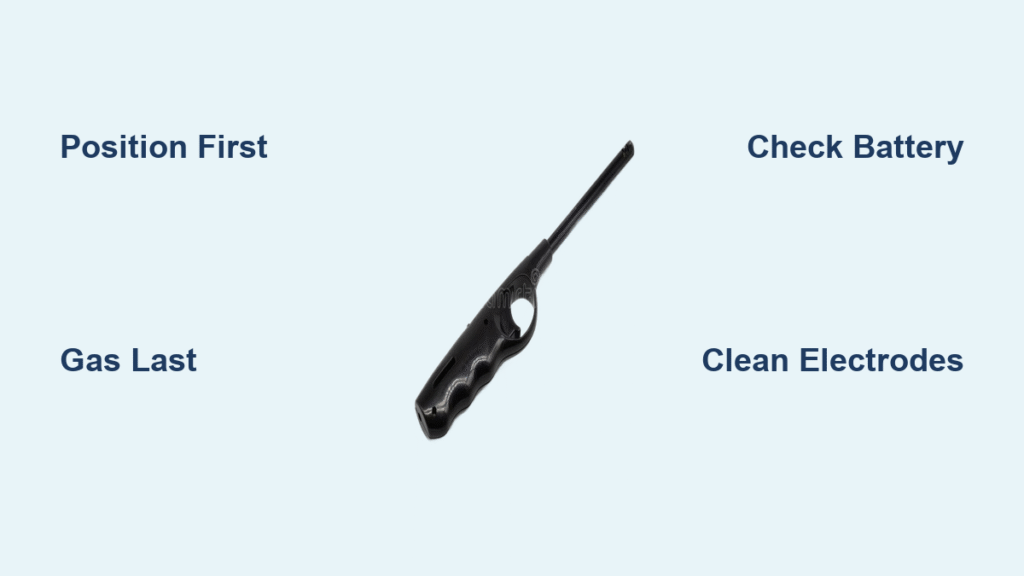
Proper Positioning Before Turning on the Gas
Never turn on the gas before positioning your lighter—this critical sequence prevents 90% of kitchen lighter accidents. Hold your kitchen lighter 1-2 inches from the burner head first, then activate the ignition mechanism, and only then turn the gas knob. This method ensures immediate ignition without dangerous gas accumulation.
Check your hand position before every lighting attempt. Hold the lighter vertically with the ignition tip pointing directly at the burner head. The flame travels upward regardless of your hand angle, so vertical positioning keeps your hand safely below the ignition point. Avoid holding the lighter horizontally—this common mistake positions your fingers directly in the flame path.
Clear the immediate area of any flammable materials before attempting ignition. Paper towels, cooking oils, and cleaning products should be at least 3 feet away from the burner area. Check for loose clothing or dangling jewelry that could accidentally contact the flame during the lighting process.
Mastering Manual Lighter Grip Mechanics
Position your thumb correctly at the top of the spark wheel, angled slightly toward the ignition button. This placement gives maximum control while preventing your thumb from sliding into the flame path. Apply light, steady pressure to roll the spark wheel into the ignition button—jerky movements create weak sparks or failed ignition.
Use the “roll and press” technique rather than a quick flick. Rest your thumb at the apex of the spark wheel and roll it downward with consistent pressure into the ignition mechanism. Think smooth, controlled motion—like striking a match with deliberate confidence rather than frantic scraping.
Replace worn manual lighters immediately when you notice diminished spark intensity, inconsistent spark generation, or physical damage to the ignition mechanism. For intensive daily use, replacement every 6-12 months is typical—don’t risk safety with a failing lighter.
Electric Lighter Operation for Maximum Safety
Check your battery status before each cooking session. Most electric arc lighters provide LED indicators—solid green means ready, flashing red means recharge. Performance drops significantly below 20% battery, leading to failed ignitions during critical cooking moments.
Activate the safety lock first if your model includes this feature. Typically requires pressing a small button or sliding a switch while pressing the main activation button. This prevents accidental ignition when retrieving from storage, a crucial safety feature especially in households with children.
Position the arc precisely 1-2 inches from the burner head. The electric arc creates a 1100°F plasma channel—powerful enough to ignite gas instantly but safe enough to prevent accidental burns from the flameless design. Unlike manual lighters, electric models offer extended reach, significantly reducing burn risk.
Perfecting Your Ignition Sequence
Follow the 3-second rule: From lighter activation to successful burner ignition should take no more than 3 seconds. Longer durations indicate either technique issues or equipment problems requiring attention. If ignition fails after three attempts, turn off the gas completely and wait 30 seconds before retrying.
Execute the position-activate-adjust sequence in rapid succession:
1. Hold lighter 1-2 inches from burner
2. Create spark/arc while simultaneously turning gas knob
3. Adjust flame size immediately after ignition
Know when to stop—if you smell gas but can’t locate the source, do not attempt ignition. Turn off gas at the main valve, ventilate the area completely, and call your gas company from outside the building. Never ignore the smell of gas.
Multi-Burner Lighting Techniques
Light burners sequentially rather than simultaneously. Complete one burner ignition—including flame adjustment—before moving to the next. This maintains proper gas-to-air ratios and prevents overwhelming your workspace with multiple open flames.
Use cross-lighting for efficiency on compatible stove configurations. Once your first burner is lit, you can often ignite adjacent burners by turning their gas knobs while holding the existing flame near the new burner head. This technique reduces overall lighter usage and improves kitchen workflow.
Master the flame transfer method used by professional chefs: light your smallest burner first, then use it to quickly ignite larger burners when needed. For high-BTU commercial burners, maintain extra distance during ignition—hold your lighter 3-4 inches away to prevent flash burns from rapid flame development.
Troubleshooting Failed Ignition

Manual Lighter Issues
Weak or no spark usually indicates one of three problems:
– Debris buildup on the spark wheel—clean with a dry toothbrush
– Low butane—refill or replace the lighter
– Improper thumb positioning—adjust your grip closer to the wheel’s apex
Inconsistent ignition often stems from worn spark mechanisms. If your lighter produces sparks but fails to ignite gas consistently after checking for debris and adequate fuel, replacement is more reliable than continued frustration.
Electric Lighter Solutions
Arc appears but no ignition typically means:
– Battery too low—recharge for 2-3 hours
– Electrode contamination—clean the arc tips with rubbing alcohol
– Moisture interference—let the lighter dry completely before reuse
Complete arc failure requires systematic checking:
1. Verify battery charge level
2. Check for physical damage to electrodes
3. Test child-lock mechanism isn’t engaged
4. Clean contact points with dry cloth
Daily Maintenance for Reliable Performance
Wipe your lighter head with a dry cloth after each use to remove grease and carbon deposits. This 15-second habit prevents 80% of performance issues and extends your lighter’s lifespan significantly.
Check spark mechanisms weekly for manual lighters. Use compressed air or a soft brush to clean around the spark wheel and ignition button, removing debris that can interfere with spark generation.
Never use water to clean any kitchen lighter. Moisture damages internal mechanisms and creates electrical hazards in electric models. For stubborn residue, use a dry cloth or rubbing alcohol on electric lighter electrodes only.
Safe Storage Practices
Store your lighter in a dry, accessible spot near the cooking area but away from direct heat sources, water exposure, and children’s reach. Ideal locations include magnetic strips mounted on cool sections of backsplash or pull-out drawers with dedicated lighter compartments.
Avoid storage near dishwashers or sinks where temperature fluctuations and humidity can affect lighter performance. The constant moisture from dishwashing dramatically reduces the lifespan of both manual and electric models.
Implement child safety protocols by storing manual lighters in locked drawers or high cabinets. Electric lighters with child-lock features provide superior safety, but should still be stored out of reach of curious hands.
Mastering how to use a kitchen lighter isn’t about fancy techniques—it’s about consistent safety practices that become second nature. Start with the basic grip and ignition sequence, then gradually incorporate advanced techniques as your confidence grows. Remember: the best lighter technique is the one you perform safely every single time, whether you’re lighting a single burner for morning coffee or orchestrating a complex multi-burner dinner service.
For manual lighters, proper thumb positioning and the gas-last sequence are your most important safety measures. For electric models, regular battery checks and electrode cleaning ensure reliable performance. When in doubt about gas buildup, always err on the side of caution—turn off the gas, ventilate the area, and wait before attempting ignition again.
By implementing these techniques consistently, you’ll transform what many consider a mundane kitchen task into a safe, reliable part of your cooking routine. Your kitchen lighter should be a tool that serves you—not a source of anxiety or danger—every time you step into the kitchen.

