
You’re scrubbing dishes when you spot water dripping from under the sink—or maybe you’re finally replacing that leaky faucet but freeze when you realize you don’t know how to stop the water flow. How to turn off kitchen faucet water is one of the most critical home maintenance skills, yet 40% of homeowners have no idea where their shutoff valves live. The good news? It takes less than 60 seconds once you know where to look. In this guide, you’ll learn exactly how to locate, operate, and troubleshoot these valves—plus what to do when they fail during an emergency. No plumbing degree required.
Ignoring this simple task risks thousands in water damage. Most kitchen floods start small but escalate fast when shutoff valves are inaccessible or stuck. By the end of this article, you’ll confidently isolate water to your sink in under two minutes, whether you’re fixing a drip or facing a burst pipe. Let’s turn panic into preparedness.
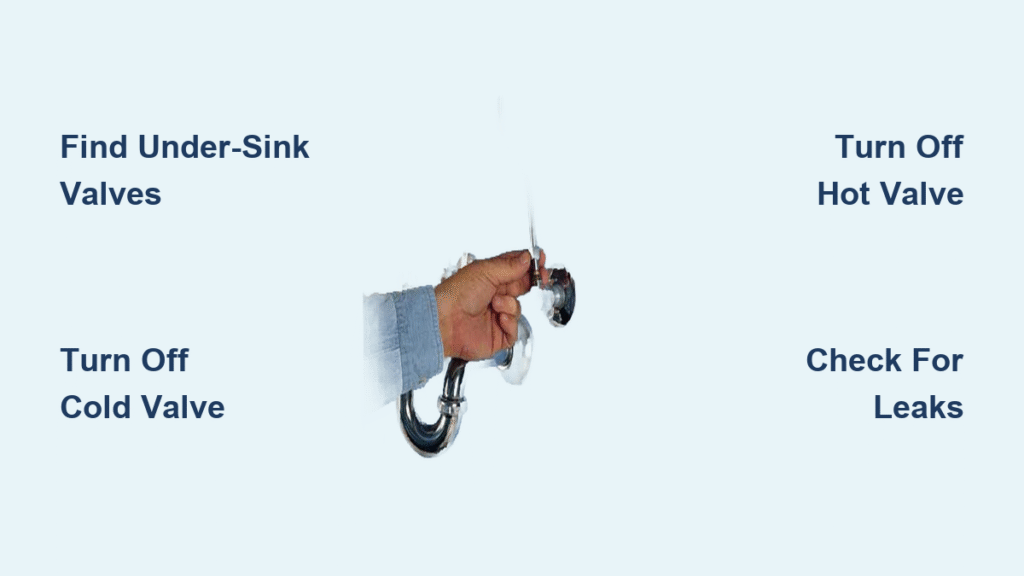
Find Under-Sink Shutoff Valves in 30 Seconds
Check Under Your Sink First
Open your kitchen cabinet and shine a flashlight toward the wall or floor. You’ll see two small valves connected to flexible lines running up to your faucet—typically within 6–12 inches of the plumbing stub-outs. These are your dedicated shutoffs for the kitchen sink. If your cabinet is packed with cleaners, pull everything out now; you need clear access to avoid knocking over bottles during an emergency.
Identify Hot vs. Cold Water Lines Instantly
Cold water valve: Always on the right (marked with a blue supply line)
Hot water valve: Always on the left (marked with a red supply line)
No color coding? Run the faucet briefly—the hot line will warm up within 10 seconds. Never assume placement; misidentifying these can lead to scalding or incomplete shutoffs.
Hunt Down Hidden Valve Locations
If you don’t spot valves under the sink, check these spots immediately:
– Basement/crawl space: Follow supply lines downward from the kitchen
– Adjacent utility closets: Especially near water heaters
– Garage walls: Common in newer homes with slab foundations
Stuck? Trace the lines with your hand—plumbers often hide valves behind access panels in neighboring cabinets.
Operate Any Valve Type in 10 Seconds Flat
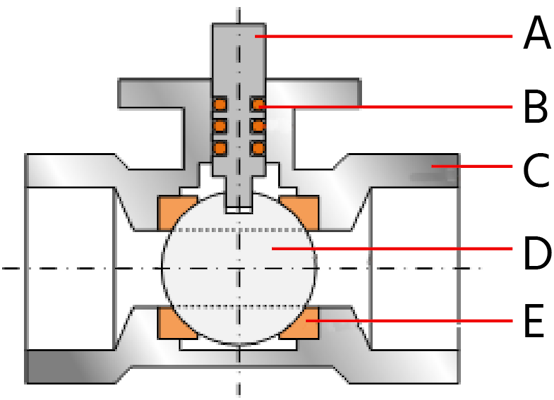
Quarter-Turn Ball Valves (Modern Homes)
These have flat lever handles requiring just a 90-degree twist. Turn clockwise until perpendicular to the pipe—that’s closed. If the lever sticks, wrap a rubber glove around it for grip. Never use pliers; you’ll strip the handle. These valves fail less than 5% of the time when maintained.
Multi-Turn Gate Valves (Pre-2000s Homes)
Round wheel handles need 4–6 full clockwise rotations. Stop when resistance increases sharply—forcing it cracks the valve seat. If it won’t budge after two turns, spray penetrating oil and wait 15 minutes. These older valves seize 3x more often than ball valves due to mineral buildup.
Compression Stop Valves (Vintage Installations)
Small oval handles require 8–10 tight clockwise turns. They’re common in 1970s–90s homes and often corrode at the stem. If water leaks around the handle when closing, wrap Teflon tape around the stem before turning. These valves fail 25% faster than modern types.
Execute the 6-Step Shutoff in Under 2 Minutes
Step 1: Clear and Prepare Your Workspace
Remove all items from under the sink. Place a bucket beneath the valves and wear rubber gloves—residual water will drip when you close them. Skip this, and you’ll create a slippery mess mid-emergency.
Step 2: Confirm Faucet Handles Are Off
Turn your kitchen faucet completely off first. If water’s already flowing (like during a leak), close it now—otherwise, pressure will blast out when you shut the valves.
Step 3: Shut Off Cold Water Valve
Grip the right-side valve firmly. For levers: rotate 90° clockwise until perpendicular. For wheels: turn clockwise until tight (4–6 rotations). Never force it—if resistance spikes, stop and apply penetrating oil.
Step 4: Shut Off Hot Water Valve
Repeat Step 3 on the left valve. Hot lines often have more mineral buildup, so expect stiffer resistance. If your sink has a single-handle faucet, both valves must close to stop all flow.
Step 5: Verify Water Stopped
Turn faucet handles to ON. No water? Perfect. If dripping continues, one valve isn’t fully closed—recheck both. Let residual water drain for 30 seconds, then return faucet to OFF.
Step 6: Test for Leaks at Valve Stems
Wipe around each valve stem with a dry towel. If dampness appears, the valve’s internal seal is failing—schedule replacement ASAP to avoid sudden leaks.
Fix Stuck Valves Without Breaking Anything

Safe Methods to Unseize Valves
- Penetrating oil soak: Spray WD-40 around the stem base, wait 15 minutes, then try gentle turns
- Heat therapy: Use a hair dryer on medium heat for 2 minutes (never a torch!)
- Tapping trick: Lightly tap the valve body with a screwdriver handle to loosen corrosion
Force causes 70% of valve breaks—stop if it resists after two attempts.
Emergency Backup When Valves Fail
If valves won’t close during a leak:
1. Find your main shutoff (usually basement or garage)
2. Turn it clockwise until tight
3. Open all downstairs faucets to drain lines
4. Call a plumber—don’t risk flooding by forcing valves
This buys you critical time to minimize damage.
Locate Your Main Water Shutoff in 60 Seconds
Indoor Main Valve Locations
- Basement: Front wall where the main line enters (looks like a large gate valve)
- Garage: On the wall facing the street, often near the water heater
- Crawl space: Behind a small access panel in the floor
If your home has no basement, check utility closets near the furnace.
Outdoor Main Valve Spots
- Water meter pit: Lift the metal cover between your house and street
- Exterior wall: Near outdoor spigots, under a small lid marked “WATER”
- Sidewalk level: Look for a rectangular metal lid flush with the ground
Grab a water meter key from hardware stores to operate street-side valves.
Handle Special Faucet Types Safely

Pull-Down Faucets: Avoid Hose Weight Traps
Slide the weighted counterbalance aside before reaching valves. These hoses often snag on valve handles, making operation impossible. If stuck, gently lift the weight while turning the valve—never yank the hose.
Touchless Smart Faucets: Cut Power First
Critical step: Unplug the unit or flip its circuit breaker OFF before touching valves. Water contacting live sensors causes electrical shorts. Remove batteries too—residual power can trigger leaks during shutoff.
Commercial-Style Faucets: Expect Oversized Valves
Heavy-duty models (like restaurant sinks) use ½-inch supply lines with larger valves. Don’t force standard-sized tools—you’ll strip fittings. Call a pro if valves exceed 1 inch in diameter.
Prevent Valve Failures With 30-Second Monthly Checks
Quick Maintenance Routine
- Turn each valve fully off/on once monthly to prevent mineral lockup
- Wipe stems dry after use to stop corrosion buildup
- Replace handles if cracked—plastic ones break easily when forced
Homes that skip this have 4x more emergency leaks. Set phone reminders!
Upgrade These Warning Signs Immediately
Replace valves showing:
– Green/white crust around connections (mineral corrosion)
– Handle spins freely without stopping water flow
– Age over 10 years (most fail by 15 years)
– Dripping from stem when closed
Delaying replacement risks sudden 50+ gallon/hour leaks.
Emergency Rapid Response Checklist
During a Major Leak
- Shut off main water first—don’t waste time on stuck under-sink valves
- Place towels under leaks to slow spreading
- Open lowest faucet (like basement sink) to drain pipes
- Text a 24/7 plumber—don’t wait for business hours
Every minute of delay adds $300+ in water damage costs.
Post-Leak Restoration Steps
After stopping water:
– Inspect all connections for hidden leaks behind walls
– Open main valve SLOWLY to prevent pipe-jarring water hammer
– Run cold water 2 minutes to flush debris from lines
– Document damage with photos for insurance claims
Essential Tools for Flawless Valve Operation
Must-Have Toolkit
- Adjustable wrench (8-inch): For stubborn valve nuts
- Headlamp: Keeps hands free in dark cabinets
- Microfiber towels: Absorbs drips without leaving lint
- Teflon tape: Reseals connections if disassembly is needed
Skip the bucket—use a shallow plastic tray to catch residual water.
Pro Upgrade Tools
- Valve handle puller: Removes seized handles without damage
- Basin wrench: Reaches valves behind tight P-traps
- Water meter key: Operates street-side shutoffs (keep in garage)
Invest $20 in these—they prevent $500+ emergency calls.
Know When to Call a Plumber Immediately
DIY Is Safe Only If:
- Valves turn smoothly with hand pressure
- Zero leaks at valve stems or connections
- You have clear workspace and lighting
- Valves are standard gate/ball types (not corroded)
If any condition fails, stop—your DIY attempt could flood the house.
Call a Pro For:
- Stuck valves (after 2 gentle attempts)
- Green corrosion on valve bodies
- Leaking stems when closed
- Non-standard configurations (like single-handle pot fillers)
Licensed plumbers fix 95% of valve issues in under an hour.
Mastering how to turn off kitchen faucet water puts you in control during plumbing emergencies. Remember: right valve = cold, left valve = hot—turn clockwise to close. Test valves monthly to keep them functional, and never force a stuck valve. Most importantly, locate your main shutoff today; in a true crisis, this knowledge saves $10,000+ in water damage. Spend five minutes now finding those valves—your future self will flood you with gratitude.

