
Your hand brushes the cabinet door, and three water bottles crash to the floor. Lids scatter like shrapnel, the kids’ favorite sippy cup vanishes into the abyss, and you’re left holding an empty bottle while searching for its missing top. If your kitchen has become a bottle obstacle course, you’re not alone—most households waste 7 minutes daily just hunting for functional containers. How to store bottles in kitchen spaces efficiently isn’t just about tidiness; it’s reclaiming sanity before your morning coffee. This guide delivers battle-tested storage systems that actually work for real families, transforming chaotic cabinets into streamlined hydration stations in under four hours. Forget one-size-fits-all solutions—we’ll match systems to your specific bottle types, cabinet dimensions, and family habits.
Purge & Prep: Your Bottle Chaos Emergency Protocol
Before buying organizers, conduct a military-grade bottle inventory. Empty every cabinet, dishwasher rack, backpack, and car cup holder—yes, even that dusty Yeti wedged behind the cereal boxes. Most households discover 30% more bottles than they actively use, including cracked tumblers and mystery straws from forgotten smoothie adventures.
Sort Bottles by Critical Categories
- Kids’ bottles with handles or straws require eye-level access
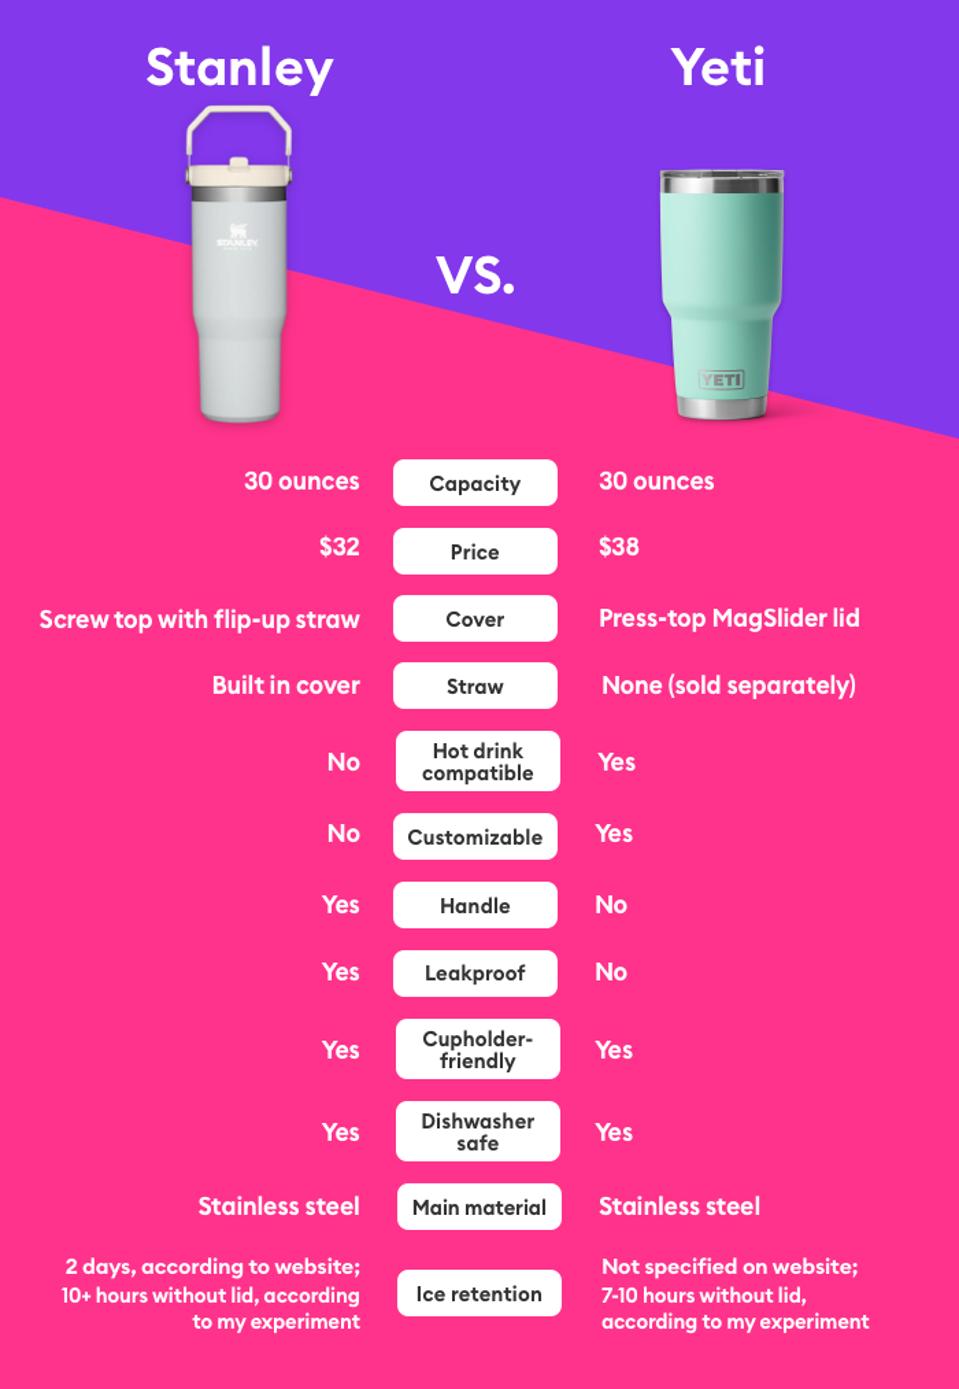
- Adult tumblers like Stanley or Yeti need vertical stability
- Travel mugs demand leak-proof lid separation
- Single-use plastics belong in recycling (not storage)
Execute the 60-Second Purge Test
Hold each bottle and ask: Does it leak? Are there permanent stains? Has anyone used it in six months? If yes to any question, discard it immediately. Keeping five reliable bottles beats managing fifteen faulty ones. Pro tip: Place purged bottles directly into your car trunk—donate functional ones to community centers within 24 hours to avoid second thoughts.
Create a Storage-Ready Zone
Wipe cabinet interiors with vinegar solution to remove sticky residue. Vacuum crumbs from drawer tracks and let surfaces dry completely. This prevents the “new system, old mess” failure that sabotages 80% of organization attempts. Measure your space now—don’t assume standard dimensions fit your Yeti 64 oz monster.
Measure for Success: Avoid Storage System Disasters
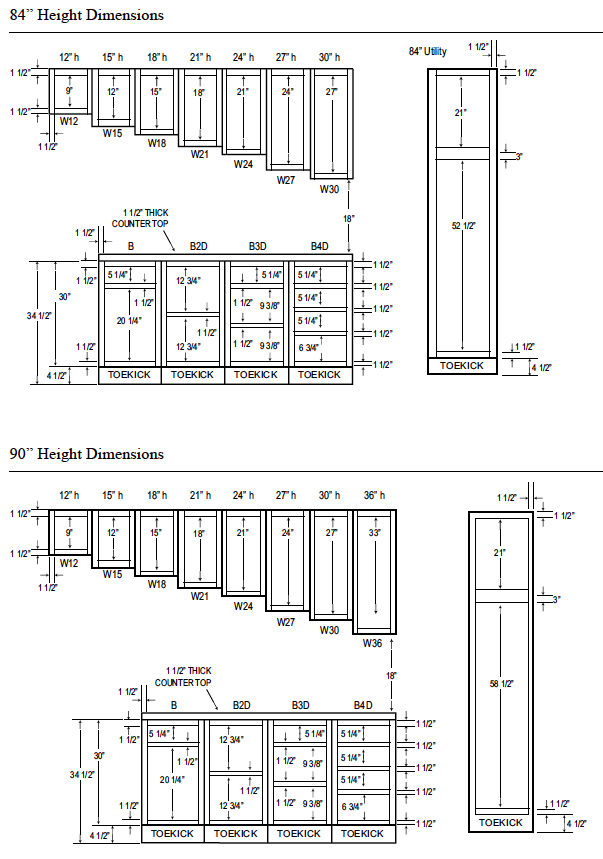
Grab your tape measure before purchasing anything. Standard cabinets offer 14-15 inches vertically, but oversized bottles like the Stanley 40 oz Quencher (12.4″ tall) will jam drawers if you ignore clearance math. Measure interior height, depth, and width—then subtract 1 cm for smooth operation.
Family Accessibility Checkpoint
Position your tallest family member’s bottle on the highest shelf they’ll actually use. If kids can’t reach it independently, they’ll never return bottles. Critical rule: The shortest user’s eye level becomes your storage sweet spot—typically 24-32 inches from the floor for children.
Oversized Bottle Clearance Chart
| Bottle Model | Height | Storage Solution |
|————–|——–|——————|
| Stanley 40 oz | 12.4″ | Horizontal in deep drawers (remove lid) |
| Yeti 64 oz | 10.5″ | Dedicated bottom shelf or rolling cart |
| Nalgene 32 oz | 8.25″ | Wine rack slots or magazine file holders |
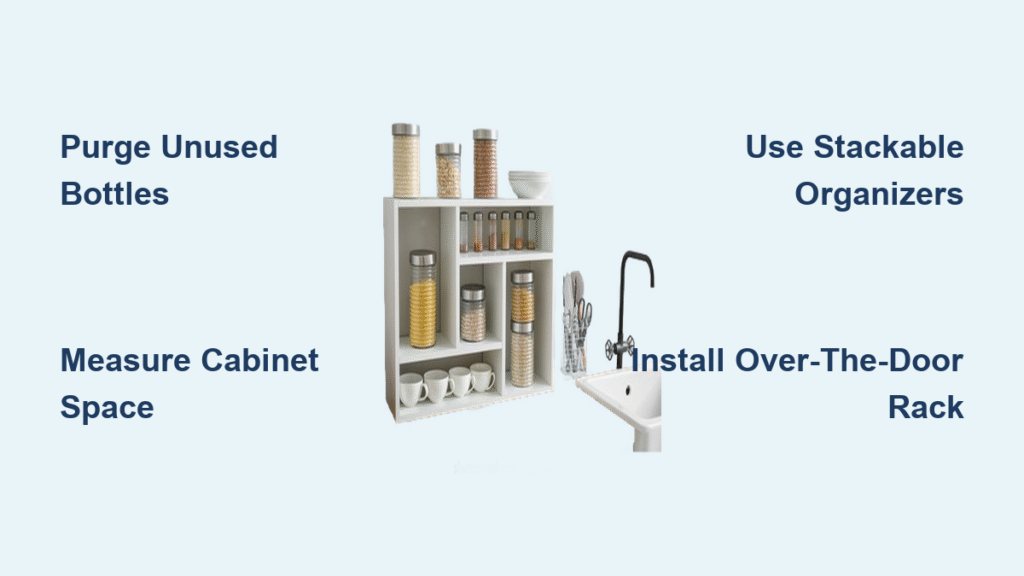
Stackable Acrylic Organizers: The Cabinet Game-Changer

Lifewit’s 6-bottle stackable system ($12-13) solves 90% of standard bottle chaos. These clear acrylic units hold bottles up to 3.8″ diameter and interlock vertically—two tiers fit perfectly in 14-inch drawers. Unlike flimsy alternatives, they withstand daily use without warping.
Setup Sequence for Foolproof Results
- Load bottles largest-to-smallest to test fit before full installation
- Position tallest bottles at the back for visibility
- Leave 0.5″ clearance on all sides for easy removal
Warning: Never stack organizers higher than your cabinet depth—bottles will topple when pulled forward.
Why Acrylic Beats Bamboo
While bamboo looks rustic, acrylic offers critical advantages:
– Full visibility to spot missing lids instantly
– Moisture resistance (bamboo warps with wet bottles)
– Interlocking tabs prevent tier separation during use
Pro tip: Place a non-slip mat under the base unit—this stops the entire system from sliding when retrieving back bottles.
Wine Rack Repurposing: Free Storage for Common Bottles
Don’t buy new organizers—repurpose what you own. Standard wooden wine racks (even thrifted $5 versions) perfectly cradle 8.25″-tall Nalgene 32 oz bottles and Yeti 30 oz tumblers. Their 3-4″ slots provide stability that open shelves lack.
Three-Step Wine Rack Hack
- Place rack inside pantry shelves or deep cabinets
- Angle bottles slightly forward for easy grabbing
- Reserve bottom slots for widest bases (Yeti 45 oz+)
Visual cue: If bottles wobble when inserted, add adhesive felt pads to rack slots—this creates a snug fit without scratching surfaces.
Magazine File Alternative
Turn metal magazine holders on their backs inside cabinets. Each file holds 3 bottles upright and costs under $5. Line three files side-by-side for a 9-bottle system that accommodates varying diameters.
Over-the-Door Shoe Organizer: The $12 Miracle Fix
Twenty-four clear pockets transform pantry doors into instant bottle stations. Each pocket holds one 16-20 oz bottle vertically with caps visible—no more digging through dark cabinets. At $9-12 from Dollar Tree, this is the fastest ROI solution available.
Installation Checklist
- Hang organizer on pantry door (not refrigerator—condensation warps plastic)
- Assign one pocket per person for accountability
- Store bottles caps-down to prevent dust accumulation
Troubleshooting: If pockets bulge, remove every third bottle—overfilling causes zipper failures within weeks.
Why This Beats Fancy Organizers
- Zero tools required (hanging takes 90 seconds)
- Full visibility for quick identification
- Doubles as storage for cleaning brushes in empty pockets
Pro tip: Place kids’ bottles on lower rows—this encourages independent use and reduces “mom, where’s my cup?” emergencies.
Rolling Cart Solutions for Oversized Bottles
Stanley 40 oz Quenchers break standard organizers. A three-tier utility cart ($25-40) creates a mobile hydration station that fits in awkward spaces—like the 6-inch gap between fridge and wall. Roll it to the sink for filling, then park it in the pantry.
Cart Configuration Master Plan
- Top tier: Kids’ bottles (easy access)
- Middle tier: Standard adult tumblers
- Bottom tier: Oversized bottles stored horizontally
Critical adjustment: Place a rubber mat on each shelf—this prevents bottles from sliding during transport and muffled clinks that annoy family members.
Horizontal Storage Hack
Remove lids from oversized bottles to gain 1-2 inches of clearance. Lay bottles on their sides in open bins—this prevents the “won’t fit” frustration while maintaining quick access. Warning: Never store bottles horizontally with liquid inside—residual moisture breeds mold in hidden crevices.
Accessory Chaos Control: Lids, Straws & Brushes
Lids disappear faster than socks in the dryer. Create a dedicated accessory zone within arm’s reach of your bottle storage using the 6×4×3 rule: A small lidded bin (6″×4″×3″) labeled “Lids & Straws” prevents the endless search.
Three-Zone Accessory System
- Mesh bag hung inside cabinet door for cleaning brushes (prevents mildew)
- Magnetic strip mounted on cabinet wall for metal straws (vertical storage)
- Ventilated bin for plastic lids (never seal completely—trapped moisture causes odors)
Pro tip: Store silicone straws with their matching bottles—attach with a rubber band during the 7-day trial period to build habit.
Installation Timeline: From Chaos to Calm in 4 Hours
Skip weekend-long projects with this realistic schedule:
Hour 1: Purge bottles and clean storage zones (use vinegar solution)
Hour 2: Measure spaces and install primary system (acrylic organizer or shoe rack)
Hour 3: Configure accessory zones and load bottles
Hour 4: Conduct family walkthrough with bottle-return practice
The 7-Day Reality Check
Observe actual usage patterns:
– If kids bypass the system, relocate to lower shelves
– If bottles roll, add adhesive backstops immediately
– If lids vanish, implement the mesh bag solution
Critical: Adjust during this window—permanent habits form within seven days.
Troubleshooting Bottle Storage Nightmares
Bottles Roll Off Shelves? Fix Overnight
Root cause: Open-back racks lack stability. Solution: Line shelves with non-slip drawer liner ($3 at Target) or attach a $2 wooden dowel as a backstop. Test with your tallest bottle—zero movement is the goal.
Drawer Won’t Close? Emergency Repair
This means bottles are wedged behind the track. Immediate action: Remove the drawer, retrieve stray bottles, and replace open-back organizers with closed variants. Prevention: Always load bottles front-to-back with caps facing you.
Lid Odor Crisis? 10-Minute Cure
Trapped moisture in sealed bins causes sour smells. Solution: Store lids in a mesh produce bag with baking soda packets. Airflow eliminates odors within 48 hours—no replacement necessary.
Your kitchen can transform from bottle avalanche zone to organized hydration hub faster than you’d believe. Start with the ruthless purge—most families discard 5-7 unusable bottles immediately. Then implement one primary system (acrylic organizers for standard cabinets, rolling carts for oversized bottles) plus the over-the-door shoe organizer for instant visibility. Remember: The system only works if your shortest family member can reach it independently. Commit to the 7-day trial period, adjust based on real usage, and you’ll never dig through a bottle pile again. Within a week, your morning routine will include grabbing—not hunting for—your favorite tumbler. That’s not just organization; it’s daily peace of mind.

