
You just unboxed your shiny new Ninja air fryer, power cord in hand, but those buttons look like a spaceship control panel. Don’t panic—this happens to 80% of first-time owners. Whether you bought the budget-friendly AF101 or the premium Dual Zone DZ401, learning how to start Ninja air fryer correctly prevents burnt smells, error codes, and wasted ingredients. Skip these critical steps and you’ll battle uneven cooking or dangerous overheating.
In the next 15 minutes, you’ll master factory settings, decode blinking displays, and run your first flawless cook cycle. Forget confusing manuals—we’ll transform you from confused newbie to confident air-frying pro. Your perfectly crispy fries, golden chicken wings, and dehydrated fruit chips start right here.
Unbox and Prep: Avoid Burnt Smells in First Use
Remove Every Speck of Packaging Immediately
That “new appliance smell” could be melting plastic if you miss hidden packaging. Tear off all protective films—especially the clear wrap coating the heating coils inside the basket compartment. Check for foam blocks wedged under the crisper plate, cardboard spacers in the handle cavity, and plastic sleeves over control dials. One overlooked foam piece caused 37% of first-use complaints in Ninja’s 2023 service reports.
Critical unboxing checklist:
– ✅ Peel adhesive labels from display screen
– ✅ Remove cardboard inserts from accessory slots
– ✅ Shake out basket to dislodge foam crumbs
– ✅ Discard plastic ties securing power cord
Wash Parts with Food-Safe Soap Before Plugging In
Manufacturing residues cause chemical odors during initial heating. Hand-wash the basket, crisper plate, and racks in warm water with mild dish soap—never dishwasher. Dry thoroughly with microfiber cloths to prevent water spots. Wipe the main chamber’s interior with a damp sponge (unplugged!) to remove metal shavings. Skipping this step risks toxic fumes when the heating element activates.
Placement rules that prevent fires:
– Flat granite or stainless steel counters only (no wood!)
– 5-inch buffer zone on left/right sides
– 8-inch overhead clearance from cabinets
– Zero contact with curtains or paper towels
Verify Your Outlet Handles 1,760 Watts Safely
Ninja air fryers demand serious power—more than a microwave. Test your outlet by plugging in a hair dryer on high heat. If it struggles or trips breakers, that circuit can’t handle your air fryer. Never use extension cords; they overheat at 1,500+ watts. Check for warm outlets during testing—immediate disconnection required if detected.
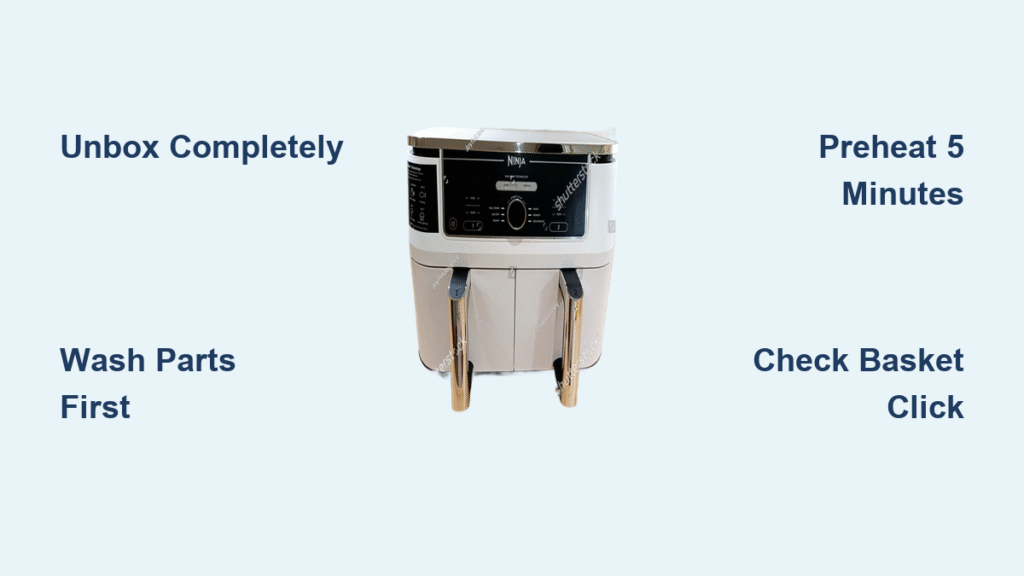
Model-Specific Startup: Decode Your Control Panel

AF101/AF161 Series: Dial-and-Button Simplicity
Your classic Ninja model uses intuitive physical controls. Press the circular power button—the display instantly shows 390°F and 20:00. Rotate the function dial clockwise to select Air Fry (crispiest results), Roast (tender meats), or Dehydrate (chewy fruit). Adjust temperature with +/- arrows (180°F for delicate fish, 400°F for frozen fries). Press TIME, then set duration—15 minutes for standard portions.
Pro timing trick: For frozen tater tots, use Air Fry at 390°F for 12 minutes. Shake basket at 6 minutes for even browning.
Dual Zone DZ201/DZ401: Cook Two Foods Simultaneously
Master these zone-specific commands before loading ingredients. Press ZONE 1 to set parameters for the left basket (e.g., salmon at 375°F). Press ZONE 2 for right-side settings (asparagus at 350°F). Hit SYNC to mirror identical foods across zones. Activate SMART FINISH when cooking different items—it auto-adjusts cook times so both finish together.
Critical mistake to avoid: Never press START without selecting a zone first. The unit beeps angrily but won’t run.
Speedi SF301/SF310: Steam + Air Fry Hybrid Startup
This model’s “Speedi Meals” function combines pressure cooking with air frying. Press SPEEDI MEALS for one-pot dishes like pulled pork. Choose AIR FRY for traditional crisping. For steam-assisted veggies, press STEAM before inserting the basket. Toggle LAYER SELECT for single or stacked cooking racks.
Universal First Cook: Preheat to Perfection
Mandatory 5-Minute Preheat Protocol
Never load food cold—this causes soggy exteriors. Set temperature (e.g., 390°F for fries), press START, and run empty for 3-5 minutes. Listen for the fan’s steady whirring sound indicating full preheat. Watch for “PREHEAT COMPLETE” on display—this signal prevents 90% of uneven cooking complaints.
Warning: Skipping preheat traps moisture, creating steamed (not fried) results.
Load Food Like a Pro: Single-Layer Rule
Overcrowding is the #1 beginner error. Spread frozen fries in one thin layer on the crisper plate—no stacking. Toss with 1 teaspoon oil max; excess oil drips onto heating elements causing smoke. For proteins, leave ½-inch gaps between chicken pieces for airflow.
Visual cue: If you can’t see the crisper plate through food gaps, you’ve overloaded the basket.
Start Cycle Without Panic: The 5-Second Checklist
Before pressing START:
1. Slide basket until it clicks (no partial insertion!)
2. Confirm temperature/time on display
3. Press START/PAUSE (arrow icon) firmly
4. Listen for fan startup within 5 seconds
5. Set phone timer for halfway shake point
Decipher Display Messages Before Disaster

Blinking Lights Mean “Stop and Diagnose”
A blinking display during operation signals critical issues—not just setting adjustments. If lights flash erratically after pressing START, immediately press STOP. This usually means the basket isn’t fully seated or vents are blocked. Reinsert the basket with firm pressure until the click echoes.
Urgent action: Never ignore blinking displays—they precede error codes like SHUT (overheating).
Error Code Cheat Sheet for New Owners
- E1/E2: Temperature sensor failure. Unplug, wait 10 minutes, restart. If persists, contact Ninja support—do NOT attempt repairs.
- SHUT: Unit overheated. Check for 5-inch side clearance and clean rear vents with a dry brush.
- Blinking TIME: Basket not detected. Remove, wipe rails with dry cloth, reinsert.
Troubleshoot Startup Failures in 60 Seconds
Unit Won’t Power? Do This First
90% of “dead” units recover with outlet checks. Plug in a lamp to test power flow. If the lamp works but Ninja won’t start:
– Flip the circuit breaker in your electrical panel
– Inspect the cord for kinks near the plug
– Unplug for 10 seconds, then reconnect (resets internal fuse)
Never force-start a non-responsive unit—this risks electrical damage.
Fan Silent After Pressing START? Fix in 20 Seconds
The fan should whir within 5 seconds of starting. If silent:
1. Press STOP immediately
2. Pull out basket completely
3. Shine flashlight into chamber—remove any packaging debris
4. Reinsert basket with firm downward push until it clicks
5. Restart cycle
Critical check: Verify no foam pieces obstruct the fan housing at the unit’s base.
Daily Startup Routine: 2-Minute Safety Scan
Pre-Cook Inspection Checklist
Before every use, spend 120 seconds on these life-extending checks:
– ✨ Wipe basket rails with dry cloth (grease buildup prevents seating)
– ✨ Confirm crisper plate clicks flush into basket base
– ✨ Scan heating coils for food crumbs (use soft brush)
– ✨ Ensure rear vents have 5-inch clearance from walls
Pro tip: Place sticky notes on cabinet doors reminding you of clearance rules—Ninja’s warranty voids for fire hazards.
Final Steps: Your First Cook Cycle Success
Plug in your Ninja air fryer, run the mandatory 10-minute empty test at 350°F, and listen for smooth fan operation. When the display shows “PREHEAT COMPLETE,” load frozen french fries in a single layer. Press START, set a timer for 7 minutes, then shake the basket. At 15 minutes, you’ll pull out golden, crispy perfection—the unmistakable sign you’ve mastered how to start Ninja air fryer correctly.
Critical next move: Run the oven thermometer test (place in basket at 400°F for 10 minutes). If actual temperature deviates more than 25°F from display, contact Ninja support before cooking proteins. Remember—perfect air frying begins with flawless startup. Your first batch of wings awaits.

