
That new air fryer sitting on your counter promises crispy fries with 70% less oil than deep frying, but where do you actually begin? You’re not alone—83% of first-time users admit confusion about preheating requirements and temperature settings. Starting your air fryer correctly transforms it from a countertop paperweight into your go-to appliance for golden-brown results in half the time of a conventional oven. This guide cuts through the confusion with actionable steps verified by manufacturer guidelines, so you’ll avoid common pitfalls like soggy vegetables or smoking units from day one.
Unlike deep fryers, air fryers use rapid hot air circulation (not oil submersion) to create crispy textures through convection cooking. Whether you own a basket-style model or an air fryer oven, mastering these fundamentals ensures perfect caramelization without burning. We’ll walk you through your very first use—from safety setup to that first flawless batch of fries—using only verified techniques from appliance manuals.
Identify Your Air Fryer Type Before First Use

Your starting procedure depends entirely on whether you own a basket or oven-style unit—confusing them leads to uneven cooking and frustration.
Basket air fryers feature a pull-out drawer with a removable inner basket. These compact models (ideal for 1-3 people) require you to shake ingredients halfway through cooking for even browning. Never overload them; the basket must slide in smoothly without forcing. If food blocks the drawer, you’ve exceeded capacity.
Air fryer ovens resemble mini convection ovens with slide-in racks. They accommodate larger portions (like a whole chicken) but demand precise rack placement—food must sit 1-2 inches below the heating element. Unlike basket models, you’ll rotate racks instead of shaking during cooking. Always verify your model type in the manual before proceeding; using oven settings on a basket unit causes burnt exteriors and raw centers.
Critical Preheating Mistake Beginners Make
Skipping preheating seems time-saving but sabotages results. Most manuals require 3-5 minutes at your recipe’s target temperature to stabilize heat distribution. Test this yourself: cook identical fries with and without preheating—you’ll see pale, limp results without it. Exceptions exist only for delicate vegetables like broccoli; their quick-browning edges burn if added to a preheated unit. For 95% of foods (fries, chicken, etc.), preheating is non-negotiable.
Essential Safety Setup Before Powering On

Place your air fryer on a heat-resistant surface with 5+ inches of clearance on all sides—this prevents cabinet discoloration from vented heat during 400°F cycles. Never position it near curtains, paper towels, or flammable materials; the rear exhaust can reach 200°F.
Critical oil warning: Do not add oil to the basket. Air fryers create crispiness through air circulation, not oil submersion. Adding oil pools at the bottom, smokes violently, and damages the nonstick coating. For extra crispness, lightly spray food before loading—not the basket. Ensure your kitchen has basic ventilation; while air fryers produce less smoke than stovetop frying, they still vent cooking odors that trigger smoke alarms in poorly ventilated spaces.
Why Your First Batch Might Smoke
White smoke during initial use typically means residual manufacturing oils burning off. Run an empty cycle at 400°F for 10 minutes before cooking. If smoke persists during food prep, excess oil dripped from marinated items—pat proteins dry thoroughly next time. Never ignore smoke; unplug immediately and let the unit cool before cleaning the heating element area.
Load Food Like a Pro: Single-Layer Rule
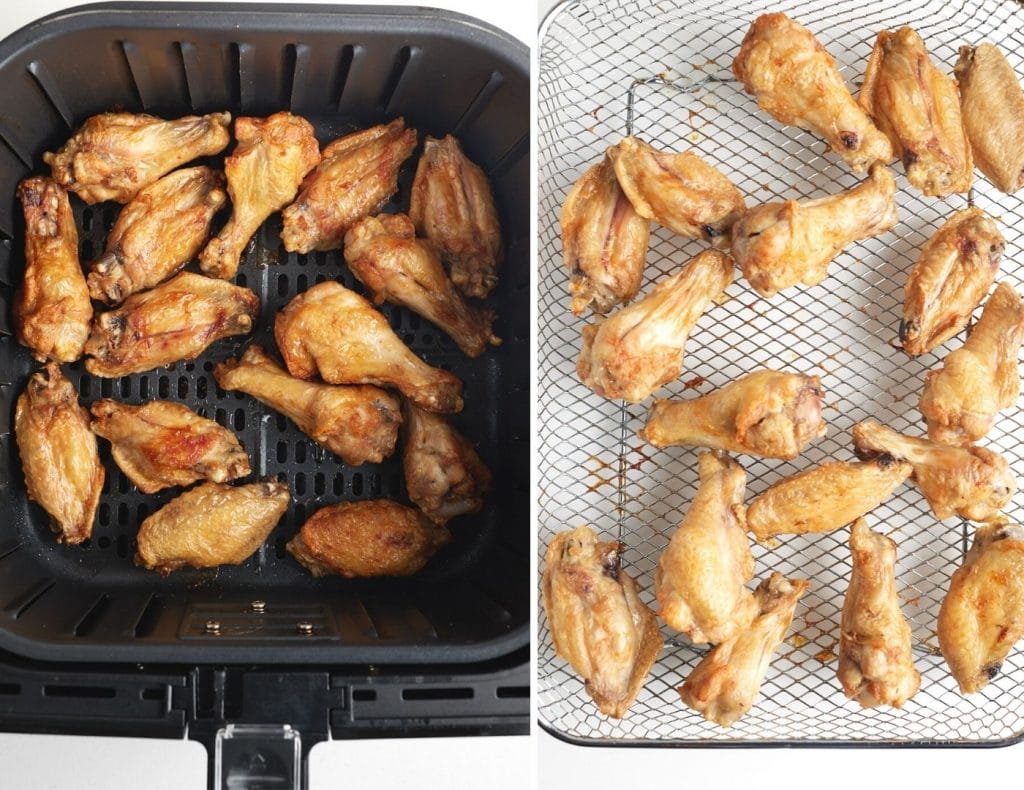
Overcrowding causes 70% of beginner failures—steam traps between stacked items prevent crisping. Arrange food in one flat layer with space between pieces, mimicking how you’d place cookies on a baking sheet. For basket models, fill only halfway; oven styles require food centered on racks without touching walls.
Shake or Rotate Timing Secrets
Set two timers: one for halfway through cooking and another for 2 minutes before completion. For basket units:
1. Pull the basket at the halfway mark
2. Shake vigorously (180-degree turn)
3. Return immediately to maintain heat
Oven-style users must rotate racks front-to-back. Skipping this creates uneven browning—imagine fries with one side pale and the other burnt.
Temperature & Time Hacks for Perfect Results

Air fryers cook 20% faster than conventional ovens at equivalent temperatures. Always reduce oven recipe temps by 25°F (e.g., 400°F oven = 375°F air fryer). Cooking times drop proportionally—20 oven minutes become 16 air fryer minutes.
| Food Type | Air Fryer Temp | Time (Per Side) | Critical Checkpoint |
|---|---|---|---|
| Frozen French Fries | 400°F | 15-18 min | Shake at 7 min |
| Chicken Breasts | 375°F | 12-15 min | Internal 165°F |
| Brussels Sprouts | 375°F | 10-12 min | Toss at 5 min |
Pro tip: Start checking 3 minutes early—air fryers overcook rapidly. Use an instant-read thermometer; visual cues alone mislead beginners.
First Recipe: Foolproof Frozen French Fries
This foundational recipe teaches loading, shaking, and timing. Use store-bought frozen fries (no thawing):
1. Preheat air fryer to 400°F for 3 minutes
2. Load fries in a single layer (max ½ basket capacity)
3. Cook 10 minutes, then shake basket violently
4. Cook 5-8 more minutes until golden
5. Season immediately with salt while hot
Why this works: Preheating ensures instant crisping, single-layer loading prevents steaming, and mid-cook shaking exposes new surfaces to hot air. If fries aren’t crispy, your next batch needs 25°F higher heat or less quantity per batch.
Immediate Post-Use Cleaning Protocol
Cleaning within 20 minutes of cooking prevents baked-on grease that damages nonstick coatings. Most baskets separate into inner/outer components—soak both in warm, soapy water for 10 minutes. Never use steel wool; scrub gently with a nylon brush. Dry thoroughly before reassembly to avoid electrical hazards.
Weekly Heating Element Maintenance
Wipe the top heating coil with a damp microfiber cloth weekly. Built-up grease here causes smoking and off-flavors. For stubborn residue, dip cloth in vinegar solution (1:1 water/vinegar). Never immerse the main unit in water—only removable parts are dishwasher-safe (check manual).
Troubleshoot First-Day Failures
Problem: Food is soggy, not crispy
Cause: Overcrowded basket or insufficient temperature.
Fix: Reduce quantity by 30% and increase temp 25°F next time.
Problem: White smoke during cooking
Cause: Excess oil from marinated foods burning.
Fix: Pat proteins dry; never add oil to basket. Clean heating element immediately.
Problem: Uneven browning
Cause: Forgot to shake/rotate at halfway point.
Fix: Set phone timer for mid-cook agitation.
Problem: Food sticks to basket
Cause: Sugary marinades caramelizing or cold basket.
Fix: Preheat empty basket; lightly spray basket with oil before adding food.
Beyond Fries: 3 Beginner-Friendly Expansions
Revive leftover pizza at 350°F for 3-4 minutes—crust regains crispness while cheese melts. Thicker deep-dish styles need 6 minutes. Never stack slices; single-layer only.
Crisp bacon in 8-10 minutes at 350°F. Place strips on a rack (not directly in basket) to prevent grease pooling. Drain on paper towels immediately.
Roast vegetables like broccoli at 375°F for 10 minutes. Toss in 1 tsp oil before loading—this enhances browning without smoking. Shake at 5 minutes for even charring.
Build a Maintenance Habit from Day One
- After every use: Wash basket components; wipe interior with damp cloth
- Weekly: Clean heating element and air vents
- Monthly: Inspect seals for warping; descale with vinegar if hard water is used
- Every 6 months: Replace worn baskets (scratched nonstick coatings cause sticking)
Neglecting weekly heating element cleaning causes persistent smoke—a top reason users abandon air fryers within 3 months. Consistent care extends lifespan by 2-3 years.
Next-Level Skills After 5 Successful Cooks
Once you’ve mastered single-layer cooking:
– Multi-rack meals: Place slower-cooking items (potatoes) on lower rack, quicker items (asparagus) above
– Dehydrate fruits: Set to 135°F for 4-6 hours (apples become leathery, not mushy)
– Bake small batches: Mug cakes cook in 8 minutes at 320°F—no preheating needed
Track your first 10 recipes in a notebook. Note adjustments like “Ninja AF101 runs 25°F hot—reduce temp for chicken.” Your appliance’s quirks become predictable within 2 weeks of consistent use.
Starting your air fryer journey correctly unlocks consistent, restaurant-quality results with minimal cleanup. By prioritizing preheating, single-layer loading, and immediate cleaning, you avoid the top frustrations that derail beginners. Remember: every perfect batch of fries builds confidence for more complex dishes. Within a month, you’ll wonder how you ever cooked without this countertop powerhouse—especially when it reheats pizza better than any microwave. Your first step? Plug it in, preheat properly, and shake that basket like your crispy dinner depends on it (because it does).

