
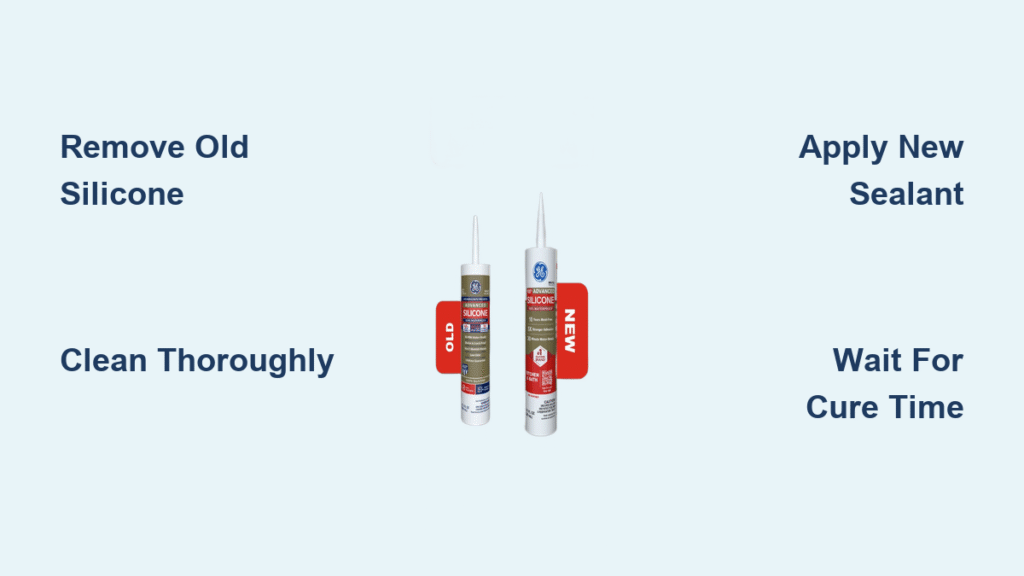
That faint black line creeping along your sink edge isn’t just dirt—it’s mold thriving in failing silicone sealant. When your kitchen’s once-pristine waterproof barriers turn brittle, crack, or develop stubborn discoloration, cleaning won’t save them. You need complete silicone replacement. The good news? This moisture-proof fix takes just a single afternoon with basic tools, transforming grimy joints into clean, mold-resistant seals that last for years. In this guide, you’ll master how to replace silicone in kitchen environments professionally—avoiding costly handymen fees while ensuring your sealant survives daily splashes and steam.
Silicone’s plastic-like flexibility makes it ideal for kitchen wet zones, but constant moisture exposure inevitably breaks it down. When you spot separation from countertops, loss of elasticity, or mold that scrubbing can’t remove, replacement becomes essential. Skipping this leads to hidden water damage behind cabinets and walls. By following these precise steps for how to replace silicone in kitchen fixtures, you’ll restore waterproof integrity while giving your space a dramatically fresher appearance. Let’s reclaim your kitchen’s cleanliness with pro-level results.
Spot Failing Silicone Before Water Damage Spreads
Kitchen silicone sealant failure follows predictable patterns you can catch early. Run your finger along sink edges and backsplash joints—if the material feels chalky, cracks under light pressure, or pulls away from surfaces, it’s beyond saving. Visible black mold that returns after bleach treatment signals deep contamination requiring full removal. Discoloration beyond surface stains (like permanent yellowing near stovetops) indicates UV degradation. Most critically, check for gaps where water penetrates behind countertops—a telltale sign the sealant lost adhesion.
Why immediate action matters: Delaying replacement lets moisture seep into wood substrates, causing irreversible rot. Test suspect areas by pressing a paper towel against the joint after splashing water nearby—dampness on the towel confirms failure. Remember: kitchen silicone typically lasts 7-10 years, but high-moisture zones like sink perimeters often fail sooner due to constant exposure.
Grab These Budget-Friendly Removal Tools

Skipping proper tools guarantees frustration and surface damage during how to replace silicone in kitchen projects. Invest in these five essentials under $20 total:
- Silicone-specific removal tool: Its curved blade lifts sealant without gouging surfaces (unlike generic scrapers)
- X-Acto knife with fresh blades: For precision work in corners and tight spaces
- Mineral spirits: Dissolves stubborn residue without harming countertops
- Microfiber cloths: Lint-free cleaning for residue-free surfaces
- Nitrile gloves: Protects hands from chemicals and sharp edges
The specialized removal tool pays for itself by preventing accidental nicks in stone or laminate. Keep mineral spirits and water nearby—dipping your knife blade in either reduces silicone’s grip during removal. Never use vinegar or bleach; they compromise new sealant adhesion.
Remove Every Trace of Old Silicone
Confirm It’s Silicone Before Starting
Kitchen sealants are 95% silicone-based in wet zones, but verify by texture: true silicone feels rubbery and stretches slightly when pulled. Latex caulk (rare in kitchens) crumbles when bent. If unsure, apply mineral spirits to a hidden section—silicone won’t dissolve, while latex will soften. Proceed only when confirmed; improper removal ruins surfaces.
Execute the 3-Step Lift Technique
Step 1: Insert your silicone removal tool at 45 degrees where sealant meets sink. Apply firm, steady pressure while pulling toward you. Most silicone releases in satisfying strips—never pry vertically, which chips countertops.
Step 2: For stubborn sections, dip your X-Acto blade in mineral spirits. Make shallow cuts along the sealant’s edge, then lift fragments with the removal tool. Work in 2-inch sections to avoid tearing.
Step 3: Inspect corners with a flashlight. Use the knife tip to dislodge hidden remnants—critical for success since new silicone won’t bond to old residue. Run a dry cloth along the joint; if it snags, more cleaning is needed.
Pro Tip: On stone surfaces, chill silicone with an ice pack first. Cold makes it brittle and easier to remove cleanly.
Prep Surfaces for Flawless Adhesion
Deep Clean Using Mold-Killing Protocol
After removal, wipe joints with mineral spirits to dissolve invisible oils. Then saturate a cloth with 90%+ isopropyl alcohol (not rubbing alcohol—its water content hinders bonding) and scrub aggressively to kill mold spores. Rinse with distilled water to avoid mineral deposits, then dry completely with a heat gun or hairdryer—never skip this. Moisture trapped under new sealant causes instant failure.
Verify Joint Readiness in 60 Seconds
Before applying new silicone, confirm these three conditions:
– Dryness test: Press palm against joint for 10 seconds; no moisture should transfer
– Depth check: Joint should be ¼–½ inch deep (ideal for proper adhesion)
– Damage scan: Probe with toothpick for soft spots indicating water damage
Address any substrate issues first—fill rotted wood with epoxy putty. Rushing this step causes rework within months.
Select Kitchen-Grade Silicone That Lasts

Avoid These Costly Product Mistakes
Never use tub-and-tile silicone, all-purpose caulk, or paintable sealants—they lack kitchen-specific mold resistance. Choose 100% silicone labeled “kitchen/bathroom” with these non-negotiable features:
– MoldShield™ technology (or equivalent mold inhibitor)
– Neutral-cure formula (acid-cure damages stone)
– White color (pigments in colored silicone reduce longevity)
– Caulking gun requirement (tubed applicators lack precision)
Top brands like GE Kitchen & Bath or DAP Kwik Seal cost $10–$15 but deliver 10+ years of service. Check the tube’s expiration date—expired silicone won’t cure properly.
Apply New Silicone Like a Master Craftsman
Load and Cut Your Caulk Tube Correctly
Insert the tube into your caulking gun, then slice the nozzle at 45 degrees using sharp scissors. The hole size should match your joint width—start small (1/8 inch) for sink edges; you can always enlarge it. Test flow on cardboard: you want a smooth, continuous bead without gaps. Squeeze gently until sealant appears at the tip—this primes the tube.
Master the One-Pass Application Method
Step 1: Hold the gun at 45 degrees, nozzle touching the back of the joint. Apply steady pressure while moving steadily toward you—never stop mid-bead. Move at 1 inch per second for consistent thickness.
Step 2: Immediately tool the bead using a damp plastic spoon or credit card. Drag in one direction with light pressure to create a concave profile that sheds water. Wipe excess quickly—silicone skins over in 5 minutes.
Pro Shortcut: Apply painter’s tape 1/16 inch from the joint edge. Remove tape 30 seconds after tooling for razor-sharp lines. Never use masking tape—it peels off new silicone.
Fix Imperfect Beads Without Starting Over
Reshape Dried Silicone in 4 Minutes
If your bead dried too thick or lumpy, don’t panic. Dip an X-Acto blade in mineral spirits and shave high spots with feather-light strokes—always cut away from the joint to avoid gouging. Use your fingernail (dipped in water) to smooth transitions at corners. For stubborn ridges, rub gently with a silicone shaper tool. Never sand—this creates dust that traps moisture.
Urgent warning: If silicone separates during reshaping, you didn’t remove all old residue. Full removal is required before reapplying.
Respect the Silicone Curing Timeline
When to Use Your Sink Safely
Critical waiting periods make or break your results:
– 0–24 hours: Absolutely no water contact (set reminders!)
– 24–48 hours: Light rinsing only—no dishwasher loading or sink submersion
– 72+ hours: Full use resumes
Humidity below 50% speeds curing; above 70% doubles drying time. Test readiness by pressing a fingernail gently—no indentation means it’s set. Rushing this step causes permanent weak spots where water invades.
Prevent Repeat Failures With Smart Habits
Extend Silicone Life by 4+ Years
Daily: Wipe splashes from sealant lines immediately—standing water breeds mold.
Weekly: Spray joints with vinegar-water solution (1:1) to inhibit mold growth.
Annually: Inspect with a flashlight for early separation signs at stress points.
Replace silicone every 8 years proactively, or immediately if you spot:
– Pinholes along the bead
– Loss of flexibility (it snaps when bent)
– Recurring mold after cleaning
Key insight: Proper ventilation reduces moisture by 60%. Run exhaust fans 20 minutes after cooking/showering.
Avoid These 5 Costly Silicone Replacement Errors
Amateur mistake #1: Applying new sealant over “cleaned” old silicone. Fix: Scrape until metal/countertop feels smooth.
Amateur mistake #2: Using vinegar for final cleaning. Fix: Only use isopropyl alcohol—it evaporates completely.
Amateur mistake #3: Skipping painter’s tape on stone. Fix: Tape is essential for clean lines on porous surfaces.
Amateur mistake #4: Overfilling joints. Fix: Apply 10% excess—tooling compresses the bead.
Amateur mistake #5: Testing with water too soon. Fix: Wait 48 hours minimum—set phone alerts.
Your kitchen’s transformation is complete when that once-dreary sink edge gleams with a crisp, white sealant line that repels water effortlessly. By dedicating 2–3 focused hours to how to replace silicone in kitchen fixtures correctly, you’ve prevented thousands in water damage while achieving results that outlast professional jobs. Remember: the secret lies in obsessive surface prep and respecting cure times. Now that your sealant is flawless, maintain it with monthly vinegar sprays and annual inspections—your future self will thank you when this silicone easily surpasses its 10-year lifespan.

