
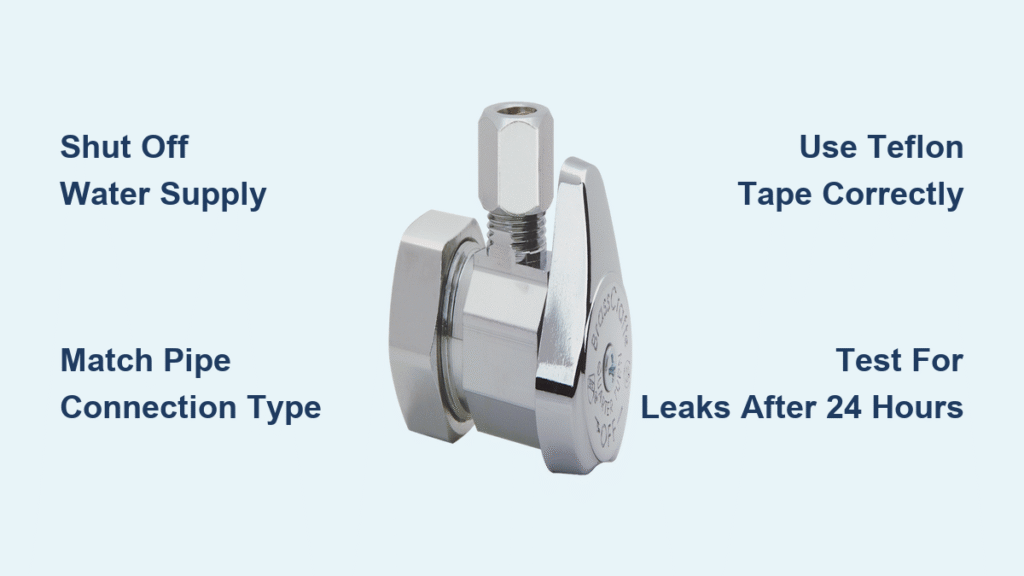
Water gushes from your kitchen faucet despite twisting the hot-water shut-off valve under the sink. You’re standing in a puddle, realizing this emergency could flood your cabinets in minutes. Don’t panic—replacing a kitchen water valve is one of the most manageable DIY plumbing fixes, taking just 30-60 minutes with basic tools. This guide reveals exactly how to replace a kitchen water valve safely, whether it’s threaded, compression, or sweat-connected, without calling a plumber or causing water damage.
Most homeowners face this crisis when their hot-water valve spins uselessly while cold-water controls work perfectly. Crucially, if other fixtures still deliver hot water, the problem is isolated to your kitchen valve—not your entire plumbing system. By following these steps, you’ll diagnose the failure, choose the right replacement, and complete the swap confidently. You’ll also learn critical safety checks professionals use to prevent leaks and avoid common pitfalls that turn simple repairs into costly disasters.
Why Your Kitchen Water Valve Won’t Shut Off
Hot Water Keeps Flowing Despite Handle Movement
When your kitchen water valve fails, the handle spins freely without stopping water flow. You’ll notice cold-water shut-offs work normally, but the hot side leaks continuously—even when fully “closed.” Confirm it’s an isolated issue by checking other fixtures: If your bathroom sink and laundry still get hot water, the problem lies solely with your kitchen valve. This distinction is critical because it means you won’t need to drain your entire water heater system during repairs.
How to Isolate Water Supply Without Draining Your Tank
Before touching any tools, determine your water shut-off strategy. If your water heater has a dedicated outlet valve, close the inlet valve first, open a downstream faucet (like the kitchen sink) to relieve pressure, then shut the outlet valve. This isolates the hot line without draining the tank. No outlet valve? Shut off the main house supply instead—especially if your repair point is below the water heater’s height, as opening faucets could siphon water from the tank. Always open both the highest and lowest faucets in your home to fully drain residual pressure before starting work.
Selecting Your Replacement Valve Correctly
Matching Pipe Connections to Avoid Costly Mistakes
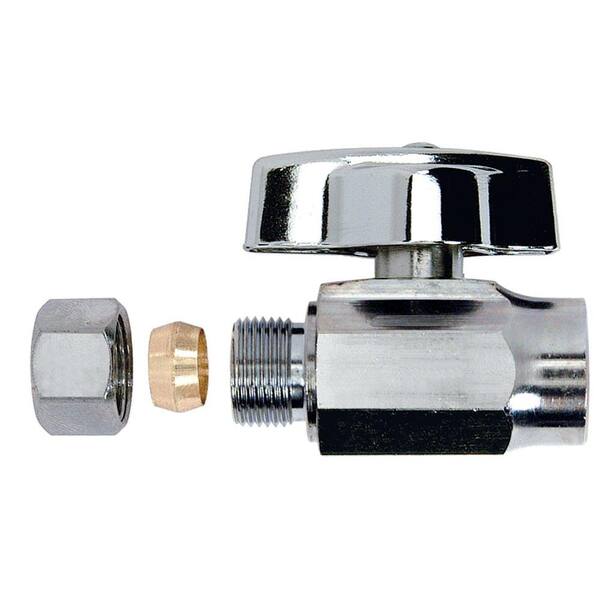
Examine how your current valve attaches to the pipe—this dictates your entire repair approach. Threaded valves screw directly onto supply pipes and loosen with a simple counter-clockwise turn. Compression valves use a hexagonal nut and brass ring that must be unscrewed before sliding the valve off. Sweat valves are permanently soldered to copper pipes, requiring specialized cutting or conversion. Misidentifying your connection type risks pipe damage—so verify whether you have threaded, compression, or sweat fittings before purchasing replacements.
Measuring for Perfect Compatibility
Grab a ruler and measure your pipe’s outer diameter: Standard kitchen sizes are ⅜”, ½”, or ¾”. If measurements are unclear, remove the old valve and take it to the hardware store for direct matching. Crucially, note the valve’s orientation (straight, 90°, dual outlet) and choose brass or stainless steel ball valves—they last decades and operate with a simple quarter-turn. Never assume sizes match across fixtures; mismatched valves cause immediate leaks upon installation.
Gathering Essential Tools Before Starting
Critical Equipment for Leak-Free Results
You’ll need two adjustable pipe wrenches (one to stabilize pipes, one to turn nuts), pliers for stubborn brass ferrules, and a flat-head screwdriver to pry cut sleeves. For compression valves, keep a hacksaw handy to score seized rings—but never cut into the pipe itself. Deburring tools like emery cloth are non-negotiable for clean pipe ends after cutting. Skipping these tools risks cracked fittings or incomplete seals that guarantee leaks.
Consumables Checklist to Prevent Re-Work
Bring home Teflon tape for threaded installations (wrap clockwise 2–3 times), pipe dope as a tape alternative, and replacement brass ferrules for compression valves. Pack paper towels and a small bucket—residual water always drips during disassembly. Never reuse old ferrules or tape; compromised seals cause 90% of post-repair leaks. Professional plumbers always carry spare washers too, as supply hoses often need replacement during valve swaps.
Shutting Off Water Without Flooding Your Cabinet
Universal Safety Protocol Every DIYer Must Follow
First, shut off the main house water supply—never rely solely on upstream valves. Then open the highest faucet (like an upstairs bathroom) and lowest drain point (basement sink) to fully relieve pressure. Critical step: Keep your kitchen faucet open during this process. Water will initially spurt, then slow to a trickle, confirming pressure is fully drained. Only when all flow stops should you place your bucket under the work area and clear cabinet contents.
Why Skipping Pressure Drainage Causes Catastrophic Leaks
Ignoring pressure drainage is the #1 DIY mistake. Residual water in pipes creates dangerous pressure that can blast fittings apart when disconnected. You’ll know pressure is relieved when:
– Water stops dripping from open faucets
– No hissing sounds from pipes
– Faucet handles turn freely without resistance
Never proceed if water still flows—this indicates incomplete shut-off and guarantees flooding during disassembly.
Replacing Threaded Valves in Under 15 Minutes
Removing Stubborn Old Valves Safely
Secure one pipe wrench on the valve body’s flat sides to prevent pipe twisting. Use the second wrench to turn counter-clockwise—apply steady force, not shock. Most valves loosen within 2–3 rotations. Once free, inspect pipe threads for corrosion; if damaged beyond 30% of the wall thickness, stop and call a plumber. Never force severely corroded valves—you risk snapping pipes.
Installing New Valves Without Over-Tightening
Wipe old Teflon tape off threads completely. Wrap new tape clockwise 2–3 times (more causes bulges), then hand-start the valve. Tighten with a wrench until snug—stop immediately at resistance. Over-torquing cracks valve bodies. Reconnect supply hoses with a quarter-turn past hand-tight; excessive force distorts rubber washers and creates leaks.
Swapping Compression Valves Without Damaging Pipes
Removing Seized Brass Ferrules Properly
Unscrew the compression nut counter-clockwise with a pipe wrench. Slide off the old valve, but expect the brass ferrule (ring) to remain stuck. Do not hammer or twist violently—gently rotate it with pliers first. If seized, make a single light hacksaw cut through the ring (not the pipe!), then insert a screwdriver to pry it open. Over-sawing cracks pipes—light scoring is sufficient for removal.
Installing New Ferrules for Leak-Proof Seals
Slide the new compression nut onto the pipe (threads facing outward), followed by the ferrule. Push the valve fully onto the pipe until seated, then hand-thread the nut. Hold the valve body with one wrench while tightening the nut clockwise—stop at ¼ to ½ turn past hand-tight. Over-tightening cracks ferrules, causing immediate leaks. Test by tightening incrementally: ⅛ turn at a time until seepage stops.
Converting Soldered Valves Without a Torch

Why Sweating Pipes Is a DIY Trap
Sweat valve replacement requires cutting pipes, desoldering, and resoldering—complex work with fire risks in tight cabinets. 95% of DIYers should skip soldering. Instead, cut off the old valve and convert to compression or push-fit (SharkBite) systems. These modern alternatives install in minutes without torches and allow future valve swaps with basic tools.
The 5-Minute Conversion Method
Use a hacksaw to cut copper pipe squarely behind the old valve. Deburr edges with emery cloth until smooth. For push-fit valves, simply slide the new valve onto the clean pipe end—no tools needed. Never install push-fits on corroded pipes; clean, smooth surfaces are mandatory for seals. This conversion prevents future soldering emergencies and simplifies maintenance.
Reconnecting Supply Hoses Without Leaks
The Right Tightening Technique for Rubber Washers
Kitchen supply hoses use internal rubber washers—never apply Teflon tape. Hand-tighten the hose nut first, then add exactly one full 360° turn with a wrench. Over-tightening distorts washers, while under-tightening causes drips. Route hoses in gentle curves to prevent kinks that restrict water flow. Always replace cracked or hardened hoses—they fail within weeks.
Immediate Valve Operation Test
Close your new valve completely, then restore main water supply. Check for leaks at all connections before opening the valve. Once confirmed dry, open and close the valve 3–4 times under pressure. Smooth quarter-turn operation confirms success—sticking indicates misalignment or debris. If leaks appear, tighten nuts incrementally (⅛ turn) before disassembling.
Testing for Hidden Leaks Before Declaring Victory
The 24-Hour Leak Monitoring Protocol
Dry all joints thoroughly with paper towels. Place fresh paper towels under connections and check every 4 hours for the first day. Initial micro-seepage often stops as compression ferrules seat under pressure—don’t panic if minimal moisture appears early. Persistent drips after 6 hours indicate loose fittings needing incremental tightening.
Long-Term Maintenance to Prevent Repeat Failures
Exercise your new valve monthly by turning it fully open and closed—this prevents mineral buildup from seizing mechanisms. During annual inspections, check for green patina on brass valves; corrosion signals replacement time. Replace valves every 8–10 years proactively, even if working, to avoid emergency failures.
When to Call a Plumber Immediately
Critical Red Flags During Replacement
Stop working if:
– Pipe threads show 30%+ corrosion loss
– Sweat valves sit in cramped cabinets with limited torch clearance
– You encounter manifold systems with water hammer arrestors
Attempting repairs in these scenarios risks catastrophic flooding—professional tools and expertise become essential. Most plumbers charge $150–$300 for valve replacements but include labor warranties.
Warranty Realities You Must Know
Quality ball valves carry 5–10 year manufacturer defect coverage, but DIY installations void labor warranties. Professional service typically includes 1–2 years of coverage against installation errors. Factor warranty value into your decision if your plumbing shows advanced corrosion or your home has hard water accelerating wear.
Key Takeaway: Replacing a kitchen water valve takes 30–60 minutes with basic tools when you identify your connection type first. Shut off water properly, match pipe sizes exactly, and follow specific steps for threaded or compression valves. For soldered valves, convert to push-fit systems to avoid torch work. Always monitor for 24 hours post-installation—most “leaks” resolve as fittings seat, but persistent drips need incremental tightening. By exercising your new valve monthly, you’ll prevent future emergencies and keep your kitchen safe from flooding disasters.

