
Your kitchen faucet sputters and spits, the once-powerful stream now reduced to a disappointing trickle. That morning coffee feels like it’s taking forever to brew, and you notice white crusty buildup around the spout. These telltale signs point to one common culprit: sediment buildup silently choking your faucet’s performance. If you’re searching for how to remove sediment from kitchen faucet issues, you’re not alone—this problem affects millions of households and can contaminate drinking water while damaging internal components.
Sediment accumulation happens gradually, often going unnoticed until water pressure drops significantly. The good news? You can restore full flow in under 30 minutes using household items and basic tools. This guide delivers actionable steps to eliminate mineral deposits, rust particles, and grit—the three most common sediment types—while teaching you how to prevent future clogs. No plumbing degree required.
Spot Sediment Buildup Before It Worsens
Reduced Water Pressure Symptoms
Watch for pressure drops exceeding 30%—your faucet should fill a quart container in under 15 seconds normally. When sediment clogs restrict flow, you’ll notice water shooting sideways from the spout or spray head, weak stream strength even with full handle rotation, and delayed hot water delivery. Critical warning: If pressure loss affects multiple fixtures simultaneously, sediment may be accumulating in your main supply lines rather than just the faucet.
Visual Sediment Indicators
Examine your aerator under bright light. White or chalky deposits signal hard water minerals (calcium/magnesium), while rust appears as orange-brown flecks. Black slimy residue indicates bacterial biofilm growth inside the faucet body. Pro tip: Place a white paper towel under running water—if particles collect on it, sediment is actively entering your water stream.
Grab These Essential Tools Before Starting
Required Cleaning Supplies
Gather these items to avoid mid-process frustration:
– Adjustable wrench (size 8-10mm for most aerators)
– White vinegar (never use bleach—it damages rubber seals)
– Old toothbrush (soft-bristled to avoid scratching metal)
– Small bowl for soaking parts (glass works best)
– Teflon tape (for leak-proof reassembly)
– Needle-nose pliers (for retrieving tiny screens)
Pre-Cleaning Safety Protocol
Turn off both shut-off valves beneath your sink clockwise until snug—never force them. Place a towel over the drain to catch dropped screws (a single lost O-ring turns a 20-minute job into a plumbing emergency). Open faucet handles fully to release pressure and drain residual water. Wear cut-resistant gloves—aerators often have sharp metal edges that cause painful nicks.
Clean the Aerator in 20 Minutes
Fast Aerator Removal Process
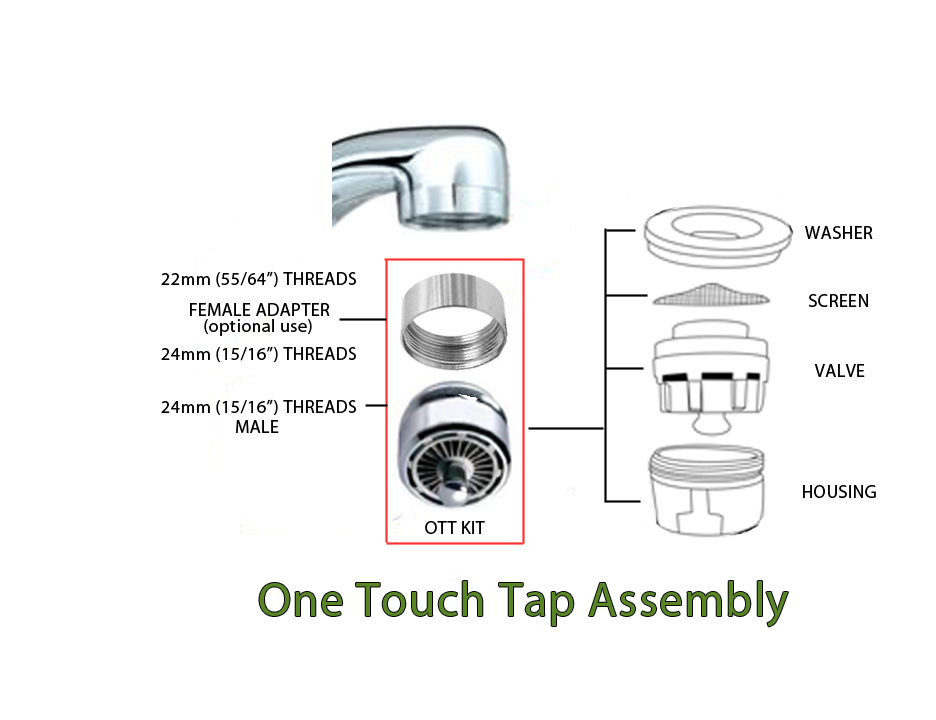
Most aerators unscrew by hand with firm counterclockwise pressure. For mineral-fused models: wrap the aerator in a rubber jar opener to prevent slippage, then use channel-lock pliers gently. Never overtighten during reassembly—this cracks the housing. As you disassemble, lay parts in order on a labeled paper towel: housing, flow restrictor, screen stack, and rubber washer.
Deep Cleaning Techniques
Soak metal components in undiluted white vinegar for 2-4 hours (minerals dissolve fastest at room temperature). For stubborn deposits: heat vinegar to 140°F in a microwave-safe bowl, then submerge parts. Never soak rubber washers—vinegar causes swelling that ruins seals. After soaking, use a toothpick to clear individual screen holes while holding screens under running water. Replace any screen showing pinholes or tears—costing under $5 at hardware stores.
Flush Faucet Cartridge Thoroughly
Cartridge Access Without Damage
Remove the handle by prying off the decorative “H/C” cap with a flathead screwdriver, then unscrewing the set screw. Never force a corroded set screw—apply penetrating oil and wait 10 minutes. The cartridge sits beneath a retaining nut; unscrew it counterclockwise while supporting the faucet body to prevent cracking. Pull straight up—twisting damages internal seals.
Critical Cleaning Steps
Rinse the cartridge under warm water to dislodge loose debris. Soak in vinegar for 60 minutes max—prolonged exposure degrades plastic components. Use a soft toothbrush to scrub water channels, focusing on the tiny inlet holes where sediment accumulates. Inspect O-rings for cracks or flattening; replace if they don’t spring back when pinched. Apply food-grade silicone grease to seals before reinserting—this prevents future sticking.
Eliminate Stubborn Mineral Deposits

Vinegar Paste for Heavy Buildup
For crusty deposits around the spout: mix 2 parts vinegar with 1 part baking soda into a thick paste. Apply with a cotton swab, cover with plastic wrap, and let sit 3 hours. Never use steel wool—it scratches chrome finishes permanently. After treatment, flush with cold water for 2 minutes to remove residue.
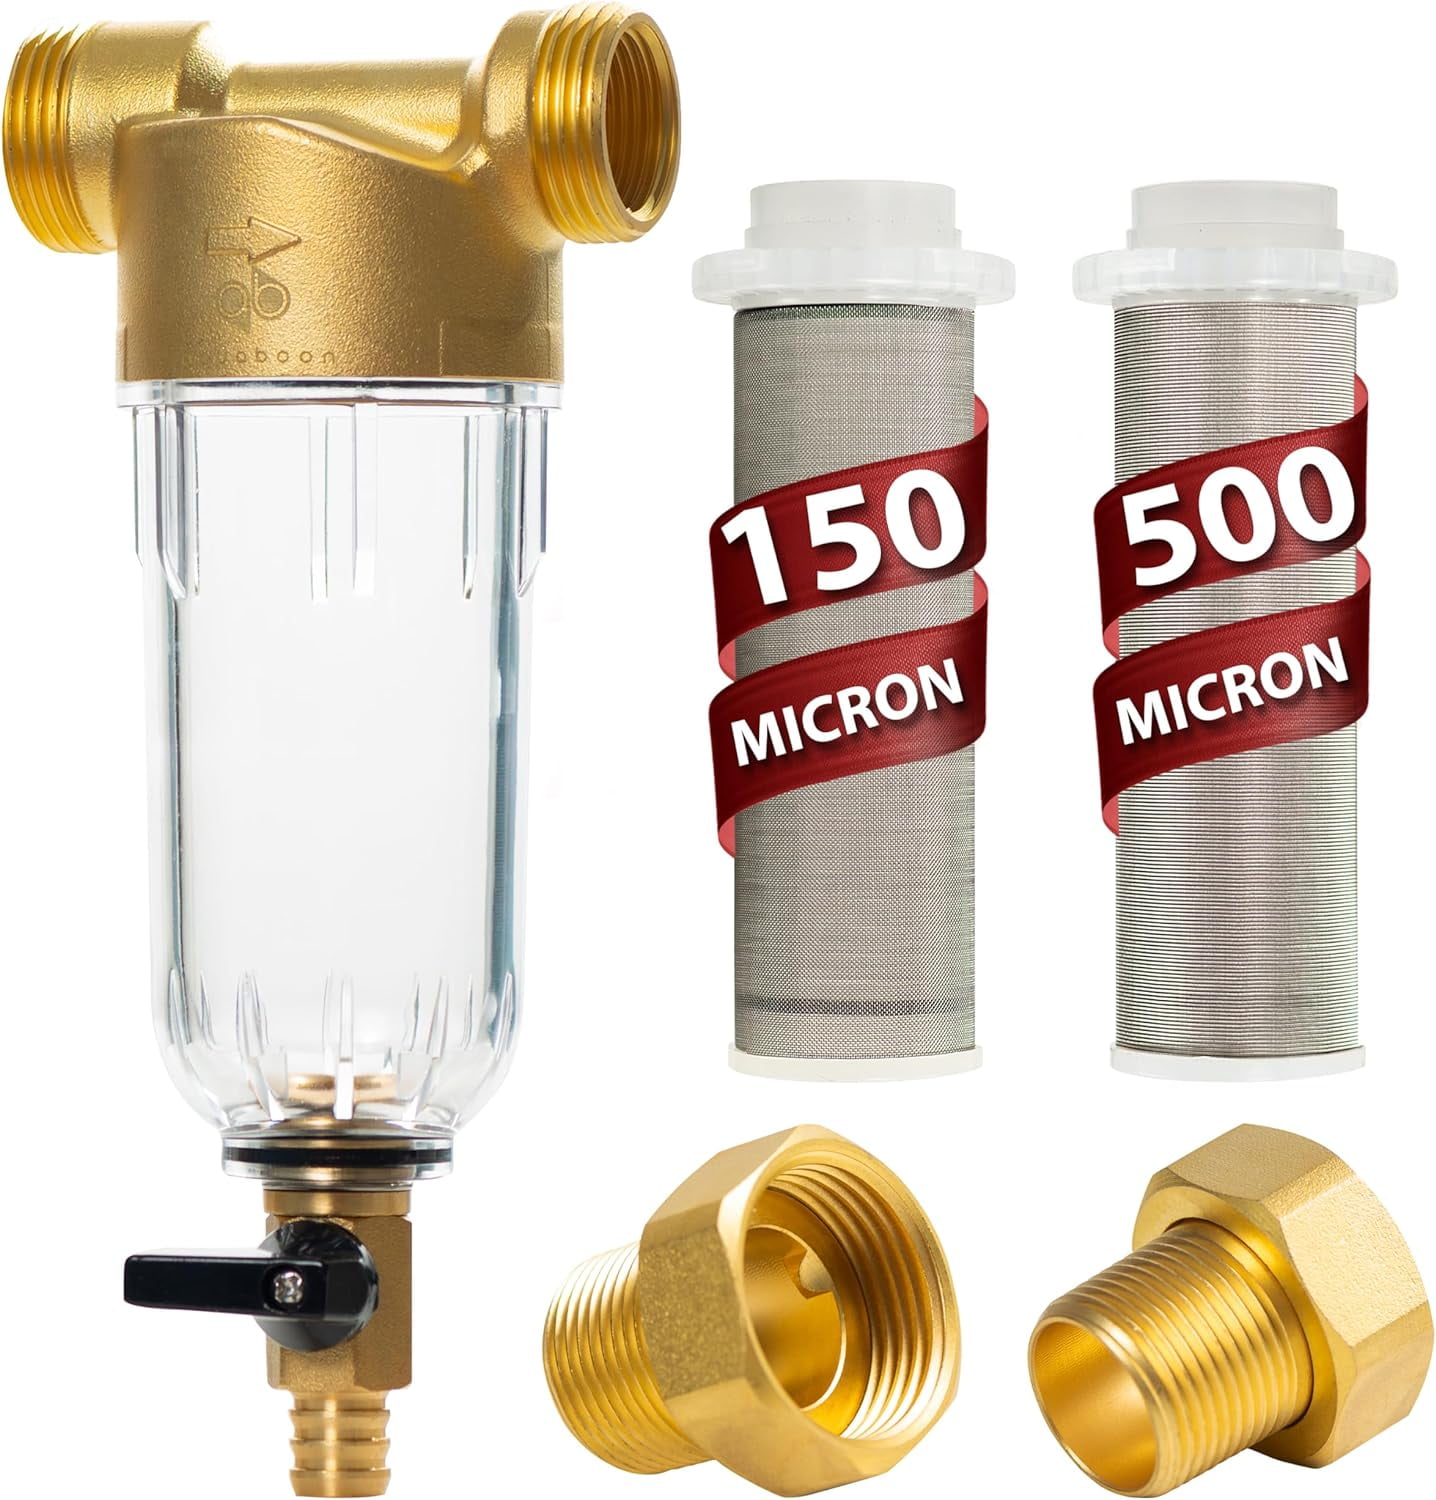
Rust Particle Solutions
If you see orange particles, install an inline sediment filter ($15 at hardware stores) on your faucet’s supply line immediately. Flush your water heater annually—sediment buildup there releases rust into hot water lines. Test water quality if rust persists; levels above 0.3 mg/L require professional pipe assessment.
Prevent Future Sediment Problems
Monthly Maintenance Routine
Remove and rinse your aerator for 60 seconds under running water during weekly sink cleaning. Check flow rate monthly by timing how long it takes to fill a 16oz cup—anything over 24 seconds needs attention. Wipe the spout exterior with vinegar-dampened cloth to prevent crust formation.
Water Treatment Upgrades
Install a water softener if you have hard water (over 7 grains per gallon)—this prevents 90% of mineral buildup. Use a faucet-mounted carbon filter for immediate drinking water improvement. Consider whole-house sediment filters if you’re on well water—replace cartridges every 3-6 months.
Troubleshoot Post-Cleaning Issues
Low Pressure After Cleaning
Recheck aerator assembly order—screens must sit in exact sequence (flow restrictor always faces outward). Verify no debris entered supply lines during disassembly by disconnecting lines and flushing into a bucket for 30 seconds. Test pressure at other faucets—if low flow is house-wide, sediment clogs your main shutoff valves.
Persistent Leaks at Base
Replace all rubber washers—they degrade faster than metal parts. Apply 3 layers of Teflon tape clockwise on threaded connections before reassembly. Hand-tighten plus quarter-turn with pliers—overtightening cracks faucet bodies. If leaks continue, cartridge seats may be pitted, requiring professional valve replacement.
Quick Reference Maintenance Schedule
Weekly: Wipe spout exterior with vinegar cloth
Monthly: Rinse aerator under running water (2 minutes)
Quarterly: Deep-clean aerator with vinegar soak
Annually: Replace cartridge and inspect supply lines
Final Note: Mastering how to remove sediment from kitchen faucet components saves hundreds in preventable plumbing bills while ensuring clean drinking water. Most homeowners restore full flow in under 30 minutes using vinegar and basic tools—no professional help needed. Implement the monthly aerator rinse described here, and you’ll avoid 80% of sediment-related issues. Remember: consistent 2-minute maintenance beats 2-hour emergency repairs every time. Your faucet (and morning coffee ritual) will thank you.

