

You’re standing in your kitchen with a tape measure in hand, staring at the blank space between your countertop and cabinets. One wrong measurement could mean ordering too few tiles, leaving you with mismatched replacements months later—or worse, staring at an unfinished wall while waiting weeks for restocked materials. Accurate backsplash measurement isn’t just about math; it’s the foundation that prevents wasted money, installation headaches, and the frustration of mismatched tiles mid-project. Whether you’re tackling a simple 8-foot wall or navigating a U-shaped kitchen with windows and outlets, this guide delivers the exact measurement system professionals use to guarantee perfect tile coverage every time.
Most DIYers make the critical error of treating their kitchen wall as one continuous surface. But real kitchens have interruptions—windows, range hoods, and uneven cabinets—that demand section-by-section measurement. Skip this step, and you’ll likely order 15-20% too little tile when accounting for cuts and waste. By following this methodical approach, you’ll capture every inch of coverage while building in smart buffers for real-world installation realities. Let’s transform your measuring tape from a source of anxiety into your most trusted tool.
Must-Have Tools for Measuring Backsplash Walls

Grab these five essentials before touching your walls: a 25-foot retractable tape measure (standard 16-foot models fall short in larger kitchens), a dedicated notebook with grid paper, a sharp pencil, your smartphone calculator, and painter’s tape. The grid paper is non-negotiable—it lets you sketch scaled diagrams where each square equals 6 inches, turning abstract numbers into visual layouts. Skip the notebook and you’ll waste hours deciphering scribbled measurements later.
Pro tip: Tear off 3-inch painter’s tape strips and stick them directly on countertops beneath each section you’ll measure. Label them “A,” “B,” “C” with permanent marker immediately after measuring. This physical reference prevents confusion when calculating areas hours later, especially when interruptions like windows break up your wall space. Never rely on memory—kitchen layouts trick even experienced renovators.
Break Your Kitchen Wall into Measurable Backsplash Sections
Your backsplash isn’t one giant rectangle—it’s multiple sections divided by natural breaks. Start at your leftmost cabinet and move right, identifying where upper cabinets stop and start. Windows, refrigerators, range hoods, and open shelves create instant section boundaries. Even a slight cabinet height change (common in older homes) warrants a new section. Missing these divisions causes the #1 measurement error: double-counting corner areas or missing gaps entirely.
Label like a pro: Assign letters sequentially (A, B, C) to uninterrupted wall segments. Section A might run from the corner to your first window, Section B spans between windows, and Section C continues to the stove. For L-shaped kitchens, use “A1” for the first wall and “A2” for the perpendicular section. This systematic labeling prevents panic when you realize your “single wall” actually has seven distinct zones. Measure height at three points per section—left, center, right—as sagging cabinets often vary by 1/4 inch or more.
Accurate Width and Height Measurements for Every Backsplash Section
Width Measurement Protocol
Measure along the countertop edge from left to right for each labeled section. Press the tape measure’s hook firmly against the cabinet’s inside corner (not the wall) for precision. Record measurements in inches down to 1/8-inch increments—never round down. That “just 1/4 inch” discrepancy compounds across six sections, potentially causing a 1.5-inch gap at your final corner. For galley kitchens with parallel walls, measure both sides separately; upper cabinets often sit at different heights.
Height Measurement Critical Points
Measure vertically from the countertop surface to the bottom edge of upper cabinets at three spots per section. Standard heights range 18-24 inches, but verify each section individually. Uneven countertops or sagging cabinets create height variations that wreck tile alignment. Critical warning: If height measurements differ by more than 1/4 inch between endpoints, measure height every 12 inches across the section. These micro-variations dictate where your tile cuts will fall—ignoring them guarantees crooked grout lines.
Quick Method to Calculate Backsplash Section Areas
Calculate each section’s area in square inches first—this avoids decimal errors when converting to square feet later. Multiply width by height for every labeled section (e.g., Section A: 48″ × 24″ = 1,152 sq in). Sum all section areas before converting to square feet. Jumping straight to square feet for small sections (like a 10″ × 12″ window return) invites miscalculation.
Real kitchen example:
– Section A (main wall): 48″ × 24″ = 1,152 sq in
– Section B (window flank): 10″ × 20″ = 200 sq in
– Section C (stove area): 36″ × 24″ = 864 sq in
Total: 2,216 sq in before deductions
This inch-based approach catches errors early—like realizing your “24-inch height” actually varies between 23.75″ and 24.25″ across Section A.
How to Measure Around Windows and Electrical Outlets
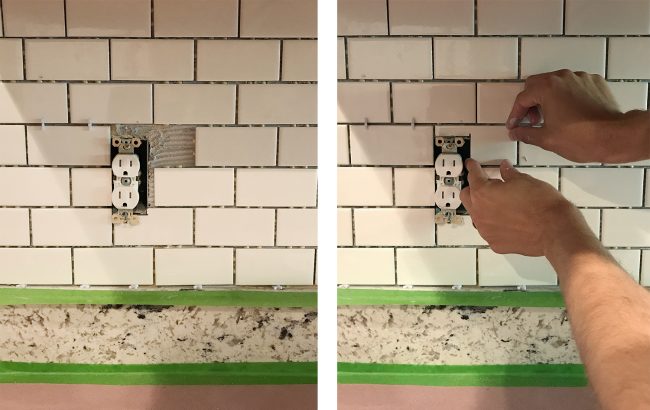
Windows and outlets aren’t just holes to subtract—they affect your entire layout strategy. For windows, measure the entire opening width and height (including trim), not just the glass. A typical 36″ × 24″ window with 2-inch trim becomes a 40″ × 28″ obstruction. Calculate its area (40 × 28 = 1,120 sq in), then deduct from your total. Never skip this step: A single window can consume 6+ square feet of tile.
Outlet pro strategy: Don’t measure each outlet individually. Group them into a single “obstruction zone.” If three outlets sit within 18 inches vertically, measure the entire zone (e.g., 12″ width × 8″ height = 96 sq in). Subtracting per-outlet wastes time and over-deducts—tile patterns often flow around isolated outlets without full cuts. For range hoods, measure the entire housing footprint, not just the vent cover.
Correct Square Foot Conversion for Backsplash Tiles
Sum all section areas in square inches, then divide by 144 (the number of square inches in a square foot). Using our earlier example: 2,216 sq in ÷ 144 = 15.39 sq ft. Critical precision: Never round this number yet—keep decimals for overage calculations. Tile suppliers sell by whole square feet, but your math must stay exact until the final step.
Common mistake alert: DIYers often divide by 12 instead of 144, inflating their order by 12x. Double-check your calculator: 144 ÷ 144 = 1 sq ft, not 12. Write “÷ 144” on your tape measure as a reminder. This conversion is why measuring in inches first prevents catastrophic errors.
Why and How to Add Tile Overage for Backsplash Projects
Ordering exact square footage guarantees a mid-project crisis. Cutting waste, breakage, and future repairs demand extra tiles. The required overage depends entirely on your tile choice:
- 10% extra for standard 3″x6″ subway tiles (simple straight cuts)
- 15% extra for most projects (the safe baseline for 12″x12″ field tiles)
- 20% extra for intricate patterns like herringbone or handmade Moroccan tiles
Calculation sequence:
1. Base area: 15.39 sq ft
2. 15% overage: 15.39 × 0.15 = 2.31 sq ft
3. Total: 15.39 + 2.31 = 17.7 sq ft → Order 18 sq ft
Pro insight: Always round up to the next whole number—suppliers won’t sell partial boxes. For 17.7 sq ft, ordering 17 sq ft leaves you short when breakage hits. That extra half-square-foot covers at least three replacement tiles for future chips.
Measuring Backsplash Walls for Different Kitchen Layouts

L-Shaped Kitchen Precision
Treat each wall as separate sections (A1 and A2). Measure the corner section last—its width depends on adjacent walls. Account for 1/8-inch overlap where tiles meet at corners; don’t deduct this space. If cabinets wrap the corner unevenly, measure heights independently on both walls.
U-Shaped Kitchen Complexity
Measure all three walls as distinct zones (A, B, C). Verify height consistency where walls meet—corner cabinets often sit 1/2 inch higher. Deduct the entire sink area if it breaks the countertop line; measure from counter edge to cabinet bottom on both sides of the sink base.
Galley Kitchen Dual-Wall Strategy
Measure both parallel walls completely. Upper cabinets frequently differ in height between sides due to uneven floor levels. Calculate each wall’s area separately before summing—don’t assume symmetry. Deduct refrigerator gaps individually; a 2-inch side gap requires its own measurement zone.
Critical Double-Checks Before Ordering Backsplash Tiles
Height variation test: Re-measure cabinet height at three points for every section. If differences exceed 1/4 inch, note the exact variance (e.g., “left: 23.5″, center: 23.75″, right: 24”). This dictates your tile starter line position—critical for avoiding tapered cuts.
Countertop angle check: Measure width at both front and back edges of the countertop. Angled countertops (common near sinks) create trapezoidal sections. If front/back widths differ by more than 1 inch, calculate using the average width.
Outlet positioning audit: Mark outlet locations on your sketch relative to section boundaries. Outlets within 6 inches of a corner or window require specialty cuts—note these zones for your installer.
Final Backsplash Tile Calculation Checklist
Complete this verification before purchasing:
- [ ] All sections labeled A, B, C with width/height recorded
- [ ] Obstruction areas (windows, hood) calculated and deducted
- [ ] Total square inches converted to sq ft (÷144)
- [ ] 15% overage added and rounded up
- [ ] Dye lot number confirmed with supplier (order all tiles simultaneously)
- [ ] One extra box secured for future repairs
Smart buying tip: Request the “cut sheet” from your tile supplier showing exact coverage per box. Some 12″x12″ tiles contain only 10.75 sq ft per box—not 12—due to grout spacing. Ordering by box count without checking this causes shortages.
What to Do After Measuring Your Kitchen Backsplash Wall
With verified measurements in hand, create a scaled diagram using free tools like RoomSketcher or SketchAndCalc. Input your exact section dimensions to visualize tile layouts and identify tricky cut zones. Share this with tile suppliers—they’ll adjust cuts for your specific obstructions. When ordering, specify “same dye lot” for all boxes; color variations between batches become glaring once installed.
Most importantly, keep your measurement notebook accessible during installation. Reference your labeled sections when cutting tiles—Section B’s 20-inch height might differ from Section A’s 24 inches, and that variance determines your entire cut pattern. Perfect measurements transform backsplash installation from a gamble into a predictable, professional result. Now go conquer that wall—one precise inch at a time.

