
Imagine this: it’s 6:30 PM at your campsite, hunger pangs are hitting hard, and instead of frantically digging through scattered bins, you simply pop open one organized container and have a fully functional outdoor kitchen ready in under three minutes. This is the magic of knowing how to make a camp kitchen that works for your specific needs. Whether you’re a weekend warrior or planning extended overlanding adventures, the right camp kitchen setup transforms meal preparation from a stressful chore into the highlight of your outdoor experience. In this guide, you’ll discover exactly how to make a camp kitchen that fits your vehicle, matches your cooking style, and stays organized trip after trip.
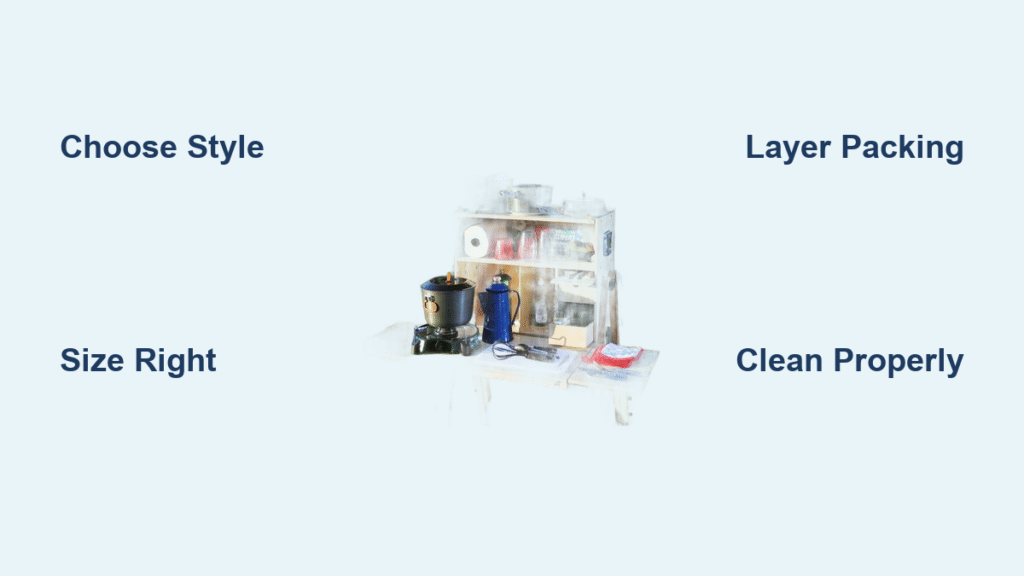
Choose Your Camp Kitchen Style for Your Camping Reality
Selecting the right camp kitchen design is the critical first step in learning how to make a camp kitchen that actually works for you. Don’t waste time building something that doesn’t match your camping style.
Chuck Box Design for True Portability
For campers who need everything in one portable unit, the chuck box is your solution. This self-contained system stores your stove, cookware, and utensils all in one box that opens up to reveal your complete kitchen. Perfect for tailgating, day trips, or when space is tight in your vehicle, a properly built chuck box lets you set up your entire kitchen in seconds. If you’re learning how to make a camp kitchen for solo trips or small groups, this is the most efficient option.
Folding Camp Kitchen for Base Camp Comfort
When you’ll be staying put for multiple days, a folding camp kitchen provides more counter space and organization but requires separate storage for your gear. These collapsible frames typically feature shelves, wind protection, and dedicated areas for your stove and wash station. While they take slightly longer to set up than chuck boxes, they offer superior cooking comfort for extended trips where you won’t be moving camp frequently.
Why Kitchen Bins Fail for Serious Campers
Avoid the temptation to just toss everything into a plastic tote—the so-called “kitchen bin” approach. This method inevitably leads to broken gear, forgotten essentials, and that frustrating bin-dump search for your can opener. While it might seem like the easiest way to make a camp kitchen on a budget, it creates more problems than it solves. True camp kitchen organization requires thoughtful design, not just random storage.
Size Your Camp Kitchen Correctly for Your Vehicle and Gear
Getting dimensions right is crucial when you’re learning how to make a camp kitchen that actually fits where you need it to go.
Stove Compatibility Check Before You Build
Your camp kitchen must accommodate your specific stove model. Most two-burner propane stoves require at least 19″ high × 24.5″ wide × 18″ deep interior space. Measure your stove before finalizing any design—don’t assume all stoves fit the same dimensions. The Coleman Classic serves as a good reference point, but if you’re using a different model, measure it precisely.
Vehicle Fit Guidelines for Stress-Free Transport
Consider where your camp kitchen will live in your vehicle. Sedan owners should keep depth under 18-20 inches to fit in trunks comfortably. SUV owners need to watch height—stay under 22 inches if you plan to slide it under a tonneau cover. Truck owners have more flexibility but remember you’ll need to lift this thing in and out repeatedly. Measure your storage space before finalizing dimensions.
DIY Chuck Box Build Plans for Every Skill Level
When you’re ready to make a camp kitchen yourself, these proven designs range from beginner-friendly to weekend warrior projects.
3-Hour IKEA Trofast Hack for Beginners
Transform an IKEA Trofast frame into a functional camp kitchen with minimal tools. You’ll need the pine frame plus 1/4″ plywood inserts cut to size. Using just a drill and hole saw, create compartments for your stove, cookware, and utensils. Add external features like a towel bar and magnetic spice tins for instant organization. This $50-70 project proves you don’t need advanced skills to make a camp kitchen that works.
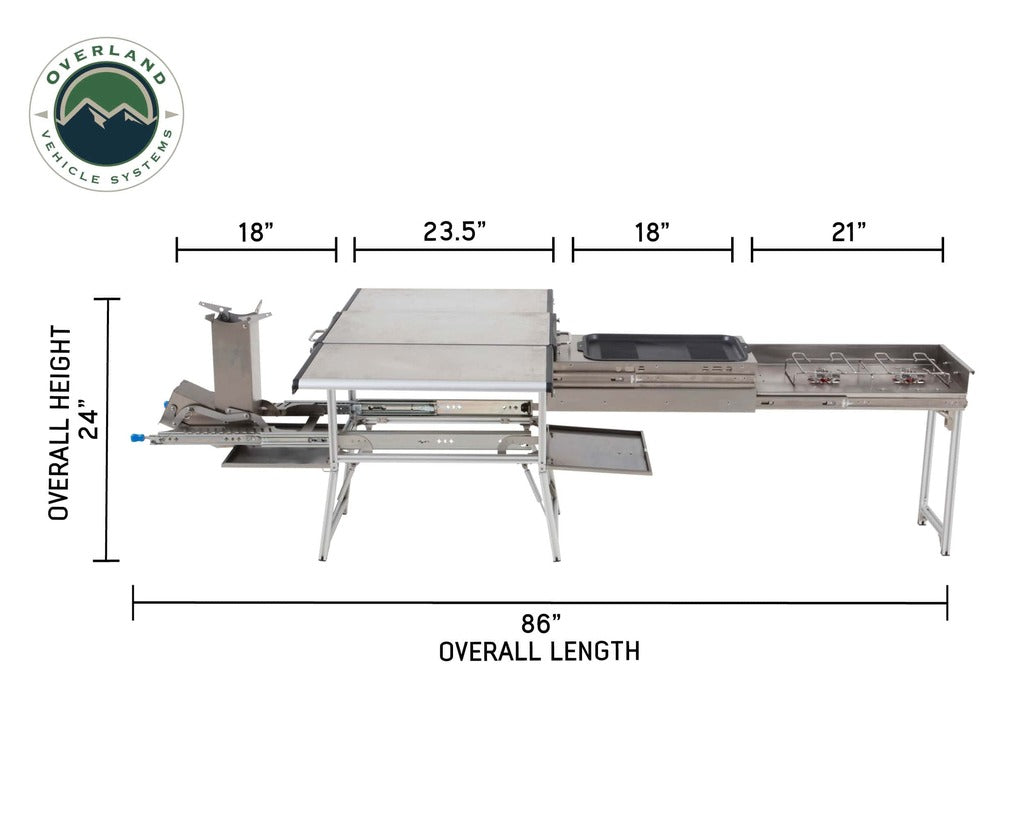
Weekend Plywood Build for Serious Campers

For those willing to invest 8-10 hours, a custom plywood chuck box delivers maximum functionality. Using 1/2″ and 3/4″ plywood with piano hinges and chain supports, you can create a unit with a massive fold-down work surface and integrated tie-down rails. This $80-120 build accommodates all standard camp gear while providing professional-level organization. The key to making this camp kitchen work is precise measurements—measure twice, cut once.
Essential Gear Checklist for Your Camp Kitchen
No matter which design you choose when learning how to make a camp kitchen, these items are non-negotiable for efficient outdoor cooking.
Stove & Heat System Must-Haves
Your camp kitchen needs a reliable heat source. A two-burner propane stove like the Coleman Classic remains the gold standard for most campers. Pack 2-3 one-pound propane canisters for weekend trips, or use a 5-pound refillable tank with adapter hose for extended stays. Don’t forget a folding windscreen and long-nosed lighter—these small items make a huge difference in cooking performance.
Complete Cleaning Station Setup
Many beginners skip proper cleaning equipment when they first make a camp kitchen, but this leads to frustration and poor sanitation. Include biodegradable camp soap, a double-sided sponge with scrub pad, and at least two quick-dry microfiber towels. A collapsible three-sink system using 2-gallon rectangular tubs follows Leave No Trace principles while making cleanup efficient. Add a fine mesh strainer to filter food particles before dispersing gray water.
Packing Sequence That Prevents Gear Explosion
The difference between a smooth camp setup and chaotic gear scattering comes down to your packing method. When you make a camp kitchen, organization starts at home.
Layered Packing Method for Instant Setup
Pack your camp kitchen in layers for quick access. Place your stove centered on the bottom layer with propane bottles secured along the sides. In the middle layer, nest your pots with a cutting board as a divider, and store utensils in a mesh sleeve. Reserve the top layer for frequently accessed items like spices, oil, and your coffee kit in a removable caddy. Finally, use elastic holders inside the lid to store paper towels, trash bags, and hand sanitizer.
Camp Setup Routine for Stress-Free Cooking
Transform your arrival chaos into organized efficiency with this proven six-step process when you make a camp kitchen part of your routine.
Site Selection & Zone Creation
Choose a location at least 100 feet from your sleeping area and 200 feet from water sources. Level your camp kitchen surface using cedar shims if needed, then extend stabilizing legs if your design includes them. Create distinct zones: left of the stove for food prep, right for serving, and behind for your wash station. This organization prevents cross-contamination and streamlines cooking flow.
Cleaning Protocol That Protects Nature
Proper camp kitchen cleanup isn’t just courtesy—it’s often required by regulations and essential for preserving wilderness areas.
Three-Sink Method for Responsible Cleanup
Follow this sequence: wash in hot water with biodegradable soap, rinse with clean hot water, then sanitize with cool water containing one tablespoon of bleach per gallon. Always air-dry items on a mesh rack rather than using towels that can harbor bacteria. Crucially, strain all food particles through cheesecloth before dispersing gray water over a broad area away from camp. Never dump food particles directly into nature—pack out all solids in compost bags.
Maintenance & Long-Term Care for Decades of Use
Your camp kitchen investment needs proper care to last through countless adventures.
After-Each-Trip Maintenance Routine
Wipe the interior with a diluted vinegar solution to prevent odors and bacteria growth. Leave the lid open for 24 hours to ensure complete drying before storage. Check propane connections and O-rings for wear—replace any damaged components immediately. These simple steps prevent the common problems that plague poorly maintained camp kitchens.
Common Problems & Quick Fixes for Your Camp Kitchen
Even well-designed camp kitchens encounter issues—knowing how to solve them keeps your trip on track.
Stove Won’t Stay Lit in Cold Weather
This common problem occurs when propane pressure drops in cold temperatures. Warm the canister in your pocket for five minutes before attaching it, and always use a windscreen to maintain heat around the burner. If this happens frequently, consider switching to a 5-pound refillable tank which maintains pressure better in cold conditions.
Warped Plywood Lid from Rain Exposure
If your DIY camp kitchen lid warps after rain exposure, seal all edges with epoxy and add a weather stripping gasket around the perimeter. For future builds, use marine-grade plywood or consider HDPE plastic which won’t warp when exposed to moisture. This simple modification transforms a problematic camp kitchen into a reliable one.
Final Thoughts: Build Once, Camp Better Forever
Creating your perfect camp kitchen isn’t just about organization—it’s about transforming outdoor cooking from a stressful chore into an enjoyable part of your adventure. Whether you choose the budget-friendly IKEA hack or invest in premium materials, the principles remain the same: right size for your vehicle, logical organization, and proper maintenance. Start with a cardboard mock-up this weekend to test fit everything in your vehicle. Then build or buy the system that matches your camping style. Your future self—standing at that perfect campsite with coffee brewing and breakfast sizzling—will thank you for taking action today. Remember: the best camp kitchen is the one you’ll actually use. Keep it simple, keep it organized, and you’ll wonder how you ever camped without it.

