
Your kitchen fills with smoke every time you sear steaks, and you’re tired of triggering the smoke alarm. Installing a proper range hood vent transforms your cooking space from a foggy mess into a clean, breathable environment. This guide walks you through the complete process of how to install kitchen range hood vent systems safely and effectively.
You’ll learn exactly how to route ductwork, cut precise holes through walls, and connect electrical components without professional help. Whether you’re replacing an old unit or adding ventilation for the first time, these steps ensure professional results while following the essential process of how to install kitchen range hood vent configurations properly.
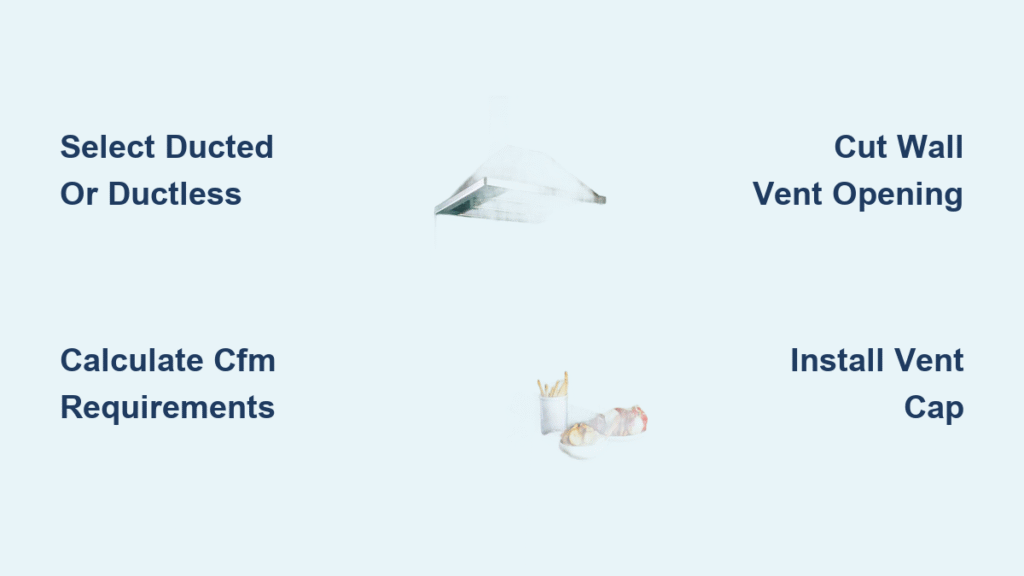
Select Between Ducted or Ductless Configuration
Ducted range hoods expel air outside through metal ductwork, eliminating odors, grease, and moisture permanently. This configuration requires venting through walls or roofs but provides superior air quality by removing contaminants from your home entirely.
Ductless range hoods filter air through charcoal and grease filters before recirculating it back into your kitchen. Installation is simpler since no external venting is needed, though filters require regular replacement to maintain effectiveness.
When Ducted Ventilation Becomes Essential
- Gas stovetops produce combustion byproducts that must exit the home
- High-heat cooking techniques like searing and stir-frying
- Kitchens without windows or poor natural ventilation
- Homes where moisture buildup causes mold concerns
When Ductless Works Well
- Apartments or condos with venting restrictions
- Kitchens located in building interiors without exterior walls
- Budget-conscious projects under $500
- Temporary solutions while planning major renovations
Calculate Proper CFM Requirements
Match your hood’s CFM rating to your cooking style and stovetop type. Gas ranges need 100 CFM per 10,000 BTUs of burner output. A typical gas stove with 40,000 BTUs requires 400 CFM minimum for adequate ventilation.
Electric ranges demand less airflow since they don’t produce combustion gases. Calculate 100 CFM for every 12 inches of cooktop width. A standard 30-inch electric range works well with 250-300 CFM for effective smoke and odor removal.
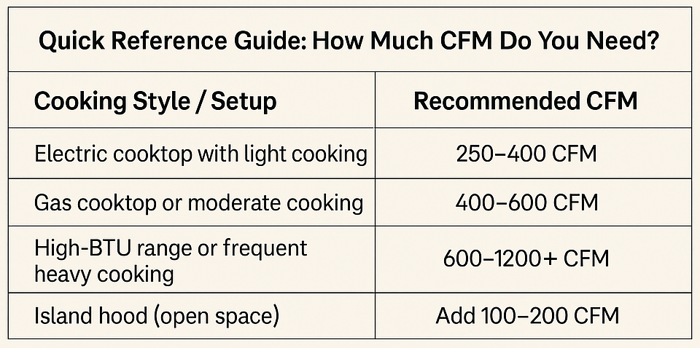
Quick CFM Reference Guide
- Light cooking: 200-300 CFM
- Regular family meals: 300-400 CFM
- Gourmet cooking/steaks: 400-600 CFM
- Commercial-style ranges: 600+ CFM
Measure Hood Size and Mounting Height
Your range hood should match or exceed your cooktop width. A 30-inch range needs a 30-36 inch hood for optimal capture of cooking vapors. Height above cooking surface is critical: position wall-mounted units 24-30 inches above gas ranges or 20-24 inches above electric ranges.
Wall-Mounted Measurements
- Measure from cooking surface to bottom of cabinet
- Subtract hood height to determine mounting position
- Ensure 30-inch minimum clearance for tall pots
Island Configuration
- Hood width should extend 3 inches beyond cooktop on each side
- Mount 30-36 inches above surface due to cross-drafts
- Consider downdraft options if ceiling height is limited
Gather Essential Installation Tools and Materials
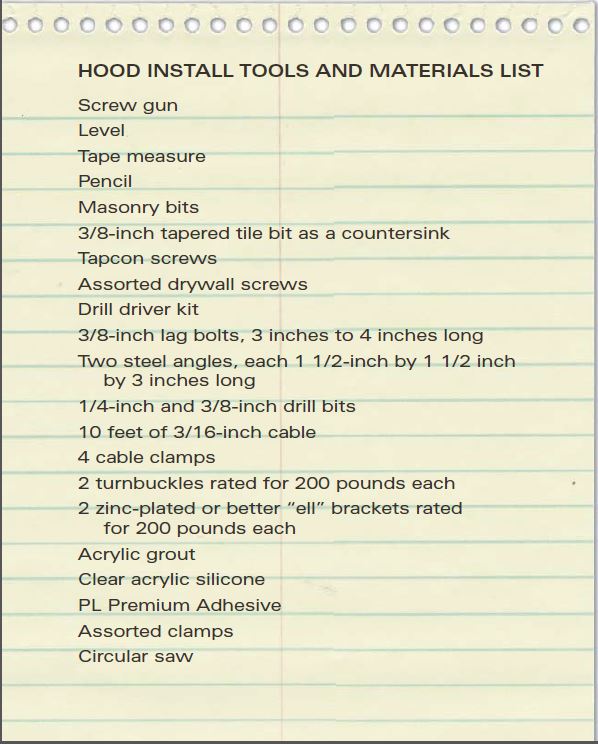
Critical tools for vent installation:
– Drill with bits: 1¼”, ⅜”, and 5/16″ for various holes
– Jigsaw or reciprocating saw for cutting vent openings
– Level to ensure hood sits perfectly straight
– Stud finder to locate wall support
– Wire strippers for electrical connections
Materials checklist:
– Metal ductwork: 6-8 inch diameter, smooth interior
– Wall cap with damper and bird screen
– Weatherproof caulk for exterior sealing
– Wire connectors (wire nuts) for electrical
– Mounting screws and wall anchors
Safely Remove Existing Unit Before Installation
Safety first: Switch off the circuit breaker controlling your existing range hood. Test with a non-contact voltage tester to confirm power is disconnected before proceeding with how to install kitchen range hood vent systems.
Remove grease filters and light covers from the old unit. Support the hood’s weight while unscrewing mounting brackets—range hoods typically weigh 20-50 pounds. Disconnect wiring by unscrewing wire nuts and separating connections. Cap exposed wires with wire nuts for temporary safety.
Common Removal Issues
- Painted-over screws: Use a utility knife to score paint around screw heads
- Stubborn ductwork: Cut duct tape with a sharp blade, avoid bending ducts
- Hidden fasteners: Check inside upper cabinets for additional screws
Precisely Mark Vent Path Through Wall
Hold your new hood in position and trace the vent opening location. Most units vent through the top or back—check your model’s specifications. Use the provided template or measure from hood edges to mark precise opening.
Drill pilot holes at the four corners of your marked opening. Check both interior and exterior walls to ensure the vent path avoids studs, plumbing, or electrical lines. Measure twice, cut once—wall repairs are expensive and time-consuming when learning how to install kitchen range hood vent systems correctly.
Template Transfer Technique
- Tape template to wall at correct height
- Level the template before marking
- Transfer marks to wall with pencil
- Verify measurements match your hood
Cut Interior Vent Opening Properly
Cut along marked lines using a jigsaw or reciprocating saw. Create an opening at least 6 inches in diameter for standard ductwork. Wear safety goggles and a dust mask—drywall dust spreads everywhere during this critical step of how to install kitchen range hood vent systems.
Smooth rough edges with sandpaper or a utility knife. Remove insulation carefully from the vent path, replacing it around the duct after installation. Vacuum debris from the opening and surrounding area.
Cutting Through Different Materials
- Drywall: Score with utility knife, then saw
- Plaster: Drill starter holes, use reciprocating saw
- Tile: Use diamond grit hole saw for clean cuts
- Brick/Stone: Requires masonry bit and hammer drill
Create Exterior Wall Opening with Precision
Drill locator holes from inside to outside at the four corners of your interior opening. Connect these holes on the exterior with pencil to form your cutting guide. This ensures perfect alignment between interior and exterior openings.
Cut the exterior opening using a jigsaw for vinyl siding or reciprocating saw for wood. For brick or stucco exteriors, use a hammer drill with masonry bits. Install a PVC trim ring if siding creates an uneven surface for the vent cap.
Weather Considerations
- Avoid rainy days when cutting exterior walls
- Seal openings immediately to prevent water damage
- Work during daylight for better visibility and safety
Install Exterior Vent Cap Correctly
Slide the vent cap through the exterior opening from outside. The cap’s flange should sit flush against the wall. Apply weatherproof caulk around the entire perimeter before securing with screws.
Ensure the damper opens freely and closes completely. The damper prevents backdrafts and pest intrusion. Point the vent opening downward to prevent rain infiltration. Add mesh screening if birds or insects are common in your area.
Sealing Best Practices
- Use silicone caulk rated for exterior use
- Apply caulk in continuous bead without gaps
- Tool caulk smooth with wet finger or tool
- Check for drafts after installation
Route Ductwork Through Wall Properly
Measure the distance from your hood to the exterior wall cap. Cut ductwork to length using tin snips, ensuring smooth cuts without sharp burrs. Connect duct sections with approved foil tape, sealing all joints completely.
Slide duct through wall from interior to exterior, connecting to the vent cap’s damper assembly. Secure with screws through the duct into the cap’s collar. Test damper operation—it should move freely without binding.
Duct Sizing Guidelines
- 6-inch round duct: Standard for 300-400 CFM units
- 8-inch round duct: Required for 600+ CFM models
- Maximum run: 30 feet with maximum two elbows
- Reduce bends: Each 90-degree elbow equals 5 feet of straight duct
Connect Electrical Wiring Safely
Run wiring from your electrical panel to the range hood location. Most hoods require 120-volt, 15-amp circuits. Use 12-gauge wire for runs over 50 feet to prevent voltage drop during operation.
Connect wires using wire nuts: black to black (hot), white to white (neutral), and green/bare to ground. Secure connections with electrical tape for added safety. Tuck wires neatly into the hood’s electrical box, avoiding sharp edges.
Wiring Method Options
- Hardwired: Connects directly to household wiring
- Plug-in: Uses standard three-prong outlet
- GFCI protection: Required within 6 feet of sink
- Dedicated circuit: Prevents overload from other appliances
Mount Range Hood Securely for Optimal Performance
Position the hood with assistance while threading ductwork and wiring through appropriate openings. Level the unit using a 4-foot level across the bottom edge. Mark mounting hole locations through the hood’s bracket system.
Drill pilot holes and install appropriate wall anchors for your wall type. Secure mounting screws through the hood’s keyhole slots, leaving screws slightly loose for final adjustment. Check level again before fully tightening all fasteners.
Mounting Tips
- Remove filters for easier access to mounting points
- Start with top screws to support weight
- Use assistant to hold hood during positioning
- Double-check level before final tightening
Complete Final Connections and Test System
Attach ductwork to the hood’s outlet using the provided clamp or foil tape. Ensure tight seal to prevent air leaks and grease accumulation. Install damper if included, checking for smooth operation.
Replace grease filters and light covers removed during installation. Install vent covers following your specific model’s manual—some snap in, others require screws. Test all functions including fan speeds, lights, and damper operation.
Testing Checklist
- Fan operation: Low, medium, and high speeds
- Light function: Both bulbs illuminate evenly
- Damper movement: Opens with fan, closes when off
- Airflow: Strong suction at filter level
- Noise level: Acceptable for kitchen conversation
Your new range hood vent transforms cooking from a smoky chore into a pleasant experience. Proper installation ensures years of reliable service while protecting your home from grease, moisture, and cooking odors. Schedule regular maintenance to maintain peak performance and extend your hood’s lifespan. Following these precise steps for how to install kitchen range hood vent systems correctly will deliver professional results without professional costs.

