
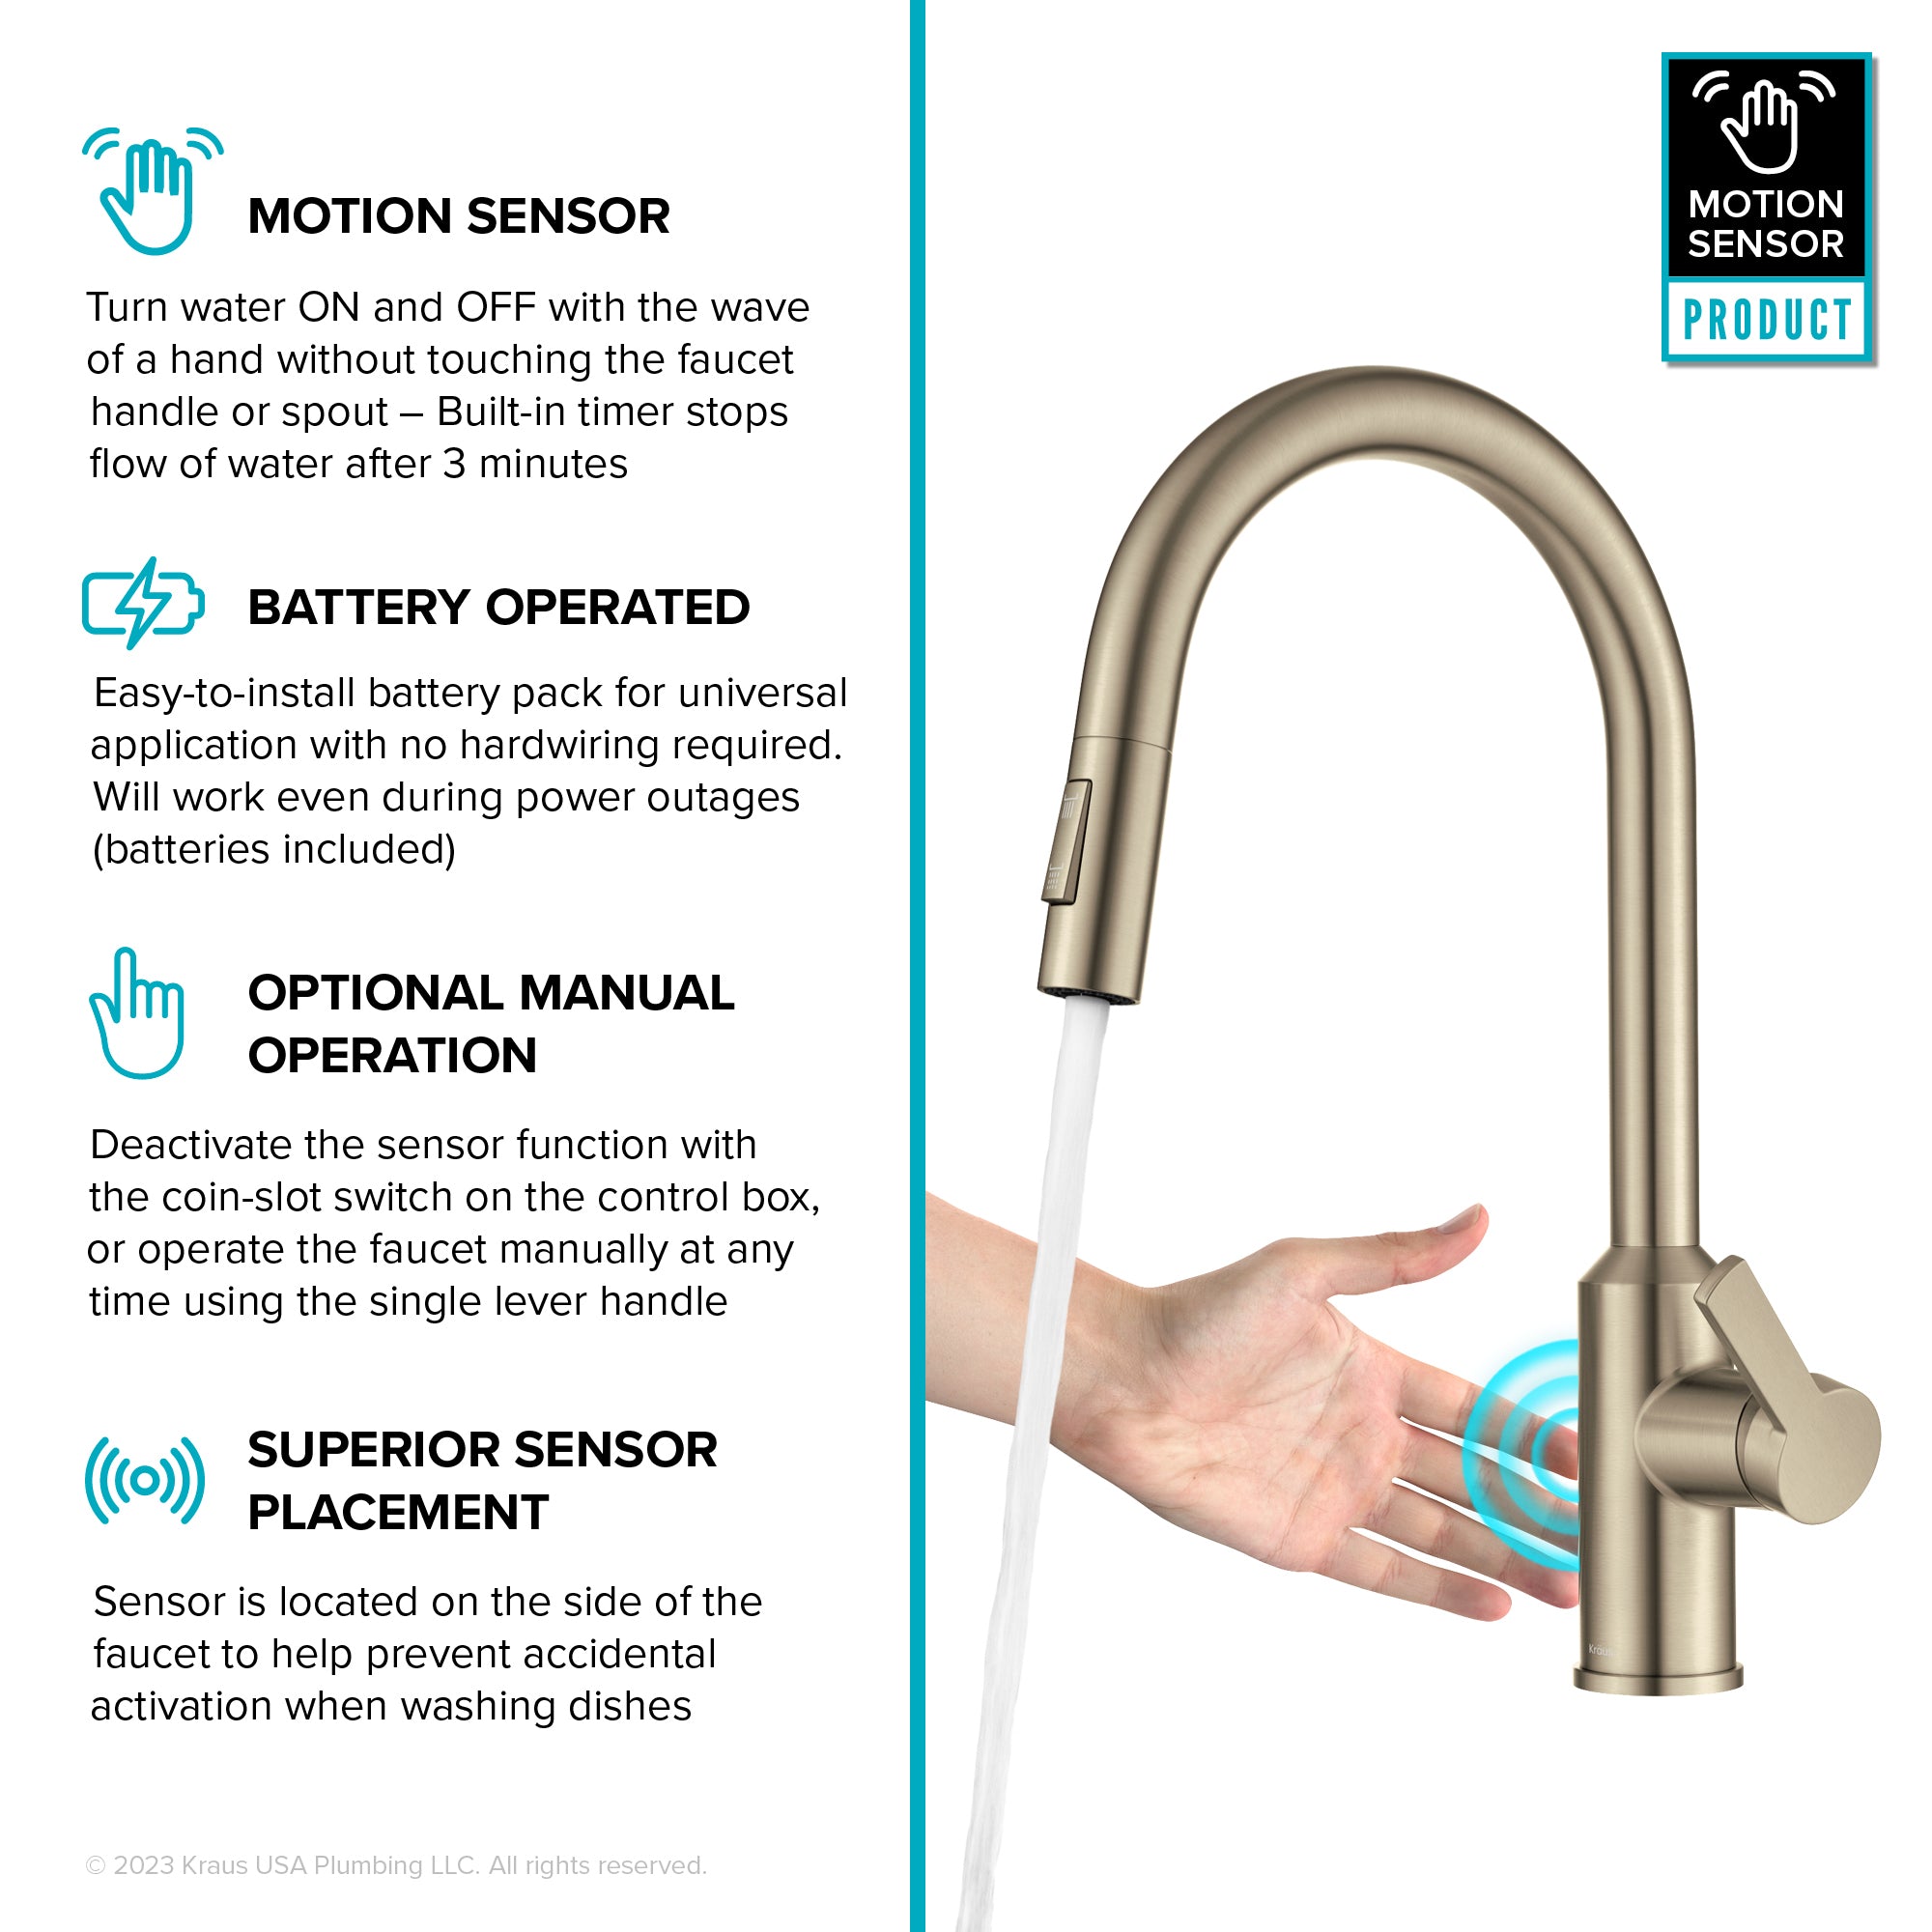
You’re elbow-deep in flour while baking bread when you need to wet your hands. Instead of smearing dough across dirty faucet handles, you simply wave your hand and water flows instantly. Installing a touchless kitchen faucet delivers this modern convenience while reducing germ transmission by up to 85% compared to manual handles. This $200-$500 upgrade takes just 1-2 hours even for beginners and transforms your sink into a hygienic command center. Forget complicated wiring—today’s battery-powered models require only basic plumbing skills (rated 1 out of 5 difficulty). Let’s get your hands-free faucet working before dinner.
Remove Old Faucet in 15 Minutes
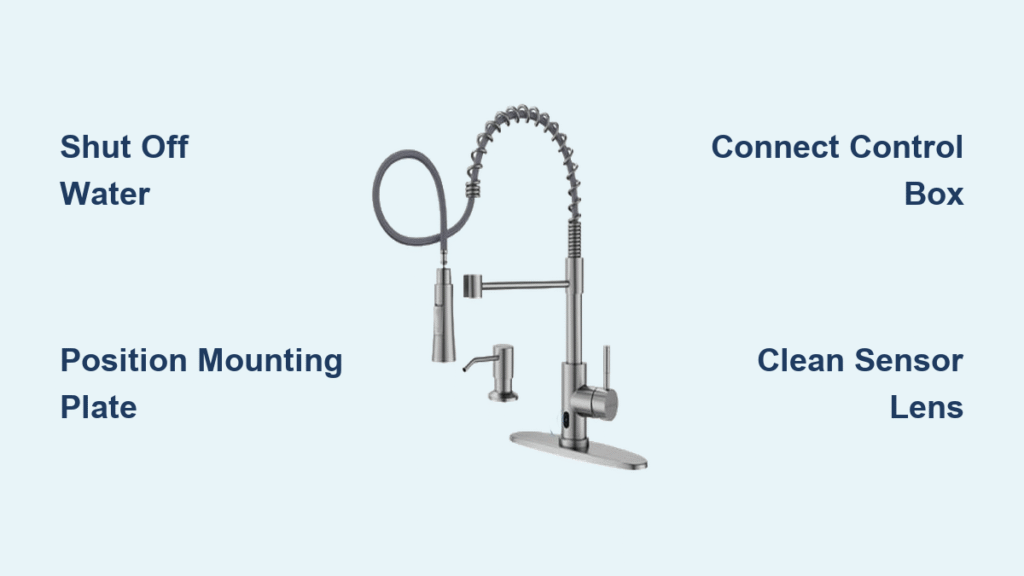
Shut Off Water Supply Completely
Turn both shutoff valves clockwise until they stop—a hot water valve on the left and cold on the right. Test by turning on your old faucet; absolutely no water should flow. If valves resist turning, wrap a rubber band around the handle for better grip. Critical step: Place a bucket directly beneath the connections before proceeding—residual water will drain out when you disconnect lines.
Disconnect Water Lines Safely
Use your basin wrench to loosen the nuts connecting supply lines to the faucet base. Rotate counterclockwise while supporting the line to prevent twisting. Let all remaining water drain into your bucket. For stubborn connections, tap the wrench handle gently with a hammer—never force it. Once disconnected, wipe the valve stems clean with a soft cloth to prevent debris from entering your plumbing.
Remove Sprayer Assembly Efficiently
Twist the hand sprayer counterclockwise to detach it from the hose. Slide a narrow screwdriver under the retainer clip and pry it off horizontally—vertical prying damages sink decks. Pull the sprayer base away, then feed the hose down through the sink hole. Allow final drips to drain into your bucket before lifting out the entire faucet assembly.
Prepare Sink Deck for New Installation
Scrape away old plumber’s putty and grime using a plastic putty knife. Wipe the surface with vinegar to dissolve mineral deposits, then dry thoroughly with a microfiber cloth. Pro tip: Shine a flashlight across the surface to spot hidden residue—your new rubber gasket needs perfectly smooth contact for a watertight seal.
Mount New Faucet Without Leaks

Position Mounting Hardware Precisely
Center the mounting plate over your sink holes with the rubber gasket on top. Ensure the gasket sits flat without wrinkles—folded sections cause leaks. The sensor should face forward toward where you stand at the sink. For three-hole sinks, align the faucet body with the center hole and the soap dispenser (if included) with the right-side hole.
Secure Faucet Body Correctly
Feed all hoses and the data cable down through the mounting plate hole. From below, slide the support bar over the cables, then add the mounting washer. Hand-thread the hex nut onto the shank until finger-tight. Avoid this mistake: Using the supplied wrench, tighten just until snug—then add only 1/4 extra turn. Over-tightening cracks porcelain or laminate sinks.
Install Soap Dispenser in Old Sprayer Hole
If repurposing the hand-sprayer hole, feed the soap tube through it from above. From under the sink, thread the mounting nut onto the tube until the dispenser base sits flush with the sink surface. Don’t overtighten—snug is sufficient. Fill the dispenser with liquid soap before final testing.
Configure Control Box for Reliable Operation
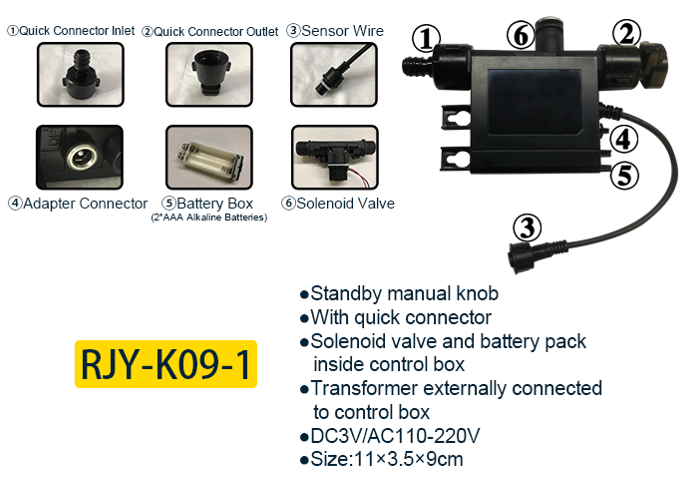
Mount Control Box Properly
Attach the battery box to your cabinet wall within 20-24 inches of the faucet using the two included screws. Position it where you can easily access batteries without moving stored items. Warning: Never mount on the cabinet door—vibration causes premature battery drain.
Connect All Components Securely
Push the hot and cold supply lines into the color-coded push-to-connect fittings until they click audibly. Connect the data cable to the sensor port and power line to the control box terminals. Install 4-6 alkaline AA batteries (non-alkaline batteries fail faster in electronics). Set the temperature dial to the 12 o’clock position for balanced warm water.
Test Manual Operation First
Turn water supply valves on slowly while watching connections. Check for leaks at every joint—especially where lines enter the control box. Let water run manually for 3 minutes to flush debris. If pressure seems low, unscrew the aerator and rinse under warm water to clear factory dust.
Activate Touchless Features Correctly
Program Sensor Responsiveness
Wave your hand 4-6 inches in front of the sensor. Water should activate within 0.5 seconds and shut off after 90 seconds of inactivity. Test from left, right, and overhead angles—some models have dead zones. If activation fails, clean the sensor lens with a vinegar-dampened cloth to remove manufacturing film.
Adjust Spray Head Retraction
Snap the counterbalance weight onto the retractable hose 6 inches below the spray head. Test retraction by pulling the spray head out fully—it should return smoothly without slamming. If it sticks, move the weight 1 inch closer to the faucet body. Pro tip: Never let the weight rest against cabinet walls—it causes hose kinks.
Prevent Common Failures with Smart Maintenance
Clean Sensors Monthly
Wipe the sensor lens weekly with a vinegar-dampened microfiber cloth. Hard water areas need this twice weekly—mineral buildup blocks infrared signals. Never use: Glass cleaners, abrasive pads, or paper towels—they scratch anti-reflective coatings.
Replace Batteries Before Failure
Change batteries when activation becomes sluggish or the low-battery LED glows red. Most models give 3-5 years of service—write the install date on the battery compartment with a marker. Keep spare AAs under your sink; alkaline types outperform rechargeables in cold cabinets.
Unclog Aerator Quarterly
Remove the aerator by twisting counterclockwise with pliers wrapped in a cloth. Soak in white vinegar for 30 minutes to dissolve lime scale, then scrub with an old toothbrush. Reinstall hand-tight—overtightening strips the threads.
Fix Sensor Issues in 5 Minutes
Diagnose False Activations
If water runs randomly, check for reflective surfaces like stainless steel backsplashes bouncing the sensor beam. Reposition dish racks at least 8 inches from the faucet. For persistent issues, unplug the control box for 30 seconds to reset the system.
Solve No-Activation Problems
First, clean the sensor lens thoroughly. If still unresponsive, replace batteries even if the indicator shows charge—weak batteries power lights but not sensors. Finally, verify no obstructions block the sensor’s field of view, like a large cutting board left near the sink.
Avoid Warranty-Voiding Mistakes
Register Within 30 Days
Complete online registration immediately using the model number on the control box label. Keep your receipt digitally—most manufacturers require it for warranty claims. Delta customers call 1-800-345-3223 for same-day support.
Use Only Manufacturer Parts
Never substitute generic O-rings or cartridges—improper materials corrode touchless components. Download exploded diagrams from your brand’s website to identify genuine parts. The limited lifetime warranty covers defects but excludes hard water damage—consider a whole-house filter if your water exceeds 7 grains hardness.
Your touchless kitchen faucet installation is complete! Enjoy hands-free operation while knowing you’ve reduced germ transmission significantly. For ongoing reliability, clean sensors monthly, replace batteries proactively, and flush the aerator quarterly. When in doubt, consult your manufacturer’s YouTube channel—most offer model-specific troubleshooting videos. Now go wash those hands without touching a thing.

