
Tired of struggling to rinse every corner of your sink or fill large pots with your fixed faucet? Adding a kitchen sink sprayer hose transforms your daily kitchen routine, offering the flexibility to direct water exactly where you need it. This simple upgrade costs under $50 and requires just basic tools—no plumbing expertise needed.
Whether you’re upgrading an old sprayer or installing one for the first time, this guide walks you through every step. You’ll learn how to connect the hose properly, avoid common leaks, and test your new sprayer like a pro. By the end of this 30-minute project, you’ll have a fully functional sprayer that makes kitchen cleanup faster and more efficient.
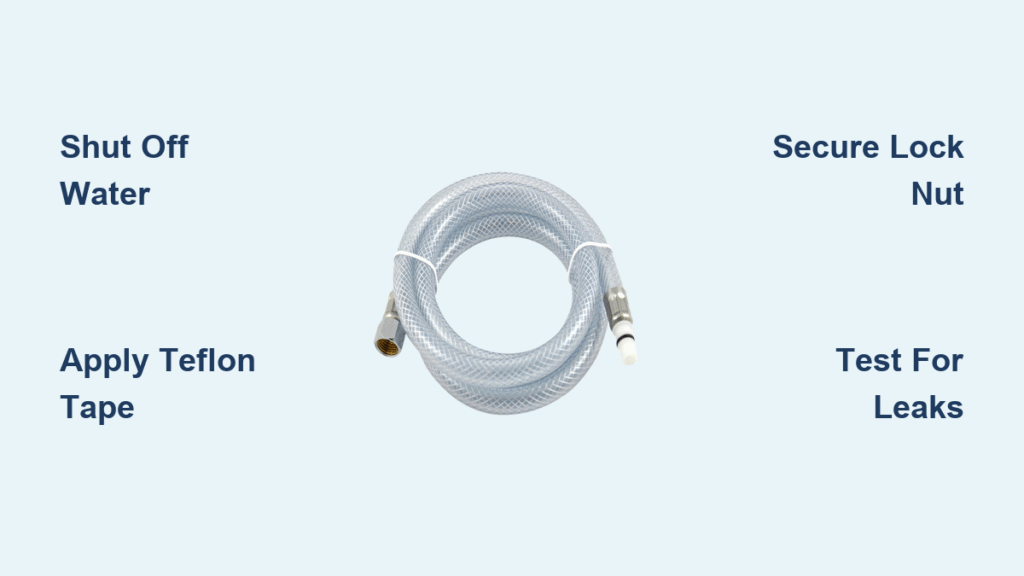
Required Tools and Materials for Sprayer Hose Installation

Before you begin how to install a kitchen sink sprayer hose, gather these essential items. Having everything ready prevents mid-installation delays and ensures a smooth process.
Essential tools:
– Adjustable wrench or channel-lock pliers for tightening connections
– Flathead screwdriver for certain mounting assemblies
– Clean towel or cloth to protect surfaces and absorb drips
Sealing supplies:
– Teflon tape (plumber’s tape) for watertight threaded connections
– Plumber’s putty to create a seal around the mounting flange
New sprayer kit components:
– Spray head and flexible hose assembly
– Mounting shank with decorative flange
– Lock nut and rubber washer
– Hex nut connector for the diverter pipe
Pro tip: Check your faucet compatibility before purchasing. Look for a threaded diverter pipe between your hot and cold water lines under the sink—this is where your new hose will connect.
Check Faucet Compatibility Before Installation
Locate Your Water Diverter Pipe
Look beneath your sink where the hot and cold supply lines connect to your faucet. Between these connections, you should see a capped, threaded pipe pointing downward—this is your water diverter. When you activate the sprayer, this component redirects water from your main faucet to the sprayer hose. If your faucet lacks this feature, you’ll need to purchase a new faucet with integrated sprayer capability.
Verify Mounting Hole Size and Position
Most sinks include a pre-drilled hole beside the main faucet specifically for the sprayer. This hole typically measures 1-1.5 inches in diameter and may be covered by a decorative cap. If your sink lacks this hole, you’ll need to drill one using a ceramic or metal hole saw appropriate for your sink material. Measure carefully to position the hole where the sprayer will be easily accessible but won’t interfere with other sink components.
Properly Shut Off Water Supply Before Working
Turn off valves safely:
1. Locate the shut-off valves beneath your sink (usually two separate valves)
2. Turn both valves clockwise until they stop—don’t force them
3. Open your faucet handles to release pressure and drain residual water
4. Place a towel in the cabinet to catch any unexpected drips
Critical backup plan: If under-sink valves are stuck, corroded, or absent, shut off your home’s main water supply before proceeding. Never attempt plumbing work with water still flowing—this prevents accidental flooding that could damage your cabinets and floors.
Install Sprayer Mounting Assembly Correctly

Prepare the Flange for Watertight Seal
Thread the decorative flange onto the mounting shank until it reaches the top. Roll a 1/2-inch rope of plumber’s putty and wrap it around the underside of the flange—this creates a watertight seal that prevents water from leaking into your cabinet. Don’t skip this step, as improper sealing is a common cause of future leaks.
Secure Mounting Assembly from Below
Insert the shank through the mounting hole from above the sink. From beneath the sink, thread on the rubber washer followed by the lock nut. Hand-tighten first to prevent cross-threading, then use your wrench to snug it down firmly—about 1/4 turn past hand-tight. Wipe away excess putty that squeezes out with a damp cloth to maintain a clean appearance.
Connect Spray Hose Components Without Leaks
Attach Spray Head Properly
Screw the spray head onto the larger end of the flexible hose. Hand-tighten only—over-tightening can crack the plastic threads and cause immediate leaks. The spray head should seat firmly without requiring excessive force. Test the connection by gently twisting the head to ensure it’s secure but not strained.
Route Hose Through Shank Correctly
Feed the smaller end of the hose down through the mounting shank from above. Push it completely through until the spray head rests in the mounting hole. Leave enough slack so the hose isn’t stretched tight but isn’t excessively coiled either. Proper routing prevents kinks that restrict water flow and cause premature hose wear.
Connect Hose to Water Diverter Without Cross-Thread
Remove Diverter Cap Carefully
Using pliers, carefully loosen and remove the plastic cap from the diverter pipe. Keep this cap in a safe place—someone might want to remove the sprayer later. Some diverter caps have slots for a flathead screwdriver; use this method if pliers slip on the smooth plastic.
Secure Hose Connection Properly
Wrap 3-4 layers of Teflon tape clockwise around the diverter threads—this creates a watertight seal without overfilling the threads. Screw the hex nut end of your hose onto the diverter until hand-tight, then give it an extra 1/4 turn with pliers. Avoid overtightening, which can strip plastic threads and create leaks that worsen over time.
Quick test: Gently tug the connection to ensure it’s secure. A properly installed connection won’t budge, but don’t apply excessive force that could damage the fitting.
Test Your New Sprayer System Thoroughly
Restore Water Supply Methodically
Slowly open both shut-off valves counterclockwise. Check for leaks at all connections as water pressure builds—especially at the diverter connection and mounting assembly. If you see drips, tighten connections slightly but don’t overdo it.
Complete Function Check Procedure
- Turn on your main faucet to normal flow
- Pull out the sprayer and squeeze the trigger
- Water should flow from the sprayer, stopping flow from the main faucet
- Release the trigger—water should immediately resume from the main faucet
- Check under the sink for any leaks during operation
Pressure troubleshooting: If flow seems weak, verify the diverter cap was completely removed and all connections are tight. Low household water pressure (below 40 PSI) can also cause weak sprayer performance.
Prevent Common Sprayer Installation Mistakes
Avoid these errors that cause leaks:
– Cross-threading connections—always start threads by hand before using tools
– Skipping Teflon tape—leads to slow leaks that develop over weeks
– Over-tightening plastic parts—creates hairline cracks that eventually leak
– Forgetting plumber’s putty—results in visible gaps and potential water damage
Take photos with your phone before disassembling anything—this visual reference helps tremendously during reassembly and can prevent simple mistakes that turn a 30-minute job into a 2-hour headache.
Maintain Your Sprayer for Long-Term Reliability
Monthly maintenance checklist:
– Inspect hose for kinks, cracks, or stiffness that restricts water flow
– Wipe spray head clean of mineral deposits using vinegar solution
– Check connection tightness at diverter and spray head (hand-tighten if needed)
Replace components when:
– Hose shows visible cracks or loses flexibility
– Spray pattern becomes uneven or sputters
– Leaks develop at connection points despite proper tightening
Pro maintenance tip: Run hot water through the sprayer weekly to prevent mineral buildup in the nozzle and keep internal components flexible. This simple habit extends your sprayer’s lifespan by years.
Quick Reference FAQ for Sprayer Installation
Q: What if my hose won’t reach the diverter?
A: Most sprayer kits include 48-60 inch hoses. If yours falls short, purchase an extension hose rather than stretching the connection, which causes premature wear.
Q: Can I install this on a pull-down faucet?
A: Pull-down faucets have built-in sprayers. Adding a separate side sprayer would create flow conflicts—consult your manufacturer before attempting.
Q: Why does water spray weakly from my new sprayer?
A: Check that the diverter cap was completely removed and verify household water pressure meets 40-60 PSI standards. Clean mineral deposits from the spray head if present.
Q: How tight should the lock nut be?
A: Tighten until snug plus 1/4 turn. Over-tightening can crack porcelain sinks or deform the mounting assembly, creating leaks.
Q: Should I use thread sealant on plastic connections?
A: Use Teflon tape on metal-to-metal connections only. Plastic threads seal through compression, not sealant—adding tape can cause cracking.
Your new kitchen sink sprayer hose is ready for action. Test it daily for the first week to catch any developing leaks early. With proper installation and basic maintenance, this upgrade will serve you reliably for years, making kitchen cleanup faster and more efficient. For future reference, keep your installation photos and any leftover parts in a labeled bag stored under your sink—this will save time if you need to replace components later.

