

Your coffee maker glaring at you every morning? Toasters and blenders permanently colonizing precious counter space? You’re not imagining it—cluttered countertops trigger stress in 60% of homeowners according to kitchen designers. The fix isn’t banishing appliances to a closet; it’s strategic concealment that reclaims up to 12 square feet of prep area while keeping essentials within arm’s reach. This guide delivers battle-tested solutions for hiding kitchen appliances based on professional design standards and real-world usability metrics.
Stop fighting your space. Within these pages, you’ll discover exactly how to hide kitchen appliances using methods from weekend DIY projects to luxury integrations—all proven to reduce daily cleaning time by 25% while maintaining instant access.
Execute Your Appliance Audit Like a Pro
Skip this step and you’ll waste money on solutions that don’t match your habits. Grab a timer and complete this 10-minute audit:
- List every countertop appliance (blender, toaster, etc.)
- Rank by usage frequency: Daily (coffee maker), 3x/week (hand mixer), monthly (stand mixer)
- Weigh each unit: Light (<5 lbs), Medium (5-15 lbs), Heavy (>15 lbs)
Apply this decision matrix immediately:
– Daily-use heavy items (like your 22-lb KitchenAid mixer) demand lift systems in base cabinets
– Monthly-use appliances belong on pantry carts or in walk-in storage
– Seasonal gadgets (ice cream maker) escape to closets—set calendar reminders for retrieval
Pro Tip: Measure clearance space before buying storage. Heavy appliances need 1-2 inches of rear airflow to prevent overheating.
Countertop Appliance Garages That Actually Work
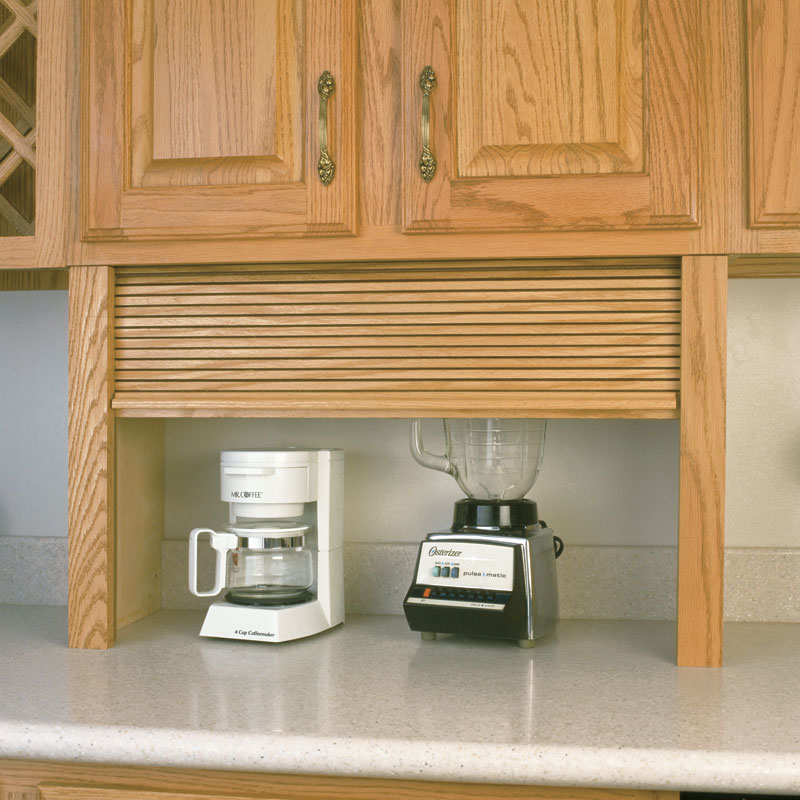
Tambour Doors: Zero-Clearance Countertop Savior
Tight galley kitchen? Tambour doors roll upward like a garage door, needing zero front clearance. Modern metal tracks eliminate 1980s-era jamming. For a $200 investment:
– Build a 24″W x 18″H x 15″D cavity (allowing 1″ airflow behind appliances)
– Mount outlets on the side wall—never the back—to avoid plug depth conflicts
– Install a 20-amp GFCI duplex outlet rated for heat-producing devices
Critical Safety Note: Never operate toasters or grills inside enclosed garages unless you’ve added louvered ventilation. Pull them out completely first.
Pocket Doors: Seamless Vanishing Act
Want your coffee station to disappear completely? Pocket doors slide into wall cavities for invisible storage. But this requires:
– 2×4 framing behind cabinetry
– Minimum 4″ wall depth for the track
– Professional installation ($1,200+ for IKEA Sektion + Utrusta motorized lift)
Visual Cue: When open, pocket doors should sit flush with adjacent cabinets—no gaps or protrusions.
Swing Door Clearance Calculator
Traditional hinged doors need breathing room. Avoid this costly mistake:
– Single doors require 15-18″ of swing clearance
– Double doors need 24-36″
– Always use soft-close hinges rated for 100 lbs—especially with heavy appliances inside
Bifold doors solve space crunches by folding in half before opening outward. Perfect for narrow pantries or tight corners.
Built-In Solutions for High-Use Appliances
Microwave Drawer Installation Cheat Sheet
Stop crouching to check popcorn! Transform upper cabinet space:
– Position shelf at 54″ from floor for eye-level access
– Install a dedicated 15-amp outlet in the adjacent cabinet bay
– Use 24″ or 30″ wide drawers matching your cabinet depth
Lower-cabinet microwave drawers are game-changers for families—kids can safely operate them without climbing.
Stand Mixer Lift: Heavy-Duty Mechanics
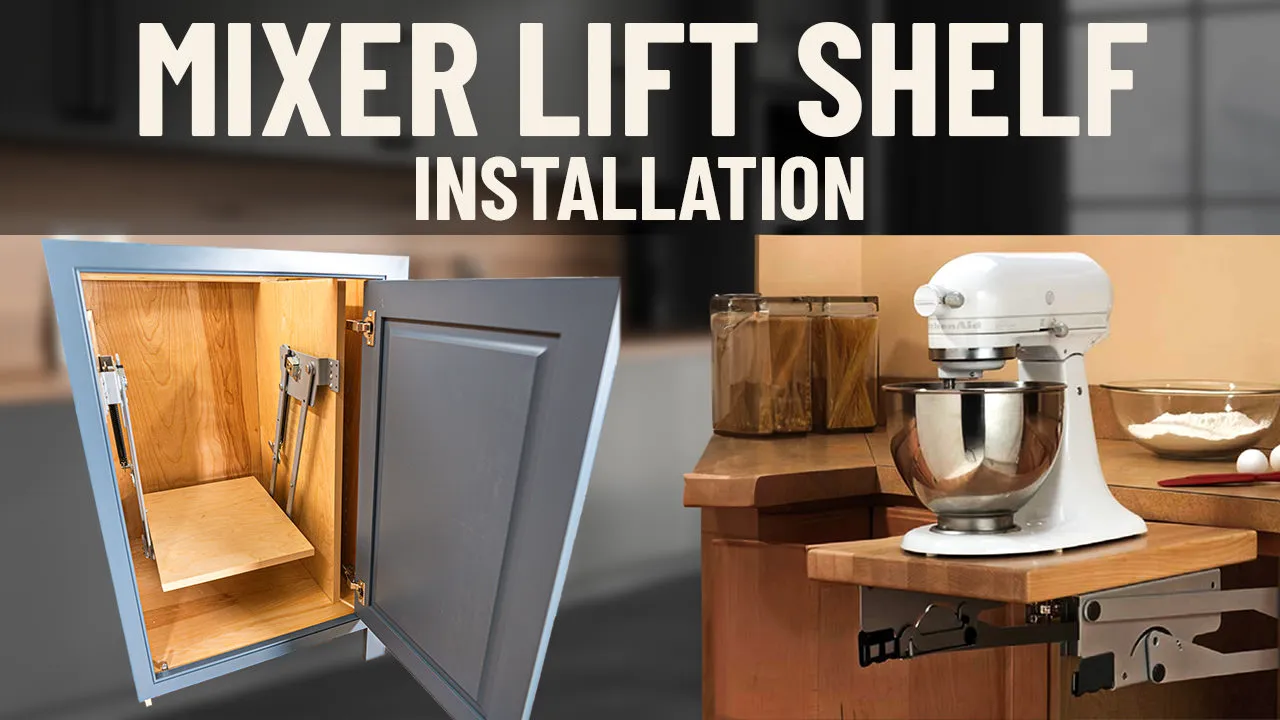
The Rev-A-Shelf LD-4 Series handles 60 lbs on soft-close slides. For flawless operation:
– Mount in 12-18″ base cabinets with 1.5″ face frames
– Ensure 18″ of vertical travel space
– Lock the lift during use—it won’t budge even during dough-kneading
Warning: Never exceed weight limits. A 22-lb KitchenAid mixer leaves safety margin; adding attachments risks mechanism failure.
Coffee Station Command Center
Create a 48″H full-height garage with zones:
– Top (24″H): Coffee maker + automatic pot filler
– Middle (18″H): Grinder, mugs, cold water stub-out
– Bottom (6″H): Drawer for pods and accessories
– Non-negotiable: Motion-sensor LED lighting (3000K) activating on door opening
Rolling & Furniture Storage That Doesn’t Scream “Temporary”
IKEA RÅSKOG Cart Hack
This $44 rolling cart hides heavy appliances in plain sight:
– Store under island overhangs (locks into place with casters)
– Load seasonal appliances for parties—wheel out when needed
– Max 44 lbs per shelf (holds stand mixers but not heavy blenders)
Pro Move: Line shelves with non-slip matting to prevent appliance migration during transport.
Vintage Credenza Conversion Blueprint
That thrifted teak sideboard? Retrofit it:
1. Add interior outlet strip with GFCI protection
2. Cut perforated metal back panel for ventilation
3. Install neoprene gaskets around edges to block steam
Doubles as a bar during gatherings—guests never suspect your slow cooker’s hiding inside.
Large Appliance Camouflage Secrets
Refrigerator Paneling Precision
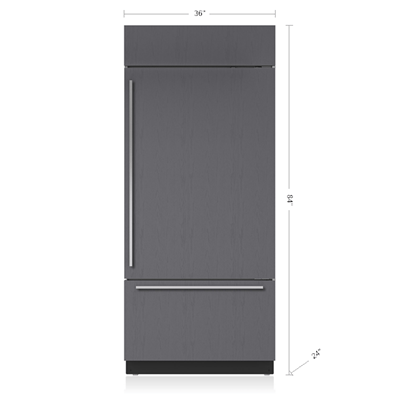
Panel-ready models (Sub-Zero BI-36U) accept custom cabinetry fronts. For seamless integration:
– Specify ¾” thick panels with vertical grain direction
– Match edge banding to existing cabinets
– Install 12″ bar pulls—not integrated pulls—to avoid handle interference
Critical Detail: Panels must extend to 4″ above finished floor for toe-kick continuity.
Dishwasher Disguise That Lasts
Prevent steam warping with military-grade sealing:
– Add neoprene gasket behind panel (not just foam tape)
– Leave ½” gap at panel bottom for moisture escape
– Match panel height to adjacent cabinet doors exactly
Walk-In Pantry Appliance Zones
Don’t just stash appliances—strategically zone your 4×6 ft pantry:
– Left Wall: Dry goods (12″ shelves)
– Right Wall: Small appliances (18″ shelves with outlets every 24″)
– Far Wall: Baking center with mixer lift + 18″ deep counter
Use Soss invisible hinges on the door—magnetic latches keep it flush with cabinetry. Interior flooring should match your kitchen for a “Narnia moment” effect.
Outlet & Safety Protocol You Can’t Skip
GFCI Placement Rules
- All outlets within 6 ft of sinks must be GFCI protected
- Mount appliance garage outlets on side walls 4″ from back
- Heat-producing appliances (toasters) need dedicated ventilation paths
The Ventilation Checklist
✅ 1-2″ rear airflow gap for all enclosed appliances
✅ Louvered gable panels for toasters/grills
✅ Monthly vacuuming of crumbs from tambour tracks
Red Flag: Discolored outlets indicate overheating—immediately add ventilation or relocate the appliance.
Budget-Savvy Implementation Roadmap
This Weekend ($150): Install Omega National Tambour kit in existing corner cabinet (24×18″). Reclaims counter space instantly.
Next Month ($500): Add Rev-A-Shelf mixer lift to base cabinet. Eliminates daily heaving of your 22-lb mixer.
This Year ($8,000): Build walk-in pantry with dedicated appliance zones. Includes stone countertops, mixer lift, and coffee station—all hidden behind a seamless door.
Maintenance Protocol for Longevity
- Weekly: Remove pull-out trays; wipe with mild detergent (prevents pest-attracting crumbs)
- Monthly: Vacuum tambour tracks with brush attachment—crumbs love narrow grooves
- Quarterly: Lubricate slides with silicone-based grease (never WD-40—it attracts dust)
Critical Check: Inspect stone inserts (3cm quartz handles 400°F) for chips after dropping heavy items.
Your countertops were designed for chopping vegetables—not becoming permanent appliance parking lots. By implementing these precise concealment strategies, you’ll transform visual chaos into curated calm while keeping every tool instantly accessible. Start tonight: audit your appliances, measure your problem zones, and reclaim your first square foot of counter space by tomorrow morning. The coffee tastes better when your kitchen isn’t screaming for attention.

