
You’re scrubbing stubborn food residue off a baking sheet when you notice the water trickling out like a leaky faucet. Suddenly, what should take seconds drags into minutes. Slow kitchen faucet water flow isn’t just annoying—it’s a daily disruption that makes simple tasks feel like chores. The good news? In most cases, you can fix slow water flow in kitchen faucet without professional help, saving hundreds in service calls.
This guide delivers exactly what you need to diagnose and fix sluggish kitchen sink pressure, starting with the simplest 5-minute fix that solves 70% of cases. You’ll learn how to identify whether your problem stems from mineral buildup, hidden leaks, or municipal issues, and most importantly—how to restore that satisfying strong stream. Whether you’re dealing with barely-there water pressure or just a gradual decline, these actionable steps will get your kitchen faucet flowing like new.
Aerator Mineral Buildup Cleaning Process

When your kitchen faucet starts delivering a disappointing trickle instead of a strong stream, the aerator is almost always the first place to look. This tiny component at the faucet tip contains a fine mesh screen that filters debris and creates a smooth water flow pattern. Over time, minerals from your water supply accumulate on this screen, gradually restricting water volume until you’re left with a frustratingly weak stream.
How to Properly Remove Your Faucet Aerator
Before attempting any faucet repairs, turn off both hot and cold water valves under your sink to prevent accidental flooding. Locate the aerator—the small, often cylindrical component at the very end of your faucet spout. Most standard aerators unscrew counterclockwise by hand, but mineral deposits can make them stubborn. If it won’t budge, wrap a rubber band around it for extra grip, or use channel-lock pliers with a soft cloth to protect the finish. Never apply excessive force—stripping the aerator threads will create a much bigger problem.
Pro tip: Take a photo of your faucet before disassembly to remember how components fit together. This simple step prevents confusion during reassembly.
Deep Cleaning Methods for Maximum Flow Restoration
Once removed, inspect your aerator for the telltale white or green crusty deposits—these mineral buildups are the silent killers of water pressure. Begin with a thorough rinse under warm running water while gently scrubbing with an old toothbrush. For stubborn deposits, prepare a vinegar soak: fill a small container with white vinegar and submerge the aerator overnight. The mild acid dissolves mineral deposits without harsh chemicals. After soaking, give it another gentle brush, rinse thoroughly, and reinstall by hand-tightening clockwise until snug. Test your faucet immediately—you should notice dramatically improved flow.
Warning: Never use steel wool or abrasive cleaners on aerators—they’ll scratch the finish and create future buildup points.
Cartridge Blockage Troubleshooting
When aerator cleaning fails to restore proper water pressure, the problem likely lies deeper inside your faucet mechanism. The cartridge controls water flow when you turn the handle, and like the aerator, it’s vulnerable to mineral accumulation that restricts water volume. Unlike aerators, cartridges vary significantly by manufacturer—Moen, Delta, and Kohler each use different designs requiring specific tools and techniques.
Safe Cartridge Removal Without Damage
Start by turning off the water supply valves completely under your sink. Remove the decorative cap on your faucet handle using a flathead screwdriver (it often pops off with gentle pressure). Beneath this cap, you’ll find a retaining screw—usually requiring a 1/8-inch Allen wrench. Once removed, carefully lift off the handle to expose the cartridge housing. Unscrew the retaining nut (often 11/16-inch) and gently pull out the cartridge. Take note of its orientation before removal—many cartridges only fit one way.
Time estimate: This process typically takes 15-20 minutes for first-timers.
Should You Clean or Replace Your Cartridge?
Examine your extracted cartridge for visible damage like cracks, worn seals, or severe mineral deposits. For minor buildup, soak it in vinegar overnight, then scrub with a hard-bristled brush. However, cartridges with damage or persistent blockages after cleaning should be replaced—most cost between $15-50. Before ordering, note your faucet model number (usually stamped on the base) to ensure compatibility. Reinstalling the correct cartridge often restores full pressure immediately.
Expert note: Some modern faucets use ceramic disc cartridges that shouldn’t be cleaned—just replace them when flow diminishes.
Hidden Pipe Leak Detection Methods
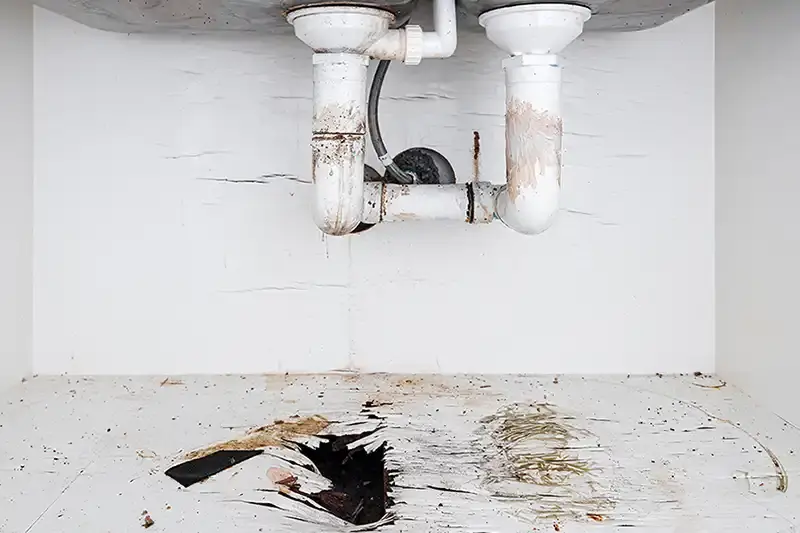
A hidden leak might be stealing your water pressure while you’re troubleshooting the faucet itself. Even small leaks divert significant water volume, creating the illusion of slow faucet flow when the real problem lies elsewhere in your plumbing system. These silent leaks can waste hundreds of gallons daily while causing expensive water damage.
Cabinet Inspection Checklist for Water Leaks
Open the cabinet beneath your sink and conduct a thorough inspection. Look for these critical signs:
– Visible moisture on pipes, connections, or cabinet floor
– Water stains or discoloration on wood surfaces
– Musty odors indicating hidden mold growth
– Damp insulation around pipes
– Rust spots on metal components
Run your hand along pipe connections feeling for moisture, especially at joints. Pay special attention to the shutoff valves and supply lines—these are common failure points. Even a slow drip inside your wall can significantly reduce water pressure at the faucet.
Pro tip: Place paper towels under suspected areas overnight—wet spots will reveal leak locations by morning.
Water Heater Sediment Impact on Hot Water Flow

If only your hot water flow is slow while cold water maintains strong pressure, your water heater has become the bottleneck. Sediment accumulation at the tank bottom restricts hot water flow, creating frustratingly weak streams when you need hot water for washing dishes or sanitizing surfaces.
Hot Water Flow Troubleshooting Steps
First, confirm the issue affects only hot water by testing both settings separately. Then locate your water heater’s shutoff valve (usually at the top) and ensure it’s fully open—a partially closed valve is an easy fix. For traditional tank heaters, annual professional flushing removes sediment buildup that restricts flow. While tempting, DIY flushing risks damaging the tank or creating safety hazards if not done correctly.
Warning: Tankless water heaters don’t suffer from sediment buildup—consider upgrading if sediment issues persist.
Municipal Water Supply Verification
Sometimes the problem isn’t your plumbing at all—it’s the city’s water system. Municipal maintenance, pipe repairs, or pressure adjustments can temporarily reduce water flow to your entire neighborhood, affecting all fixtures in your home.
Neighborhood Pressure Check Protocol
The fastest way to determine if the issue is municipal is to ask neighbors if they’re experiencing similar problems. If multiple households report low pressure, contact your water provider immediately—they can confirm if work is being done in your area. Municipal issues typically affect all fixtures equally, not just your kitchen sink.
Action step: While waiting for municipal resolution, turn off unnecessary water-using appliances to maximize available pressure for essential tasks.
Professional Help Decision Framework
Knowing when to call a plumber saves you time, money, and potential water damage. While many slow flow issues are DIY-friendly, certain situations require professional expertise to prevent costly mistakes.
When to Call a Plumber Immediately
Contact a licensed plumber if you encounter any of these red flags:
– Persistent low pressure after cleaning aerator and cartridge
– Water appears rusty or discolored
– Multiple fixtures show pressure problems simultaneously
– You suspect leaks behind walls or under floors
– Your home has older galvanized steel pipes showing corrosion
Cost expectation: Basic pressure issue diagnosis typically costs $150-400, while pipe replacement ranges from $500-2000 depending on accessibility and materials.
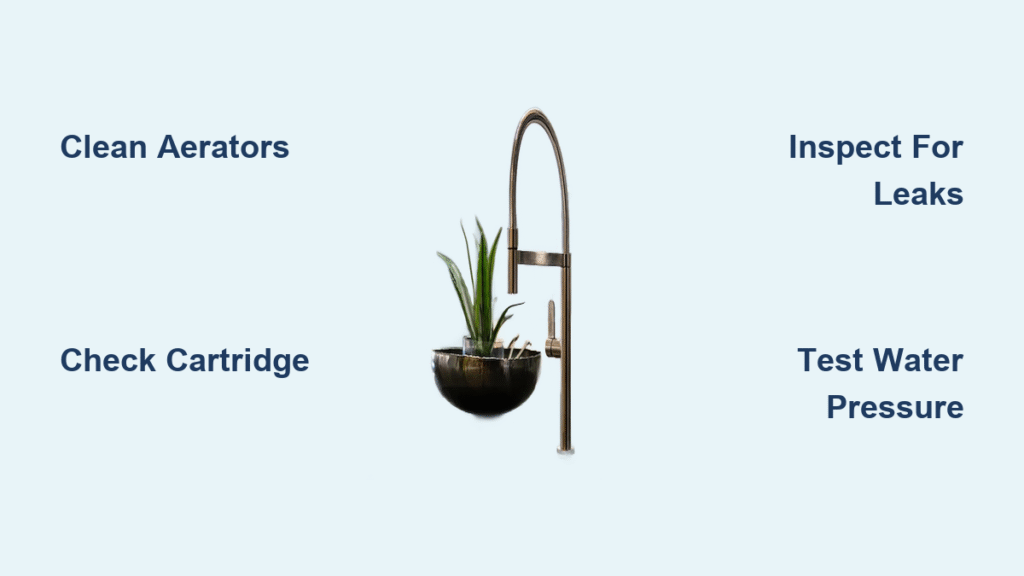
Preventive Maintenance Schedule for Consistent Flow
The best approach to slow water flow problems is preventing them before they start. A simple maintenance routine keeps your kitchen faucet performing optimally while extending the life of your entire plumbing system.
Monthly Faucet Health Check
During regular sink use, pay attention to subtle changes in water pressure, unusual noises, or visible mineral buildup. Monthly, remove and rinse your aerator under running water—this quick 2-minute task prevents most flow problems. In hard water areas, quarterly deep cleaning with vinegar keeps mineral deposits at bay.
Pro tip: Install a whole-house water softener if your area has hard water—it reduces mineral buildup in all plumbing fixtures by 90%.
Annual Professional Inspection Benefits
Schedule a professional plumbing inspection annually to catch developing issues before they become emergencies. A qualified plumber can test water pressure throughout your system, inspect for hidden leaks, and recommend preventive measures specific to your home’s plumbing. This small investment prevents expensive repairs and ensures your kitchen faucet delivers strong, reliable water flow for years to come.
Bottom line: Start with the aerator—this simple fix resolves most slow water flow in kitchen faucet issues within minutes. If cleaning doesn’t restore full pressure, methodically work through each potential cause from cartridge to supply lines. By following this systematic approach, you’ll restore proper water flow while avoiding unnecessary plumber visits. Remember: consistent preventive maintenance keeps your kitchen faucet flowing strong and prevents most pressure problems before they start.

