
That relentless drip… drip… drip from your kitchen sink isn’t just maddening—it’s a silent water waster. When your single-handle faucet leaks continuously with the handle in the “off” position, it’s almost always a worn cartridge or failing O-rings. The good news? You can permanently stop the leak using basic tools and replacement parts costing under $20. Most homeowners complete this repair in under an hour, avoiding $150+ plumber fees while saving hundreds of gallons of wasted water annually.
Whether your faucet drips only when hot water runs or leaks steadily 24/7, this guide targets the three core failure points identified in plumbing diagnostics: cartridge erosion, O-ring deterioration, or valve seat damage. You’ll learn to pinpoint the exact cause, replace critical components correctly, and test your repair like a professional. No prior plumbing experience needed—just follow these proven steps.
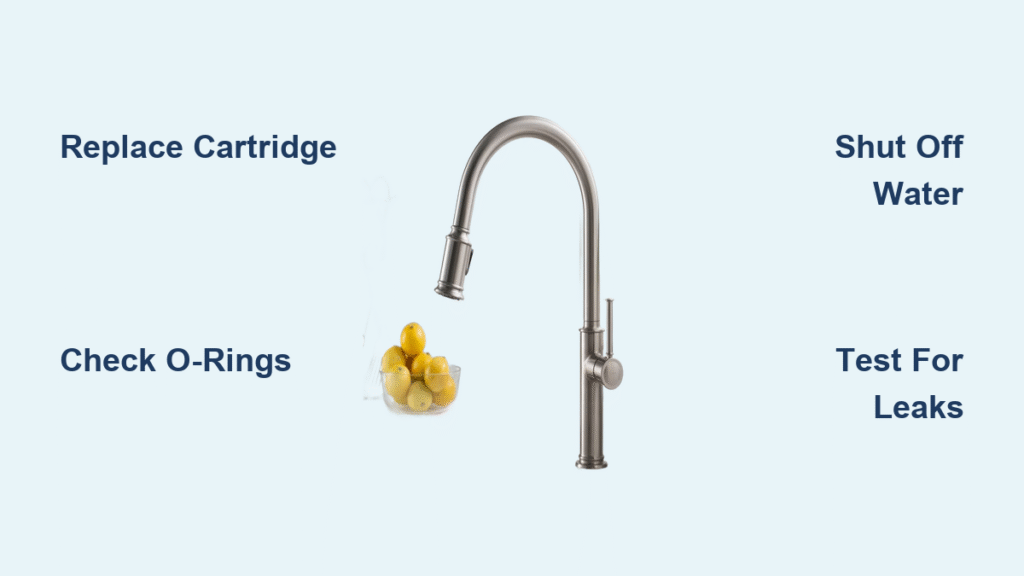
Identify Your Faucet Type Before Starting
.png)
Brand Recognition Made Simple
Don’t guess at replacement parts—identify your faucet first. Look for these hidden markers:
– Delta faucets: Check for “Delta” stamped on the handle base or escutcheon plate
– Moen models: Find “Moen” laser-etched on the spout base or handle underside
– Kohler fixtures: Locate model numbers on supply line tags under the sink
– American Standard: Inspect the faucet body near the base for embossed lettering
Cartridge Style Check
Single-handle faucets use either ceramic disc cartridges (cylindrical, 3-inch long) or ball valve assemblies (featuring a visible rounded plastic/ball mechanism). Remove the handle cap to see which type you have—this determines your replacement parts. Ceramic discs dominate modern faucets, while ball valves appear in older Moen models.
Stop Water Flow Safely to Prevent Flooding
Shut-Off Valve Locations
Locate the two oval or round valves under your sink connected to copper or flexible supply lines. These control hot and cold water flow independently.
Proper Shutdown Sequence
1. Turn both valves clockwise until fully closed (don’t force them)
2. Open the faucet handle to release pressure and drain residual water
3. Place a dry towel over the drain to catch dropped screws
4. Test by turning on the faucet—no water should flow
Critical safety check: If water still flows after shutting valves, your shut-offs are faulty. Replace them before proceeding—never work on a pressurized faucet. Wear safety glasses to protect against debris during disassembly.
Essential Tools Checklist for Flawless Repair

Required Tools
– Adjustable wrench or basin wrench (for tight spaces)
– Phillips and flat-head screwdrivers
– Allen wrench set (1/8″, 3/32″, and 5/64″ cover 90% of models)
– Cartridge puller (or Moen’s white plastic removal tool for Moen faucets)
– Needle-nose pliers and small pick for O-rings
Replacement Parts
– Exact-match cartridge (Delta RP50587, Moen 1225, Kohler GP76851, etc.)
– O-ring kit with multiple sizes (match to your faucet’s specs)
– NSF/ANSI 61-certified silicone plumber’s grease
– Paper towels for immediate leak testing
Pro tip: Take photos of your faucet’s parts before disassembly—it prevents reassembly errors.
Remove Faucet Handle Correctly Without Damage
Locate Hidden Set Screws
Most handles conceal the set screw under:
– A plastic cap on the handle front (pops off with flat screwdriver)
– A rear-facing screw visible when lifting the handle
– A screw under the handle base (requires handle removal first)
Handle Removal Steps
1. Pop off the decorative cap with a flat-head screwdriver
2. Insert the correct Allen wrench and turn counterclockwise 3-4 full turns
3. Lift the handle straight up—wiggle gently if mineral deposits seize it
4. Set handle aside with screw attached to prevent loss
Handle won’t budge? Spray penetrating oil around the base, wait 10 minutes, then try again. Never hammer the handle—this cracks the cartridge stem.
Access Cartridge Assembly Without Breaking Parts
Remove Trim Components
After handle removal, unscrew the decorative escutcheon plate’s retaining screws. Lift it off to expose the brass cartridge retaining nut surrounding the stem.
Cartridge Retaining Nut Removal
1. Position adjustable wrench firmly on the nut’s flats
2. Turn counterclockwise slowly (plastic nuts crack if forced)
3. Remove completely once loose—do not lose this nut
4. Mark the old cartridge’s orientation with a permanent marker before extraction
Critical step: Note the cartridge’s alignment tabs or flat sides—installing it backward causes immediate leaks.
Replace Worn Cartridge Like a Professional
Extract Old Cartridge
1. Grasp the stem with needle-nose pliers and pull straight up
2. For stubborn cartridges: Use a cartridge puller, applying steady pressure while twisting gently
3. Moen-specific: Insert the white plastic removal tool and twist to release
Clean Housing Thoroughly
Wipe the cartridge chamber with a vinegar-dampened cloth to dissolve mineral deposits. Use a soft brush for buildup, then rinse with clean water. Dry completely before installing new parts.
Install New Cartridge
1. Lubricate all O-rings with silicone grease
2. Align with your orientation marks—mismatched alignment causes leaks
3. Press down firmly until fully seated (you’ll feel a distinct click)
4. Reinstall retaining nut—hand-tight plus 1/4 turn max (over-tightening cracks plastic)
Replace O-Rings to Stop Base Leaks
Locate Critical O-Rings
Your faucet contains three key O-ring zones:
– Cartridge body: Two rings around the cylindrical shaft
– Spout base: Large ring where spout meets faucet body
– Handle stem: Small ring where handle connects to cartridge
Install New O-Rings Correctly
1. Match exact sizes using old O-rings as templates (standard: 3/8″ ID × 1/2″ OD × 1/16″)
2. Lubricate lightly with silicone grease—dry O-rings tear during installation
3. Roll into grooves without twisting (use a small pick for seating)
4. Verify full seating by running a fingernail around the groove
Pro mistake: Skipping spout base O-rings causes leaks when pulling down spray models.
Reassemble and Test for Zero Leaks
Reverse Assembly Order
1. Reinstall trim plate and secure screws
2. Position handle aligned with “off” position
3. Insert set screw and tighten snugly (over-tightening strips plastic)
4. Snap decorative cap into place
Water Supply Restoration
1. Turn valves counterclockwise slowly to prevent pressure surges
2. Check connections immediately for leaks with dry paper towels
3. Run water 30 seconds to flush debris from lines
4. Close handle completely and wait 5 minutes
Final Leak Test
Place dry paper towels under the faucet base and handle. Check after 5 minutes for any dampness. Test hot and cold separately—drips often occur only on one temperature setting.
Troubleshoot Persistent Drips After Repair
Drip Continues Despite New Cartridge
– Valve seat damage: Shine a flashlight into the cartridge chamber. Pitted surfaces require professional reseating or faucet replacement
– Wrong cartridge: Verify part numbers match exactly (Moen 1224 vs. 1225 is a common error)
– Debris interference: Remove cartridge, flush system for 10 seconds, reinstall
Handle Won’t Shut Off Water
1. Check set screw tightness—loose handles can’t close the valve
2. Confirm cartridge is fully seated (listen for the click)
3. Test without the handle to isolate cartridge vs. handle issues
Leaks from Handle Base
Replace the handle stem O-ring and tighten the cartridge retaining nut. If leaks persist, inspect the cartridge for cracks near the handle interface.
Prevent Future Leaks with Smart Maintenance
Monthly Maintenance
– Wipe faucet surfaces daily with soft cloth after use
– Check handle operation for developing stiffness
– Inspect connections for moisture weekly
Annual Prevention
– Replace O-rings yearly in hard water areas (install a water softener if minerals exceed 7 gpg)
– Soak aerator monthly in 50/50 vinegar solution for 30 minutes
– Apply silicone lubricant to the handle mechanism annually
Critical tip: Water pressure over 80 PSI accelerates wear—install a pressure regulator if your home exceeds this.
When to Call a Professional Plumber
Complex Issues
– Valve seat damage requiring specialized reseating tools
– Cracked faucet body beyond cartridge replacement
– Supply line corrosion at shut-off valves
Safety Red Flags
– Non-functional shut-off valves (replace these before faucet repair)
– Electrical hazards near garbage disposal wiring
– Persistent leaks after two cartridge replacements
Never attempt: Grinding valve seats without proper tools—this ruins the faucet body.
A properly repaired single-handle kitchen faucet should operate smoothly with zero drips for 3-5 years. By using NSF-certified silicone grease on all rubber components and matching exact cartridge part numbers, you’ll avoid 95% of post-repair leaks. Keep your model-specific cartridge and O-ring kit stored under the sink for future quick fixes—most homeowners recover their tool investment after the first DIY repair. Remember: that drip you silence today saves over 3,000 gallons of water yearly while protecting your plumbing from costly water damage. Turn off the leak for good before it turns into a flood.

