
A broken kitchen faucet handle can transform your morning coffee routine into a frustrating battle with water control. When your handle spins uselessly, won’t turn at all, or literally falls off in your hand, you’re facing more than just an inconvenience—you’re dealing with a potential water-wasting emergency. The good news? Most handle failures can be fixed in under an hour with basic tools you likely already own.
Knowing how to fix a broken kitchen faucet handle saves you from expensive plumber calls and prevents water damage from uncontrolled flow. Whether your handle is loose, completely detached, or frozen in place, this guide delivers specific solutions tailored to your faucet type. You’ll learn to diagnose the exact problem, gather the right tools, and execute professional-quality repairs that restore full functionality to your kitchen’s most-used fixture.
Identify Your Faucet Handle Type Before Repairing
:max_bytes(150000):strip_icc()/Types-of-faucets-1824889_color_rev_02-83ac08e1289d4e01b09216cd586fa7bc.jpg)
Single-Lever Handle Diagnosis Steps
Your single-lever handle likely conceals a set screw beneath a decorative cap at its base—pop this off with a flathead screwdriver to reveal the fastener. Common brands like Moen and Delta use hex-shaped set screws requiring Allen wrenches (typically 3/32″), while some models hide Phillips-head screws instead. If your handle spins freely without controlling water, you’re probably dealing with stripped cartridge splines rather than just a loose handle.
Double-Handle Faucet Identification
Two separate handles marked “H” and “C” indicate an older compression-style faucet. These typically feature visible decorative caps covering Phillips-head screws—simply pry these off to access the mounting hardware. Unlike modern cartridge designs, these older systems rely on rubber washers that wear out over time, so handle problems often indicate broader maintenance needs beyond just tightening or replacement.
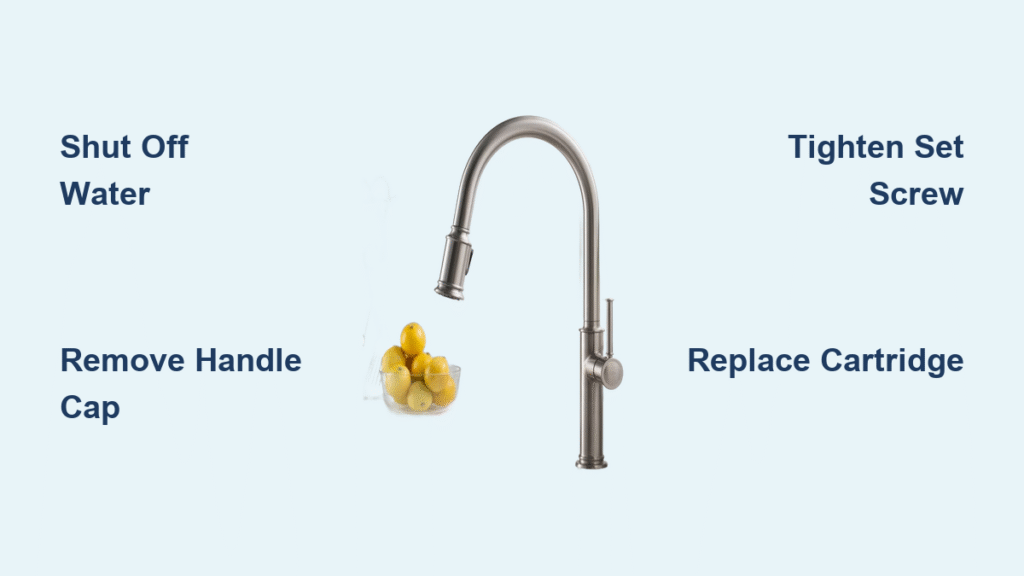
Shut Off Water Supply Properly Before Starting
Immediate Water Control Procedure
Always locate and close the angle stops under your sink before attempting repairs—these small valves connect to your water lines and stop flow with a clockwise turn. With water shut off, open your faucet to drain remaining water and relieve pressure. Crucially plug your sink drain immediately to prevent losing tiny screws, and place towels in the basin to protect surfaces from dropped tools. Skipping this step risks flooding when you disconnect components.
Remove Your Broken Handle Safely
Single-Lever Handle Removal Technique
Start by prying off the decorative cap with a flathead screwdriver—many caps snap out easily, while others require gentle persuasion. Once exposed, loosen the set screw with the appropriate Allen wrench (usually 3/32″). If the handle won’t budge, apply penetrating oil around the base and wait 10 minutes before trying again. For stubborn handles, grip the base with pliers while pulling upward—never force it sideways, which can damage the cartridge stem.
Double-Handle Removal Process
Pry off the “H” or “C” indicator cap to access the Phillips-head screw beneath. After removing this screw, try pulling the handle straight up—if it resists, tap the top gently with a rubber mallet while applying upward pressure. For severely corroded handles, use a dedicated handle puller tool available at hardware stores. Never use excessive force that could damage the valve stem threads.
Diagnose the Root Cause Accurately
Handle Movement Assessment Guide
Handle spins freely? This indicates stripped splines on either the handle adapter or cartridge. Won’t turn at all? Mineral buildup or corrosion has likely seized the mechanism. Loose despite tightening? You’re dealing with worn threads or a damaged handle adapter. Falls off repeatedly? The set screw is stripped or handle threads are compromised. With the handle removed, try turning the cartridge directly—if it operates smoothly, handle replacement alone will fix your issue.
Execute the Right Repair for Your Problem
Quick Tightening Fixes That Actually Work
For a slightly loose handle, simply remove the decorative cap and tighten the set screw clockwise using the proper tool. Stop when resistance increases—overtightening can strip threads. If the screw won’t tighten, remove it completely and inspect for damage. Replace with an identical screw if stripped, or apply a drop of thread locker for temporary hold. Test handle movement before replacing the cap to ensure smooth operation.
Complete Handle Replacement Made Simple
When tightening fails, replacement becomes necessary. Measure your stem diameter (common sizes: 1/4″, 5/16″, or 3/8″) and note the spline count (typically 16, 20, or 24 ridges). Take these measurements plus photos of your faucet to the hardware store for an exact match. During installation, apply plumber’s grease to the stem before pushing the new handle into place, then insert and tighten the set screw. Always test operation through the full range of motion before finishing.
Cartridge Replacement When Handle Issues Persist
If your handle spins uselessly even after replacement, cartridge failure is likely. After removing the handle, unscrew the retaining nut with an adjustable wrench, then pull out the cartridge. Match the model number exactly when purchasing a replacement—cartridges only fit one way. Lubricate new O-rings with plumber’s grease, insert the cartridge fully, reinstall the retaining nut (snug but not overtightened), and test thoroughly before replacing the handle.
Troubleshoot Common Repair Challenges
Handle Won’t Turn After Repair
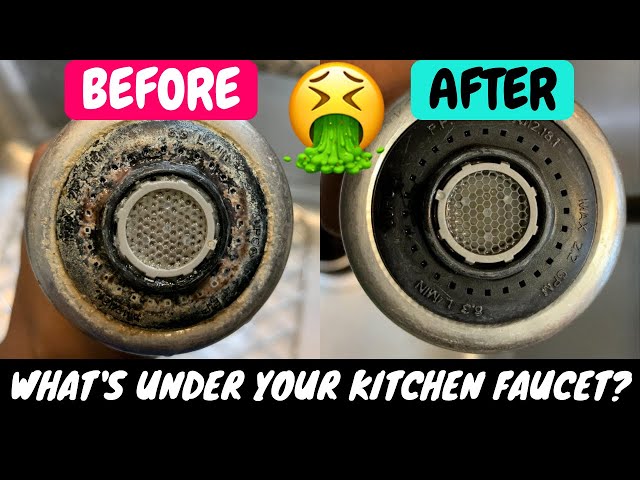
Mineral deposits often cause this frustrating issue. Disassemble components and soak overnight in white vinegar—the acid dissolves buildup without damaging parts. For stubborn corrosion, apply penetrating oil to threads and let it work for 15 minutes before attempting movement. If parts remain seized, replacement becomes necessary to restore functionality.
Handle Falls Off Repeatedly Despite Tightening
This indicates severely worn threads. Try a thread repair kit that inserts new metal threads into the handle, or replace the entire handle assembly. For immediate functionality, wrap the stem with plumber’s tape before reinstalling the handle—this creates temporary friction to hold the handle in place until proper repairs can be made.
Prevent Future Handle Failures
Monthly Maintenance Routine That Works
Check handle tightness monthly by gently trying to wiggle it—if movement exceeds 1/8 inch, tighten the set screw. Clean handles weekly with mild soap and water to prevent grime buildup that accelerates wear. Annual lubrication with plumber’s grease on moving parts reduces friction and prevents corrosion. In hard water areas, install a water softener to minimize mineral deposits that seize mechanisms.
Know When to Call a Professional
DIY Repair Limitations to Recognize
While most handle issues are DIY-friendly, certain situations warrant professional help. Call a plumber if you encounter ceramic disc cartridge failures, corroded valve seats requiring reseating, or integrated pull-out spray complications. If your faucet is under warranty, DIY repairs might void coverage—check manufacturer terms first. When multiple issues appear simultaneously (leaks plus handle failure), professional diagnosis often proves more cost-effective than repeated part replacements.
Test Your Repair Thoroughly Before Finishing
Critical Post-Repair Validation Steps
After reassembly, slowly restore water supply while watching for leaks at all connection points. Test handle operation through its full range—movement should be smooth without binding. Verify precise temperature control from full cold to full hot, and ensure complete shutoff when the handle reaches its stop position. Monitor for 24 hours to catch slow leaks that might not appear immediately. Your repair succeeds when the handle moves smoothly, controls water perfectly, and shows zero leaks.
A broken kitchen faucet handle doesn’t require a full replacement when you know how to fix it properly. Most repairs take under an hour with basic tools and prevent unnecessary plumbing expenses. The key is acting quickly—small issues like loose screws become major problems when ignored, leading to water damage and costly repairs. Keep this guide handy for future reference, and remember that regular maintenance prevents most handle failures before they start. When you address issues promptly and correctly, your kitchen faucet will deliver reliable service for years to come.

