
Your gas stove installation determines kitchen safety and cooking performance for years to come. Improper connections cause dangerous gas leaks while incorrect measurements leave frustrating gaps between your appliance and cabinetry. This guide reveals professional techniques for fitting a gas stove in kitchen spaces while avoiding common mistakes that compromise safety. You’ll learn precise measurement methods, proper gas line connections, and critical safety checks that ensure your new stove operates safely from day one.
Verify Legal Installation Permissions Before Starting
Contact your local building department immediately after selecting your new gas stove. Many jurisdictions prohibit homeowner gas line work entirely, requiring licensed professionals for all gas connections. Others permit DIY installation only after passing certification exams or with specific restrictions on connection types. Ignoring these regulations risks fines, insurance claim denials, and potentially catastrophic gas leaks.
Schedule professional consultation if your kitchen lacks essential safety features. You must hire a certified technician when:
– No accessible shutoff valve exists behind your current range location
– Gas line modifications require new piping through walls or floors
– Your kitchen layout needs completely new gas line routing
– Previous installation shows signs of improper connections or leaks
Measure Kitchen Space for Perfect Gas Stove Fit
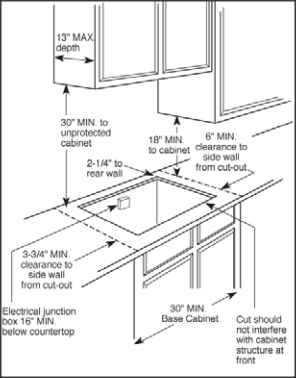
Record exact cabinet cutout dimensions before purchasing your stove. Measure width at three points (top, middle, bottom) as cabinets often aren’t perfectly square. Standard gas ranges require 30″ width, but compact 24″ models for small kitchens or commercial 36″ units need different clearances. Depth measurements must account for both the appliance body and required gas connector space behind it.
Check minimum clearance requirements in your stove’s manual before finalizing placement. Most manufacturers require:
– 1-2 inches between stove sides and adjacent cabinets
– 0-1 inch gap between back wall and stove rear
– 30-36 inches above cooking surface to cabinets
– 3-6 inches behind stove for gas connector accessibility
Select Correct Stove Type for Your Kitchen Layout
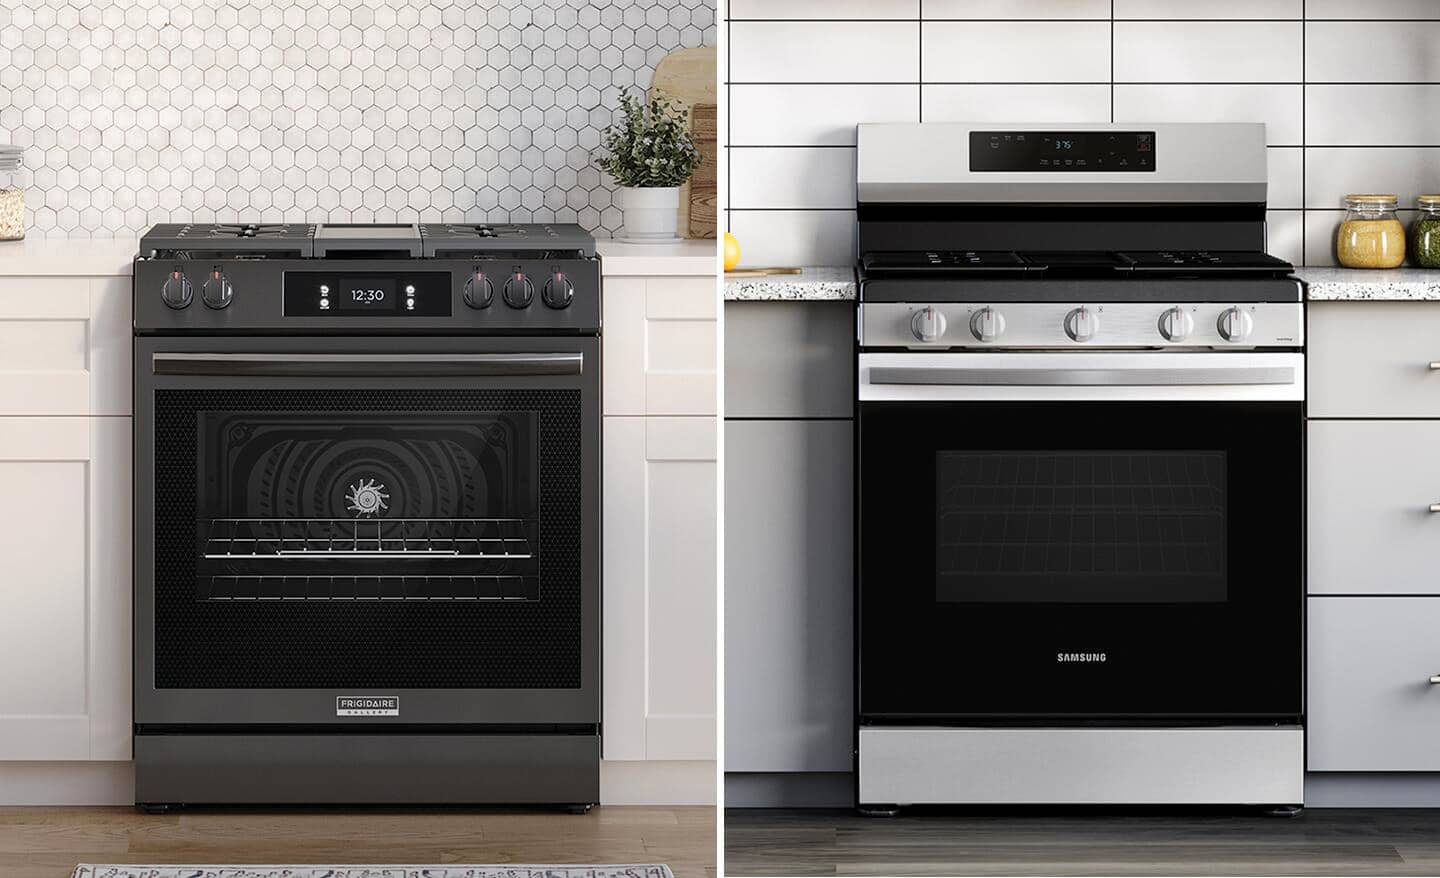
Slide-in gas ranges create seamless integration with countertops but demand precise measurements. These models:
– Sit flush with surrounding countertops when properly installed
– Feature finished sides allowing placement in kitchen islands
– Require exact cutout dimensions (typically 30″ wide x 25″ deep)
– Lack backguard protection requiring separate backsplash installation
Freestanding gas ranges offer flexible placement options with built-in safety features. These models:
– Stand independently with integrated backguard protecting walls
– Fit standard cabinet openings without custom modifications
– Allow easier replacement in existing kitchen layouts
– Provide consistent sizing across most major appliance brands
Gather Essential Installation Supplies Before Starting
Purchase gas-rated connector components specifically designed for stove installation:
– New flexible gas connector marked “for range use” (never reuse old ones)
– Yellow Teflon pipe-joint tape rated for gas connections only
– ½ inch x ½ inch street elbow pipe fitting
– Gas leak detector solution or homemade soapy water mixture
Critical safety equipment includes:
– Adjustable wrench (primary tool needed for connections)
– Second person to assist with appliance positioning
– Work gloves for handling sharp cabinet edges
– Flashlight for inspecting dark installation spaces
Shut Off Gas Supply Properly Before Connection
Locate and operate the shutoff valve correctly before disconnecting old appliances. Turn the lever perpendicular to the gas pipe (90-degree angle) to stop flow completely. This valve typically sits behind your current range or in the basement directly below. Never skip this step—working with live gas lines creates immediate explosion hazards.
Install missing shutoff valves before proceeding if none exists at your installation point. This represents the optimal time for professional gas line modification, ensuring future safety during maintenance or replacement. Attempting to work on gas lines without proper shutoff capability violates safety standards in most jurisdictions.
Connect Gas Line to Stove Without Creating Leaks
Prepare threaded connections using yellow Teflon tape correctly:
– Wrap gas valve threads twice clockwise (never counterclockwise)
– Avoid tape on LP gas tubing systems (propane requires different methods)
– Use ½ inch x ¾ inch coupling fittings when size mismatches occur
Assemble connector components in precise sequence:
1. Attach taped end to gas supply line without kinking connector
2. Install street elbow into range gas port with proper threading
3. Connect remaining end to street elbow without forcing connections
4. Tighten all fittings firmly but avoid overtightening which damages seals
Critical installation errors to avoid at all costs:
– Never connect connector nuts directly to black gas pipes
– Avoid sharp bends or kinks in flexible connector tubing
– Don’t use regular Teflon tape on gas connections (must be yellow gas-rated)
– Never skip mandatory leak testing procedures after connection
Test for Gas Leaks After Stove Installation
Perform systematic pressure testing before considering installation complete:
1. Turn gas valve to vertical (on) position slowly
2. Light all burners for 60 seconds to clear air from lines
3. Spray all connections with leak detector solution
4. Monitor for bubble formation indicating dangerous leaks
Immediate leak response protocol saves lives when bubbles appear:
– Turn off gas valve instantly at main shutoff point
– Open windows and ventilate area thoroughly
– Do not operate electrical switches or create sparks
– Contact professional gas service before attempting repairs
Position Gas Stove Correctly After Installation
Level the appliance using adjustable feet on range bottom:
– Place level across cooking surface in multiple directions
– Adjust feet clockwise to raise, counterclockwise to lower
– Ensure stability on all four corners before final positioning
Install anti-tip brackets according to manufacturer specifications:
– Secure bracket to wall studs or floor framing
– Prevents dangerous range tipping when door is opened
– Required by building codes in most jurisdictions for safety
Connect Electrical Components for Gas Stove
Verify standard 110-volt outlet functionality before final positioning:
– Test outlet with voltage tester to confirm proper operation
– Ensure grounded three-prong connection (no adapters needed)
– Position stove so cord reaches without stretching across cooktop
Avoid common electrical errors that compromise safety:
– Never confuse gas range requirements with electric stove needs
– Don’t use 250-volt circuits incorrectly (gas ranges don’t require these)
– Ensure outlet remains accessible behind appliance for future service
Professional vs DIY Gas Stove Installation Decision
DIY installation time investment typically ranges from 4-6 hours:
– 1 hour for precise measurement and planning
– 2 hours for gas connection work
– 1-2 hours for positioning and safety testing
– Additional time for learning curve with first installation
Professional installation becomes essential when:
– No previous gas appliance experience exists
– Gas line modifications require new piping
– Local codes mandate licensed technician work
– Home insurance policy requires professional service documentation
Post-Installation Gas Stove Maintenance Tips
Weekly cleaning routine prevents performance issues and extends appliance life:
– Remove burner grates for thorough washing in warm soapy water
– Clear burner ports using soft brush or toothpick (never metal objects)
– Wipe control knobs to prevent grease buildup and sticking
– Clean spills immediately to avoid permanent staining and odors
Monthly safety checks ensure continued safe operation:
– Inspect flexible connector for kinks, damage, or corrosion
– Test all burner ignition systems for proper function
– Verify proper flame appearance (blue, not yellow or orange)
– Check for unusual odors during operation indicating potential issues
Troubleshoot Common Gas Stove Problems Immediately
Ignition failures often stem from simple issues you can fix:
– Clean dirty burner ports obstructing gas flow
– Dry moisture from ignition components after cleaning
– Check electrical connections powering ignition system
– Verify gas supply valve is fully open
Flame irregularities indicate potential safety concerns:
– Yellow or orange flames signal incomplete combustion
– Uneven burner flames suggest clogged ports needing cleaning
– Low flame intensity may indicate gas pressure problems
– Persistent gas odors require immediate professional attention
When to call professionals immediately:
– Any gas smell after leak testing confirms installation error
– Multiple ignition attempts without burner lighting
– Yellow or orange flame colors persisting after cleaning
– Visible damage to gas line connections or components
Properly fitting a gas stove in kitchen spaces requires precision, patience, and strict adherence to safety protocols. By following these professional techniques, you ensure years of safe, efficient cooking performance while avoiding dangerous mistakes. Remember that when in doubt about gas connections, consulting a certified professional always beats risking a dangerous leak—your safety is worth the investment. Schedule annual professional maintenance to keep your gas stove operating safely and efficiently for its entire service life.

