
You stand in your kitchen, coffee mug in hand, staring at that stubborn gap above your cabinets. Dust gathers there like a silent intruder. The harsh overhead light casts shadows that make your beautiful cabinetry look unfinished. If you’ve ever felt frustrated by this common kitchen flaw—especially with standard 30″ cabinets leaving a glaring 12″ gap under 8′ ceilings—you’re not alone. The good news? You can eliminate this eyesore yourself this weekend without calling a contractor. This guide reveals exactly how to fill the gap between kitchen cabinets and ceiling using methods that work for every budget, skill level, and ceiling irregularity. No more ignoring that dead space—transform it into storage, style, or seamless integration.
That gap exists for practical reasons: building codes require 18″ clearance from countertops to cabinet bottoms, and stock cabinets rarely match ceiling heights. But uneven drywall, settling foundations, and bowed framing turn what should be a uniform space into a messy 0″ to 3/4″+ eyesore. Whether you have a 5″ gap from 36″ cabinets or a cavernous 18″+ space in high-ceiling homes, this guide delivers solutions verified by professional installers. You’ll discover which method saves you $200+ versus hiring a pro, how to handle wavy ceilings without demolition, and why one technique takes just 30 minutes per cabinet run. Let’s turn that awkward void into your kitchen’s strongest design feature.
Why Measuring Your Cabinet-to-Ceiling Gap Prevents Costly Mistakes
Skipping measurements causes 90% of failed gap-filling projects. Ceilings aren’t perfectly level—drywall sags between joists, and framing settles unevenly over time. What looks like a uniform 5″ gap might actually vary from 4½” to 6″ across your cabinet run. Measure every 12″ along the cabinet tops using a tape measure and laser level. Record the largest dimension—your solution must accommodate this maximum space. For example, if your gap ranges from 4¾” to 5¼”, plan for the 5¼” measurement.
How Gap Size Dictates Your Best Solution
- 0–1″ gaps: Often touch the ceiling at one end but leave a sliver elsewhere. Scribe molding alone suffices.
- 2–4″ gaps: Picture rail shelves work perfectly here—adding display space while hiding irregularities.
- 5–6″ gaps: The sweet spot for solid wood extensions. A 1×6 board plus crown molding creates seamless height.
- 12″+ gaps: Drywall soffits become cost-effective. Anything over 18″ needs stacked cabinets for visual balance.
Install Scribe Molding in 30 Minutes (No Advanced Skills Needed)

When ceilings dip and bow, flexible scribe molding follows contours that rigid trim can’t. This isn’t decorative crown—it’s a functional spacer that bridges uneven gaps. Use ½” thick maple or poplar flat stock (1–2½” wide) for durability. Avoid pre-primed molding; raw wood sands smoother for custom fits.
Scribing Your Ceiling Profile Like a Pro
- Transfer the curve: Hold molding against cabinet top. Set a compass to the largest gap measurement. Slide it along the ceiling while tracing the contour onto the wood.
- Rip to the line: Use a belt sander for gradual curves or a thin-kerf table saw blade for sharp dips. Sand until the back edge perfectly matches your scribed line.
- Secure invisibly: Pre-finish the molding, then pin-nail into cabinet tops with 1″ brad nails every 8″. Add ¼” quarter-round at the ceiling junction if minor gaps remain.
Time-saver: For gaps under 1″, skip quarter-round—caulk the top edge instead. This method costs $15–25 per 10-foot run and takes 30 minutes per cabinet section. Rent a belt sander for $15 if you don’t own one.
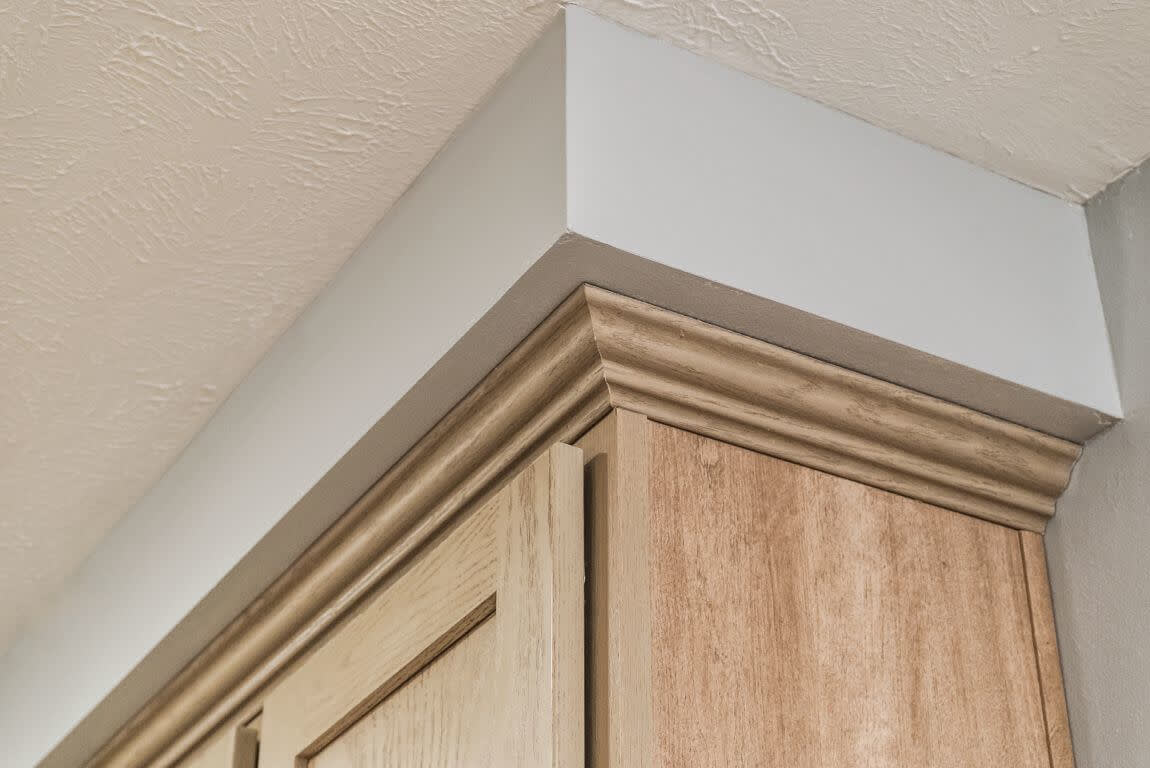
Build a Solid Wood Cabinet Extension: Step-by-Step Guide
For the cleanest built-in look, extend cabinets to the ceiling with real wood. This method works for 2″ to 12″ gaps and adds valuable storage. Pre-primed 1×6 or 1×8 pine is ideal—avoid MDF as it swells in humid kitchens.
Critical Blocking Installation Steps
- Anchor hidden supports: Cut 2×2 SPF blocks to 6–8″ lengths. Screw them to cabinet tops every 16″ using 2″ wood screws (drill pilot holes to prevent splits). Ensure screws don’t penetrate cabinet interiors where dishes could hit them.
- Attach ceiling blocking: Place a scrap block against your cabinet-top blocking. Mark the ceiling position with a pencil, then fasten 2×2s into joists with 2½” screws. These create a “shelf” for your extension boards.
Why Coping Beats Mitering for Crown Molding
Dry-fit crown molding first. For inside corners, use a coping saw to cut the second piece’s inner edge—this creates a tighter seam than miters when ceilings aren’t square. Nail the bottom edge into your extension board and the top edge into ceiling blocking. Caulk all seams with paintable flexible caulk before painting with Sherwin-Williams Urethane Trim Enamel for a washable finish. Total cost: $75–120 for 10 feet of cabinets.
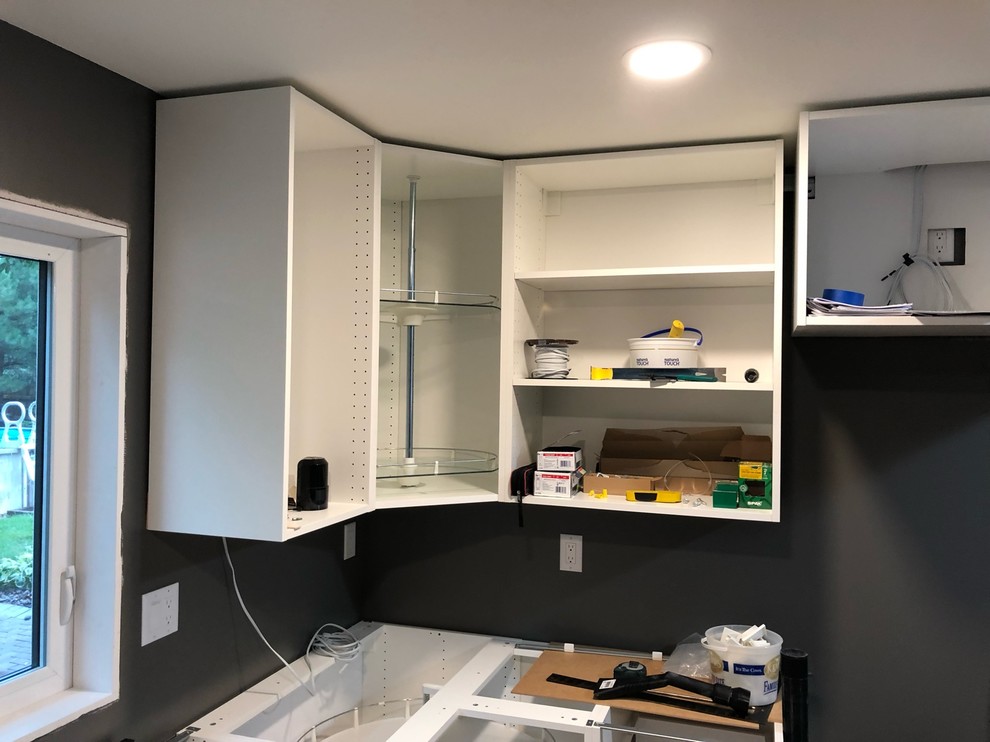
Drywall Soffit Method for Large Gaps (Under $50)
Gaps over 8″ need structural framing. Forget flimsy boxes—build an L-shaped soffit that becomes part of your ceiling. This $50 solution works where extensions would look top-heavy.
Frame and Finish in 4 Hours
- Construct the frame: Attach 2×4s horizontally to cabinet tops and vertically to ceiling joists using 3″ deck screws. The vertical leg should match your gap’s maximum height.
- Skin with drywall: Cover the frame with ¼” drywall (easier to bend than ½”). Tape and mud inside corners, then add metal corner bead to the cabinet junction.
- Seamless integration: Texture the soffit to match your ceiling using a hopper gun. Once painted, install 3½” crown molding where it meets cabinets—this hides any drywall imperfections.
Pro tip: For vaulted ceilings, add rigid foam insulation between framing before drywalling. This prevents condensation in humid climates.
Fix Irregular Ceilings with Adjustable Trim Build-Up
Wavy ceilings sabotage standard extensions. Instead of forcing wood to conform, build up trim gradually to absorb variations.
Create a Tapered Transition in 3 Steps
- Install a base strip: Nail a 1×4 horizontally 1″ below the ceiling using your largest gap measurement as reference.
- Add crown molding: Start at the ceiling’s lowest point. The molding’s top edge will sit flush against the ceiling, while the bottom edge creates a slight taper downward.
- Conceal the taper: Fill the wedge-shaped gap behind the molding with backer rod, then caulk over it. Paint everything the same color to hide the transition.
For gaps under 1″, lowering cabinets ½” creates uniformity. Loosen mounting screws, slide cabinets down until the gap is consistent, then re-secure. Ensure you maintain the 18″ minimum countertop clearance.
How to Choose the Right Solution for Your Gap Size
Stop guessing which method fits your kitchen. Match your measurements to this decision chart:
| Gap Size | Budget Level | Best Solution | DIY Time |
|---|---|---|---|
| 0–1″ | Low | Scribe molding only | 2 hrs |
| 2–4″ | Medium | Picture rail shelf + décor | 3 hrs |
| 5–6″ | Medium | 1×6 extension + crown | 7 hrs |
| 12″ | Low | Drywall soffit | 5 hrs |
| 18″+ | High | Stacked cabinets with glass doors | 8 hrs |
Critical factor: If your ceiling slopes more than ½” over 10 feet, skip solid extensions—opt for scribe molding or adjustable trim. For rental kitchens, removable picture rail shelves avoid permanent modifications.
Maintain Your Cabinet-to-Ceiling Fix for Years
Dust accumulation defeats the purpose of filling that gap. Fully enclosed extensions (wood or drywall) eliminate dust traps entirely—unlike open shelves requiring quarterly cleaning. For painted surfaces, use urethane-alkyd enamel like Benjamin Moore Advance. It resists grease splatter and wipes clean with a damp cloth.
Annual maintenance checklist:
– Inspect caulk lines for separation (common in seasonal humidity shifts)
– Tighten loose crown molding nails with a nail set
– Re-caulk gaps wider than 1/16″ using paintable flexible caulk
– Touch up scratches with cabinet-matched paint
Pro tip: Snap installation photos before finishing. Future homeowners (or you during renovations) will thank you for knowing what’s behind the walls.
That gap above your cabinets isn’t a flaw—it’s untapped potential. Whether you choose the $25 scribe molding fix for minor irregularities or build full extensions for a custom look, you’ll gain storage, eliminate dust magnets, and create visual harmony. Most solutions take one weekend and cost less than $120. Grab your tape measure today: measure your largest gap, pick the matching solution from our guide, and transform that awkward space by Sunday night. Your dream kitchen is literally just above your cabinets—now you know exactly how to fill the gap between kitchen cabinets and ceiling.

