
Your kitchen island feels cramped with four people bumping elbows, and you’re eyeing that empty floor space wondering if you can just make it longer. Good news—extending your existing island is absolutely possible, often without replacing your beloved countertops. Whether you need space for holiday cooking marathons or want comfortable seating for family dinners, these proven extension methods transform your kitchen’s functionality without the cost of a full renovation. The industry standard reveals a truth most homeowners discover too late: you need 10 feet (120 inches) of total length for four people to sit comfortably at your island, yet most standard islands measure just 84 inches—leaving each person with barely 21 inches of personal space.
Add Second Level to Existing Island
Creating a two-tier island maximizes vertical space while solving the “elbow wars” at your current counter height. This approach adds an elevated dining surface above your existing prep area, giving you both expanded workspace and comfortable seating without touching your original countertop.
Planning Your Elevation for Optimal Functionality
Measure 42-44 inches from floor to bottom of new upper surface for standard bar-height seating. Your existing counter likely sits at 36 inches, creating a natural 6-8 inch step-up that visually separates cooking from dining zones. This height difference isn’t just practical—it creates distinct areas for different activities, making your kitchen feel larger and more organized. Ensure you maintain at least 12 inches of vertical clearance between surfaces to prevent head bumps while standing at the lower counter.
Structural Support Methods for Stability

Your two-tier design needs proper support to handle daily use. Install pony walls (short walls) at desired height using 2×4 framing for maximum stability, especially with heavier countertop materials. Alternatively, add decorative corbels or brackets for a floating appearance that still provides necessary support. Crucially, anchor all new framework to existing island structure using lag bolts rather than just screws to prevent wobbling over time. For granite or quartz surfaces, keep support intervals at 24 inches maximum to prevent cracking.
Material Integration for Cohesive Design
Choose butcher block, quartz, or matching granite for the upper tier to maintain visual harmony. Dark grey surfaces complement white countertops beautifully while defining the new dining zone. The contrast actually enhances visual appeal rather than looking like an afterthought. When selecting materials, consider how they’ll interact with your kitchen’s lighting—lighter surfaces reflect more light in darker kitchens, while darker tones create cozy ambiance in well-lit spaces.
Build Stand-Alone Extension Unit
This budget-friendly option creates a completely separate piece that functions as an island extension while maintaining flexibility for future rearrangement. You’ll build or purchase a mobile unit that butts against your existing island, instantly adding seating and storage without permanent structural changes.
Pre-Made Solutions for Immediate Results
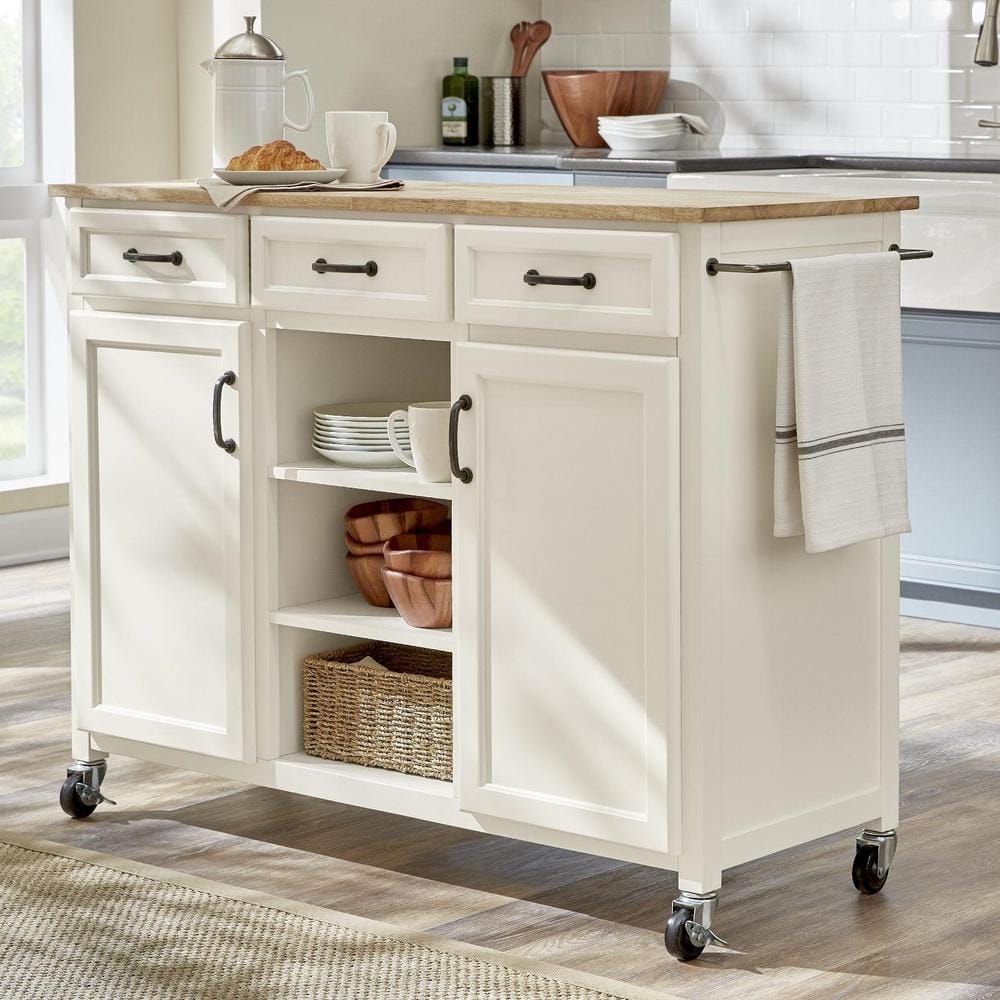
Rolling kitchen carts with butcher block tops provide immediate gratification—simply wheel into position, lock the wheels, and you have 12-18 inches of additional counter space plus shelving beneath. Units measuring 24″x36″ fit most island ends perfectly and typically cost several hundred dollars. Look for carts with casters that lock securely and have a weight capacity of at least 150 pounds to handle kitchen appliances and dinnerware.
Custom Construction Approach for Perfect Fit
Build your own unit from 3/4″ birch plywood for durability and longevity. Add 1/4″ MDF trim pieces for refined edges that match your existing cabinetry style. Install adjustable shelving inside for versatility as your storage needs change. Top with 20mm butcher block matching existing counters for seamless visual integration. Pro tip: Prime all wood surfaces with shellac before painting to prevent bleed-through and ensure proper adhesion.
Attach Extension Table to Island
Lower your extension to standard dining table height (30 inches) for ultimate versatility. This creates a homework station, casual dining spot, or serving area that feels intentional rather than tacked-on, solving the common problem of limited seating.
Height Differential Benefits for Multi-Use Spaces
The 6-inch drop from counter to table creates visual interest and functional separation. Kids can reach the table easily while adults still access the higher counter for prep work. This configuration works particularly well in open-concept kitchens where the island serves as both cooking space and family gathering point. The height difference signals to users which area is for eating versus food preparation.
Attachment Methods for Secure Connection
Use metal brackets underneath for invisible support that keeps the table firmly in place without visible hardware. Create pocket holes for seamless appearance when joining the table to your island structure. Alternatively, build a freestanding table that simply touches existing island—this provides flexibility to move it when needed while maintaining visual connection. For safety, ensure any attached table has at least two secure connection points to prevent tipping.
Install Butcher Block End Addition
When your island ends abruptly against open floor space, adding a butcher block extension creates natural flow while solving seating constraints. This method works particularly well when existing countertops are white quartz or granite, providing warm contrast.
Seamless Integration Technique for Professional Results
Cut butcher block to match existing counter thickness (typically 20mm), ensuring both surfaces meet at identical heights. The wood tone adds warmth while creating intentional contrast with white surfaces. To achieve a seamless transition, clamp the new section tightly against the existing countertop and fill any microscopic gap with color-matched epoxy before sanding smooth.
Support Structure Options for Different Styles
Add decorative legs matching existing cabinet style for traditional kitchens, creating an open, airy feel beneath the extension. Install corbels underneath for hidden support that maintains a floating appearance in modern designs. Build custom base cabinet for integrated storage that extends your kitchen’s functionality while matching existing cabinetry. Critical note: Account for base end panels (18mm thick each side) plus overhang allowances in your measurements—what seems like a 30-inch extension may actually require 32-1/4 inches of total space.
Calculate Perfect Extension Dimensions

Comfortable Seating Math for Your Specific Needs
Industry standards reveal the truth about your cramped island: you need 10 feet (120 inches) total length for four people to sit comfortably without touching. Your current 84-inch island leaves each person just 21 inches—tight airplane seating in your kitchen. Calculate your required extension using this simple formula: Desired total length minus existing island length equals required extension.
For comfortable seating:
– Minimum: 24 inches width per stool
– Comfortable: 26-28 inches per person
– Luxury: 30+ inches for elbow room
Visualize Before You Build to Avoid Costly Mistakes
Use painter’s tape to outline your planned extension on the floor before cutting any materials. Live with the taped dimensions for 48 hours, adjusting traffic patterns and confirming adequate walkway clearance. Measure carefully for these critical dimensions:
– Between island and opposing cabinets: Minimum 42 inches for two people to pass
– Extension depth: 24-30 inches provides adequate knee space
– Overhang: 12-15 inches for comfortable seating without banging knees
Execute Your Extension Project
Phase 1: Preparation and Planning for Success
Start by completely emptying your island—remove everything from drawers and cabinets. This reveals existing construction details and prevents damage during installation. Document current electrical outlet locations since extensions typically require additional outlets. Gather essential tools including a circular saw with fine-tooth blade, drill with assorted bits, 4-foot level, stud finder, and measuring tape.
Phase 2: Structural Framework Installation
Install base cabinets or framework first, ensuring absolute level installation. Any height variations telegraph through to your finished countertop, creating obvious seams and potential stress points. Use shims underneath base structure, checking level in multiple directions. Position legs or corbels at appropriate intervals—24-inch maximum for granite/quartz, 36-inch for butcher block—to prevent sagging over time.
Phase 3: Countertop Integration for Seamless Appearance
Whether extending existing surface or adding new material, achieving identical height alignment determines success. Use countertop underlayment (3/4-inch plywood) to build up new surface to match existing height exactly. When joining new countertop to existing, create tight seam using color-matched epoxy. Clamp sections firmly for 24 hours, then sand flush for invisible transition. Install matching millwork and moldings for cohesive appearance.
Maintain Your Extended Island
Daily Care Guidelines for Longevity
Extended butcher block sections require oiling every 3-4 months to prevent drying and cracking. Use food-grade mineral oil, applying liberally and wiping excess after 30 minutes. This 10-minute maintenance prevents costly refinishing later. Critical tip: Wipe liquids immediately from seams between old and new surfaces—standing water causes swelling at joints, creating visible gaps over time.
Long-Term Considerations for Future Flexibility
Plan electrical upgrades during extension installation. Most original islands include two outlets—inadequate for extended surfaces hosting small appliances and device charging. Design extension as separate module rather than permanent attachment to allow rearrangement if kitchen needs change, protecting your investment in expensive countertop materials. Store extra matching countertop material for future repairs—this ensures even minor chips or cracks become invisible fixes.
Your extended kitchen island transforms from cramped workspace to the heart of your home where family naturally gathers. These proven methods deliver professional results whether you choose weekend DIY or hire contractors. The key lies in precise planning and methodical execution—measure twice, cut once, and enjoy the extra space for years to come. With careful attention to structural requirements and design integration, you’ll create an island that functions beautifully for your current needs while maintaining flexibility for future changes.

