
That hulking boiler staring you down every time you make coffee isn’t just an eyesore—it’s a relic from when central heating invaded homes without warning. When boilers became standard in the 1900s, they were shoved wherever space existed, leaving modern kitchens with a utility-focused eyesore that clashes with sleek cabinetry and open shelving. The frustration is real: you’ve invested in a beautiful kitchen, but this necessary appliance dominates the space like an uninvited guest.
The good news? You can conceal your kitchen boiler safely and stylishly without violating building regulations or compromising maintenance access. This guide delivers battle-tested solutions that balance aesthetics with critical ventilation requirements. You’ll discover exactly how to measure clearances, choose materials that won’t overheat, and create covers that look like intentional design features—not afterthoughts. Forget generic advice; we’re diving into precise measurements, renter-friendly hacks, and DIY methods that cost less than $150.
Why Your Kitchen Boiler Cover Must Meet Safety Clearances
Ignoring clearance measurements risks overheating, voided warranties, and dangerous carbon monoxide buildup. These aren’t suggestions—they’re legally mandated requirements that must dictate your entire concealment strategy.
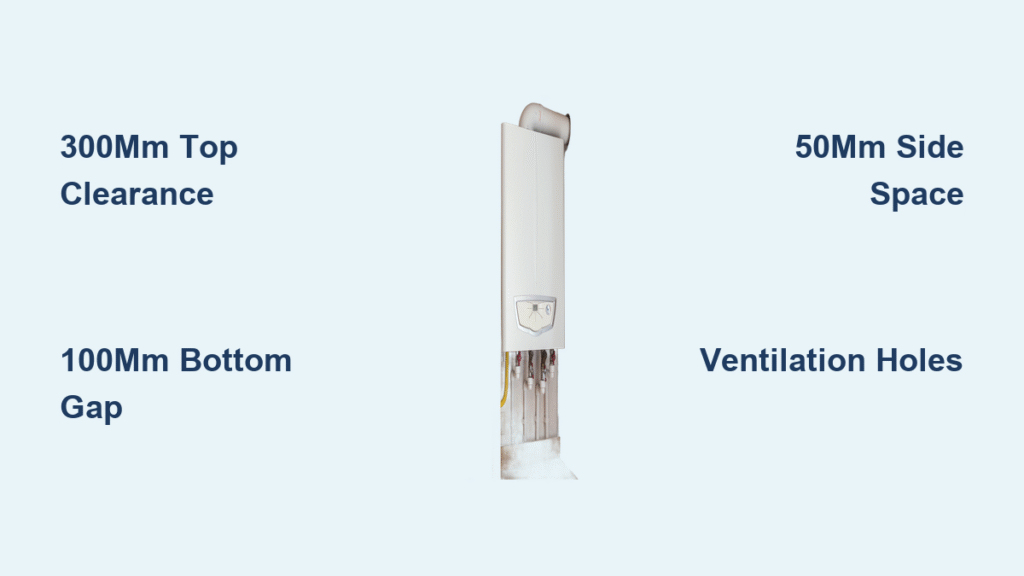
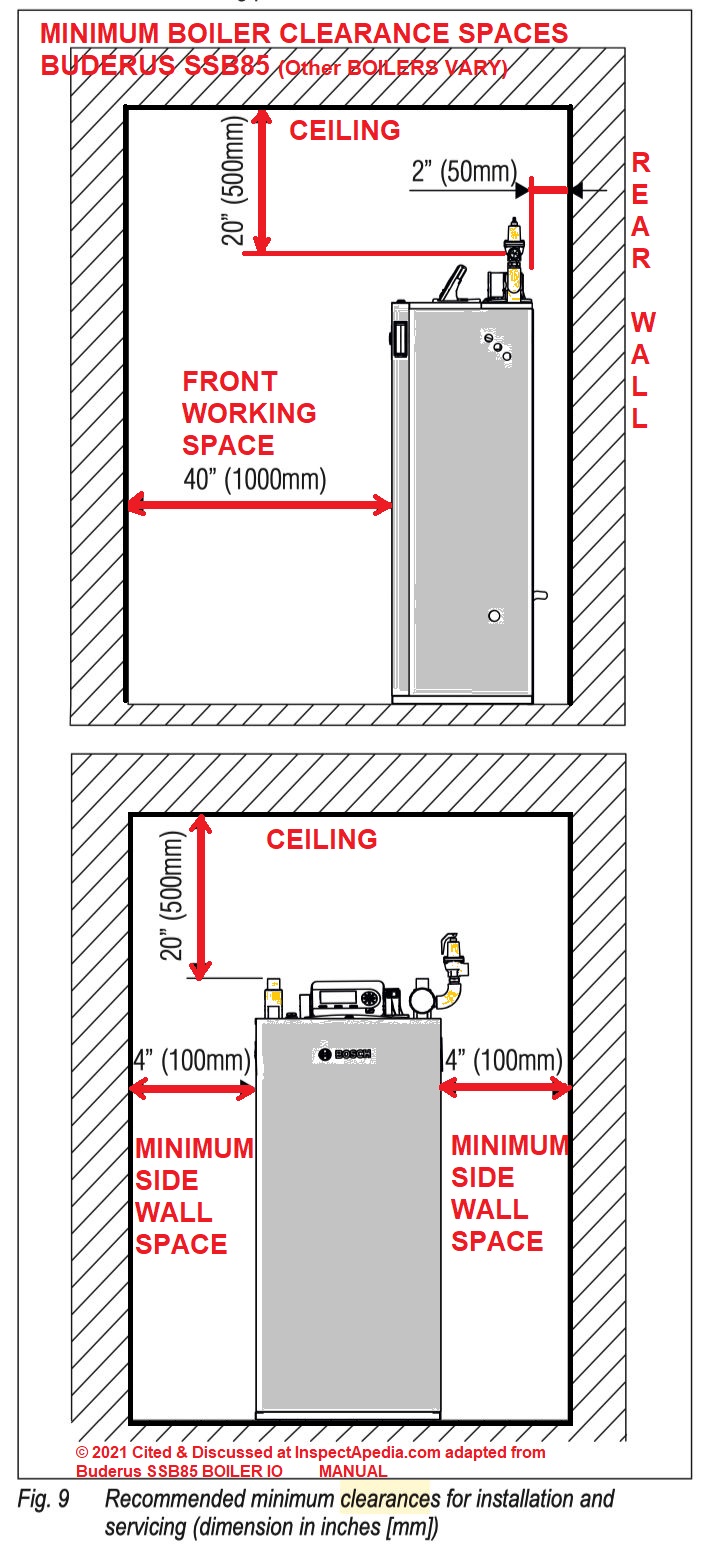
How Top Clearance Prevents Overheating (300mm Minimum)
Your boiler’s top vent requires exactly 300mm of unobstructed space above it—a non-negotiable gap verified by Hunsbury Heating guidelines. This isn’t arbitrary; hot air rises and needs room to dissipate. When installing cabinet covers, measure vertically from the boiler’s highest point (including pipes) to your cabinet’s underside. If your boiler sits 140cm tall, your cabinet must start at least 170cm from the floor. Any less invites thermostat malfunctions and potential shutdowns during winter’s coldest days.
Why Bottom and Side Gaps Are Non-Negotiable (100mm/50mm)
The 100mm gap between cabinet base and boiler bottom prevents heat accumulation from igniting nearby materials, while the 50mm side clearance allows air circulation around pipes. During installation, temporarily place cardboard spacers at these measurements—never rely on visual estimates. I’ve seen homeowners lose $200 in service calls because they assumed “close enough” satisfied requirements. When in doubt, add extra space; boilers expand when hot, and tight fits cause scorching within months.
IKEA SEKTION Cabinet Method: Step-by-Step Installation
This DIY solution integrates seamlessly with modern kitchens while meeting all safety standards. The SEKTION system’s 37cm depth (shallower than standard cabinets) creates a streamlined profile that doesn’t protrude into your workspace.
Measuring Your Boiler and Pipework Before Cutting
Most boilers fit within 60cm widths, but pipework dictates your critical dimensions. With the boiler off, measure:
– Total height including top/bottom pipes
– Deepest pipe protrusion at sides
– Distance from wall to pipe endpoints
Mark these on masking tape along your intended cabinet line. If pipes extend 15cm below the boiler base, your cabinet must start 25cm above the floor (100mm clearance + 15cm pipes). Never cut the cabinet first—measure three times while the boiler is operational to account for thermal expansion.
Modifying Cabinet Height Without Damaging the Finish
Standard SEKTION cabinets are 200cm tall, but most boilers require 140cm coverage. Cut from the bottom using:
1. Masking tape along the cut line (prevents veneer chipping)
2. Jigsaw with clamped straight-edge guide
3. 80-grit sandpaper on raw edges facing upward
For uneven walls, build a timber mounting frame first—this creates a level surface for perfect door alignment. Secure the frame with 10cm wall plugs before attaching the cabinet. If pipes run underneath, mount brackets directly to your worktop; this floating installation hides all plumbing while maintaining bottom clearance.
Building a Level Mounting Frame on Uneven Walls
Older homes rarely have plumb walls, making direct cabinet mounting impossible. Create a timber frame using 5x5cm construction lumber:
– Attach vertical studs to wall studs (not just plaster)
– Shim gaps with plastic wedges until perfectly level
– Attach horizontal top/bottom plates to studs
– Mount cabinet to this frame, not directly to wall
This frame absorbs wall imperfections while providing solid anchor points. Test stability by hanging on the cabinet—zero wobble is mandatory before adding the door.
Renter-Friendly Folding Screen Solutions
For apartments or temporary fixes, folding screens offer instant concealment without drilling. They’re ideal when you can’t modify walls but still need 100mm boiler clearance.
Selecting Slatted Wood Screens for Maximum Airflow
Choose screens with natural gaps between slats—perforated metal or bamboo won’t trap heat like solid panels. Position 15cm from the boiler (exceeding the 50mm minimum clearance) to ensure air circulation. For awkward corners, use L-shaped screens that wrap around pipe clusters. When service engineers visit, simply fold the screen flat against the wall—it takes 10 seconds and requires zero tools.
Positioning Without Drilling or Permanent Fixtures
Most renters damage walls trying to secure screens. Instead:
– Place weighted bases (sand-filled planters work perfectly)
– Use non-marking rubber pads to prevent sliding
– Angle screens slightly toward the wall for stability
Critical warning: Never let fabric or paper elements touch the boiler. I’ve seen renters melt curtain liners onto hot surfaces, creating fire hazards. Maintain that 100mm buffer zone religiously.
Ventilation Holes: Where to Drill for Hidden Airflow

Enclosed cabinets require strategic ventilation that doesn’t compromise your design. Skip this step, and your boiler will overheat within weeks.
Strategic Placement That Won’t Ruin Your Design
Drill four 50mm holes per side—two near the top (to release hot air) and two near the base (for cool air intake). Hide them by:
– Positioning top holes under cabinet crown molding
– Placing bottom holes behind toe-kick panels
– Using decorative vent covers matching your hardware finish
For painted cabinets, drill before applying the final coat—touch-up paint hides any imperfections. Never drill into pipe zones; use a stud finder to map hidden obstructions first.
Maintenance Access: Designing Covers That Service Engineers Love

Boiler covers that frustrate service technicians get removed permanently. Design for one-handed access in under 30 seconds.
Avoiding Common Access Mistakes That Void Warranties
Engineers reject covers requiring tools or complex maneuvers. Your solution must allow:
– Full front access without moving cabinets
– Door opening beyond 110 degrees (standard hinges only open 95°)
– Zero obstructions to boiler control panels
For cabinet doors, install full-overlay hinges that clear adjacent units. Test access monthly—if you hesitate to open it, so will your engineer. One client lost coverage because their magnetic panel required a screwdriver for “emergency removal.”
Quick Decision Guide: Which Method Fits Your Kitchen?
Cabinet Integration vs. Paint vs. Screens – Cost and Effort Compared
| Solution | Cost | DIY Time | Best For | Ventilation Needs |
|---|---|---|---|---|
| IKEA Cabinet | $131 | 4 hours | Homeowners with standard boilers | Drill 4+ holes |
| Paint Disguise | $25 | 2 hours | Tight budgets, partial concealment | None |
| Folding Screen | $45 | 15 minutes | Renters, awkward placements | None |
Choose cabinet integration if you own your home and have standard pipework. Opt for paint disguise when budget is under $30 or the boiler integrates well with wall niches. Select folding screens for rentals or irregular boiler positions. Always prioritize the 300mm top clearance—no solution works without it.
Final Considerations Before You Start
Your boiler cover should disappear into the kitchen’s design narrative. Before cutting wood or ordering materials:
– Photograph your boiler from all angles with measurements noted
– Consult your boiler manual for model-specific clearance requirements
– Test temporary solutions (like cardboard mockups) for two weeks
Remember: the most successful concealments aren’t admired—they’re unnoticed. A properly installed cover makes guests ask, “What boiler?” not “How did you hide that?” Whether you invest $131 in a seamless cabinet or $30 in an elegant screen, never sacrifice the 300mm top clearance for aesthetics. That gap isn’t empty space—it’s your safety net. When done right, your boiler vanishes behind intentional design, proving that even necessary utilities can earn their place in a beautiful kitchen.

