
Your kitchen should be a sanctuary, not a danger zone. Yet for the 1 in 100 Americans with celiac disease, invisible gluten particles hiding in toaster slots, wooden spoon grooves, or countertop seams can trigger months of digestive pain and intestinal damage. Standard cleaning won’t cut it—gluten behaves like microscopic sand that clings stubbornly to surfaces. This guide delivers the exact protocols to transform your kitchen into a truly celiac-safe space, whether you’re creating a 100% gluten-free home or managing a shared kitchen. You’ll learn which items must be replaced immediately, the three-step cleaning method that actually removes gluten (not just disinfects), and daily habits that prevent cross-contamination before it happens.
Replace These Kitchen Items Immediately

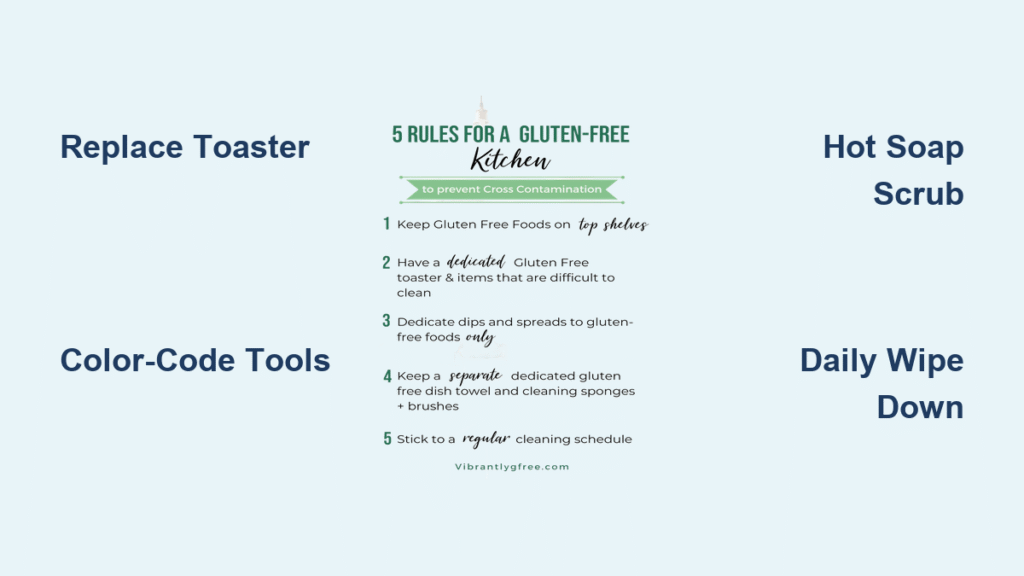
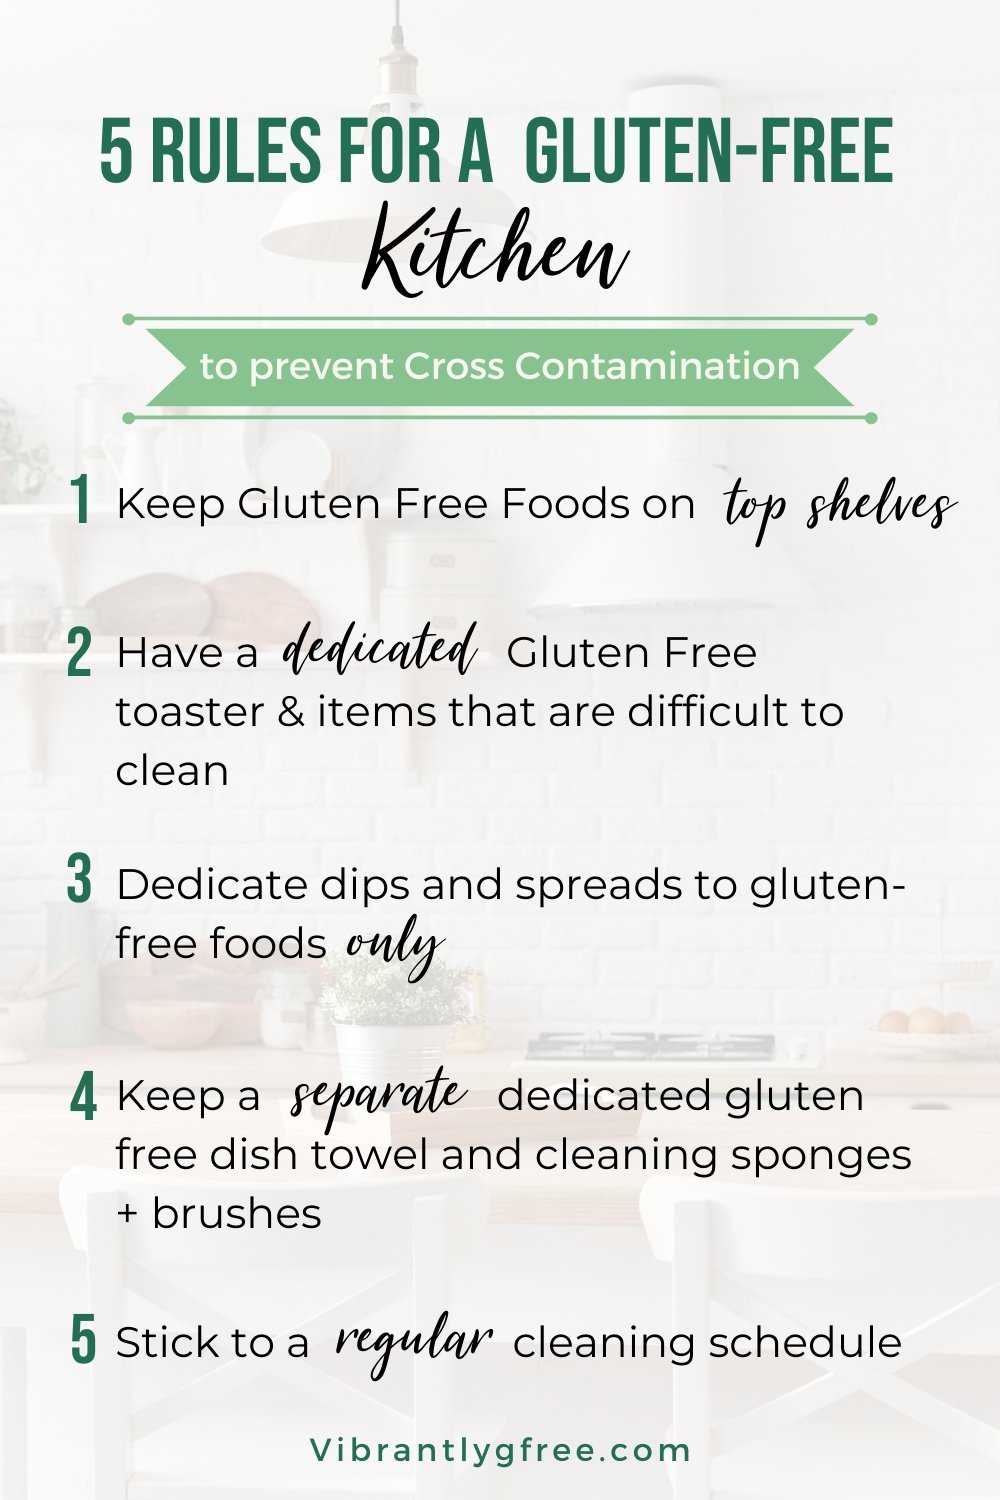
Why Your Current Toaster Is a Gluten Trap
Gluten particles embed permanently in toaster slots—no amount of shaking or vacuuming removes them. Replace your toaster today or commit to using dedicated toaster bags for gluten-free bread only. Never attempt to “clean” a standard toaster; the risk is too high.
Critical replacements for celiac safety:
– Wooden utensils and cutting boards: Porous grains absorb gluten proteins like a sponge
– Non-stick pans with scratches: Microscopic cracks trap particles permanently
– Colanders and strainers: Gluten hides in mesh holes and resists cleaning
– Plastic cutting boards with deep grooves: Switch to smooth, dedicated plastic boards
– Old sponges and dish rags: Replace with color-coded versions (green = gluten-free)
Implement a Foolproof Color-Coding System
Prevent dangerous mix-ups with visual cues:
– Green labels: All gluten-free tools, cutting boards, and storage
– Red labels: Gluten-containing items (store separately)
– Blue labels: Clean tools safe for temporary use during kitchen transition
Deep Clean Surfaces Using the Gluten Removal Protocol
Three-Step Countertop Cleaning That Actually Works
Gluten requires physical removal—not disinfection. Standard sprays spread particles rather than eliminate them. Follow this sequence every time:
- Hot, soapy scrub: Use dish soap and the hottest water possible (140°F+) to dissolve gluten’s sticky proteins. Scrub for 2 full minutes.
- Disposable wipe follow-up: Apply Lysol or Clorox wipes to break down residual proteins missed by soap. Let sit 1 minute.
- Final hot rinse: Rinse thoroughly with hot water to remove all cleaning residue.
Pro Tip: Always clean from top to bottom (shelves → counters → appliances → floors) to prevent recontamination.
Appliance-Specific Deep Cleaning Methods
Refrigerator protocol: Remove all items. Discard shared condiments (mayo, butter, jam) where double-dipping occurred. Wash shelves, drawers, and handles with hot soapy water. Don’t overlook door seals where crumbs accumulate.
Oven safety: In shared kitchens, avoid convection mode—circulating air spreads gluten particles. Clean racks, walls, and heating elements with oven cleaner, then line with parchment paper when baking gluten-free items.
Microwave critical zones: Remove turntable and splatter guard. Scrub interior walls, ceiling, and handle with hot soapy water. Wipe the door seal where crumbs hide.
Create Unbreakable Storage Zones for Gluten-Free Safety
Pantry Reorganization That Prevents Fallout Contamination

Empty every shelf before cleaning—crumbs nestle under liners and in corners. After deep cleaning:
- Store gluten-free items on top shelves: Prevents crumb fallout from gluten-containing foods above
- Use airtight containers: Transfer all bulk items (flour, cereal, spices) to labeled “GF ONLY” bins
- Install permanent shelf labels: Mark zones with waterproof “Gluten-Free” and “Contains Gluten” tags
- Never use bulk bins: Shared scoops guarantee cross-contamination
Condiment Contamination Fixes That Work
Shared jars are landmines. Immediately replace all condiments used with gluten-containing foods. Switch to squeeze bottles (ketchup, mustard, mayo) labeled “GF ONLY” with permanent marker. Store gluten-free condiments in the refrigerator’s top shelf, far from gluten items.
Daily Maintenance Rules for Shared Kitchens
Post-Meal Cleanup Non-Negotiables
After every cooking session—even when using cutting boards:
– Wipe all counters with hot soapy water (not just disinfectant)
– Sweep floors immediately to remove stray crumbs
– Store gluten-free condiments in designated zones only
– Never reuse utensils that touched gluten foods
The 10-Second Pre-Cooking Safety Check
Before starting any meal prep:
1. Scan counters for visible crumbs
2. Verify gluten-free cutting board is in use (not shared)
3. Confirm gluten-free condiments haven’t been moved
4. Check that color-coded sponges are properly separated
Emergency Contamination Response Plan
Immediate Actions When Gluten Contact Occurs
If gluten touches gluten-free surfaces or tools:
1. Discard all exposed food immediately—do not taste-test
2. Re-clean surfaces using the full three-step protocol
3. Replace sponges and dish rags used during contamination
4. Sanitize appliances that contacted gluten (microwave, oven)
5. Isolate cutting boards for deep cleaning or replacement
Build Your Gluten-Free Emergency Kit
Keep these items stocked for contamination days:
– Shelf-stable gluten-free meals (canned soups, rice cakes)
– Disposable gluten-free cookware (paper plates, foil pans)
– Travel-sized cleaning supplies (wipes, mini dish soap)
– Backup toaster bags for emergency bread needs
Long-Term Success Strategies for Celiac Safety
Monthly Kitchen Safety Audits
Schedule these checks to catch hidden risks:
– Inspect non-stick pans for scratches (replace if damaged)
– Examine cutting boards for deep grooves (sand or replace)
– Check wooden spoons for cracks (switch to stainless steel)
– Verify color-coding labels haven’t faded
Household Training That Sticks
Hold a 15-minute family meeting with:
– A visual chart showing gluten-free zones
– A demonstration of proper wiping technique
– Clear consequences for protocol violations
– Monthly refreshers on why these steps matter
Travel and Guest Kitchen Safety Protocols
Your Portable Celiac-Safe Kit
Pack these essentials in a dedicated bag:
– Mini dedicated toaster or toaster bags
– Collapsible green-labeled cutting board
– Color-coded sponge and dish towel
– Labeled utensils and squeeze condiment bottles
– Disposable foil for surface barriers
Guest Kitchen Setup in 5 Minutes
When using someone else’s kitchen:
1. Wipe all surfaces with hot water and Lysol wipes
2. Line counters and baking sheets with foil
3. Store your kit items in a visible “gluten-free only” zone
4. Bring your own cooking oil and spices
5. Never use host’s utensils for gluten-free prep
Creating a celiac-safe kitchen isn’t about perfection—it’s about consistent, actionable steps that build real safety. Start today by replacing your toaster and implementing color-coding. Within one week, establish the three-step cleaning protocol for all surfaces. By month’s end, you’ll have transformed anxiety into confidence every time you cook. Remember: gluten particles smaller than a grain of salt can cause months of symptoms, but your commitment to these protocols creates a kitchen where every meal is truly safe to eat. Keep your emergency kit stocked, perform monthly audits, and share this knowledge with anyone who cooks in your space. The peace of mind you gain—knowing your kitchen won’t betray your health—is worth every minute invested.

