
Spilled red wine, muddy dog paws, and the daily dance of pots and pans—your kitchen floor takes more abuse than any other surface in your home. Yet most homeowners pick flooring based on a single photo in a magazine or whatever’s on sale at the big-box store. That shortcut often leads to cracked tiles, warped planks, or daily regret.
This guide walks you through the exact process professional designers use to match flooring to real-life kitchens. You’ll learn which materials laugh off grape juice, which feel best under bare feet, and which choices save thousands in the long run. Discover how to choose a kitchen floor that withstands your reality while looking stunning for decades.
Durability That Survives Kitchen Warfare
Your kitchen floor faces a unique gauntlet: hot oil splatters, dropped cast iron pans, high-heeled traffic, and pet accidents. Choosing kitchen flooring requires prioritizing materials that handle moisture and impact without showing battle scars.
Why Water Resistance Determines Longevity
Kitchen spills happen daily—ignoring water resistance guarantees premature failure. Porcelain tile and luxury vinyl plank (LVP) are bulletproof options with near-zero water absorption. Porcelain’s density prevents staining, while LVP’s waterproof core laughs off flooded dishwashers. Avoid solid hardwood unless you commit to immediate spill cleanup—it swells faster than you can grab a towel.
Spot the danger zones:
– Laminate’s HDF core swells if water seeps through seams
– Unsealed natural stone (like limestone) absorbs wine in seconds
– Engineered hardwood needs ≥2mm veneer to survive refinishing after water damage
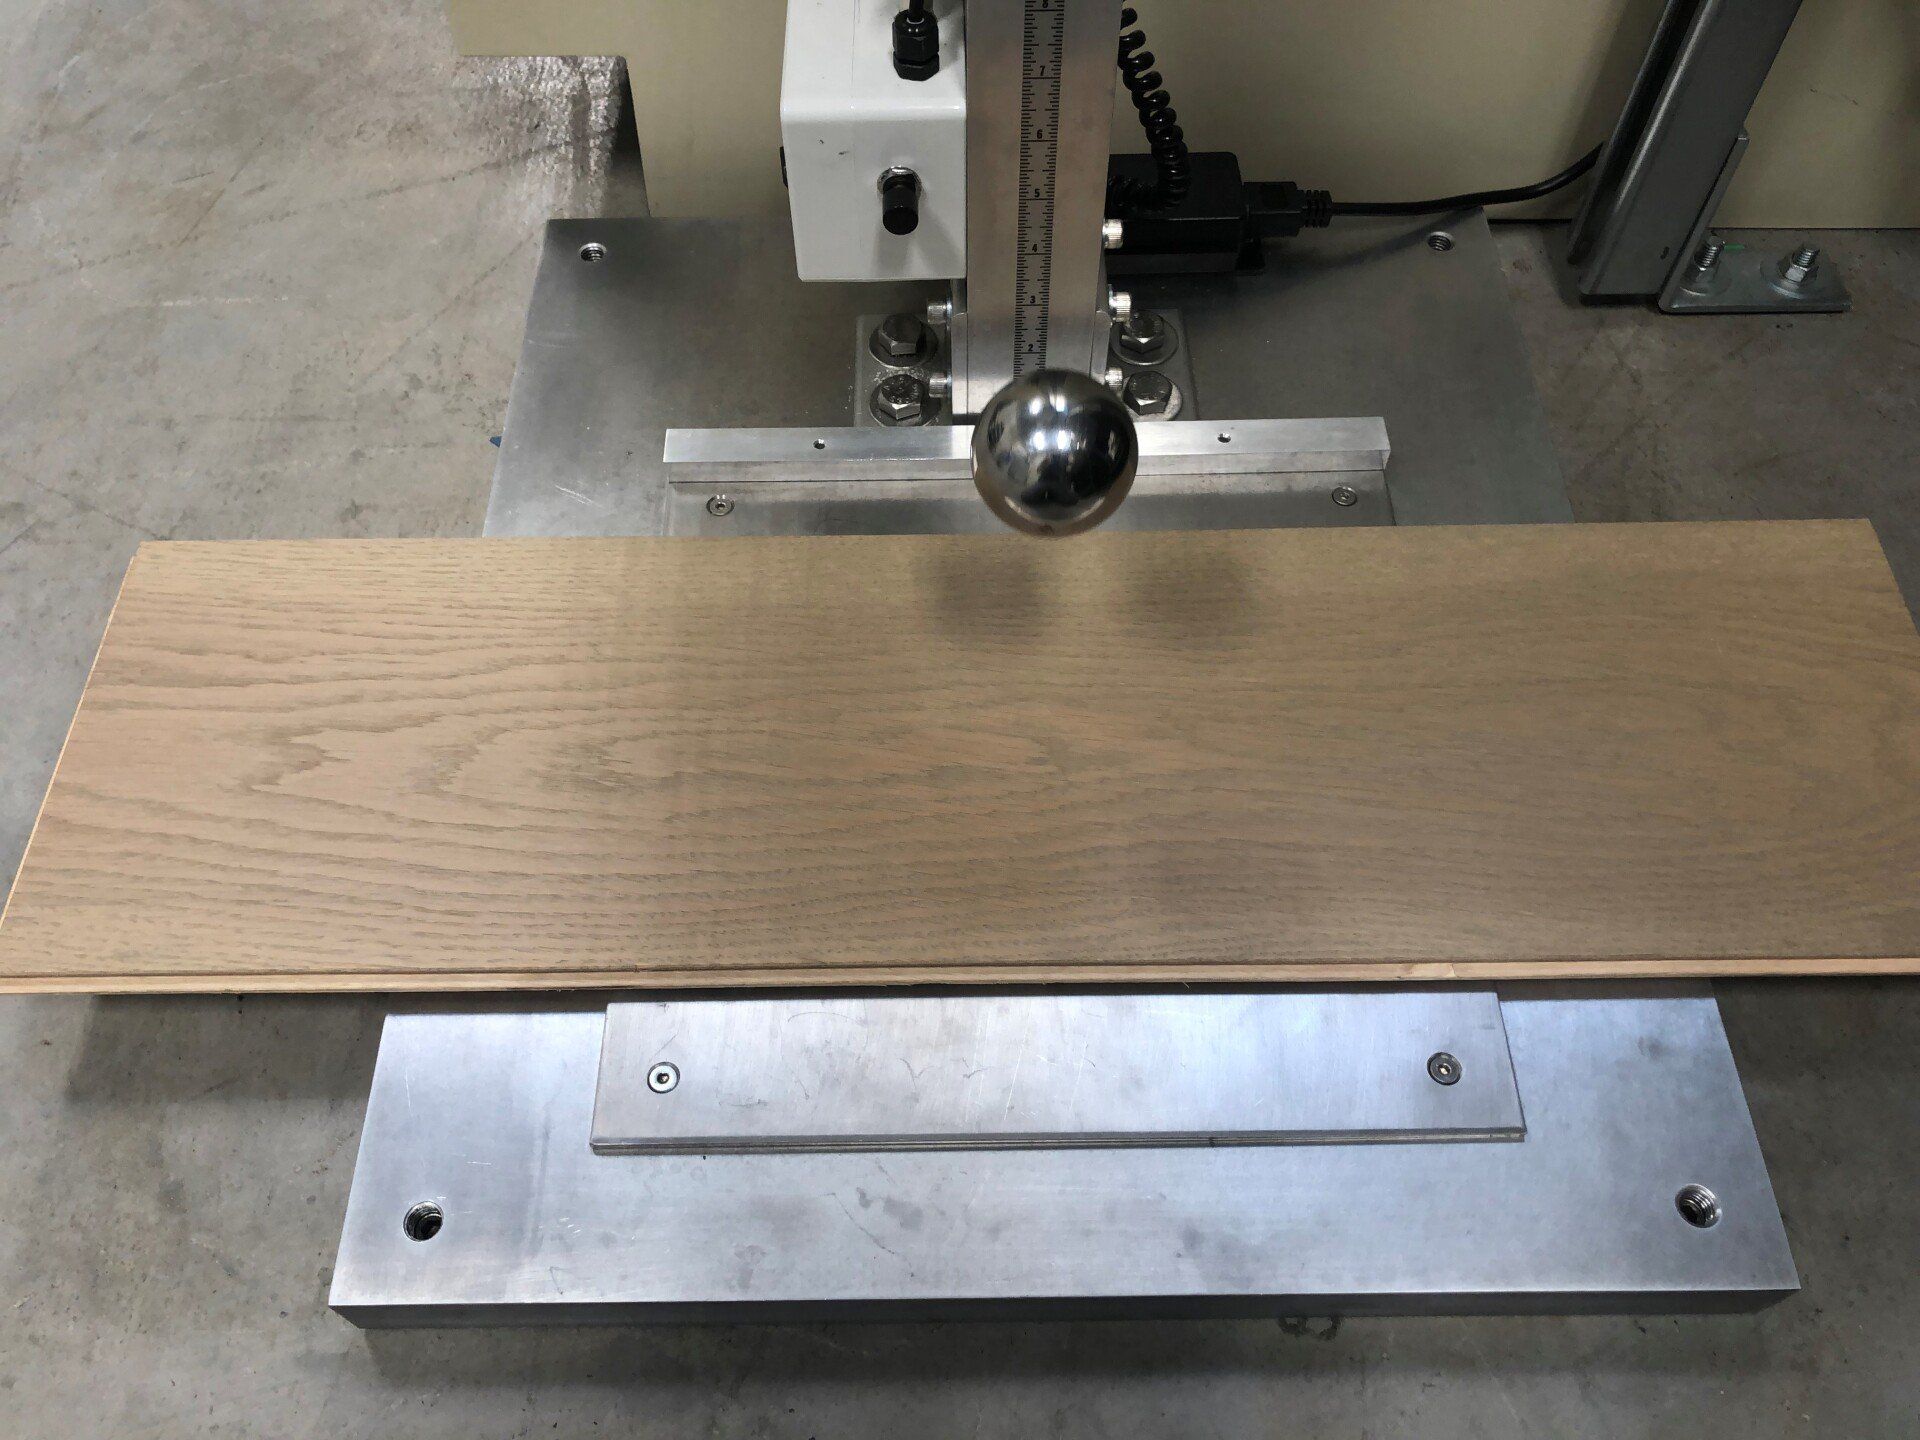
Impact Resistance: When Pots Hit the Floor
That dropped Dutch oven tests your floor’s mettle. Cork and LVP absorb shock without denting, while porcelain tile chips if heavy objects land on grout lines. For high-traffic kitchens, demand porcelain with a PEI rating of 4+—this commercial-grade durability handles rolling appliance bases without scratching. Natural stone like granite survives impacts better than marble, which cracks under pressure.
Low-Maintenance Flooring That Fits Real Life
That glossy marble Instagram photo hides a harsh truth: natural stone needs resealing every 6-12 months. Skip this step and coffee becomes a permanent fixture. Learning how to choose a kitchen floor means matching maintenance to your actual habits.
The Daily Reality Check
If you dread weekly chores, porcelain tile or LVP are your allies. Sweep and mop porcelain with zero sealing—use dark epoxy grout to hide dirt between cleanings. LVP requires only vacuuming and damp mopping with no grout lines to scrub. Meanwhile, marble demands pH-neutral cleaners and instant spill response to prevent etching from lemon juice or vinegar.
Maintenance red flags:
– Linoleum requires periodic resealing to prevent stains
– Laminate boards must be replaced if water penetrates seams
– Cork needs resealing every 3-4 years despite natural mold resistance
Comfort Underfoot: Stand Longer, Pain-Free
You’ll spend more time standing here than any room except your bedroom. Hard surfaces like tile transmit cold and cause leg fatigue within minutes, while resilient options feel warmer but may dent.
Standing Comfort Showdown
Cork wins for ergonomics with natural elasticity that reduces fatigue—ideal for meal-prep marathons. LVP with attached cork underlayment offers surprising give while staying room-temperature. Porcelain tile feels brutally cold unless paired with radiant heating (adding $8–$15/sq ft). If choosing engineered hardwood, verify it’s compatible with radiant systems to avoid warping.
Pro tip: Place anti-fatigue mats near the sink and stove—this simple move extends comfortable standing time by 40% regardless of flooring.
Smart Style Choices That Hide Daily Chaos
Stark white floors showcase every crumb; jet black reveals every dust speck. How to choose a kitchen floor that looks clean between cleanings? Prioritize colors and patterns that camouflage life’s messes.
Dirt-Disguising Color Secrets
Light-to-mid grays and warm beiges hide dust and crumbs better than pure white or black. For wood-look floors, select planks with subtle grain variation—solid colors highlight every scratch. In small kitchens, large-format porcelain tiles (12″x24″ or bigger) create seamless flow while minimizing grout lines that trap grime.
Pattern pitfalls to avoid:
– Busy cabinets need solid-color floors (not geometric tile)
– Dark floors shrink small spaces—use only in kitchens over 150 sq ft
– Glossy finishes show water spots; opt for matte or textured surfaces
DIY Installation vs. Calling the Pros
Your skill level determines whether you save money or create expensive disasters. How to choose a kitchen floor that matches your DIY confidence?
The Weekend Warrior Test
Click-lock LVP and laminate are true DIY projects—install in one weekend with basic tools. Floating engineered hardwood requires intermediate skills to handle subfloor moisture testing. But skip tile or stone unless you own a wet saw—professional installation prevents lippage (uneven tile edges) that traps dirt.
Hidden prep costs:
– Subfloor leveling adds $2–4/sq ft if uneven
– Concrete moisture testing prevents future warping
– Budget 15% extra for waste with diagonal patterns
Budget Truths Beyond the Price Tag

That $2/sq ft laminate seems affordable until water damage forces replacement in 10 years. How to choose a kitchen floor that delivers lifetime value?
Real Cost Per Square Foot
| Material | Material Cost | True 15-Year Cost |
|---|---|---|
| LVP | $3–7 | $4–8 (no maintenance) |
| Porcelain Tile | $4–12 | $6–15 (grout sealing) |
| Engineered Hardwood | $5–15 | $10–25 (refinishing) |
| Natural Stone | $15–25+ | $25–40+ (annual sealing) |
Warranty traps: Lifetime promises often exclude moisture damage (common in kitchens) and pet scratches. Always verify coverage for “normal wear”—most exclude rolling appliance damage.
Your Foolproof Selection Framework
Stop second-guessing. Use this decision tree to cut through marketing hype when choosing kitchen flooring.
Match Flooring to Your Non-Negotiables
Choose porcelain tile if:
– You have pets/kids and demand wipe-and-go cleanup
– Radiant heating is planned (tile conducts heat perfectly)
– You want lifetime durability without maintenance
Choose LVP if:
– Budget is tight but you need waterproof performance
– DIY installation is mandatory
– You want realistic wood look without hardwood’s fuss
Choose engineered hardwood if:
– Authentic wood is essential for resale value
– Your kitchen flows into living areas with wood floors
– You’ll commit to immediate spill cleanup
Never skip sample testing: Pour red wine on samples, slide chairs across them, and assess under your kitchen’s lighting. What looks warm in daylight may appear cold under LED under-cabinet lights.
Your kitchen floor isn’t just a surface—it’s the foundation of daily life. Choose wisely using these real-world criteria, and it will serve you beautifully for decades while adding tangible value to your home. Prioritize water resistance over aesthetics, match maintenance to your habits, and always test samples under actual kitchen conditions. The perfect floor withstands spilled pasta sauce today and looks just as good 15 years from now—now you know exactly how to choose a kitchen floor that delivers.

