
Picture this: Sunday morning sunlight spills across your kitchen, your family gathered in a cozy corner booth sharing pancakes without chairs scraping the floor or kids teetering on bar stools. That dead kitchen corner? It’s about to become your home’s heartbeat. How to build a corner kitchen booth transforms wasted space into an intimate dining haven—and you can complete this project in just one weekend with basic tools.
Forget expensive contractors or rigid store-bought units. This guide delivers battle-tested techniques for creating a custom booth that fits your space perfectly, with hidden storage and professional finishes. Whether you’re a beginner with a cordless drill or a seasoned DIYer, you’ll discover money-saving hacks and critical pitfalls to avoid while building a corner kitchen booth that becomes your family’s favorite gathering spot.
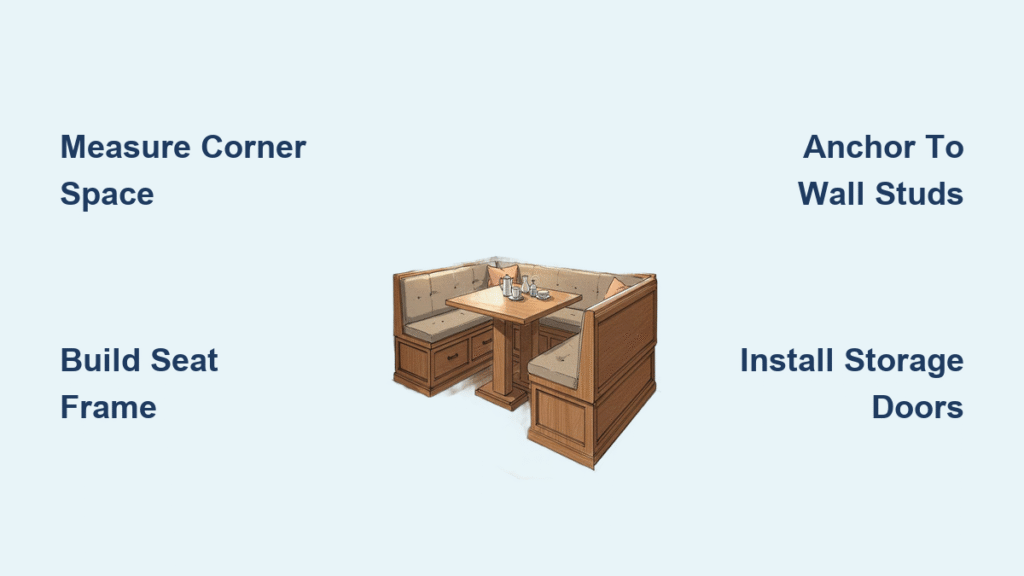
Measure Your Corner Space Before Cutting Wood
Grab your tape measure immediately—this single step prevents 90% of corner booth disasters. Stand in your chosen kitchen corner and record four non-negotiable measurements: the depth from wall to booth endpoint (typically 21-24″), the available width along both walls (accounting for baseboards), window sill height if building below windows, and traffic clearance (minimum 36″ from planned table edge).
Critical mistake to avoid: Ignoring baseboard thickness. Existing baseboards often add 2-3″ of hidden depth. Either remove them first (leaving drywall exposed for painting) or build your frame around them—never cut baseboards flush, as this creates gaps. Test your dimensions by taping the outline on your floor for 48 hours. Walk through the space during dinner prep—if you bump into the tape, adjust your design now.
Plan Seat Dimensions for All-Day Comfort
Standard dining heights fail in corner booths. For true comfort, build your seat frame at 16.5″ height before cushions (not 18″ like standard chairs). This creates the ideal 12-15″ gap between seat edge and tabletop. Seat depth must be 18-20″—less causes knee strain, more makes leaning forward uncomfortable.
Pro tip for small kitchens: Angle your backrest at precisely 10 degrees from vertical. This ergonomic tilt lets people sit closer to the table while feeling supported. Include a 3.5″ toe kick recess at floor level—this hidden space lets feet rest naturally during long meals. Sketch your final dimensions with these rules: allow 24″ width per person, and never position the table edge within 30″ of opposing walls.
Choose Between Traditional Build or IKEA Hack

Skip complex joinery with the IKEA Kallax bookcase shortcut—two $49 units form a rock-solid L-shaped base in half the time. Simply remove shelf dividers, stack units vertically, and cap with plywood. Total cost: $238 with paint and hardware. Best for renters or beginners, but limited to 30.5″ seat depth.
For custom sizing, build a traditional frame using 2×4 lumber ($400-600 total). This method accommodates awkward corners, integrates storage hatches, and supports 400 lbs per section. You’ll need basic carpentry skills but gain complete control over dimensions. Both methods require anchoring to wall studs—never rely solely on floor contact.
Gather These 7 Essential Tools Before Starting
Avoid mid-project hardware store runs with this non-negotiable toolkit:
– Table saw (or circular saw with guide rail for straight plywood cuts)
– Miter saw (for precise 10-degree backrest angles)
– Stud finder (critical for wall anchoring—skip if renting)
– Speed square (ensures 90-degree frame corners)
– 1 5/8″ deck screws (GRK Fasteners recommended for grip)
– Construction adhesive (prevents plywood squeaks)
– Painter’s tape (for layout testing)
Budget saver: Skip the brad nailer—use 1 1/4″ pocket screws instead for invisible joins. Rent a table saw from Home Depot for $40/day if you lack space.
Build the Structural Frame in 3 Critical Steps
Step 1: Construct base boxes
Cut 2×4 lumber into rectangles matching your seat dimensions minus 3.5″ for the toe kick. For L-shapes, build two separate boxes then join with 2×4 cleats. Dry-fit corners using your speed square—wobbly frames ruin everything.
Step 2: Create the toe kick recess
Rip 2×6 boards to 2.5″ height. Screw these around the base perimeter, creating that essential 3.5″ foot space. This isn’t optional—without it, legs hit the wall during meals.
Step 3: Anchor to wall studs
Locate studs every 16-24″ with your stud finder. Drive 2 7/8″ structural screws through the frame into studs. Warning: If your drywall is uneven, shim gaps with cedar shingles—never force the frame flush. Test stability by standing on the frame; if it moves, add floor anchors.
Install Platform and Backrest Without Gaps
Cut 3/4″ plywood to your frame dimensions using construction adhesive on all edges. Secure with 1 5/8″ screws every 8″, sinking heads slightly. This creates a silent, squeak-free seat surface. For the backrest, install 2×4 ledger boards 12.25″ above the seat surface along both walls.
Angle-cut vertical supports at 10 degrees using your miter saw—this ergonomic slope prevents slouching. Space supports 16″ apart, adding scrap plywood blocks between them to stop horizontal movement. Cover with 1×4 pine boards, maintaining consistent 1/8″ gaps for wood expansion.
Add Storage That Actually Gets Used
:strip_icc()/white-bench-internal-storage-0CtCdxlTqQUAprDyH__nPa-4f419d5833a54aa0b42a9d98033a2d5d.jpg)
Hinged tops beat fixed storage for accessibility. Attach 57″ plywood tops with continuous “piano” hinges along the back edge. Paint the underside before installation—it shows when opened. For heavy lids, add $20 gas struts to prevent finger injuries.
Front-access doors work better under windows. Create 12″-high hinged panels in the front facing, using magnetic catches for invisible closure. Install interior shelves at 8″ and 16″ heights—perfect for storing placemats vertically and small appliances horizontally. A 5-foot booth holds 24 cubic feet: enough for holiday dishes plus daily essentials.
Finish Like a Cabinetmaker (Not a DIYer)
Sand strategically: Start with 120-grit on raw wood, finish with 220-grit. Focus on edges where cushions rub—rough spots destroy fabric. Fill screw holes with stainable wood filler, then caulk all seams with paintable latex caulk. This creates seamless transitions between boards.
Paint for durability: Use Sherwin-Williams Infinity in Ultra White semi-gloss. Apply four thin coats instead of two thick ones—this prevents drips while building a hard-wearing surface. Sand lightly between coats with 320-grit paper. Install matching baseboard trim along the front, caulked and painted to blend with your room.
Create Cushions That Last 10 Years
Foam specs matter: Use 3.5″ thick, 1.8 lb density open-cell foam—not memory foam (it traps heat). For seat cushions, cut to 57″ × 16.5″ (adjust to your frame). Back cushions need a 10-degree angle cut—measure your actual backrest slope.
Fabric that survives real life: Choose Sunbrella Canvas in charcoal gray—it hides crumbs while feeling like linen. Avoid light colors; they show every coffee splash. Add 2″ zipper closures for removable covers. Budget $200 for DIY foam cutting and fabric, or $400 for custom-sewn cushions with piping.
Handle Outlets and Vents Safely
Never install outlets on the booth top. Instead, cut access holes in the side facing and install flush-mount USB outlets ($15 each). Use old-work electrical boxes for easy installation without drywall removal. Place two outlets per side for charging devices during meals.
For floor vents: Extend ductwork through the toe kick recess using flexible 4″ aluminum tubing. If rerouting isn’t possible, leave the booth bottom open in the vent area—this maintains airflow while hiding clutter elsewhere. Test airflow with a tissue before final assembly.
Test Weight Capacity Before Adding Cushions
Load-test your frame with 50 lb sandbags per section. Check for:
– Squeaking at wall anchors
– Visible joint separation
– Uneven seating surface
Gradually increase to 150 lbs per section (your adult test weight). Critical fix: If corners wobble, install anti-tip brackets ($8) between the frame and wall studs. Never skip this—unsecured booths can tip during use.
Maintain Your Booth for Decades
Vacuum seat crevices weekly with a brush attachment—crumbs accelerate cushion wear. Wipe painted surfaces with a damp microfiber cloth (no chemicals). Annually, tighten all frame screws and touch up paint nicks with a small artist’s brush.
Future-proof upgrades: Add LED strip lighting ($25) under the seat lip for ambiance. Install wireless charging pads in the tabletop. Replace cushion covers seasonally—navy for winter, cream for summer—to refresh your kitchen instantly.
Realistic Budget and Timeline
| Component | Traditional Build | IKEA Hack |
|---|---|---|
| Structure | $400-600 | $150 |
| Paint/Finish | $75 | $50 |
| Cushions | $200-400 | $200-400 |
| Total | $675-1,075 | $400-600 |
Time investment: Beginners need 20-25 hours over two weekends. Experienced builders complete it in 15 hours. Start Saturday morning—you’ll be serving dinner in your new booth by Sunday evening.
Your corner kitchen booth becomes the soul of your home—a place for homework, holiday feasts, and quiet morning coffees. By following these precise steps for how to build a corner kitchen booth, you’ll create a custom gathering spot that costs less than store-bought alternatives while delivering professional quality. Measure twice, cut once, and within days, that empty corner will pulse with life.

