
That stubborn coffee ring won’t budge. Raw chicken juice left behind invisible bacteria. Your once-pristine porcelain sink now looks dull and questionable. Before you reach for the bleach bottle, know this: one wrong move can permanently damage your sink or create toxic gas. The good news? With the right technique, how to bleach a kitchen sink transforms grimy basins into hygienic centerpieces—safely and effectively. Here’s exactly how to do it without costly mistakes, verified by plumbing experts and sanitation guidelines.
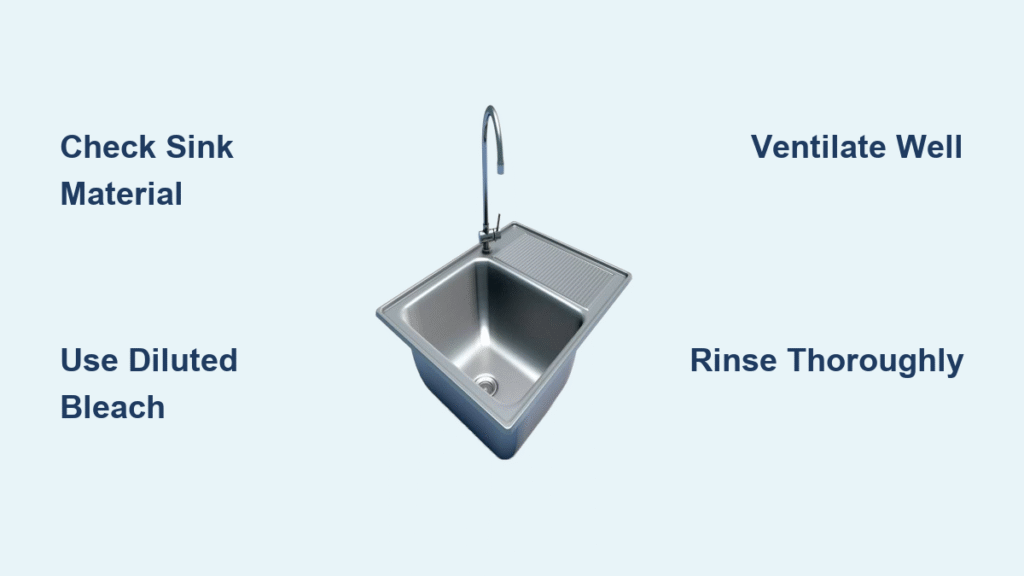
Verify Your Sink Material Before Touching Bleach
Never skip this critical step. Bleach destroys certain materials instantly, turning a quick clean into an expensive replacement. Your sink’s survival depends on this 10-second check.
Porcelain Sinks: The Only Safe Bleach Candidate
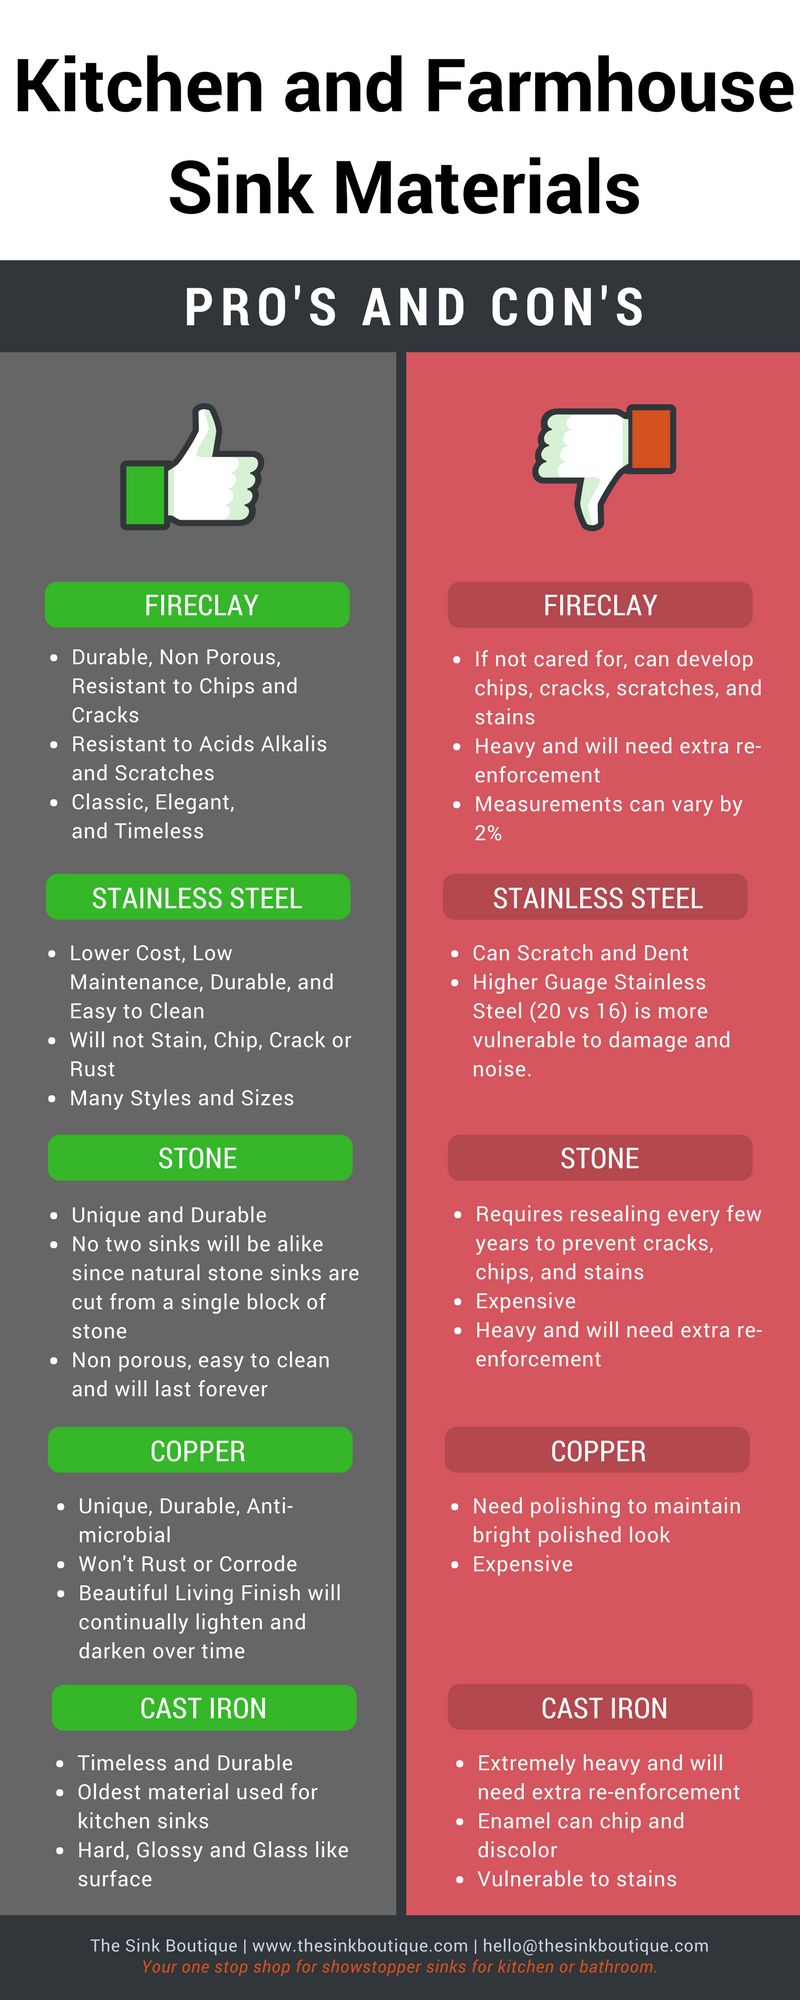
White or colored porcelain handles diluted bleach perfectly. These classic enameled cast-iron or ceramic sinks resist chemical damage when properly diluted and rinsed. Confirm by checking for a smooth, non-magnetic surface—porcelain won’t attract a fridge magnet. If your sink passes this test, proceed immediately to safety prep.
Stainless Steel Sinks: Bleach = Permanent Damage
Stop immediately if your sink attracts magnets. Bleach corrodes stainless steel within minutes, creating rust spots and pitting that require professional refinishing. For these sinks, use Bar Keepers Friend paste instead—apply with a damp sponge, scrub gently, and rinse thoroughly. Never risk bleach exposure.
Copper & Brass Sinks: Skip Bleach Entirely
These metals lose their protective coatings when exposed to bleach, triggering green oxidation that ruins their finish. Stick to gentle soap, water, and a soft cloth. For stubborn stains, make a paste of cream of tartar and hydrogen peroxide, apply for 10 minutes, then rinse.
Avoid Plumbing Disasters During Bleaching
Your sink material isn’t the only concern. Hidden plumbing can suffer irreversible damage from bleach exposure. Protect your entire system with these checks.
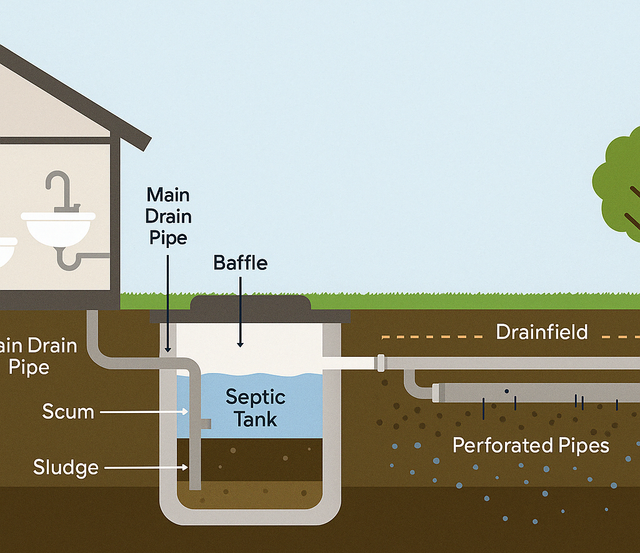
Septic System Emergency Warning
If you have a septic tank, never bleach your kitchen sink. Bleach kills the beneficial bacteria essential for waste breakdown, causing system failure within weeks. Opt for vinegar-based cleaners: fill the sink with 1 gallon hot water, add 1 cup white vinegar, let sit 10 minutes, then drain.
Pipe Material Danger Zones
Crawl under your sink now. Visible stainless-steel pipes? Do not proceed—bleach runoff will corrode them. PVC pipes become brittle over time with repeated bleach exposure. Limit bleach use to once monthly for porcelain sinks, and never exceed 10 minutes of contact time.
Gather Essential Safety Gear (Non-Negotiable)
Skipping proper equipment risks chemical burns or toxic fumes. Assemble these items before opening the bleach bottle.
Must-Have Safety Kit
- Liquid chlorine bleach (5.25-6% concentration only)
- Nitrile gloves (latex degrades instantly on contact)
- Measuring cup and tablespoon (never guess ratios)
- Dedicated bleach sponge (never reuse for dishes)
- Timer (critical for contact duration)
Ventilation Protocol That Saves Lungs
Open two windows and run your exhaust fan on high. Bleach fumes cause severe respiratory irritation—keep pets and children out of the kitchen for 2 hours post-cleaning. If you smell chlorine during prep, stop immediately and increase airflow.
Mix the Exact Bleach Solution for Your Needs
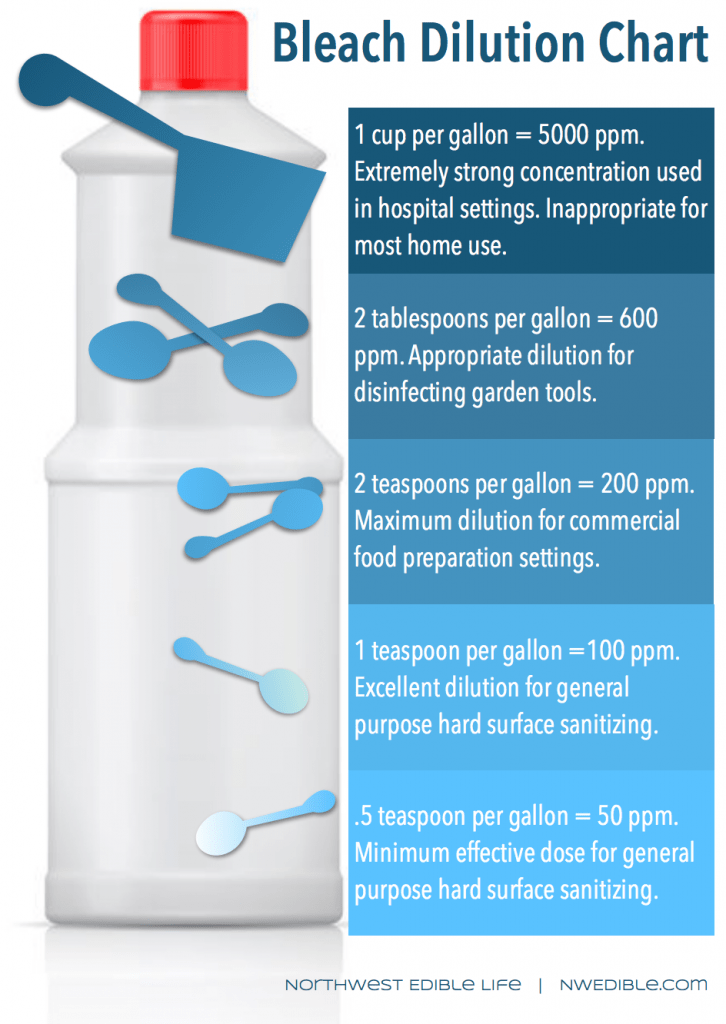
Precision matters. Too weak won’t sanitize; too strong etches porcelain. These USDA-approved ratios deliver results without damage.
Food-Safe Sanitizing Mix for Daily Use
1 tablespoon bleach + 1 gallon cool water
This ratio kills 99.9% of foodborne bacteria like salmonella and E. coli. Ideal after chopping raw meat or weekly sanitizing. Always add bleach to water—not water to bleach—to prevent dangerous splashing.
Deep-Cleaning Disinfection Mix for Viruses
5 tablespoons bleach + 1 gallon cool water
Use only for flu season or after illness exposure. Kills viruses including norovirus but requires strict 10-minute contact time. Never exceed this concentration—stronger solutions damage surfaces.
Pro Mixing Tip That Prevents Accidents
Use cool water only. Hot water releases toxic chlorine gas when mixed with bleach. Pre-measure your gallon container with a permanent marker line for quick refills.
Execute the Soak Method for Porcelain Sinks
This foolproof technique sanitizes every inch without scrubbing. Follow these steps exactly—deviations cause damage.
Step 1: Seal the Drain Completely
Test your stopper with plain water first. A leaking plug creates uneven sanitizing and wastes solution. If water drains, replace the stopper or use a rubber drain cover.
Step 2: Fill and Treat Correctly
Fill the basin ¾ full with warm water. Add ¼ cup bleach per gallon of water using your measuring cup. Swirl gently with a gloved hand—never pour bleach directly into an empty sink.
Step 3: Time Exposure to the Second
Set a timer for exactly 5-10 minutes. Longer exposure etches porcelain permanently; shorter contact won’t kill bacteria. Do not walk away—monitor constantly for leaks.
Step 4: Triple Rinse Without Fail
Drain completely, then fill with clean water and drain again. Repeat three times. Finish by running fresh water for two full minutes while scrubbing the overflow channel with a bottle brush.
Master the Wipe-Down Method for Targeted Cleaning
Use this controlled approach for quick sanitizing or avoiding drain exposure. Ideal for small households.
Prepare Your Tools Right
Mix 1 tablespoon bleach with 1 quart water in a separate container. Dip a clean sponge, wring until damp (not dripping), and start at the faucet base—bacteria concentrate here.
Apply Systematically for Full Coverage
Work outward in overlapping circles, covering:
– Faucet handles and base
– Drain edges and strainer
– Entire basin surface
– Overflow holes (use an old toothbrush)
Keep surfaces wet for the full 5-10 minutes—reapply solution if it dries.
Rinse Thrice Rule to Prevent Residue
Use a fresh sponge and clean water for three complete rinses. Any remaining bleach creates a sticky film that attracts dirt and causes cloudy spots. Dry immediately with paper towels.
Fix Common Post-Bleaching Problems Immediately
Mistakes happen—but these quick fixes prevent permanent damage.
Eliminate Lingering Chlorine Smell in 60 Seconds
Run your fingers over the sink surface. If you smell bleach or feel slipperiness, continue rinsing. The surface must feel squeaky clean. For stubborn odors, wipe with 50/50 vinegar-water solution, then rinse.
Remove Cloudy Film from Hard Water Reactions
Hard water minerals react with bleach to create cloudy spots. Apply undiluted white vinegar to a cloth, wipe the film, rinse thoroughly, and dry with paper towels. Prevent future occurrences by using distilled water in your bleach mix.
Stop Overflow Channel Odors for Good
Pour ½ cup baking soda into overflow holes, followed by 1 cup vinegar. Let fizz for 5 minutes, then flush with hot water. Do this monthly to prevent organic matter buildup.
Maintain Shine Between Bleach Sessions
Over-bleaching destroys sinks faster than grime. Follow this schedule for lasting results.
Daily Prevention Routine
Spray with 1:1 white vinegar and water solution after each use. This prevents mineral buildup and keeps bacteria below detectable levels without harsh chemicals. Dry completely with a microfiber cloth—water spots become permanent stains.
Weekly Refresh That Boosts Shine
Make a paste of 2 tablespoons baking soda + 1 teaspoon water. Apply with a soft sponge using circular motions, focusing on stained areas. Rinse thoroughly and dry. This removes light discoloration between monthly bleach treatments.
Stain Prevention You’re Missing
Place a silicone mat under dish racks and soap dispensers. These items trap moisture against porcelain, causing ring stains that bleach can’t fix. Lift and dry underneath daily.
When to Call Professionals Immediately
Certain signs indicate irreversible damage requiring expert help.
Emergency Red Flags
- Discolored pipes under the sink (blue/green = copper corrosion)
- Visible etching or pitting in porcelain surface
- Drain leakage starting after bleaching
- Strong chlorine smell persisting 24+ hours
Professional Alternatives Worth Calling For
Plumbers offer enzyme-based sanitizing treatments that eliminate bacteria without chemical damage. Ideal for septic systems or vintage porcelain sinks. Cost: $75-$120—cheaper than sink replacement.
Critical Safety Quick Reference
If Bleach Contacts Skin or Eyes
Skin: Remove gloves immediately, rinse under running water for 15+ minutes.
Eyes: Flush while holding eyelids open for 15+ minutes, remove contacts, seek emergency care.
Save Poison Control NOW: 1-800-222-1222 (program into your phone before starting).
Never Mix These Chemicals
- Bleach + Ammonia = Chloramine gas (lung damage)
- Bleach + Vinegar = Chlorine gas (respiratory failure)
- Bleach + Rubbing alcohol = Chloroform (nerve damage)
A gleaming, hygienic sink takes just 15 minutes with proper technique. Skip the material check, and you’ll face permanent damage costing hundreds to fix. Follow these steps precisely, and you’ll transform your kitchen’s focal point safely. Remember: porcelain loves bleach when handled correctly, stainless steel hates it absolutely, and your plumbing system has the final say. When in doubt, vinegar and elbow grease never fail—but for true sanitization, how to bleach a kitchen sink done right delivers unmatched results.

