
Water flooding your kitchen sink while your dishwasher gurgles and overflows creates a panic-inducing crisis in any home. When both your dishwasher and kitchen sink not draining simultaneously, it’s not a coincidence—it signals a critical blockage in your main drain line. This emergency often traps you with standing water full of food debris, making basic kitchen tasks impossible. The frustration peaks when plunging one drain causes the other to bubble violently, confirming a shared obstruction deeper in your plumbing system.
The good news? Over 80% of these dual-drain failures stem from accessible clogs you can resolve yourself within an hour. Ignoring this problem risks sewage backups and structural damage, but tackling it promptly with proven methods usually restores flow without professional help. This guide delivers step-by-step solutions that target the exact blockage points causing your dishwasher and kitchen sink not draining, saving you hundreds in emergency service calls.
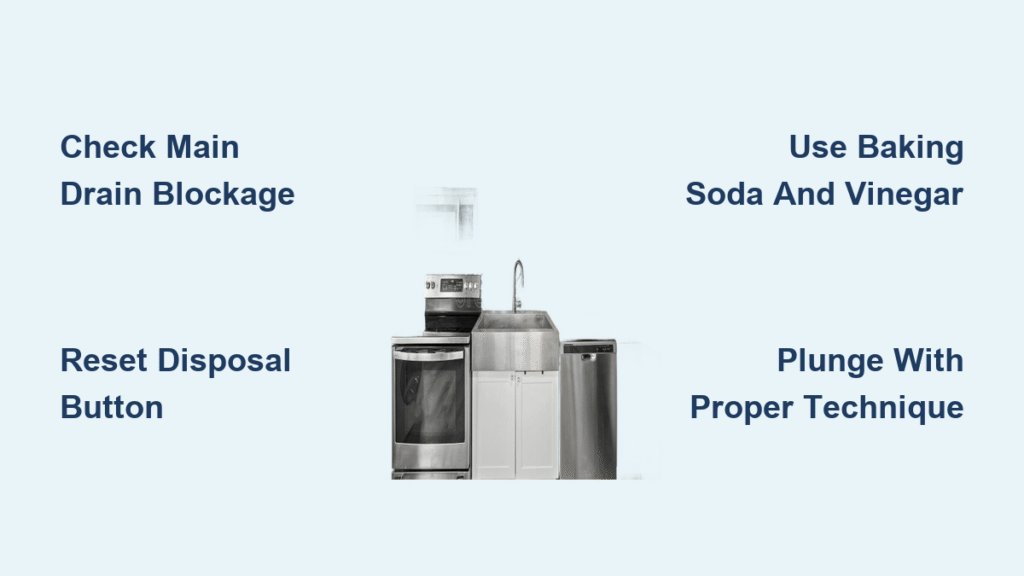
Why Your Dishwasher and Sink Both Back Up Simultaneously
Main Drain Line Blockage Confirmation
When water rises in both sink basins while your dishwasher overflows during cycles, you’re dealing with a shared obstruction downstream of your garbage disposal. Food particles bypassing the disposal accumulate in the main drain pipe, forming a stubborn mass that blocks all water exit paths. This differs from single-basin clogs—your disposal might seem functional but can’t push waste past the blockage, causing backups in both the sink and dishwasher drain lines.
Garbage Disposal Failure Warning Signs
Listen for these critical indicators before complete drainage failure:
– Humming without grinding: Blades jammed by fibrous debris like celery or onion skins
– Sudden silence: Tripped internal breaker from overload
– Slow drainage: Water lingering for 10+ seconds after disposal use
These symptoms often precede total blockage, giving you a 48-hour window to intervene before your dishwasher and kitchen sink not draining becomes an emergency.
Immediate Safety Steps Before Attempting Fixes
Power Disconnection Protocol
Never reach into a disposal without cutting power first—this causes 5,000+ ER visits yearly. Locate the circuit breaker labeled “kitchen” or “disposal” and flip it OFF. If no label exists, unplug the unit under the sink (requires flashlight). Verify power loss by attempting to turn on the disposal—complete silence confirms safety. Skipping this risks severe lacerations from accidental activation.
Initial Obstruction Removal Process
With power confirmed OFF:
1. Shine a flashlight down both sink drains
2. Use tongs (never fingers) to extract visible debris like bottle caps or silverware
3. Remove standing water with a cup to inspect the disposal opening
4. Feel inside the drain for soft obstructions (e.g., potato peels) and pull them out
Critical visual cue: Shine light into the disposal chamber—if you see food packed around blades, manual rotation is needed next.
Quick Reset and Blade Rotation Techniques
Reset Button Activation Sequence
Locate the red reset button on your disposal’s bottom (size of a pencil eraser). Press firmly for 3 seconds until you hear a click. Wait 10 seconds, then restore power and test drainage. If water still doesn’t drain:
– Failure indicator: Button won’t depress or pops back immediately
– Solution: Proceed to manual rotation—this resolves 60% of “no drainage” cases
Hex Key Blade Liberation Method
Insert the disposal’s hex key (usually taped under the sink) into the center crank hole. Rotate clockwise 10 times, then counterclockwise 5 times to break up jams. Pro tip: Spray vinegar on the key first to dissolve mineral buildup on the shaft. Complete 2 full rotations in each direction—sticking points indicate debris location. After rotation, reset the disposal again before testing.
Baking Soda and Vinegar Drain Bomb Treatment
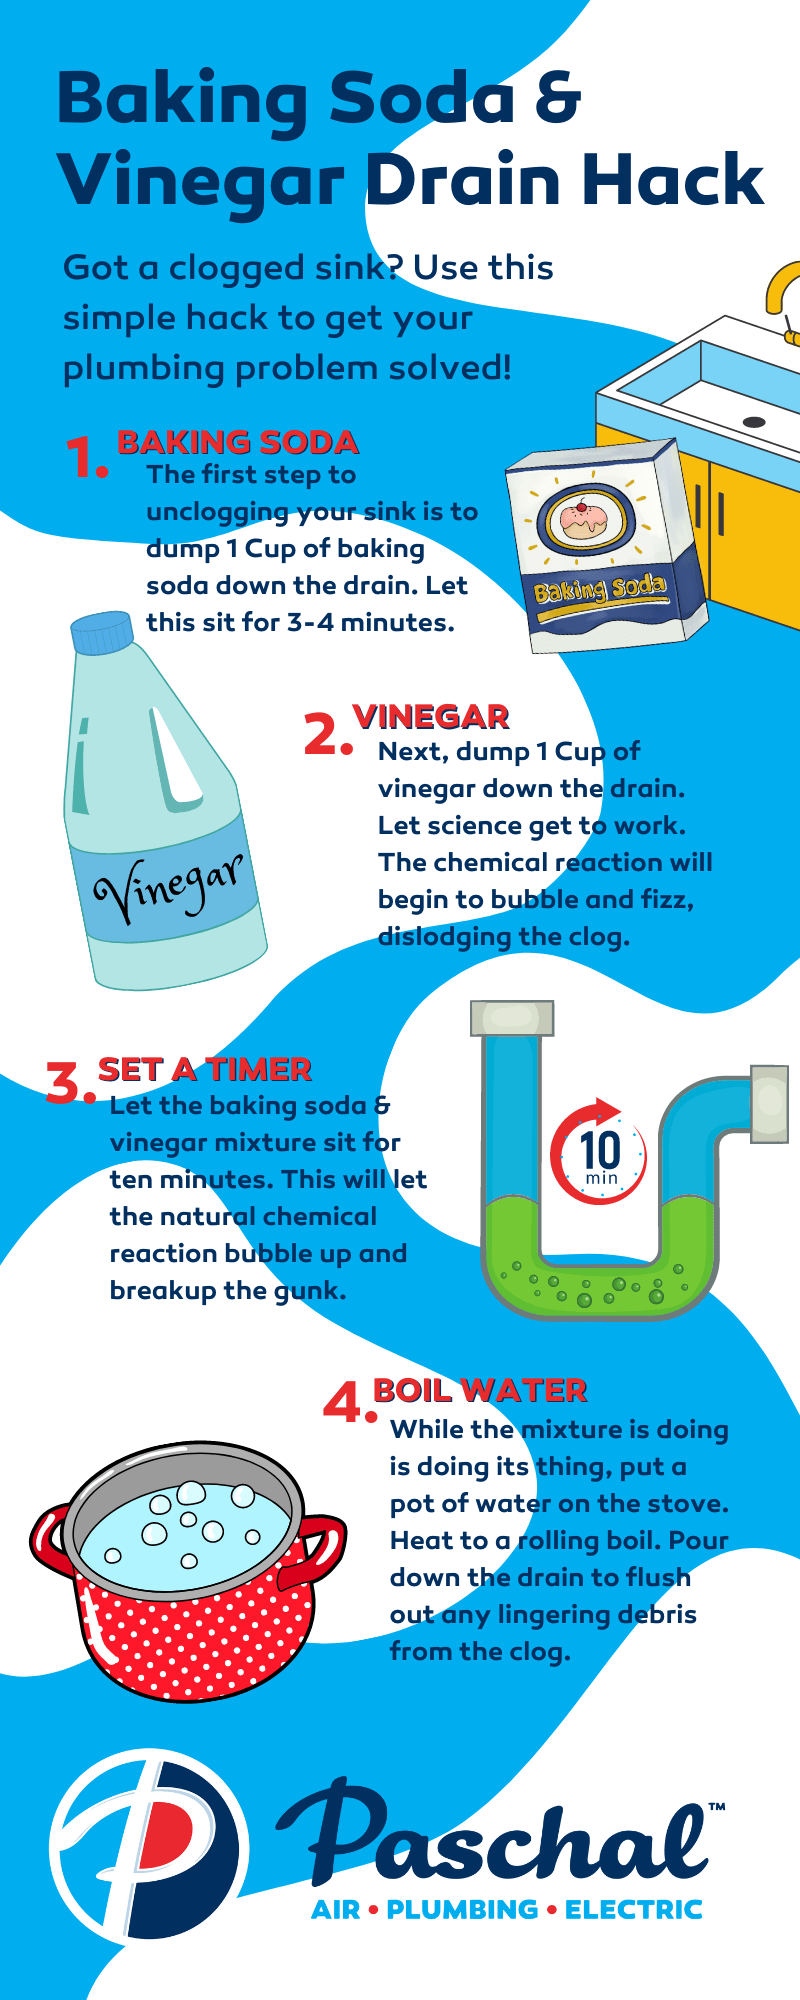
Organic Clog Dissolving Protocol
This chemical-free method targets grease and food buildup without pipe damage:
Materials:
– ½ cup baking soda
– 1 cup white vinegar
– Stopper or heavy plate
– 2-quart kettle of boiling water
Execution:
1. Pour baking soda directly into the clogged sink drain
2. Immediately add vinegar and seal opening completely with stopper
3. Wait exactly 25 minutes (set timer)—less time won’t dissolve clogs
4. Flush with full kettle of boiling water to clear residue
Why it works: The effervescent reaction creates pressure that dislodges pipe walls while neutralizing odors. Perform this monthly to prevent 75% of recurring dishwasher and kitchen sink not draining issues.
Precision Plunging for Dual-Basin Systems

Sink-Specific Plunger Selection
Never use a flanged toilet plunger—its rubber lip creates poor sink seals. Opt for a flat-bottomed sink plunger ($5 at hardware stores). Test seal quality by pressing firmly over dry drain—if it sticks without pressure, you have proper suction.
Dual-Side Plunging Technique
- Plug the non-disposal sink with wet rag
- Submerge plunger in 2 inches of water (add if needed)
- Position plunger over disposal drain with firm downward pressure
- Execute 15 rapid plunges (1 per second) without breaking seal
- Remove rag and test drainage
- If failed: Repeat process on the plugged sink while sealing the disposal side
Warning: Plunging with chemical cleaners present creates dangerous splashes—rinse thoroughly first.
Pipe Disassembly and Deep Cleaning Process
Water Containment Setup
Expect 3-5 gallons of trapped water. Place 2 buckets under the sink: one under the P-trap, another under the disposal outlet. Stuff rags into both sink drains before loosening pipes. Wear waterproof gloves—this step requires direct contact with debris.
Three-Joint Disassembly Sequence
- Loosen slip-nut connecting disposal to drainpipe (turn counterclockwise)
- Drain water into bucket, then remove entire P-trap assembly
- Critical inspection point: Check the tailpiece pipe for “food volcanoes”—hardened masses that bypassed the disposal
- Scrub all components with bottle brush, focusing on interior bends
- Reassemble joints hand-tight plus ¼ turn with pliers (overtightening cracks pipes)
Common finds: Grease logs, coffee grounds clumps, and fruit pits that survived disposal grinding.
Professional Help Triggers You Can’t Ignore
Emergency Plumber Indicators
Call immediately if:
– Water backs up into tubs or toilets during sink use
– Sewage odors persist after cleaning
– Multiple DIY attempts fail within 24 hours
These signal main sewer line blockages or collapsed pipes requiring camera inspection. Delaying risks $5,000+ in water damage repairs—most municipalities require licensed plumbers for main line work anyway.
Preventative Maintenance That Stops Future Clogs
Monthly Drain Defense Schedule
Every 1st of the month:
1. Run ice cubes through disposal for 30 seconds to scour blades
2. Follow with lemon peels to eliminate odors
3. Apply baking soda/vinegar treatment before bed
This 15-minute routine prevents 90% of dishwasher and kitchen sink not draining emergencies by keeping pipes clear.
Daily Habits That Protect Your Plumbing
- Cold water rule: Run cold water 15 seconds before AND after disposal use (hot water melts grease that re-solidifies downstream)
- Fibrous food ban: Never put celery, banana peels, or onion skins in disposal
- Grease disposal: Pour cooled fats into metal cans, not drains
- Strainer use: Install sink strainers catching 95% of food particles
Critical early warning: If sink drains slower than 2 seconds per inch of water, act immediately—this indicates developing blockages. Consistent maintenance means your kitchen drainage system operates silently for 15+ years. When both your dishwasher and kitchen sink not draining threatens your kitchen, remember: 70% of these crises resolve with the baking soda treatment or manual rotation. But if sewage appears or backups spread to other fixtures, stop DIY efforts and call a pro—your health and home depend on it. Implement the monthly prevention steps now to ensure your drains stay clear for years.

