

Your kitchen cabinets are hiding a secret weapon against pantry chaos. Instead of dreaming about walk-in storage, you can transform existing cabinetry into a high-functioning pantry system that cuts grocery waste by 30% and shaves minutes off meal prep time. Most home cooks waste precious seconds hunting for ingredients across scattered cabinets—this guide reveals how to consolidate your entire food inventory into one strategically organized cabinet bank that flows with your kitchen workflow.
By following these professional techniques, you’ll create a pantry that feels custom-designed without demolition or expensive contractors. You’ll learn exactly which cabinet location delivers maximum efficiency, how to configure shelves for your specific inventory, and budget-friendly storage hacks that prevent the “black hole” effect where food disappears until expiration. Within two hours, you’ll have a system that makes meal planning intuitive and grocery shopping precise.
Select Your Prime Pantry Cabinet Location
Skip the common mistake of scattering food storage across random cabinets. Your most efficient pantry conversion happens in the primary food-prep triangle—the zone between your refrigerator and stove. This central location minimizes wasted steps during cooking. Measure your candidate cabinets for four critical specs: adjustable shelves (non-negotiable for flexibility), 12-18 inch depth (prevents items from vanishing behind others), total volume for your household’s inventory, and accessible height without requiring constant stool use.
Identify Your Cabinet’s Storage Capacity
Before emptying a single shelf, document your cabinet’s exact dimensions and obstacles. Use a tape measure to record height, width, and depth at three points—left, center, right—to catch any irregularities. Note fixed elements like pipes or hinges that create dead zones. For standard base cabinets, expect 24-25 inches deep by 30-36 inches high; wall cabinets typically run 12-14 inches deep by 30-42 inches high. This audit reveals whether your space can accommodate 3-4 weeks of household inventory or requires incorporating secondary zones like lower cabinets opposite your fridge for cereal boxes and chip bags.
Empty and Deep Clean Your Cabinet Space
Complete Inventory and Purge Process
Remove every item from your target cabinet and sort into five essential categories: daily breakfast foods/snacks, baking ingredients, canned goods, dry goods, and specialty items. Check expiration dates on the spot—toss anything expired or stale. This purge isn’t just cleanup; it’s your inventory blueprint. Note which categories dominate your storage. If baking supplies overwhelm other categories, you’ll need deeper lower shelves. If snacks and daily oils dominate, prioritize eye-level real estate.
Refurbish Surfaces for Food Safety
With shelves removed, scrub all surfaces using a vinegar-water solution to eliminate grease and crumbs that attract pests. For wood cabinets, apply a food-safe sealant like Roxil wood waterproofing to protect against spills. Skip adhesive shelf liners—they trap moisture and become sticky traps for crumbs. Instead, use peel-and-stick vinyl with a matte finish that resists fingerprints. This step takes 20 minutes but prevents future sanitation headaches when storing open containers.
Install Adjustable Shelving for Maximum Flexibility
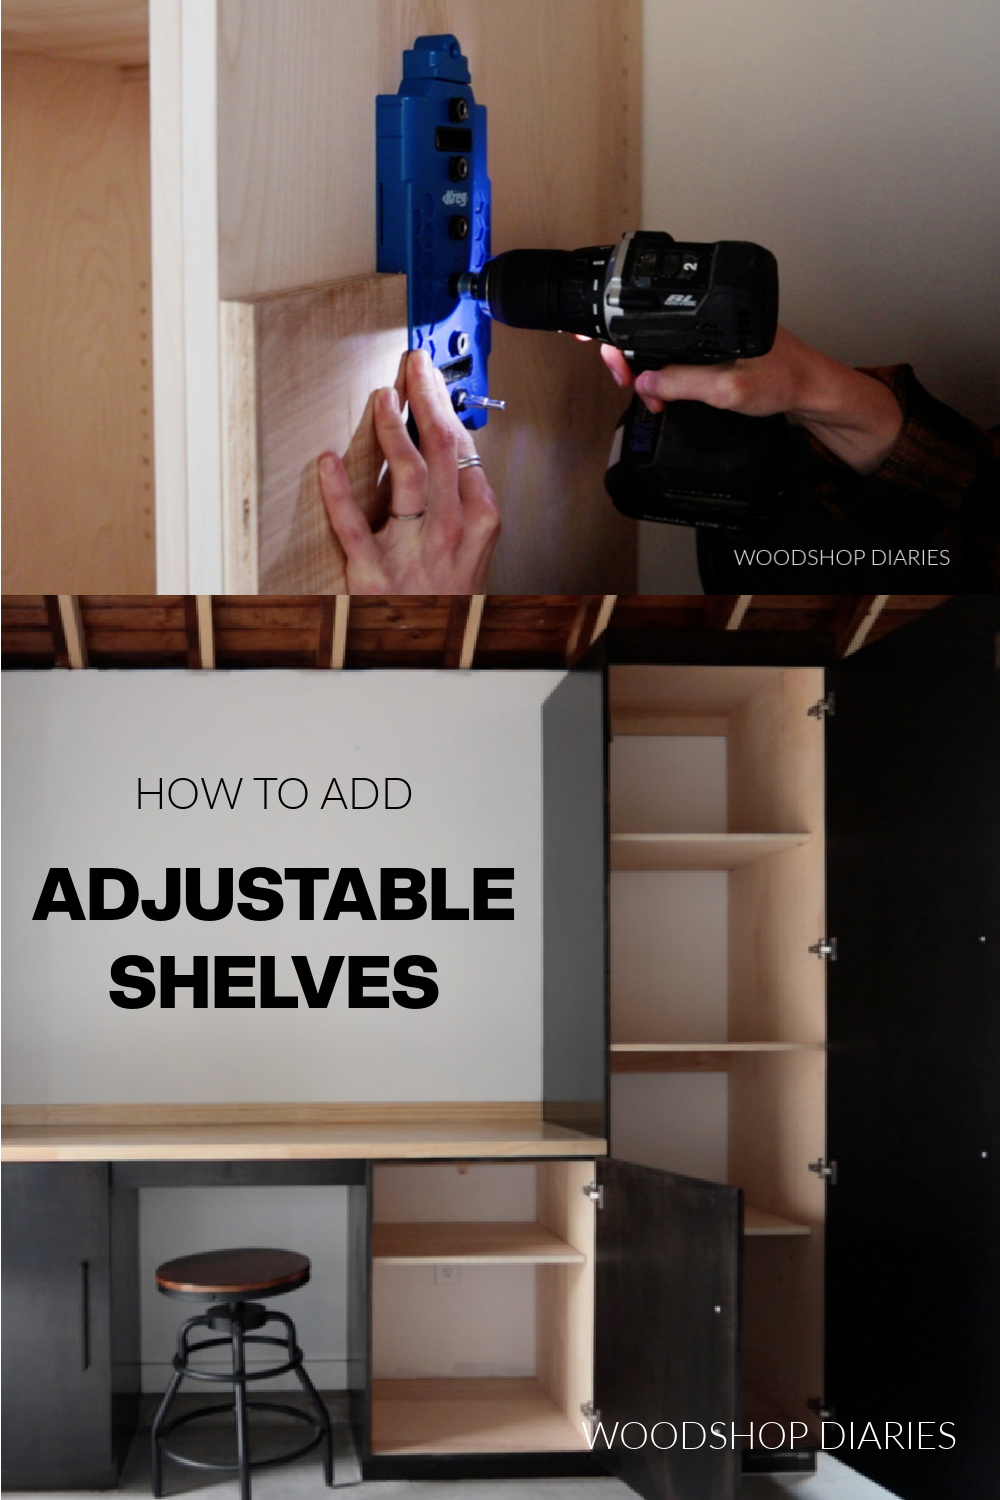
Create Your Three-Zone Shelf Configuration
Build a vertical workflow by installing shelves at strategic heights: shallow upper shelves (8-10 inches deep) for daily spices and oils, medium-depth mid-shelves (12-14 inches) for cereal boxes and canned goods, and deep lower shelves (16-18 inches) for bulk flour and sugar bags. Use heavy-duty shelf brackets rated for 50+ pounds per foot—standard brackets buckle under dense food weight. When marking bracket positions, add 1.5 inches clearance above your tallest item (like a full olive oil bottle) to prevent topples during access.
Maximize Lower Cabinet Accessibility
For base cabinets, install pull-out shelf kits—adjustable width models like Rev-A-Shelf cost $75-$120 but transform awkward deep storage. Slide-out shelves let you see every item without crawling on the floor. If budget-constrained, retrofit existing shelves with nylon roller glides ($15) to create makeshift pull-outs. Always test weight capacity with books before loading food—overloaded shelves warp within months.
Transform Cabinet Doors into Storage Powerhouses
Mount Heavy-Duty Door Organizers
Install 4-tier wooden racks on cabinet doors using wood screws (not adhesive hooks—they fail under spice jar weight). Position racks so the bottom tier aligns with your eye level when the door opens. Standard 16-18 inch wide racks fit most cabinet doors and hold 12-15 spice jars. For wall cabinets, mount turntables on doors for oils and vinegars—the rotation prevents back-row items from becoming forgotten. This single upgrade adds 25% more storage without eating interior space.
Add Motion-Activated Lighting
Clip battery-powered LED puck lights ($25) inside cabinet tops with removable adhesive mounts. Choose 3000K color temperature bulbs—they render food colors accurately unlike cool-white LEDs. Position lights to illuminate shelf edges where items get lost. Motion sensors activate when you open the door, eliminating fumbling in dim corners. This $25 investment pays off when you stop wasting expired items hidden in shadows.
Select the Right Clear Storage Containers by Category
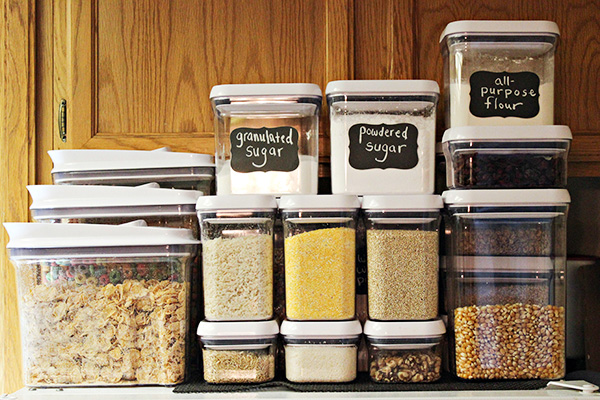
Match Containers to Your Specific Inventory
Use wide-mouth Mason jars for baking ingredients—they’re stackable and let you see flour levels at a glance. Label directly on glass with Sharpie (wipes off with soap). For cereal and pasta, choose OXO Pop containers with tall rectangular profiles that fit wall cabinet depths. Store canned goods sideways in clear handled bins—this 20% space-saver makes labels visible without pulling everything forward. Repurpose cake pans as drawer dividers for tea bags and baking chocolate; ensure pan height allows full drawer closure.
Avoid These Container Cost Traps
Skip expensive matching sets—you’ll waste money on sizes you don’t need. Instead, buy modular bins à la carte: small bins ($5) for spices, long bins ($12) for spaghetti, deep bins ($15) for bulk rice. Test containers in your cabinet before buying—many “standard” sizes don’t fit irregular cabinet depths. Always prioritize clear over decorative containers; opaque bins force you to pull items out for identification, defeating the purpose.
Organize Using a Frequency-Based Placement System
Implement the 30-Second Access Rule
Place daily breakfast items and cooking oils on eye-level shelves—you should reach them in under 30 seconds during morning rush. Store weekly-use items like canned beans on lower-mid shelves. Reserve top shelves for seasonal specialties (pumpkin pie spices) requiring step stools. Keep heavy flour bags on the floor level—never above waist height to prevent injury. This placement cuts cooking time by eliminating “ingredient hunts.”
Decant and Label in One Session
Complete a full grocery trip before organizing to ensure accurate sizing. Transfer all items from original packaging into your containers immediately—this prevents visual clutter and deters pests. Label consistently with a Cricut Smart Label maker (or printed labels) using category names like “Pasta” not specific items (“Spaghetti”). Group like items strictly: don’t mix baking chocolate with tea bags. This system prevents duplicate purchases and tracks inventory at a glance.
Avoid These 5 Costly Pantry Organization Mistakes

Critical Errors That Waste Space and Money
Over-stacking items beyond 2-deep depth creates blind zones where food expires unseen—stick to single rows for visibility. Ignoring door storage wastes 30% of potential space; those racks pay for themselves in six months. Placing frequently used items on high shelves destroys efficiency—you’ll abandon the system within weeks. Using non-food-safe containers like repurposed detergent bottles risks chemical leaching into your food.
Safety Shortcuts That Backfire
Skipping shelf bracket reinforcement causes catastrophic collapses—always use cabinet-rated brackets with at least 4 anchor points. Installing child locks after organizing invites accidents; secure heavy items during setup. Never overload shelves beyond 75% capacity—food weight compounds over time. These precautions take 15 extra minutes but prevent $200+ in replacement costs when shelves fail.
Budget-Friendly Container Solutions Under $50
Strategic Splurges and Savings
Focus your budget on high-impact items: $30 for LED lighting pays off in reduced waste, $15 for handled bins prevents step-stool dependence. Save on containers by repurposing glass food jars—rinse and remove labels with vinegar. Use existing baking pans as drawer dividers. Shop discount bins at Target or IKEA instead of buying full OXO sets. Start with essential zones (daily use and baking) and expand containers as needed—this phased approach costs under $50 initially versus $200+ for full systems.
Your converted cabinet pantry delivers professional organization without renovation chaos. Within two hours, you’ve created a system that shows exactly what you have, prevents overbuying, and streamlines meal prep. The real test comes in three weeks—when you instinctively reach for ingredients without hesitation and notice fewer expired items in your trash. For ongoing optimization, adjust shelf heights monthly based on actual usage patterns. Ready to expand? Apply these same principles to your fridge organization next—your grocery budget will thank you.

