

That comforting memory foam mat under your feet while cooking dinner has absorbed more than just your weight—it’s collected cooking grease, food splatters, and daily foot traffic that transform it from a comfort aid into a potential hazard. Unlike ordinary rugs, memory foam kitchen mats contain delicate cushioning that requires specialized cleaning techniques to maintain their supportive structure. One common mistake—tossing your mat in the washing machine—can permanently destroy the foam core, leaving you with a flat, useless piece of rubber in just one cycle.
When memory foam kitchen mats become saturated with kitchen grime, they don’t just look unsightly—they become breeding grounds for bacteria and lose their anti-fatigue properties. The good news is that with the right hand-cleaning method, you can restore your mat’s hygiene and support without costly replacement. This guide reveals the exact temperature limits, soap types, and drying methods professionals use to keep memory foam kitchen mats functional and safe for years of comfortable cooking.
Never Machine Wash Memory Foam Mats
Tossing your memory foam kitchen mat in the washing machine guarantees permanent damage. The violent agitation and high-speed spin cycle will shred the delicate foam structure, creating lumps and uneven support that actually increases fatigue. Even “gentle” cycles compress the foam beyond recovery, turning your comfortable mat into a thin, hard rectangle that offers zero anti-fatigue benefits.
The foam core simply cannot withstand the mechanical stress of machine washing—regardless of whether the surface is rubber, vinyl, or leather. After one spin cycle, you’ll notice immediate loss of cushioning as the foam breaks down internally. This isn’t just an inconvenience; uneven support can cause posture problems and increase leg strain while you’re cooking. Always stick to hand-washing techniques specifically designed for memory foam kitchen mats.
Remove Loose Debris Before Washing
Shake Out Daily Buildup
Take your memory foam kitchen mat outside and shake vigorously for 30 seconds to dislodge crumbs, dried spices, and loose dirt. Focus on corners where debris accumulates most—these particles scratch the surface during washing and accelerate wear. For mats near the stove, expect to release significant amounts of cooking grease particles trapped in the texture.
Vacuum Both Sides Thoroughly
Use your vacuum’s brush attachment to clean both surfaces of your memory foam kitchen mat. Work in overlapping passes, concentrating on textured areas where particles hide. Don’t neglect the bottom—it collects just as much debris from floor grit and pet hair as the top collects from cooking. This pre-cleaning step prevents grinding dirt into the foam during washing.
Create the Perfect Cleaning Solution
Water Temperature Sweet Spot
Heat water to 120-140°F (48-60°C)—hot enough to emulsify kitchen grease but cool enough to prevent foam damage. Test with your hand: water should feel hot but not scalding. This precise temperature range cuts through cooking oils without degrading the foam structure. Water hotter than 140°F will melt the foam, while cooler water won’t effectively remove grease.
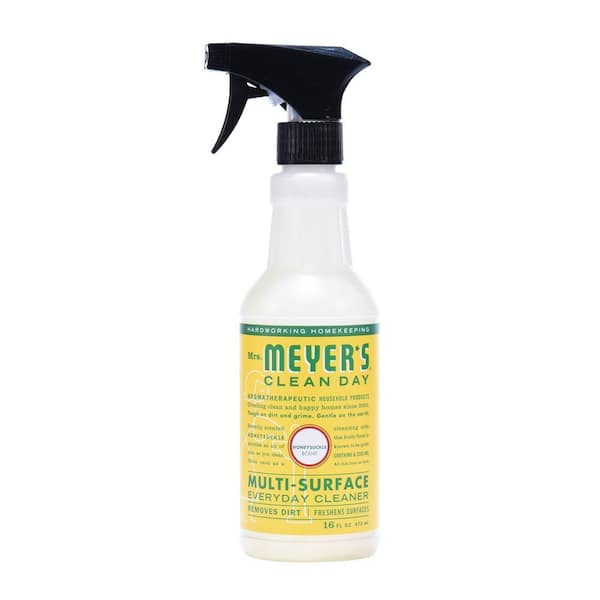
Choose Safe Cleaning Agents
Mix mild dish soap, detergent, or degreaser with pH under 9.5. Dawn Original, Simple Green, or Mrs. Meyer’s work perfectly for cleaning memory foam kitchen mats. Absolutely avoid:
– Bleach (corrodes foam structure)
– Ammonia (breaks down adhesives between layers)
– Solvents (dissolve foam)
– High-pH oven cleaners (crack surface materials)
Hand-Wash Using Proper Technique
Scrub Top Surface Methodically
Dip a soft brush or microfiber cloth in your solution and scrub in small circles, working from one corner outward. Spend extra time on high-traffic areas near the sink and stove where grease accumulates heaviest. Apply moderate pressure—memory foam kitchen mats need thorough cleaning but can’t handle aggressive scrubbing that damages the surface.
Clean Bottom Surface Completely
Flip the mat and repeat the process on the bottom. This prevents uneven wear and removes floor grime that causes premature deterioration. Kitchen floors harbor oils and chemicals that transfer to mat undersides, weakening the structure over time. Neglecting the bottom surface creates imbalance in wear patterns.
Limit Total Cleaning Time
Keep washing to 20 minutes maximum. Extended soaking saturates the foam core, making drying difficult and creating mold risks. Work efficiently—your goal is surface cleaning, not deep foam penetration. Set a timer to avoid over-soaking, which is the most common mistake when learning how to clean memory foam kitchen mats.
Rinse Until All Soap Is Gone
Use warm, clean water to remove every trace of soap residue. Any remaining cleaner creates slippery surfaces and attracts new dirt faster. Rinse both sides twice, checking water clarity each time. Run your fingers through textured grooves to confirm complete removal—these areas often hide suds that compromise safety.
Air Dry Flat for Complete Results

Select Ideal Drying Location
Lay your memory foam kitchen mat flat in a well-ventilated area away from direct sunlight. UV rays degrade foam and cause surface cracking. Avoid heat vents, radiators, and sunny windowsills. A shaded patio or laundry room with a fan provides ideal drying conditions without damaging the foam structure.
Allow Full Drying Timeframe
Give mats 24-48 hours for thorough drying. Foam retains moisture deep inside—surface dryness doesn’t indicate complete drying. Test by pressing firmly—if you feel any dampness, it needs more time. Using a damp mat traps floor moisture and breeds bacteria, creating health hazards in your kitchen.
Never Rush the Drying Process
Rolling, folding, or storing damp mats creates permanent creases and mold growth. The foam structure weakens when compressed while wet, leading to uneven cushioning. Wait until completely dry before returning to kitchen use—this patience preserves your investment and ensures safety.
Establish Your Cleaning Routine
Weekly Deep Clean Schedule
Most home kitchens need thorough cleaning weekly to prevent grease buildup. This consistent maintenance prevents stains from setting and makes each cleaning session faster. Mark your calendar—cleaning memory foam kitchen mats regularly beats intensive restoration every few months.
Increase Frequency for Heavy Use
Cook daily or have pets? Clean your memory foam kitchen mats 2-3 times weekly. Pet hair and dander accumulate quickly, while daily cooking creates more grease and food debris. Commercial kitchens require daily cleaning due to constant use—your home kitchen deserves similar attention if heavily used.
Spot Clean Spills Immediately
Address wine, oil, or sauce spills the moment they happen. Fresh stains lift easily with dish soap and warm water. Keep a spray bottle with mild soap solution handy near your kitchen mat. Blot—don’t rub—to avoid pushing liquids deeper into the foam. Set-in stains may require multiple cleaning cycles and could become permanent.
Recognize When Replacement Is Necessary

Physical Damage Warning Signs
Replace mats showing cracks, tears, or surface separation. These create tripping hazards and expose foam to liquids that accelerate deterioration. Even small tears spread quickly under foot pressure—don’t wait until your memory foam kitchen mat becomes a safety risk.
Cushioning Loss Indicators
When your mat feels flat or hard, the foam has compressed permanently. Test by kneeling—original mats provide 1-2 inches of give. If you feel the floor through the mat, replacement time has arrived. No amount of cleaning will restore lost cushioning.
Extend Mat Lifespan With Smart Habits
Rotate Mats Every Two Weeks
If you have multiple mats, rotate their positions to ensure even wear. Kitchen work areas create specific wear patterns—rotating prevents premature failure in high-traffic zones. This simple habit can double the lifespan of your memory foam kitchen mats.
Store Properly When Not in Use
Roll mats loosely for storage—never fold. Folding creates permanent creases that weaken structural integrity. Store in cool, dry locations away from heat sources and heavy objects. Proper storage maintains your mat’s shape until you need it again.
Troubleshoot Common Cleaning Problems
Eliminate Lingering Odors
For persistent smells after cleaning, mix a stronger degreaser solution and scrub thoroughly. Increase drying time to 48-72 hours in maximum ventilation. If odors remain after multiple attempts, bacteria has penetrated too deep—replacement becomes necessary for kitchen hygiene.
Remove Stubborn Grease Stains
Heat your cleaning solution to the maximum 140°F. Apply directly to grease spots and let sit 5 minutes before scrubbing. Repeat up to 3 times for set-in stains. Avoid stronger chemicals that damage foam—patience with proper technique yields better results than harsh chemicals.
Prevent Future Slips
Ensure complete soap removal during rinsing—residue creates slippery surfaces. Verify 100% dryness before use. Check kitchen floor for moisture before replacing mat each time. A properly cleaned and dried memory foam kitchen mat actually reduces slip risks when maintained correctly.
Key Takeaway: Your memory foam kitchen mat’s longevity depends entirely on proper cleaning techniques. Hand-wash with mild soap in warm (not hot) water, never machine-wash, allow complete air drying, and replace when cushioning fails. By following these specific methods for cleaning memory foam kitchen mats, you’ll maintain both comfort and safety in your kitchen workspace for years. Start implementing these techniques today—your back, your safety, and your kitchen hygiene will thank you.

