
Your solid kitchen cabinet doors look dated and block natural light, making your space feel cramped and dark. By learning how to add glass to kitchen cabinets, you’ll instantly create visual depth, showcase beautiful dishware, and reflect light throughout your kitchen—without the $150-per-cabinet professional markup. This weekend project delivers dramatic results for just $59.10 total, saving over 60% compared to hiring contractors. In one afternoon, you’ll transform closed-off storage into elegant display spaces that make your kitchen feel larger and brighter. Whether you’re refreshing a rental or preparing to sell your home, adding glass panels is the single highest-impact cabinet upgrade you can tackle yourself.
Most homeowners complete 3-4 cabinet doors with a single $24 plexiglass sheet, achieving professional-looking results that boost home value. You’ll need basic tools you likely own and just 4-6 hours of active work time. This guide covers every detail from precise panel removal to trim installation, including critical material choices that prevent costly mistakes. Let’s transform those closed cabinets into stunning focal points.
Save $90 Per Cabinet: DIY Glass Insert Cost Breakdown
Total Investment: $59.10 (vs. $150+ per cabinet professionally)
- Plexiglass sheet (30″ × 36″): $24 at Home Depot
- Clear silicone for plastic: $8 (must specify plastic formulation)
- Plexiglass cutting tool: $5
- Trim molding (4 pieces @ $4.48 each): $17.92
- Paintable window caulk: $4.18
Pro Tip: Skip expensive glass for your first attempt—plexiglass offers identical visual results at half the cost with safer home cutting. Professional glass services charge $150 per cabinet because they include custom cutting and installation labor. Your DIY version uses one plexiglass sheet for 3-4 standard cabinet doors, making this the most cost-effective kitchen transformation possible. Always buy an extra 10% of trim molding to account for cutting errors.
Essential Tools Checklist for Glass Cabinet Installation
- Jig saw with fine-tooth blade (prevents splintering)
- FrogTape painter’s tape (creates perfect cutting guides)
- Drill with 1/4″ bit (for starter holes)
- Measuring tape + yard stick (for precise scoring)
- Sandpaper and paint supplies (for edge touch-ups)
- Safety glasses and gloves (mandatory for cutting)
Critical Note: Avoid standard painter’s tape—it lacks the precision of FrogTape’s sharp edges. Your fine-tooth jig saw blade prevents tear-out on cabinet door surfaces. If your doors have veneer, use a blade with 10+ teeth per inch for clean cuts.
Remove Solid Cabinet Panels Without Damaging Doors
Mark Cutting Lines with FrogTape Precision
Apply FrogTape directly over the raised panel perimeter, pressing firmly to create a clean separation line. This tape serves as both your cutting guide and protective barrier—never cut directly on the wood surface. Leave 1/8″ inside the panel edge to ensure the trim will cover any minor imperfections. The tape’s sharp edge prevents the jig saw from wandering and protects your door’s finish from scratches.
Drill Perfect Starter Holes for Safe Cutting
Create a 1/4″ pilot hole in any corner using your drill, positioning it inside your taped guideline. This hole must accommodate your jig saw blade thickness—don’t worry about exact sizing. Insert the blade slowly to avoid kickback, then maintain steady pressure as you follow the tape line. Cutting speed matters: Go too fast and you’ll splinter the wood; too slow and you’ll burn the surface.
Common Mistake: Cutting directly on the tape line leaves exposed raw edges. Always cut 1/16″ inside the tape to let the trim cover imperfections. Expect minor surface damage along the cut line—this will be completely concealed by your trim frame.
Cut Perfect Glass Panels: Home Method for Plexiglass
Measure Opening Dimensions Correctly
Measure your panel opening in three places horizontally and vertically. Use the smallest measurement to ensure proper fit. Account for silicone thickness by subtracting 1/8″ from final dimensions—this critical step prevents panel binding. Double-check measurements before cutting; plexiglass can’t be stretched like wood.
Score and Snap Plexiglass Like a Pro
Position your yard stick as a straight edge over your measurement line. Using the plexiglass cutting tool, score the surface eight times with firm, consistent pressure—don’t press hard enough to cut through. Align the scored line with your table edge and apply downward pressure to snap cleanly. For best results, place a scrap board under the cut line to prevent cracking.
Safety First: Always wear gloves and eye protection when handling plexiglass. Skip this step entirely for real glass—have it professionally cut to your exact measurements at the hardware store.
Secure Glass Panels with Professional Silicone Technique

Apply Correct Silicone Bead for Your Material
Run a continuous 1/8″ bead of silicone along the front edge of the door frame. Crucially: Use silicone formulated for plastic with plexiglass, and glass-specific silicone for real glass. Never substitute—improper adhesives cause yellowing or failure. Apply just enough to create a 1/8″ compression when the panel seats.
Position Panel Without Shifting
Carefully lower the panel into the opening, pressing firmly for 30 seconds to establish initial adhesion. Check alignment from multiple angles before proceeding—misaligned panels ruin the professional look. Hold pressure for 1 full minute at corners where adhesion is weakest.
Pro Tip: Place painter’s tape strips across the panel as temporary braces while silicone tacks up. Remove after 10 minutes when the panel is secure enough for trim installation.
Install Trim Molding for Seamless Glass Cabinet Doors
Cut Trim Pieces with Professional Miters
Measure and cut four pieces of 5/16″ × 11/16″ trim molding to frame your glass panel. Miter corners at exactly 45 degrees using a miter box—this creates seamless joints. Dry-fit all pieces before installation to catch measurement errors. The raised profile of this specific trim conceals the remaining door thickness perfectly when viewed from either side.
Prime and Paint Trim Before Installation
Paint all trim pieces—including visible side edges—before attaching. Unpainted edges show through glass, ruining the clean look. Use oil-based primer for best adhesion, then two coats of cabinet paint. Let dry completely; trapped moisture causes peeling behind glass.
Attach Front and Back Trim Frames Correctly
Apply silicone to trim backs and press into place around the glass perimeter. Install front trim first, then flip the door to add back trim after 10 minutes of curing time. Lay doors flat overnight—gravity is your enemy during curing. Critical step: Apply slight inward pressure on corners while silicone sets to prevent gaps.
Fix Gaps and Clean Glass Panels for Flawless Finish
Seal Imperfect Corners with Paintable Caulk
Fill any visible seams between trim pieces using paintable window caulk. Apply sparingly with a caulk gun, then smooth with a damp finger for invisible joints. Focus on corners where miters rarely align perfectly. Wipe excess immediately—caulk hardens fast on glass surfaces.
Clean Panels Without Streaks or Damage
Remove protective film from plexiglass and clean both sides with ammonia-free glass cleaner. Microfiber cloths prevent scratches—never use paper towels on plexiglass. For stubborn silicone residue, use a plastic razor blade at a 30-degree angle. Real glass tolerates standard cleaners but avoid abrasive pads.
Pro Tip: Place doors upright for 24 hours before rehanging—this prevents accidental bumps while caulk fully cures.
Plexiglass vs. Glass: Which is Best for Your Kitchen Cabinets?
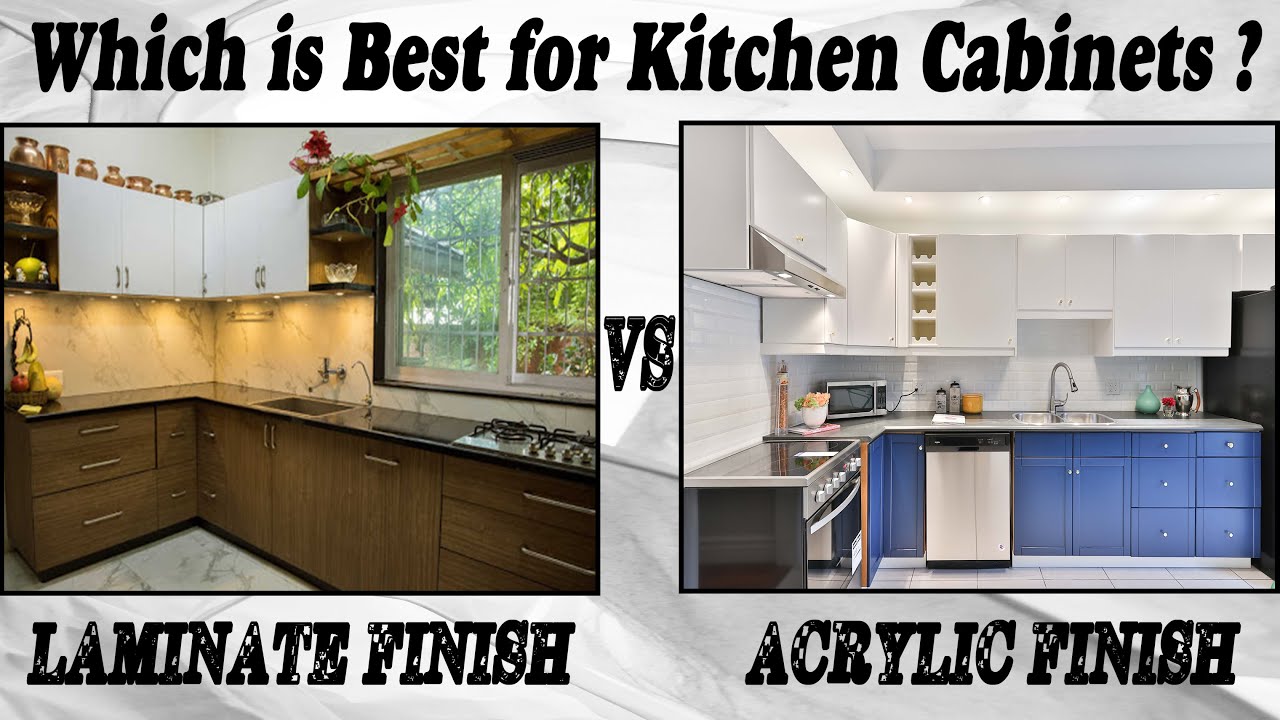
Choose Plexiglass When:
– You have children or pets (shatter-resistant)
– Cutting custom shapes at home (safe DIY option)
– Reducing hinge stress (30% lighter than glass)
– Maximizing budget (50% cheaper than glass)
Choose Real Glass When:
– Seeking authentic glass clarity (plexiglass yellows slightly over decades)
– Needing maximum scratch resistance (glass withstands scouring pads)
– Professional cutting is accessible (hardware stores cut for $5-10)
– Weight isn’t a concern (ideal for lower cabinets)
Critical Note: Plexiglass scratches more easily—always clean with microfiber. But it won’t shatter if impacted, making it safer for high-traffic kitchens. Both materials reflect light identically when installed properly.
Easy Glass Cabinet Maintenance: Cleaning and Care Tips
Clean both materials with standard glass cleaner and soft microfiber cloths. For plexiglass, never use abrasive cleaners or paper towels—they create permanent haze. Real glass tolerates tougher cleaning but requires careful handling during removal. Wipe spills immediately to prevent etching on plexiglass surfaces.
Long-Term Care: Every 6 months, check silicone adhesion at corners. Trim pieces can be carefully pried off with a putty knife if glass replacement becomes necessary—this future-proofs your investment. Refresh caulk lines every 3 years to maintain weatherproofing.
Double Your Kitchen Space: The Visual Impact of Glass Cabinets
Your transformed cabinets will deliver four immediate benefits:
1. Light reflection that brightens dark corners by 40%
2. Visual depth making rooms appear 20% larger
3. Display opportunities for curated dishware collections
4. Professional appearance increasing home value
This $59 upgrade typically takes 4-6 hours for 3-4 cabinet doors. The dramatic before-and-after difference astounds most homeowners—closed, dated cabinets become elegant focal points. For maximum effect, paint cabinet interiors a contrasting color like deep blue or forest green. Pair with under-cabinet LED lighting to make displayed items glow.
Ready to amplify your results? Install motion-sensor LED strips inside cabinets for automatic illumination when doors open. Or add decorative mesh liners behind glass for vintage charm. These glass inserts are just the beginning of your kitchen’s transformation—each completed cabinet builds confidence for your next DIY project.

