

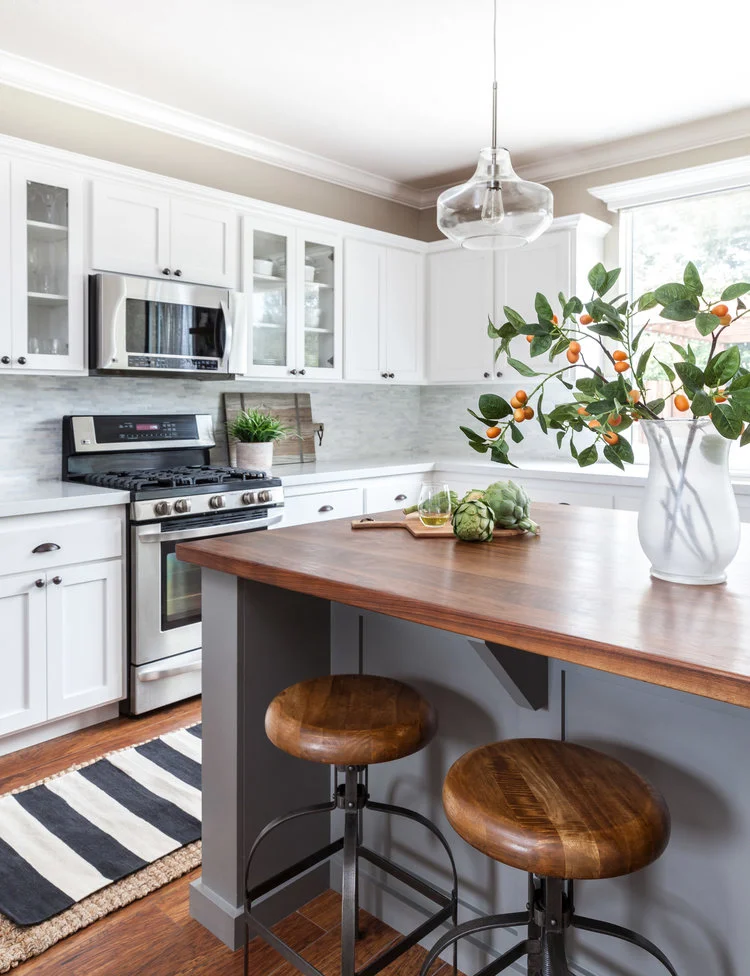
That cramped counter space where chopping boards compete with coffee makers? A well-chosen kitchen cart solves this daily frustration while adding prep room, storage, and serving capacity. Yet 68% of buyers regret their purchase within months because they overlooked critical sizing and material factors. Stop guessing—this guide delivers exact measurements, material comparisons, and storage configurations proven to transform your cooking workflow. You’ll learn how to match cart specifications to your actual kitchen movements, avoid plastic caster disasters, and select surfaces that handle your cooking intensity.
Measure Your Space Before Browsing Models
Calculate Maximum Cart Dimensions Using Clearance Rules
Grab your tape measure immediately—this prevents the #1 cart regret: blocking cabinet doors. You need 36 inches of clearance on all sides for safe movement and cabinet access. Measure your longest wall, then subtract 72 inches (36 inches for each side). The result is your absolute maximum cart length. For apartments or galley kitchens, prioritize narrow carts between 18-24 inches wide that tuck completely under existing counters when not in use. Never skip this step; a cart that fits “on paper” often impedes your natural workflow path.
Match Counter Height Within 4 Inches
Your cart surface must align with existing counters within a 4-inch tolerance. Measure your current counter height—standard ranges from 34-36 inches but varies in older homes. A 5-inch difference creates constant bending or reaching during food prep. If multiple household members cook, seek telescoping legs adjustable between 34-38 inches. This flexibility accommodates both tall chefs and shorter bakers without ergonomic strain during extended prep sessions.
Select Countertop Materials Based on Your Cooking Style
Hardwood vs. Stainless Steel: Performance Breakdown
Your surface material dictates daily usability. Solid hardwood (oak or maple) handles moderate chopping for 20-30 years but requires oiling every 6-12 months. It tolerates heat up to 300°F—ideal for rustic kitchens where aesthetics matter. For serious cooks, stainless steel withstands 500°F+ temperatures and survives commercial use with simple wipe-downs. It’s the only surface that won’t stain from tomato sauce or resist knife scratches during heavy prep. Marble excels for pastry work with its naturally cool surface but demands annual sealing. Butcher block offers the best cutting experience but needs monthly mineral oil treatments to prevent warping.
Frame Construction Determines Lifespan
Look beyond the surface—frame quality makes or breaks durability. Solid wood frames with 1.5-2″ thick legs and mortise-and-tenon joints support 300+ pounds, handling stand mixers and cast iron collections. Metal frames must have 1.2-1.5mm wall thickness with powder-coated finishes to resist scratches. Avoid particleboard carts (common under $200) in cooking zones; their 50-80 pound weight limit fails when holding appliances, and moisture exposure causes irreversible swelling.
Configure Storage for Your Specific Workflow
Optimize Drawer Depths for Daily Tasks
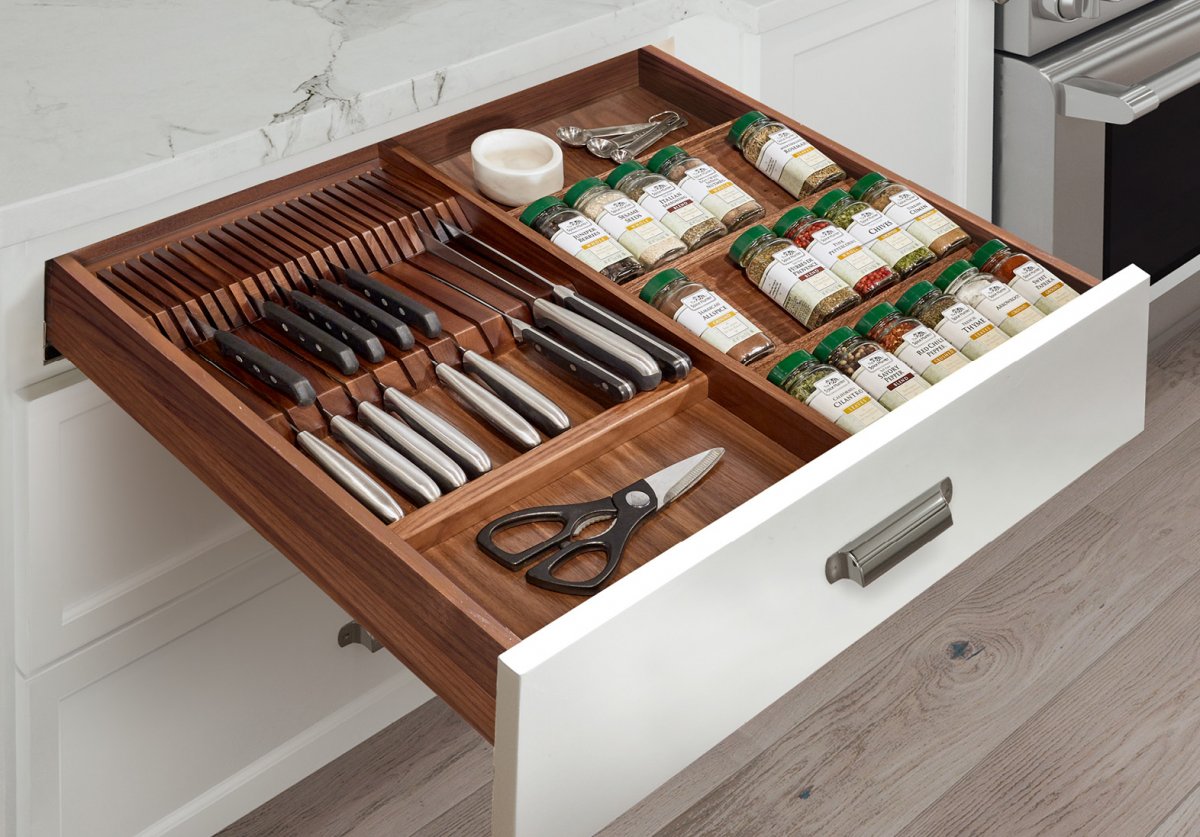
Shallow 3-4″ drawers organize utensils and spices within arm’s reach during cooking. Deep 8-12″ drawers swallow pots, pans, or food processors—critical if cabinet space is limited. Prioritize soft-close, full-extension slides rated for 100 pounds; they prevent dropped drawers when loaded with heavy Dutch ovens. Standard slides (50-pound capacity) sag prematurely under real kitchen loads.
Plan Shelf Loads Based on Contents
Fixed shelving handles 75-100 pounds per shelf—perfect for heavy appliances like mixers. Adjustable pin-hole systems drop to 50-75 pounds per shelf but offer flexibility for changing needs. Open shelving displays frequently used items but creates visual clutter; add cabinet doors if you entertain often. For specialty storage, integrate a three-tier spice rack (holds 15-20 jars) or built-in knife block (8-12 slots) directly into your cart design.
Choose Casters That Survive Real Kitchen Use
Identify Industrial-Grade Wheel Specifications
Never settle for plastic casters—they crack on tile grout lines within months. Demand rubber or polyurethane wheels rated for 75-125 pounds per caster. Wheel diameter matters: 2.5-3″ wheels glide smoothly on hardwood, while 4-5″ wheels power through carpet transitions. The optimal setup combines front swivel casters with rear rigid wheels for straight-line stability when fully loaded. Always test-lock two wheels; this prevents “kneading drift” when working dough on the cart.
Decide Between Mobile and Semi-Stationary Setups
Fully mobile carts (four swivel casters) work best in large kitchens where repositioning is frequent. For compact spaces, choose semi-stationary models with two locking casters and two adjustable leveling feet. This provides rock-solid stability during heavy prep while allowing movement for deep cleaning. Fixed islands (using only leg levelers) suit dedicated kitchen layouts but lack flexibility for evolving needs.
Expand Surface Area Without Sacrificing Stability

Compare Drop-Leaf Support Mechanisms
Butterfly leaf systems add 12-18″ of workspace through a single hinged section—ideal for narrow kitchens needing occasional expansion. Double drop-leaf designs extend both sides for 24-36″ total added space but require ample clearance. Gate-leg supports handle 150 pounds when extended (safe for rolling pastry), while sliding track supports max out at 100 pounds. Test extensions in-store; gaps wider than 1/16″ create dangerous food traps during use.
Verify Hardware Longevity Before Buying
European concealed hinges with soft-close mechanisms survive 50,000 cycles (10+ years of daily use). Avoid basic hinges that squeak or fail within months. Steel support arms with positive-locking positions prevent sagging under weight—press down firmly on extended leaves to test. Flimsy plastic supports buckle under 25 pounds, making the surface unsafe for cooking tasks.
Integrate Style Without Compromising Function
Match Cart Design to Existing Kitchen Aesthetics
Farmhouse kitchens demand distressed wood with visible grain and wrought iron hardware. Modern spaces require clean lines—think stainless steel frames with quartz composite tops and hidden storage. Traditional kitchens pair best with raised panel doors and rich wood stains like espresso or walnut. Industrial styles thrive with raw steel frames and reclaimed wood tops. Never force a mismatched style; the cart should feel like a natural extension of your kitchen.
Coordinate Colors Strategically
Create cohesion by matching your cart to existing elements: espresso stains complement dark cabinets, while natural maple brightens white kitchens. For visual interest, contrast wood tones (e.g., walnut cart against white cabinets) or add matte black metal accents to light wood. Test paint samples in your kitchen lighting—sage green may look fresh online but appear muddy under fluorescent lights.
Budget for Long-Term Value, Not Just Price
Avoid Budget Cart Pitfalls
Carts under $200 typically use particleboard cores, basic casters, and flimsy hardware. They fail within 2-3 years under daily cooking demands—especially when holding appliances. Mid-range carts ($200-$600) deliver the best value with solid wood/metal frames, soft-close drawers, and industrial casters. This tier handles daily use for 5-7 years. Premium carts ($600+) justify costs through genuine marble tops, integrated power strips, and lifetime frames—ideal if you entertain weekly.
Calculate True Cost Per Use
A $400 cart used daily costs just $1.10 per use in year one—cheaper than your coffee. An $800 entertainment cart used 24 times yearly costs $33.33 per use initially, but premium materials last 10+ years. Run this math: (Cart price ÷ annual uses) ÷ years of expected use. If the result exceeds $2.00, reconsider—your daily coffee habit costs more.
Test Quality Before Final Purchase
Perform Real-World Stress Tests
Apply 150 pounds of distributed weight (like filled pots) and check for wobbling or joint stress. Navigate a 10-foot course with 50 pounds loaded to test caster smoothness—jerky movement indicates poor bearings. Fully extend drop leaves and press down with 25 pounds at the center; any flex means inadequate support. Cycle drawers 50 times with 30 pounds inside; sticky slides signal cheap hardware. Finally, scratch the finish with your key—if it mars easily, avoid it.
Avoid These Costly Kitchen Cart Mistakes
Oversizing Blocks Natural Workflow
The top regret? Choosing a cart that obstructs cabinet access or creates narrow choke points. Measure your actual movement paths—not just empty floor space. A cart that fits when stationary often impedes your natural workflow when cooking. Always map your primary kitchen triangle (sink-fridge-stove) before selecting dimensions.
Ignoring Weight Limits and Lighting
Exceeding 200 pounds total capacity (including contents) causes premature caster failure and frame warping. Check the cart’s specification sheet—not just the product description. Also, position task lighting above your cart; shadowy prep areas lead to knife slips and uneven chopping. Clip-on LED lights solve this instantly if overhead lighting is inadequate.
Your perfect kitchen cart disappears into daily use—so functional you’ll forget it wasn’t always there. Start by measuring clearance with your tape measure today, prioritize surface materials matching your cooking intensity, and test casters in-store. The right cart pays for itself through reclaimed counter space and stress-free meal prep. When your stand mixer finally has a home and your spices live within arm’s reach, you’ll wonder how you ever cooked without it.

