
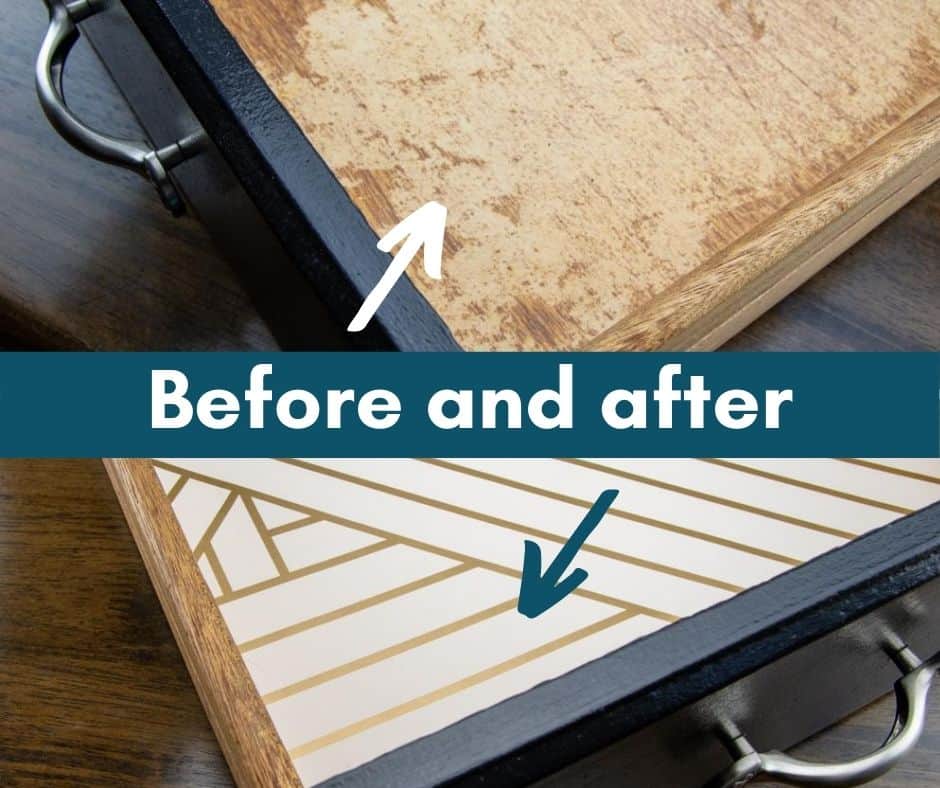
Your kitchen cabinets endure daily abuse from spilled sauces, heavy cookware, and moisture damage—yet most homeowners ignore the hidden surfaces where stains and scratches permanently mar expensive cabinetry. Installing the right liners transforms these vulnerable areas into protected, easy-clean zones while adding instant visual polish. Whether you’re battling under-sink leaks or refreshing a rental kitchen, this guide delivers proven techniques to achieve seamless results. You’ll discover exactly how to measure awkward corners, eliminate stubborn bubbles, and choose the perfect liner thickness for your needs—saving you time, money, and repeated reinstallation headaches.
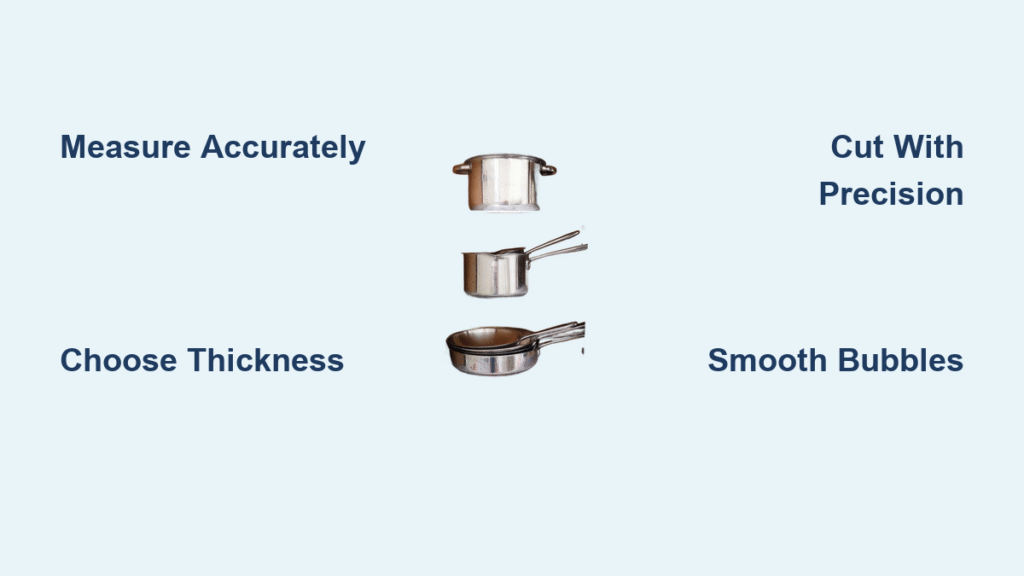
Measure Cabinets Like a Pro
Record Every Surface Separately
Never assume identical dimensions across shelves or drawers. Grab a soft tape measure and document each surface individually to the quarter-inch, starting with length before width. Older homes often have subtle variations due to settling—measuring just one shelf risks crooked liners in adjacent cabinets. Note measurements in a dedicated notebook, labeling each entry (e.g., “Upper left pantry shelf: 18.25″ x 12.5″”). This precision prevents wasted material and ensures pattern alignment across visible areas.
Calculate Total Liner Needs
Add 10–15% extra to your final square footage for cutting errors and future repairs. Standard rolls cover about 20 square feet, but decorative patterns require additional material for seamless repeats. Remember that drawers often need thinner liners (0.3mm) compared to heavy-duty shelf liners (0.5mm+) for cookware storage. Under-sink cabinets demand waterproof vinyl while pantry shelves benefit from cushioned foam to prevent glass breakage.
Choose Your Liner Type

Adhesive vs. Non-Adhesive Decision
Adhesive liners create permanent protection ideal for high-moisture zones like under-sink cabinets where water damage threatens cabinetry. Non-adhesive options suit rental properties or seasonal décor changes—simply lift and replace when stained. Clear ribbed liners provide invisible grip for dishes while marble-patterned sheets disguise existing stains in visible areas. For best results, match adhesive strength to your cabinet usage: heavy-duty adhesive for base cabinets, lighter hold for upper shelves.
Thickness Selection Guide
Heavy cast-iron cookware demands 0.5mm+ liners to prevent crushing and tearing, while lightweight linens only require 0.3mm protection. Under-sink areas need waterproof vinyl that resists moisture penetration, whereas pantry shelves shine with cushioned foam that absorbs impact from glass jars. Avoid ultra-thin liners (under 0.2mm) in high-traffic zones—they peel prematurely under daily use.
Prepare Surfaces Perfectly
Empty and Deep Clean
Remove every item before starting; partial clearing leads to crooked liner placement. Vacuum debris from corners using a crevice attachment, then wipe surfaces with warm water only—avoid cleaners that leave oily residue, which prevents proper adhesion. Pay special attention to edges where crumbs accumulate. Let surfaces dry completely for at least 30 minutes; trapped moisture creates mildew under liners.
Remove Drawers When Possible
Most kitchen drawers lift out when fully extended and tilted upward. Working on a flat surface prevents the frustration of installing liners while crouched inside cabinets. Can’t remove them? No problem—installation simply requires more patience. Place a towel inside to catch debris during cleaning, and work in short bursts to avoid back strain.
Master Cutting Techniques
Professional Cutting Setup
Transform your dining table into a cutting station with a protective mat. Use a rotary cutter with a fresh blade for clean edges, guided by a metal yardstick—never flexible rulers that shift during slicing. Mark measurements with a washable pen directly on the liner backing, using the printed ruler lines on adhesive liners as guides. Always cut length first, then width, to prevent awkward repositioning.
Handle Roll Memory Fast
Freshly unrolled liner fights back, curling stubbornly. Roll it backwards against the original curve for 30 seconds, then place heavy books on flattened sections while you work. This simple trick prevents waves during installation. For urgent projects, place cut pieces under cast-iron pans overnight to relax stubborn curl memory.
Install Non-Adhesive Liners
Position for Maximum Grip
Place ribbed texture facing upward to prevent dish sliding—smooth side contacts the shelf for flat adherence. Press firmly from center outward to eliminate trapped air. For oddly shaped areas like curved pantry shelves, create paper templates first by tracing the surface onto newspaper. Test fit templates before cutting expensive liner to avoid costly mistakes.
Notch Around Obstacles
Mark pipe locations by placing liner in position and tracing obstacles with a pencil. Remove liner and cut notches slightly smaller than needed—you can always trim more, but you can’t add material back. For under-sink cabinets, notch generously around plumbing to prevent lifting edges. Re-test fit before final placement to ensure no gaps.
Apply Adhesive Liners Flawlessly
Secure Temporary Positioning
Use Frog Tape (painter’s tape that won’t damage surfaces) to anchor one end of your cut liner. Position the entire piece before removing any backing to verify sizing—this prevents misalignment disasters. Once satisfied, remove tape from the secured end and proceed with permanent adhesion. For drawers, start at the back edge to hide seams.
Peel and Stick Method
Remove backing in 6-inch sections while smoothing with a credit card. Working incrementally prevents massive bubbles that require starting over. If bubbles appear, lift gently from the center and re-smooth rather than stretching the material. For deep drawers, work from back to front to avoid trapping air pockets.
Speed Up the Process
Batch Your Work
Cut all liners during one session using your measurement notebook, then install during another. Stack cut pieces in labeled piles (e.g., “Upper cabinets—left side”) for organized installation. This assembly-line approach cuts project time by 40%, especially with 20+ cabinet shelves. Keep a caddy with tools and cleaning supplies to avoid constant trips.
Tackle High-Impact Areas First
Focus initial efforts on under-sink cabinets and cooking prep zones—these see the most spills and heavy use. Visible shelves deserve precision, while rarely seen areas (like high cabinets) can use the quicker “eyeballing” method. Prioritizing high-traffic zones delivers immediate functional payoff while building your confidence for trickier spots.
Pre-Roll the Night Before
Roll all liners backwards and secure with rubber bands overnight. This eliminates most curl memory, making morning installation dramatically faster. You’ll handle the material like a pro instead of fighting stubborn waves—critical for patterned liners where misalignment ruins aesthetics.
Post-Installation Perfection
Verify Every Edge
Walk through your kitchen pressing any lifted corners with your thumbnail—a pro trick that seals edges for years. Return items strategically: heavy cookware helps flatten new liners in base cabinets while decorative items showcase fresh surfaces in upper shelves. This is the perfect time to reorganize, grouping similar items for improved functionality.
Maintain Your New Liners
Wipe most surfaces clean with a damp microfiber cloth—avoid harsh chemicals that break down adhesive over time. Check edges quarterly, re-pressing any lifting sections before moisture seeps underneath. Non-adhesive liners allow simple spot replacement in high-wear areas without complete reinstallation.
Troubleshoot Common Problems
Fix Persistent Bubbles
Lift adhesive liner gently from the bubble center outward. Use a hair dryer on low heat for 10 seconds to soften adhesive, making repositioning easier. Smooth with a credit card as you reapply, working slowly to prevent new bubbles. For non-adhesive liners, simply lift and reposition without heat.
Correct Cutting Mistakes
Keep extra liner on hand—every installer has miscut pieces. When errors occur, use the mistake as a template for recutting rather than starting measurements fresh. Place the flawed piece over new material, trace the outline, and cut 1/8″ inside the line for a perfect fit. This saves time and ensures consistency.
Flatten Stubborn Curl
Place heavy objects like cast iron pans on curled areas for 24–48 hours. For severe cases with non-adhesive liners, lightly mist the back with water, then weight down—moisture relaxes the material as it dries flat. Never use this method on adhesive liners, as moisture compromises bonding.
Final Success Checklist
Before declaring victory, confirm:
– All edges lay flat without lifting (press corners with thumbnail)
– Patterns align consistently across visible areas (critical for marble designs)
– High-traffic zones use 0.5mm+ thickness for durability
– Extra material stored in labeled bag for future repairs
– Cleaning schedule established (quarterly edge checks)
Your newly lined cabinets now resist stains, reduce noise from clattering dishes, and provide a custom look reflecting your personal style. With proper installation techniques, these protective layers will serve your kitchen beautifully for years—turning daily cleanup from a chore into a 30-second wipe-down. For immediate visual impact, start with under-sink and pantry liners tonight; you’ll gain functional protection while planning your full kitchen transformation.

