
Tired of crawling on the kitchen floor to retrieve your favorite cast iron skillet from the back of a deep cabinet? You’re not alone. Most homeowners waste valuable kitchen space with traditional lower cabinets that force you to kneel, reach, and dig for essential cookware. Converting these cabinets into full-extension drawers transforms wasted space into organized, easily accessible storage that handles up to 100 pounds of kitchen essentials without straining your back.
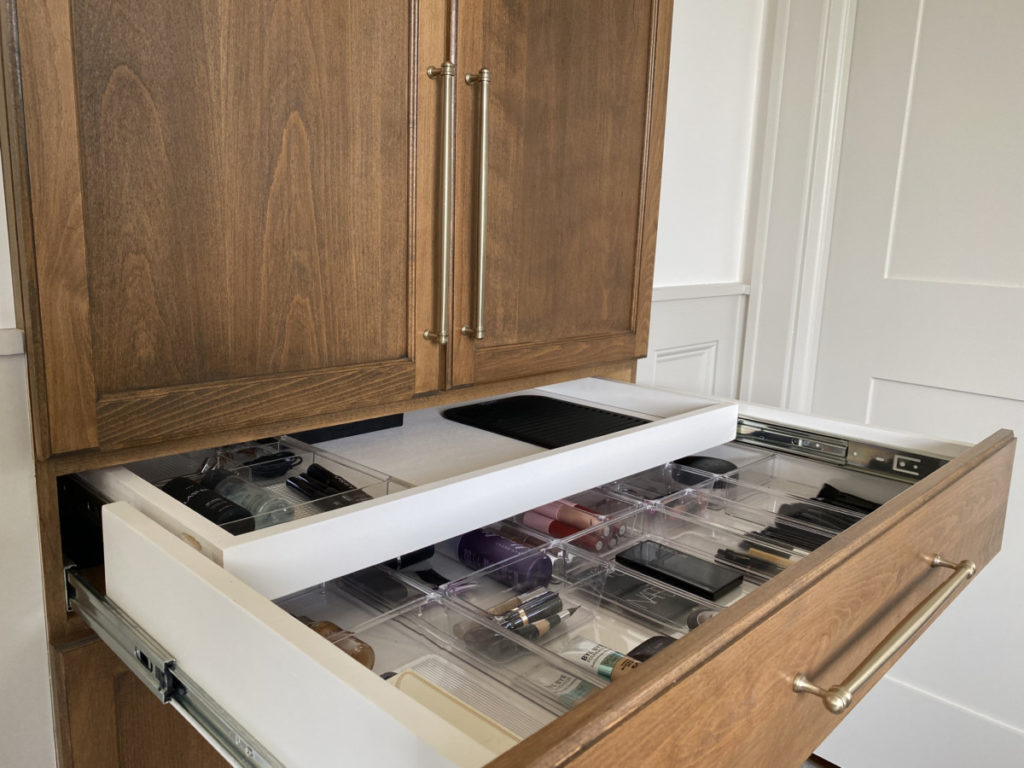
This practical upgrade delivers furniture-quality aesthetics while eliminating the frustration of navigating dark, deep cabinets. Whether you’re renovating your entire kitchen or updating just one cabinet, learning how to turn kitchen cabinets into drawers creates a seamless, functional space where everything you need is instantly accessible at waist level.
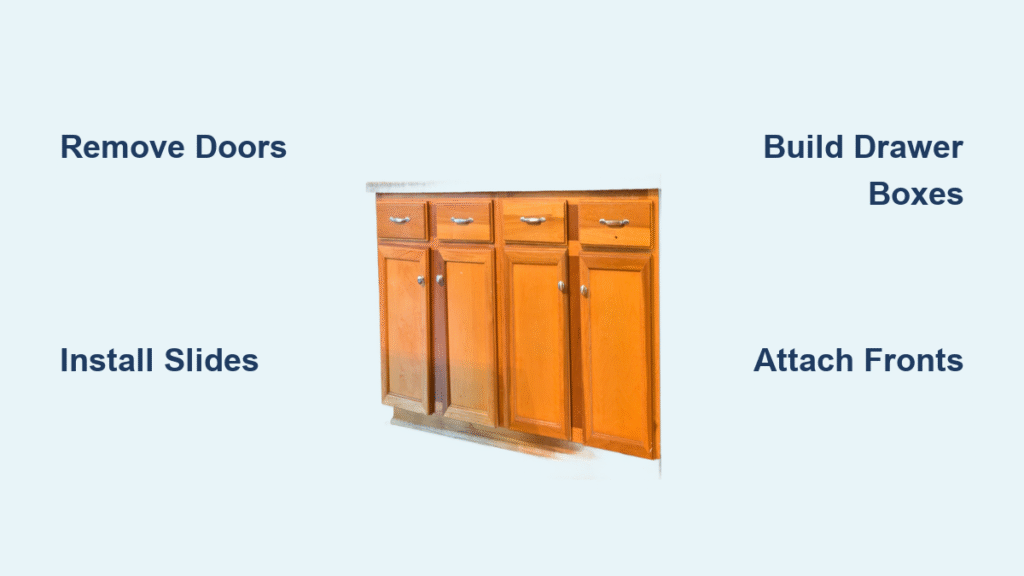
Cabinet to Drawer Conversion Methods
Full Cabinet Transformation
This approach completely replaces your existing cabinet structure with integrated drawer systems. You’ll remove doors and shelves entirely, creating floor-to-ceiling drawer boxes that maximize every inch of storage space. This method works particularly well for kitchen islands where you want that custom furniture appearance without visible cabinet doors interrupting the clean lines.
Shelf-to-Drawer Conversion
Keep your existing cabinet framework intact while adding pull-out drawers inside the structure. Ideal for renters or homeowners on a budget, this less invasive method preserves your current cabinet boxes while dramatically improving accessibility. You’ll simply replace static shelves with sliding drawer systems that glide smoothly on heavy-duty tracks.
Essential Tools and Materials
Required Tools Checklist
- Circular saw with guide for precise cabinet modifications
- Jigsaw for removing center stiles between cabinet doors
- Drill equipped with countersink bit for clean hardware installation
- Clamps to secure pieces during assembly
- Pin nailer for professional finishing touches
- Sanding equipment to prepare surfaces
Critical Hardware Selection
Choose 100 lb capacity full-extension slides for reliable performance with heavy pots and pans. Opt for dovetail drawer boxes made from hardwood for maximum durability. You’ll also need 2×4 lumber for structural support pieces, 3/4-inch wood spacers, and quality adhesives like Loctite glue and silicone caulk for secure installations.
Remove Cabinet Doors and Hardware Properly
Door Removal Process
Begin by unscrewing all cabinet doors and removing hinges. Use painter’s tape to mark each door’s original position—this prevents confusion during reinstallation. Save doors if you plan to repurpose them as drawer fronts later. This step typically takes 15-20 minutes per cabinet and creates immediate access to your cabinet structure.
Clean and Inspect Thoroughly
After door removal, sand any rough spots left from hardware. This crucial step prevents splintering during modifications and creates smooth surfaces for new installations. Check for damaged areas that might need reinforcement before proceeding with your cabinet to drawer conversion.
Measure Accurate Drawer Dimensions
Critical Measurements Checklist
Measure the inside depth behind your cabinet’s face frame, then subtract ½ inch for proper clearance. This calculation determines your drawer box size whether building custom or ordering pre-made options. For height measurements, account for slide clearance—typically requiring 1-2 inches less than your cabinet’s total height.
Height Considerations for Appliances
Before finalizing your drawer heights, measure your tallest kitchen appliances like rice makers or stand mixers. These items may barely fit on new, higher shelves, so accurate measurements prevent frustrating surprises after installation. Proper planning ensures your converted drawers accommodate all essential kitchen tools.
Build Structural Support System

Side Support Creation
Rip 2×4 lumber to match your cabinet depth (typically 1.5 inches thick × 2 inches high). Sand these support pieces smooth and finish with satin Polycrylic to match your existing cabinetry. These supports bear the weight of your new drawers and prevent sagging over time.
Spacer Installation Technique
Use ¾-inch wood spacers to elevate bottom support pieces. This creates proper clearance for drawer slides and ensures smooth operation. Position spacers at regular intervals along the cabinet base to distribute weight evenly across the entire structure.
Install Heavy-Duty Drawer Slides Correctly
Precise Positioning Method
Mount slides 1/8 inch back from the drawer front using Loctite glue and predrilled countersunk holes. This positioning ensures flush mounting with your cabinet face frame and prevents binding during operation. Quality installation means your drawers will glide smoothly even when fully loaded.
Level Installation Process
Install slides perfectly level and aligned—no shims should be needed if measurements are accurate. Misaligned slides cause drawers to stick or fail prematurely under heavy loads. Double-check alignment before securing slides permanently to avoid costly corrections later.
Construct Durable Drawer Boxes
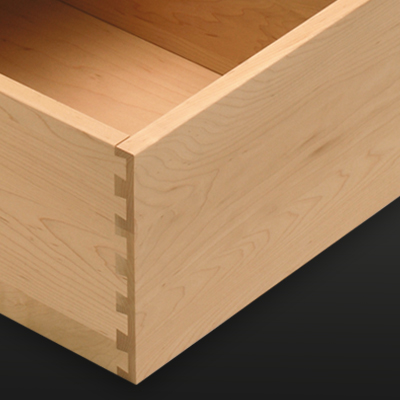
Dovetail Construction Benefits
Install hardwood drawer boxes with dovetail corners for maximum strength and longevity. Size boxes to utilize the full cabinet height while maintaining proper slide clearance. Quality dovetail construction withstands years of heavy use without loosening or warping.
Weight Testing Procedure
Before final installation, test your drawer system with actual kitchen weights. Quality systems handle 100+ pounds—place your heaviest cast iron pieces in the drawer to verify smooth operation under realistic loads. This step prevents future frustration when your new drawers are fully stocked.
Handle Center Stile Removal Expertly
When to Remove Stiles
Remove center stiles (vertical pieces between cabinet doors) when converting double cabinets to full-width drawers. These pieces are typically decorative rather than structural, serving only as closing surfaces for cabinet doors. Removing them creates necessary space for wider drawers.
Clean Removal Process
Use a jigsaw to cut the stile flush with the cabinet frame top and bottom. After removal, replace any damaged trim with new wood pieces, sand smooth, and touch up paint to eliminate evidence of modification. This process typically takes 20-30 minutes per stile and dramatically improves drawer functionality.
Attach New Drawer Fronts Seamlessly
Door-to-Drawer Conversion
Repurpose existing cabinet doors as drawer fronts by cutting them to size. This maintains your kitchen’s cohesive appearance while creating functional storage. Apply Loctite glue to cabinet frame center pieces and attach using reference marks made during removal.
Gap Solutions for Double Cabinets
When center stile removal creates visible gaps, cut thin wood fillers to size and screw them to the back of cabinet doors. These fillers sit flush with the cabinet face frame when closed, becoming invisible. Consider your natural door-opening pattern when positioning gap fillers for optimal functionality.
Ready-Made Conversion Kits Options

Slide-A-Shelf Systems
Custom-sized sliding shelf kits require only four screws per drawer using template-based installation. These systems feature:
– Precise sizing based on your exact measurements
– Heavy appliance load capacity (up to 100 lbs)
– One-afternoon installation time
– Minimal space loss (just a few inches per side)
Pre-Made Drawer Solutions
Companies like FastCabinetDoors offer ready-made drawer boxes for standard cabinet dimensions, eliminating custom construction needs. These pre-fabricated solutions save significant time while delivering professional results, especially for homeowners without advanced woodworking skills.
Final Installation Steps Checklist
Drawer Slide Testing
Before permanent installation, test slide operation with weight in the drawer. Smooth movement under load indicates proper installation—any binding requires immediate adjustment. This critical step prevents future frustration when your drawers are fully stocked with kitchen essentials.
Hardware Alignment Process
Ensure drawer fronts align perfectly with existing cabinetry. Use shims behind drawer fronts for fine-tuning alignment—this professional touch creates the seamless appearance of custom cabinetry rather than a retrofit project.
Maintenance and Longevity Tips
Regular Maintenance Routine
Clean drawer slides quarterly and apply silicone lubricant annually to prevent sticking and extend slide life. This simple maintenance takes just 10 minutes per cabinet but significantly improves long-term performance.
Weight Distribution Strategy
Distribute heavy items evenly across drawer bottoms—avoid concentrating all weight in one corner, which stresses slides and causes premature wear. Place heavier items toward the back of drawers where slides provide maximum support.
Prevention Strategies
Install soft-close mechanisms to prevent slamming. This protects both drawer boxes and cabinet structure from damage while adding a premium touch to your converted cabinets.
Transforming your kitchen cabinets into drawers revolutionizes daily cooking and storage. Start with a single cabinet to test the process before expanding to your entire kitchen. The improved accessibility and organization make every meal prep easier, while the furniture-quality appearance adds lasting value to your home. Properly executed, your cabinet to drawer conversion becomes one of the most functional and aesthetically pleasing upgrades you can make to your kitchen space.

