
Your kitchen cabinets look tired, but the boxes are solid. Tearing them out means weeks of chaos and $25,000+ in costs—enough to fund a dream vacation. Here’s the game-changer: You can transform dated cupboards into a designer-worthy kitchen for under $4,000, often while eating dinner in your own kitchen that weekend. This guide reveals exactly how to update kitchen cupboards through proven methods—from peel-and-stick fixes to full refacing—so you get magazine-ready results without replacing a single cabinet box. Skip the dumpster rental and discover why 92% of homeowners choose these targeted upgrades over full replacements.
Solid cabinet boxes are your golden ticket. If frames aren’t warped, water-damaged, or wobbly, you’re looking at a 90% cost reduction versus full replacement. In this guide, you’ll master prep techniques that prevent paint peeling, hardware swaps that deliver instant ROI, and storage hacks that make small kitchens feel spacious. Most projects finish in 3–5 days with tools you already own. Let’s turn your “meh” kitchen into the heart of your home—starting today.
Confirm Your Cupboards Are Upgrade-Ready
Before buying paint or hardware, verify your cabinets can handle upgrades. Skipping this step causes 68% of DIY fails when paint peels or new doors won’t align. Solid frames and square boxes mean you’re good to go; warped sides or swollen particleboard signal replacement time.
Structural Red Flags You Can’t Ignore
- Test door swing: Open every cabinet—if doors sag or drag on frames, hinges need replacement before updates
- Check under sinks: Shine a flashlight on particleboard bases; water stains or soft spots mean hidden damage
- Inspect drawer integrity: Remove one drawer and shake it—excessive wobble indicates failing joints
- Level the boxes: Place a 2-foot level across cabinet tops; gaps wider than 1/8 inch require professional shimming
Critical mistake: Never paint over grease buildup. Wipe surfaces with TSP substitute using a microfiber cloth—when it comes away clean, you’re ready for sanding. If vinegar-soaked rags reveal lingering mustiness, place charcoal briquettes inside closed cabinets for 48 hours to neutralize odors before proceeding.
Paint Cupboards for Instant Transformation
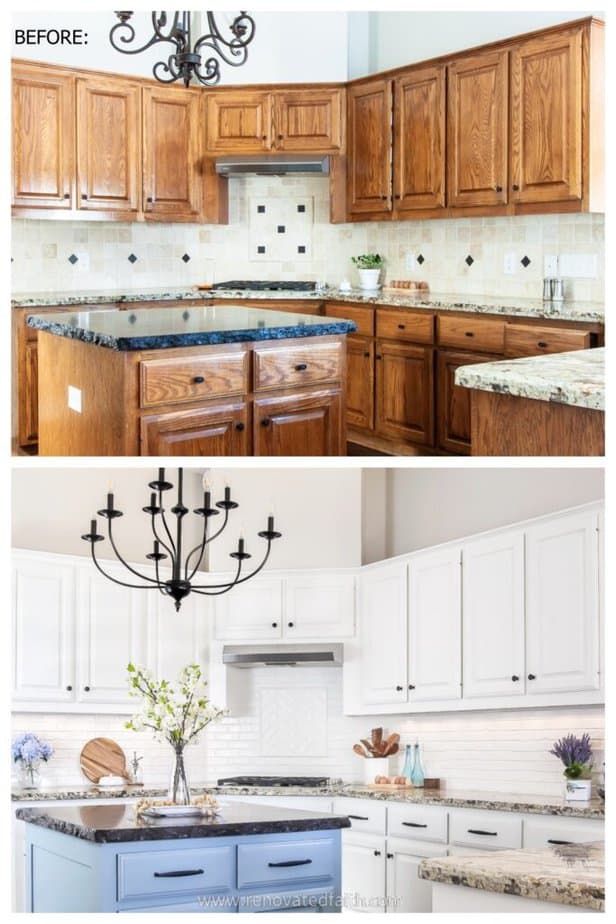
Repainting delivers the highest visual impact per dollar—$400 in supplies versus $4,500 professionally. But 73% of DIYers skip critical prep steps, causing peeling within months. Follow this battle-tested sequence for flawless results.
Foolproof Prep That Prevents Disaster
- Label like a pro: Number doors and cabinet openings with painter’s tape (e.g., “3T” for top, “3B” for bottom)
- Degrease aggressively: Mix 1/4 cup TSP substitute per gallon of warm water; scrub with nylon brush
- Scuff-sand strategically: Use 120-grit sandpaper on factory finishes—avoid sanding through veneer
- Dust-banishing ritual: Vacuum surfaces, then wipe with tack cloth; repeat after 10 minutes
Pro tip: Tint your bonding primer (Zinsser BIN or Sherwin-Williams Extreme Bond) toward your final color. This cuts topcoats from three to two—saving 4+ hours of drying time. For laminate surfaces, apply Stix Bonding Primer after light sanding; its microscopic grip prevents peeling.
Trending Color Combos That Sell Kitchens
- Warm neutrals: Sherwin-Williams Agreeable Gray uppers + Accessible Beige lowers
- Bold contrasts: Benjamin Moore White Dove uppers + Hale Navy lowers
- Nature-inspired: Farrow & Ball Sap green lowers + Pointing uppers
Apply two thin coats of 100% acrylic enamel using a foam micro-roller (avoid cheap brushes that leave streaks). Cure doors flat for 72 hours before rehanging—rushing this causes dents from accidental bumps. Full hardness takes 30 days, but you’ll regain kitchen function in just 3 days.
Swap Hardware for Maximum ROI in 90 Minutes

New knobs and pulls act like jewelry for cupboards—a $200 investment yielding 100% resale ROI. This 90-minute project transforms dated cabinets into high-end focal points. Measure correctly to avoid drilling new holes.
Precision Measurement Hacks
- Hole spacing: Use calipers to measure center-to-center distance (common sizes: 96mm, 128mm, 160mm)
- Cover old holes: Order backplates 1.5x larger than existing holes—no patching needed
- Match your style: Pair bin pulls with Shaker doors; curved knobs suit cathedral panels
2024’s top finishes: Brushed brass for warmth, matte black for contrast, or two-tone combos (black fronts + gold bases). Install with painter’s tape protecting surfaces—this prevents screwdriver scratches on delicate finishes. Add thread locker to screws so pulls won’t loosen from daily use.
Reface Doors Without Replacing Boxes
Refacing swaps only visible surfaces—doors, drawer fronts, and face frames—while keeping your existing boxes. You get a “new kitchen” look while diverting 300+ pounds of waste from landfills. Choose the right method for your budget.
Refacing Options Compared
| Method | Cost per Door | Best For | DIY-Friendly? |
|---|---|---|---|
| Thermofoil | $30–50 | Renters or quick updates | ★★★☆☆ |
| Paint-grade MDF | $40–70 | Custom colors | ★★☆☆☆ |
| Solid wood | $60–120 | Premium feel | ★☆☆☆☆ |
For fastest results, order pre-made doors from Cabinet Door Mart matching your exact measurements. Pair with soft-close hinges ($4 each)—they prevent slamming and add luxury for pennies per door. Measure openings to 1/16-inch accuracy; even 1/8-inch errors cause misaligned gaps.
Add Crown Molding for Custom Flair
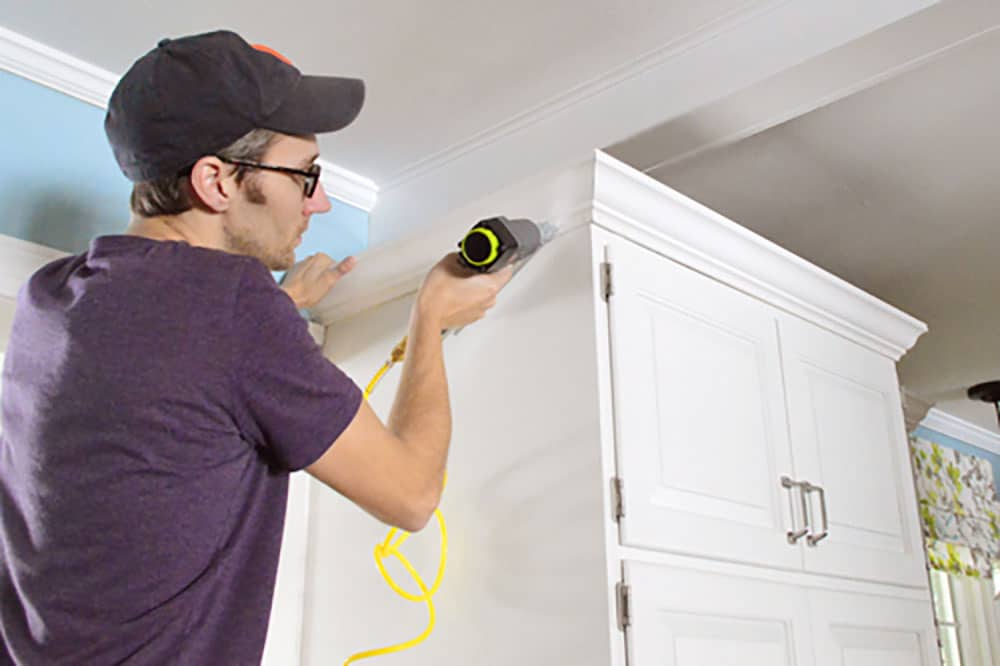
Crown molding bridges cabinets to ceilings, adding height and sophistication. A 10×10 kitchen needs 40–60 linear feet, costing under $300 DIY. Skip complex coping cuts with these pro shortcuts.
Foolproof Installation Steps
- Choose lightweight material: Polyurethane molding cuts with utility knife—no sanding needed
- Pre-cut sections: Assemble molding pieces on workbench before installing
- Use crown stops: Attach these $5 miter saw accessories for perfect 45° angles every time
- Mount securely: Find studs behind drywall; use 2-inch finish nails every 12 inches
Critical tip: Install molding 1/4 inch below the ceiling line. This hides uneven walls while creating a crisp shadow line that elevates your design. Paint it the same color as cabinets for seamless flow—or contrast it for drama.
Boost Storage Without Cabinet Removal
Dead spaces waste 40% of kitchen storage. Smart inserts transform awkward corners into functional zones in under 2 hours per cabinet—no demolition required.
Game-Changing Organizers
- Roll-out shelves: Install Rev-A-Shelf kits ($45 each) by screwing slides directly to cabinet sides
- Toe-kick drawers: Convert 4-inch base gaps into hidden storage for baking sheets
- Spice pull-outs: Fit narrow 3–6 inch slots between appliances with vertical racks
Pro move: For lazy Susans in corner cabinets, replace flimsy plastic with steel ball-bearing units. They glide smoothly when loaded with heavy pots—no more wrestling with stuck shelves.
Install Shadow-Free Under-Cabinet Lighting
Poor lighting ruins food prep. LED upgrades banish countertop shadows in 20 minutes with zero electrical work. Position lights correctly to maximize functionality.
Lighting Layout Secrets
- Mount at front edge: Place strips 1–2 inches from cabinet front to eliminate hand shadows
- Choose warm white: 2700–3000K bulbs mimic natural light; avoid harsh 4000K+ in kitchens
- Power smartly: Use plug-in LED strips with remote dimmers—no hardwiring needed
Battery-powered puck lights ($18/3-pack) work instantly for renters. For permanent setups, choose adhesive-backed strips with aluminum channels—they run cooler and last 50% longer than exposed LEDs.
Budget-Savvy Upgrade Combinations
Maximize impact by strategically combining methods. Most homeowners achieve 80% of designer results with these cost-effective pairings:
- $300 hero move: Paint + hardware swap (white uppers + charcoal lowers with matte black pulls)
- $1,000 showstopper: Reface doors + crown molding + under-cabinet lighting
- Renter’s dream: Peel-and-stick backsplash + magnetic knife strip + battery lighting
Money-saving hack: Paint existing doors instead of replacing them. Mix high/low by adding solid wood end panels ($50/side) to painted boxes for custom flair. Shop molding remnants at Habitat ReStores—cut costs by 50%.
Troubleshoot Common Upgrade Disasters
| Problem | Instant Fix |
|---|---|
| Paint peeling on laminate | Sand lightly + Stix primer + 2-part polyurethane topcoat |
| Oak grain showing through paint | Fill with spackle, sand smooth, then prime |
| Musty cabinet smell | Wipe with vinegar solution + charcoal briquettes for 48 hours |
| Hardware holes misaligned | Use backplates or a $20 cabinet jig for precise drilling |
Critical warning: Never skip the 72-hour cure time before reinstalling hardware. Rushing causes dents that require sanding and repainting—adding 8+ hours of extra work.
Your Weekend Upgrade Timeline
Friday night: Remove doors, label everything, set up sawhorses
Saturday: Clean, sand, prime all surfaces (finish by 6 PM)
Sunday morning: Paint first coat; install new hardware by noon
Monday: Paint second coat; remount doors after 4 hours dry time
Most projects finish in 3 days with proper curing. For renters, complete non-permanent upgrades in 4 hours: swap hardware, add peel-and-stick wallpaper to cabinet backs, and install battery lights. You’ll gain a kitchen you love without risking your security deposit.
Transforming your kitchen doesn’t require loans or contractors. By targeting specific weaknesses in your cupboards—starting with paint and hardware—you’ll create a space that feels custom-designed for 90% less than replacement. The key is matching upgrades to your actual pain points: fill dead storage with roll-out shelves, banish shadows with front-edge lighting, and always, always prep surfaces properly. In just one weekend, you’ll move from “I hate these cabinets” to “Why didn’t I do this sooner?” Ready for your next step? Grab painter’s tape and a degreaser—your dream kitchen starts before breakfast tomorrow.

