
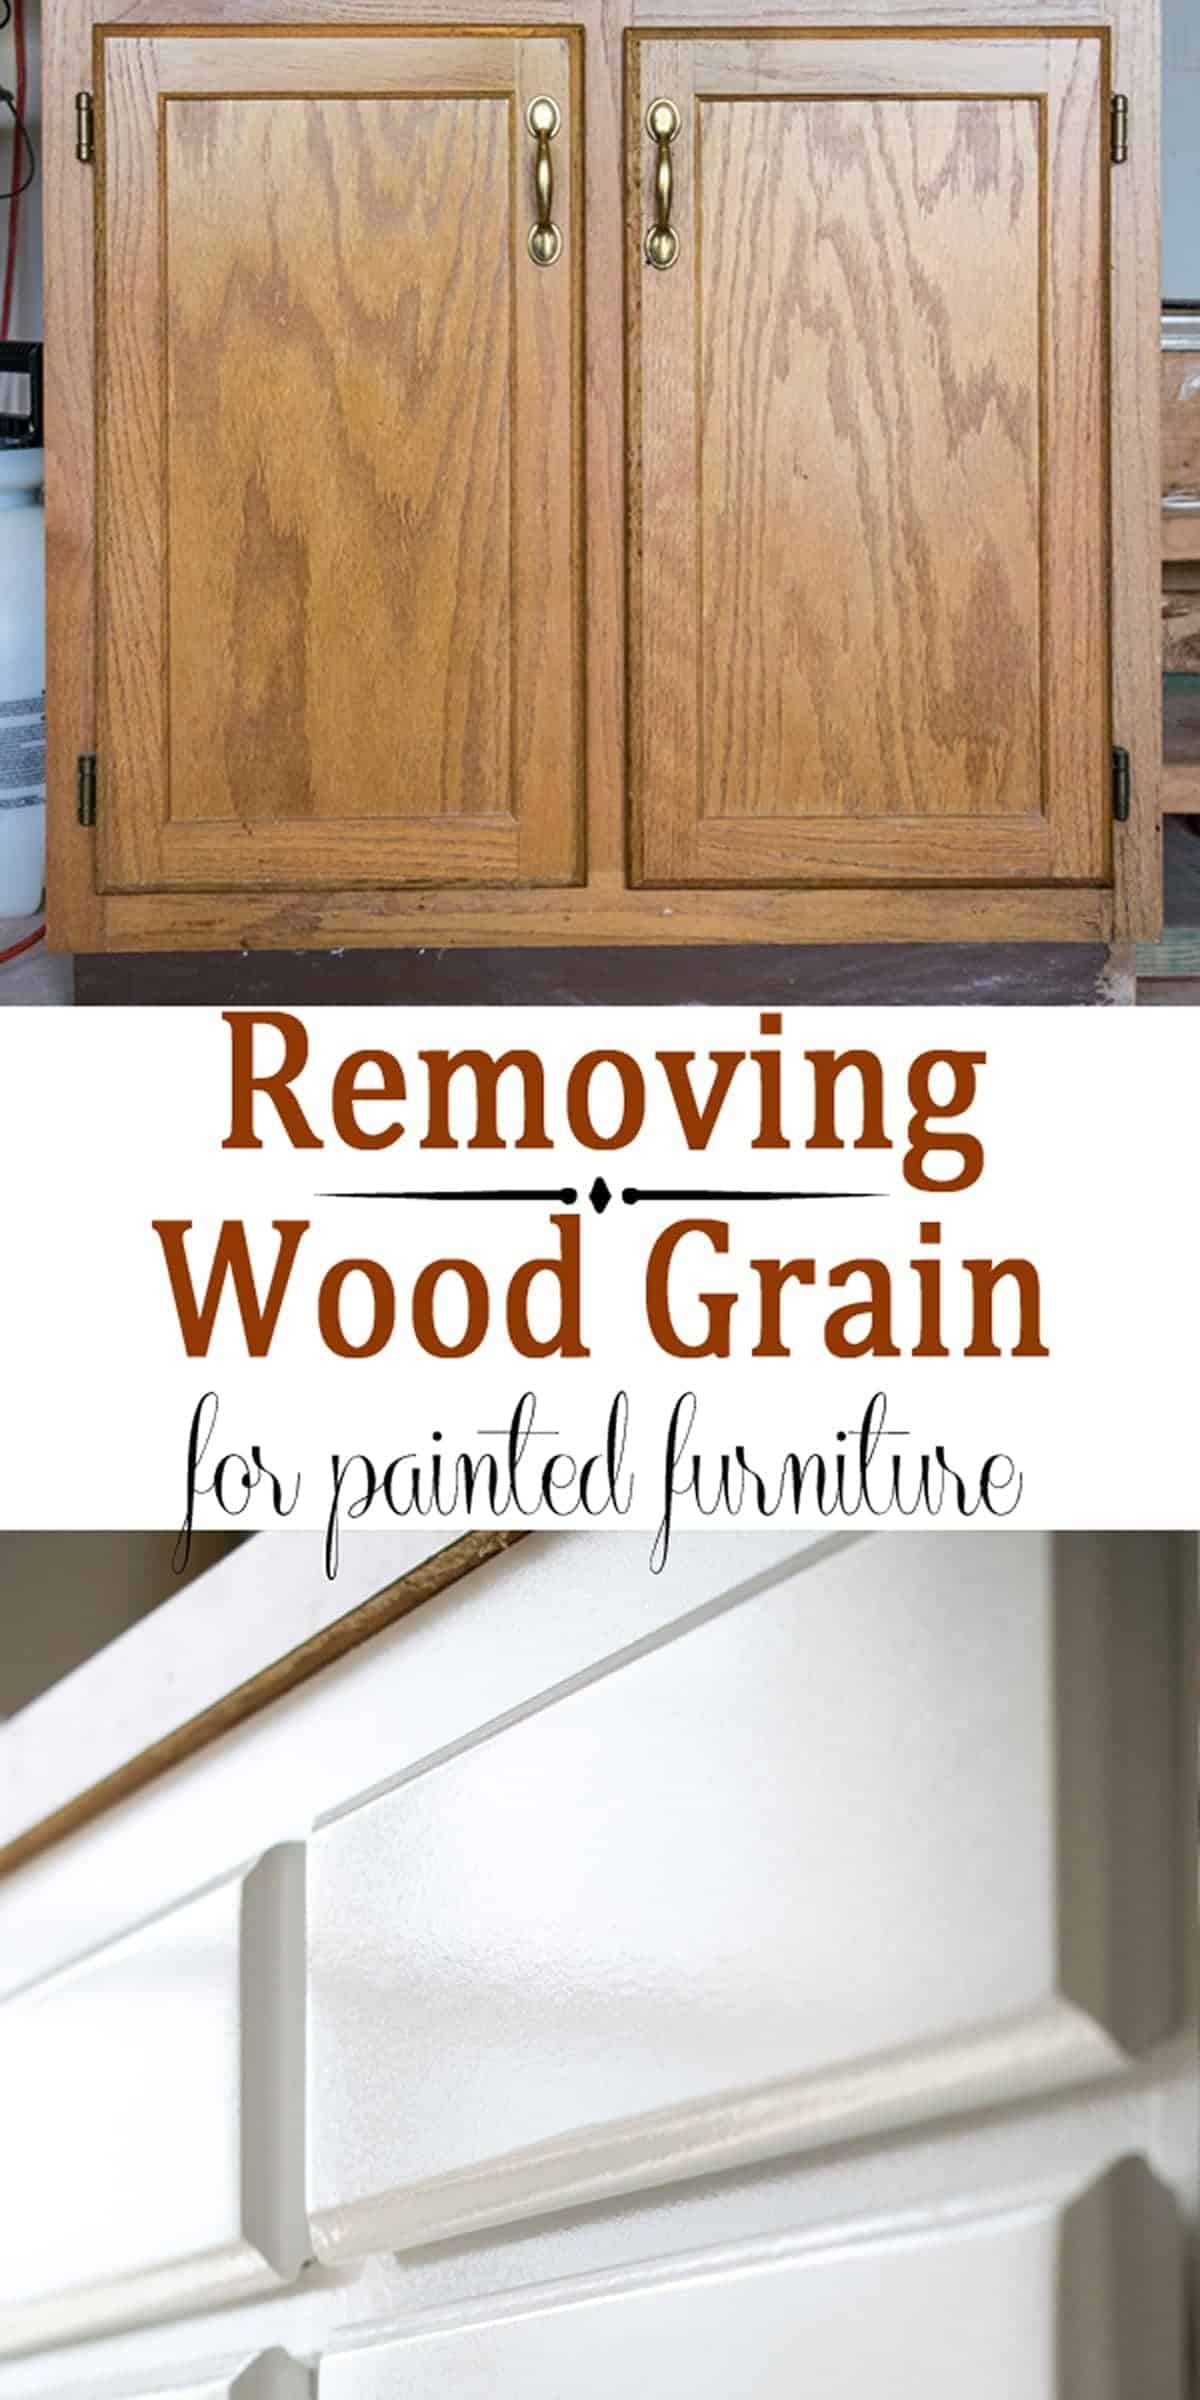
That stubborn groove along your cabinet edges isn’t just a design relic—it’s a grease trap that makes cleaning feel like archaeology. Whether you’re battling 1990s finger pulls or dated panel lines, those ridges scream “outdated” while collecting crumbs and cooking residue. The good news? You don’t need a full kitchen remodel to achieve that clean, modern finish—this comprehensive guide reveals exactly how to cover grooves on kitchen cabinets for under $100.
Forget temporary fixes that peel after three months. We’ll explore renter-friendly contact paper hacks, permanent filler solutions that add home value, and pro-level techniques for flawless results. Whether you’re a weekend DIYer or prepping for resale, you’ll learn which method matches your groove depth, skill level, and timeline—saving you costly mistakes and wasted weekends.
Spot Decorative vs. Functional Grooves Before You Start
.webp)
Misidentifying your groove type guarantees project failure. These visual cues tell you exactly which solution to use—before you buy a single tube of filler.
Decorative Panel Grooves: The Silent Kitchen Killer
These shallow 1-3 mm indentations form geometric patterns across flat cabinet doors (think squares or borders on recessed-panel designs). Critical mistake to avoid: Treating them like structural damage. Since they serve zero functional purpose, filling them requires only lightweight wood filler—not epoxy. Run your finger over the surface: If it feels barely indented and traps minimal grime, you’re dealing with decorative grooves.
Routed Finger Pull Grooves: Handle Hazards
These curved, slanted grooves along door/drawer edges function as handles—and they’re grease magnets. Visual test: Shine a flashlight sideways across the surface. If shadows reveal a U-shaped profile deeper than 3 mm, you’ll need structural filler. Crucially, removing these affects cabinet functionality—you must install new hardware after filling.
Match Fillers to Your Groove Depth: Shallow, Deep, or Temporary
Using the wrong material causes peeling, cracking, or uneven finishes. This depth-based guide eliminates guesswork.
Shallow Grooves (1-3 mm): Wood Filler Precision
Solid wood cabinets with minor decorative lines need color-matched wood filler applied in thin layers. Pro timing tip: Work in 2-hour intervals between coats—most fillers shrink 10-15% as they dry. For stained wood, use wood grain filler spread with a putty knife along the grain direction. Skip priming if matching finishes perfectly.
Deep Grooves (3+ mm): Epoxy Wood Filler Tactics
Finger pulls and structural grooves demand epoxy wood filler—its moisture resistance handles kitchen humidity. Critical step: Mix only small batches (15-30 minute working time!). Apply in 2mm layers, waiting 6 hours between coats. Cure time? 48 hours minimum before sanding.
Renter-Approved Temporary Fixes
Caulk or Flex Seal works on laminate, metal, or painted surfaces without permanent damage. Application hack: Load a caulk gun, then slice the tip at a 45° angle to match groove width. Smooth with a damp finger—water-based versions wipe off cleanly during move-out.
Renters’ Guide: Hide Grooves Without Damaging Cabinets
This contact paper method survives lease inspections and costs under $35 for a full kitchen. No landlord approvals needed.
Step-by-Step Groove Erasure
- Pre-cut micro-strips: Slice contact paper into groove-width strips using an X-Acto knife—wider than the groove by 1/8 inch
- Fill depressions first: Press strips into each groove before applying full sheets
- Seamless overlay: Cover entire doors with larger sheets, stretching paper across grooves (not parallel)
- Edge mastery: Use the knife tip to cut around hardware while pressing firmly into corners
- Test secretly: Apply to a hidden cabinet interior first—some laminates reject adhesives
Warning: Avoid vinyl with air channels—it bubbles over grooves. Opt for smooth matte finishes.
Permanent Filler Solutions: Fill and Sand for Smooth Doors
This method adds home value but demands precision. Skip any step, and filler cracks within months.
Wood Filler Application Process
- Degrease like a pro: Wipe surfaces with TSP cleaner—any grease prevents adhesion
- Strategic sanding: Start with 150-grit to roughen surfaces, then 220-grit for feathering
- Layered filling: Apply thin coats using a flexible putty knife—never one thick glob
- Overfill by 10%: Account for shrinkage as water-based fillers dry
- Progressive sanding: Use 120 → 150 → 220 grit sequence across the grain
Color Matching Secrets Landlords Won’t Believe
Bring a cabinet door sample to the paint store for computer matching—don’t trust eye tests. Test stains on the door’s interior edge first. Critical move: Match sheen levels exactly (gloss vs. satin shows mismatch instantly). Store leftover filler in an airtight container for touch-ups.
Transform to Shaker Style: Cover Grooves with Filler Strips

Ditch dated grooves for clean Shaker aesthetics using pre-cut strips—no cabinet replacement needed.
Installation Methods That Won’t Fail
Adhesive mounting: Ideal for MDF or PVC strips on flat surfaces. Clean doors with rubbing alcohol first, then press strips firmly for 60 seconds per section. Screw mounting: For permanent security, attach strips from inside the cabinet frame using #6 screws every 8 inches. Pro tip: Use 3/8″ thick strips—they blend seamlessly with standard cabinet depths.
Pro Sanding and Priming for Flawless Cabinet Surfaces
Amateur sanding leaves visible ridges. These techniques create factory-smooth results.
Surface Preparation Protocol
Remove all dust with a tack cloth—microfiber leaves lint. Moisture check: Press plastic wrap to the surface; condensation means wait 24 hours. Sand curved areas with 150-grit wrapped around a foam block for even pressure.
Priming Like a Pro
Never skip this step: Primer prevents blotchy paint. Use oil-based for stain blocking (wait 4 hours drying time) or water-based for quick turnaround (1 hour). Critical technique: Extend primer 3 inches beyond filled areas—this avoids visible “halos” later.
Long-Term Care to Keep Filled Grooves Looking New
Most filler failures happen from improper maintenance—not bad application.
Weekly Care Routine
Clean only with 1 tsp dish soap per quart of water. Never use: Ammonia cleaners (they dissolve fillers) or abrasive sponges. Dry surfaces immediately with a microfiber towel—standing water causes bubbling.
Long-Term Protection Schedule
Inspect quarterly for cracks using a flashlight at a low angle. Touch-up protocol: Sand problem areas with 220-grit, reapply filler, and spot-prime. Humidity control: Keep kitchen RH between 35-55%—use a dehumidifier in summer to prevent wood movement.
Fix Cracked or Mismatched Filler on Cabinet Grooves
When disasters strike, these fixes save your project without starting over.
When Fillers Crack
Cause: Thick application or inadequate sanding. Solution: Remove failed filler with a chisel, degrease again, and rebuild in 1mm layers with 8-hour drying intervals.
Color Matching Disasters
Blend mismatched areas by applying a tinted primer first, then 3 thin paint coats. Sheen uniformity trick: Wipe entire door with clear polyurethane—this evens out gloss variations instantly.
Must-Have Tools for Covering Cabinet Door Grooves
Skip these, and your project fails:
– Flexible putty knife (for curved grooves)
– Grit progression kit (120, 150, 220 sandpaper)
– TSP cleaner (removes invisible grease)
– Tack cloth (eliminates dust for smooth finishes)
– Artist brushes (for precision priming in grooves)
Safety non-negotiables: Nitrile gloves (chemical protection) and safety glasses (flying wood particles).
How Long to Cover Cabinet Grooves: 1-Day to 4-Week Timelines
Contact paper method: Complete in 8 hours—ideal for urgent move-ins. Permanent filler: Requires 14 days (7 days for filler curing, 7 for paint drying). Pro finish: Allow 28 days including humidity-adjusted cure times.
Your cabinet transformation starts with identifying groove types and matching solutions to your commitment level. Whether you choose renter-safe contact paper or value-adding permanent fills, these techniques deliver modern, clean surfaces without kitchen demolition. Remember: Proper surface prep prevents 90% of failures—never rush degreasing or sanding. Keep leftover materials for touch-ups, and your groove-free cabinets will look freshly installed for years. Ready to elevate your space? Start with one test cabinet tonight—your future self will thank you when guests admire your “new” kitchen.

