

Open kitchen shelves can transform your cooking space from cramped to curated—but only when styled with intention. If you’re staring at bare planks or battling chaotic clutter, you’re not alone. Over 68% of homeowners who install open shelving end up hiding their dishes behind closed cabinets within six months because they can’t balance beauty with function. This guide cuts through the confusion with battle-tested strategies to create shelves that look magazine-worthy yet survive real-life cooking. You’ll discover exactly what to display (and what to stash), how to arrange items for visual harmony, and maintenance tricks that keep your display fresh for years. Stop fighting your shelves and start enjoying a kitchen that feels both stylish and practical.
Plan Your Shelf Layout Before Hanging a Single Bracket
Measure Twice, Drill Once for Perfect Proportions
Grab your tape measure before buying a single accessory. Mark stud locations first—your grandmother’s stoneware needs solid anchoring, not drywall anchors. Standard spacing runs 10-12 inches between shelves for dinner plates (stacks up to 12 plates high), while 6-8 inches works for glassware layers. Position bottom shelves at waist height for heavy everyday dishes like cast-iron skillets, reserving eye-level space for statement pieces like artisanal pitchers. Top shelves should hold lightweight decorative items like trailing pothos plants or vintage cookbooks, keeping them safely out of reach from heat zones near stoves.
Zone Your Kitchen for Smarter Storage Solutions
Identify moisture hotspots near sinks and heat radiators above cooktops before loading shelves. Place metal canisters and stoneware near the stove—they handle splashes better than porous wood. Keep fresh herbs and delicate china in dry upper zones away from steam. Reserve the prime real estate directly above your coffee maker for a dedicated coffee bar setup, while the space beside your sink becomes the “clean zone” for glassware and drying racks. This zoning prevents warping, staining, and constant reorganizing when life gets messy.
Choose Shelf Materials That Survive Real Kitchens
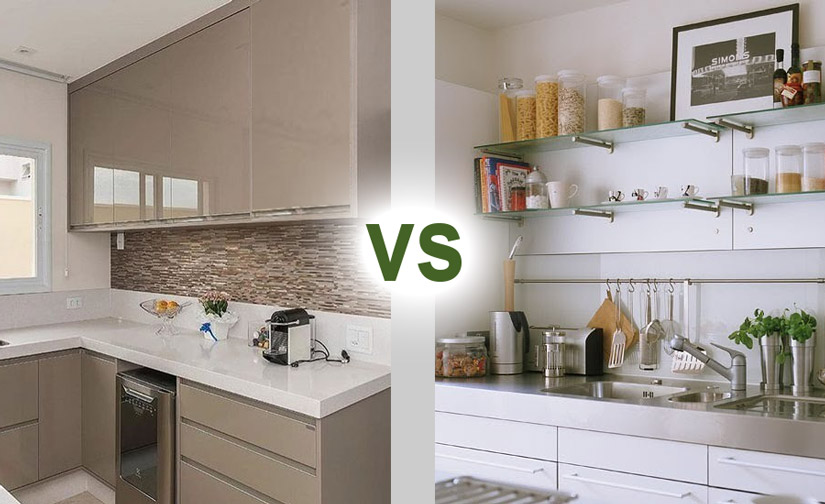
Wood vs. Glass vs. Metal: Grease-Proof Your Style
Reclaimed wood shelves deliver rustic charm but demand annual resealing in high-grease zones—wipe monthly with a damp cloth to prevent oil buildup. Glass shelves create a light-reflecting modern look but require weekly cleaning with vinegar solution; avoid installing above busy cooktops where grease splatters accumulate fastest. Metal brackets (brass or matte black steel) offer industrial edge but need weekly microfiber dusting to prevent micro-scratches. For renters, melamine shelves are the hero—wipe clean with mild soap and pair with unbreakable melamine bowls for stress-free living.
Respect Weight Limits to Avoid Disaster
Standard floating brackets support 20-30 pounds per stud—test with a firm tug before loading heirloom ceramics. Distribute weight evenly by placing heaviest items (like cookbooks or stoneware) directly above brackets. Never stack more than four dinner plates vertically on lower shelves, and keep espresso machines centered over support brackets. If shelves tilt after loading, immediately relocate heavy items to lower levels and re-anchor wobbling brackets into studs. Safety isn’t stylish, but broken pottery on your kitchen floor definitely isn’t.
Master Color Palettes That Don’t Clash Daily

Build on Neutral Foundations for Effortless Harmony
Start with whites, warm beiges, and soft browns as your base—these tones create visual breathing room and pair with any accent color. Limit bold hues to 10% of your display: one indigo bowl set or a single matte black pitcher adds punch without chaos. Stick to five coordinating hues maximum (like ivory, sage green, slate blue, walnut wood, and brass) to prevent visual noise. When in doubt, step back six feet and squint; if colors blur into a muddy mess, rotate bold pieces to closed storage and reintroduce neutral alternatives.
Pull Colors From Existing Art for Instant Cohesion
Spot a landscape painting or abstract print you love? Extract 3-5 colors from it to guide your dishware selection. A coastal watercolor might inspire reactive-glaze ocean-blue stoneware and sea-glass vases, while an autumnal piece suggests matte pistachio green dinnerware and wood bead garlands. This creates effortless cohesion without matchy-matchy perfection. Thrifted hardback cookbooks with muted spines can be color-blocked by tone (ivory, slate, charcoal) to form a textured backdrop that ties everything together.
Style with Proven Formulas That Work Every Time

Create Visual Triangles with the Rule of Three
Group objects in height variations: a tall white cylinder vase (9″), medium stack of pistachio green bowls (6″), and small salt cellar (3″). This staggered approach guides the eye naturally across shelves. Apply this to every cluster—pair a tall herb pot with medium mugs and small spice jars. Avoid symmetrical rows; instead, lean an acacia wood cutting board at a 15-degree angle against bowls for organic movement.
Balance Diagonally for Dynamic Energy
Place identical items on opposite corners of adjacent shelves to create invisible zig-zag lines. Two white pitchers on top-left and bottom-right corners feel balanced but not rigid. Repeat with glass cloches, small plants, or brass candlesticks. For coffee bars, position your espresso machine forward on the bottom shelf while stacking mugs diagonally above it—this creates flow between functional zones.
Source Budget-Friendly Essentials That Elevate Your Display

Dinnerware That Doubles as Decor Under $25
Reactive-glaze blue stoneware sets ($18-22 per place setting) offer sand-and-sea texture and microwave safety. Matte pistachio green bowls ($16-20) stack beautifully for everyday use while adding color. Ribbed white porcelain serving bowls ($12-14) provide versatile, neutral bases that highlight vibrant foods. Skip matchy sets—mix two-toned exposed clay stoneware ($15-18) with vintage silver pieces for curated charm.
Storage Solutions That Hide Clutter in Plain Sight
Hobnail ceramic canisters ($8-12 each) store coffee or flour with vintage flair. Build a DIY mason jar wall rack using $10 pipe clamps to hold oils near your stove. Place white lidded ceramic canisters (thrifted for $10-15) on upper shelves for sugar and spices—they disappear into neutral palettes while keeping counters clear.
Troubleshoot Common Shelf Styling Disasters
When Shelves Look Cluttered: The 30% Fix
Immediately remove 30% of items—start with mismatched mugs or duplicate utensils. Apply the Rule of Three clustering: group remaining items in trios with intentional negative space between clusters. Step back six feet and squint; if visual weight feels lopsided, shift taller items toward the heavier side. For daily dishes, leave 2 inches of empty shelf space between plate stacks to prevent a crowded feel.
Combat Grease and Dust with Smart Tactics
Install a high-CFM range hood to reduce airborne residue near cooking zones. Rotate items monthly so undersides don’t develop shadow stains—swap front-facing mugs with backstock weekly. Use matte finishes on lower shelves; they hide grease splatters better than glossy surfaces. For glass shelves, wipe with a microfiber cloth after every meal to prevent film buildup.
Maintain Your Display With Minimal Effort
Weekly 10-Minute Refresh Routine
Remove all items, wipe shelves with a damp cloth, then dry thoroughly to prevent wood warping. While surfaces air-dry, quickly wash glass cloches and vases in the sink. Reset clusters using your diagonal balance method—this takes just 10 minutes but prevents monthly deep cleans. Pro tip: Time this with your Sunday meal prep for effortless habit stacking.
Seasonal Swaps That Feel Fresh Without Overhauling
Summer shift: Introduce ocean-blue stoneware, sea-glass vases, and coconut-scented candles for instant vacation vibes. Winter warmth: Swap in matte pistachio dishes, wood bead garlands, and cinnamon candles. Keep your neutral base consistent (white plates, beige canisters) so accents pop without chaos. Rotate just 3-5 items per season—like replacing eucalyptus stems with pine boughs—to refresh the entire kitchen.
Your kitchen shelves should work as hard as you do—displaying daily essentials beautifully while staying practical for real cooking. Start with neutral foundations, add personality through texture and strategic color, and maintain with micro-habits. The result? Shelves that look styled by a designer but function for your actual life. Use this checklist to launch your project: measure wall space, select shelf material, source neutral dinnerware plus one accent color, gather textured accessories, sketch your diagonal layout, install shelves safely, and schedule weekly maintenance. Within a weekend, you’ll transform blank planks into a space that inspires every meal you make.

