

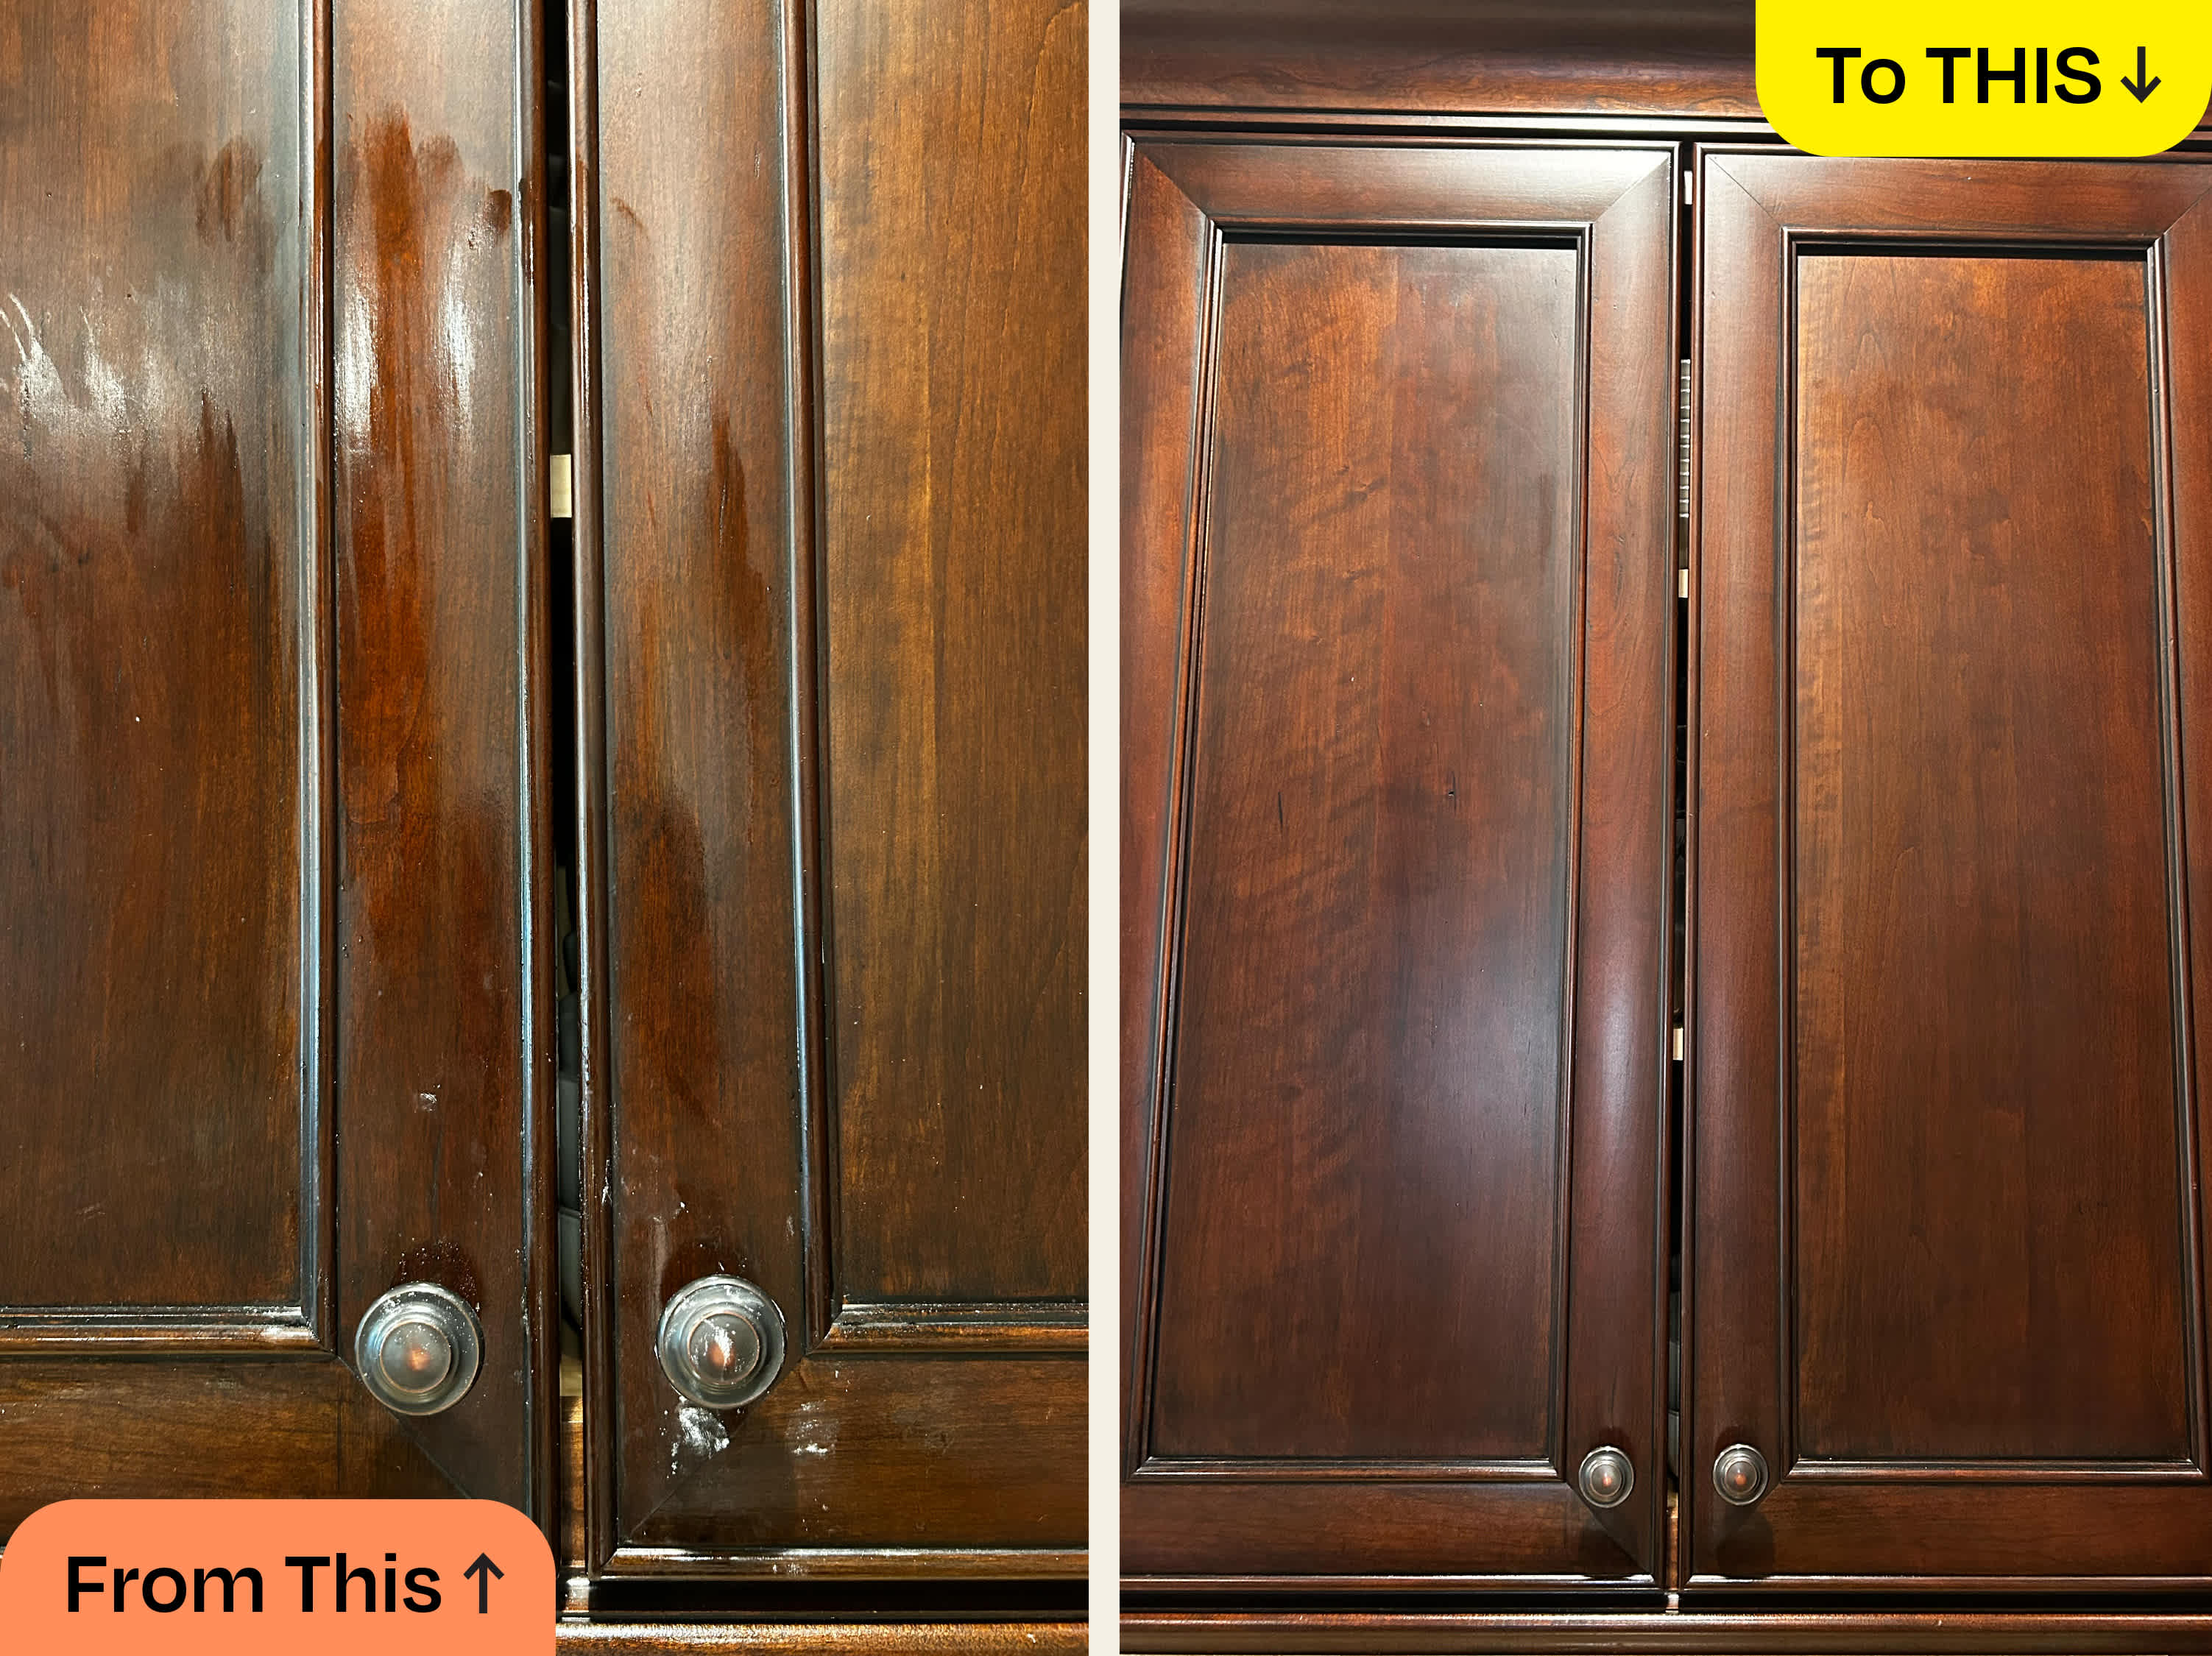
That sticky, amber-colored film coating your cabinets didn’t appear overnight—it’s the result of months (or years) of microscopic cooking vapors cooling and solidifying on every surface near your stove. As these invisible particles accumulate, they transform into the thick, stubborn grease layer that resists your regular cleaning attempts, especially noticeable on white kitchen cabinets and flat-front maple finishes. The good news? Even the most hardened buildup surrenders to the right technique. Forget harsh chemicals that damage finishes—this guide reveals the exact methods professional cleaners use daily to restore cabinets to their original condition without risking damage to your investment.
Most homeowners waste hours scrubbing with ineffective solutions, not realizing that the right grease-cutting approach takes less time than their failed attempts. Whether you’re dealing with light splatter or decades-old buildup, you’ll discover which method matches your situation, how to protect your cabinet finish, and most importantly, how to prevent this cycle from repeating. By the end of this guide, you’ll have a complete action plan to tackle grease at any stage of buildup.
Dawn Dish Soap Unlocks Tough Grease Buildup
Dawn dish soap earns a perfect 5/5 effectiveness rating from cleaning professionals because it breaks down grease molecules on contact through its unique surfactant formula. Unlike harsh degreasers that strip finishes, this kitchen staple penetrates thick buildup while remaining gentle on cabinet surfaces—making it your first line of defense against kitchen grease.
Quick Mix Formula:
– Fill small bowl with warm water (not hot, which can damage finishes)
– Add 1 tablespoon Dawn dish soap—no precise measurement needed
– Stir gently until sudsy without creating excessive foam
Application Process:
1. Dip microfiber cloth into solution, wring until damp (not dripping)
2. Work in 2-foot sections starting at cabinet bottom (prevents drips)
3. Use circular motions with gentle pressure for 30 seconds
4. Watch grease dissolve visibly as you work
5. Rinse cloth frequently in clean water
6. Dry immediately with fresh microfiber to prevent water spots
Pro Timing: Plan 2 minutes per cabinet door for heavy grease, 45 seconds for lighter buildup. For best results, tackle upper cabinets first while solution is fresh.
Vinegar Power Boost for Extra-Sticky Grease
When Dawn alone doesn’t cut through the thickest buildup, white vinegar’s natural acidity provides the extra muscle needed while neutralizing trapped cooking odors. This combination particularly excels on maple cabinets where grease creates visible dark patches that resist standard cleaning.
Mixing Instructions:
– Equal parts white vinegar and warm water in spray bottle
– Add 2 drops Dawn dish soap for enhanced grease-cutting power
– Shake gently to combine (avoid vigorous shaking which creates bubbles)
Effective Application:
– Spray solution onto microfiber cloth (never directly on cabinets)
– Let sit 20 seconds before wiping—this dwell time is crucial
– Use figure-eight motion for even coverage without streaks
– Follow immediately with clean water rinse
– Expect strong vinegar smell that fades within 2 hours
This method requires careful timing—too little dwell time won’t break down grease, while too long can damage some finishes. Always test on hidden area first.
Baking Soda Paste Conquers Rock-Hard Grease

For grease that’s turned into a concrete-like substance around handles and along bottom edges, create a gentle abrasive paste that lifts without scratching. Professional cleaner Alicia Sokolowski specifically recommends this approach for stubborn spots on white cabinets where buildup concentrates.
Paste Recipe:
– 1 tablespoon baking soda
– 1 tablespoon water
– Mix until toothpaste consistency (adjust water as needed)
Strategic Application:
1. Apply paste directly to problem areas using soft cloth
2. Let sit 2-3 minutes (don’t allow to dry completely)
3. Gently scrub using soft-bristled brush in circular pattern
4. Wipe away with damp cloth—residue should come off easily
5. Dry thoroughly to prevent water spots
Critical Warning: Avoid this method on unfinished wood or damaged finishes where paste could penetrate and cause swelling.
White Cabinet Deep Clean Protocol
White kitchen cabinets demand special attention since every grease mark becomes instantly visible. Follow this intensive protocol used by professionals to remove baked-on residue while preserving bright finishes without yellowing.
Preparation Steps:
– Remove doors using screwdriver (label each for easy reassembly)
– Take off all hardware (hinges, knobs)
– Vacuum crevices with soft brush attachment first
– Mix 1 quart warm water with 1 tablespoon Dawn and 2 tablespoons baking soda
Cleaning Sequence:
1. Work solution with microfiber in circular motions
2. Use soft toothbrush for detailed edges and grooves
3. Rinse with clean, damp cloth—never skip this step
4. Dry immediately with fresh microfiber—water causes yellowing within minutes
5. Reattach hardware only when completely dry
Pro Tip: Clean one cabinet at a time to prevent solution from drying on surfaces.
Commercial Cleaner Showdown: What Actually Works
Pledge Everyday Cleaner (4/5 Rating)
- Ready-to-use spray formula saves mixing time
- Leaves subtle citrus fragrance without overpowering
- Creates protective sheen that repels future grease
- Best for maintenance cleaning between deep cleans
Murphy Oil Soap (3/5 Rating)
- Requires two-step process (clean then rinse)
- Leaves citronella scent many find unpleasant
- Suitable for natural wood cabinets but avoid on painted surfaces
- Costs more with limited grease-cutting power
Castile Soap Mixture (2.5/5 Rating)
- Tends to fizz and leak from bottles during use
- Struggles with heavy buildup despite ingredients
- Higher cost with minimal effectiveness
- Only works adequately for light, fresh grease
Critical Mistakes That Damage Cabinets During Cleaning
Never spray cleaner directly on cabinets—this creates drip marks and allows liquid to seep into seams, causing swelling or finish damage. Always apply to your cloth first, as professional cleaner Rosa Picosa emphasizes.
Skip abrasive scrubbers completely including steel wool, magic erasers, or rough sponges. These create permanent scratches that attract more grease and become impossible to remove.
Avoid bleach and ammonia on painted cabinets. These chemicals strip paint and cause yellowing, especially on white surfaces where discoloration is most noticeable.
Don’t forget to dry immediately—letting cabinets air-dry leads to water spots, finish damage, and potential warping of wood components. Keep multiple dry microfiber cloths ready.
Your 5-Minute Daily Routine to Prevent Grease Nightmares
Stop grease before it becomes a problem through simple daily habits that take mere seconds but save hours of scrubbing later. Professional cleaner Ashley Kidder notes that consistent light maintenance prevents 90% of serious buildup.
Immediate Action Habits:
– Wipe splatters while cooking with damp microfiber
– Use splatter screens during high-heat cooking
– Run range hood during all stove use
– Keep dedicated cleaning cloth near stove
Monthly Maintenance:
– Quick wipe-down with Dawn solution
– Inspect high-risk areas weekly
– Clean behind handles where grease collects first
– Check cabinet undersides near stovetop
Seasonal Deep Clean:
– Remove doors quarterly for thorough cleaning
– Clean hinges and hardware during removal
– Inspect for early signs of finish damage
– Apply protective polish if recommended
Troubleshooting Stubborn Grease Problems
Grease balls up during cleaning: Switch to Dawn method—current solution too weak. This happens when grease is partially dissolved but not fully broken down.
Streaky finish appears: Rinse cloth more frequently and dry completely. Streaks usually indicate soap residue left behind.
White residue remains: Baking soda not fully removed—rewipe with damp cloth. This often occurs in corners and grooves.
Cabinets feel sticky: Dawn solution needs second application—grease partially dissolved. Residual stickiness means some grease remains.
When to call professionals: Consider expert help when grease resists all household methods after two attempts, or when dealing with antique, custom-built cabinets where mistakes could be costly.
After successfully removing thick grease, maintain your cabinets’ renewed appearance through consistent, gentle care. Keep a dedicated microfiber cloth near your kitchen for immediate cleanup, and schedule monthly 15-minute maintenance sessions. Remember: the best degreasing method is the one you’ll actually use consistently. Start with the gentlest approach (Dawn soap) and escalate only if needed—your cabinets will stay cleaner longer with minimal effort. Implement these techniques today and transform your greasy kitchen nightmare into a spotless, welcoming space that reflects your pride in home care.

