
That annoying drip from your kitchen sink spray head just turned into a steady stream, soaking your countertops every time you try to rinse vegetables. Don’t panic—you don’t need to call a plumber for this common issue. Replacing a kitchen sink spray hose is a straightforward DIY project most homeowners can complete in under 30 minutes with basic tools. This guide cuts through the confusion to show you exactly how to replace a kitchen sink spray hose, whether you have a Moen, WaterRidge, or generic faucet. You’ll learn to identify your connection type, avoid costly mistakes, and install your new hose without flooding your cabinet.
When your pull-out sprayer starts leaking, it’s usually the hose itself failing—not the entire faucet. The good news? Fixing this saves you $150+ in plumber fees and takes less time than your morning coffee break. In this step-by-step walkthrough, you’ll discover how to safely disconnect old fittings, transfer critical components like the hose weight, and test your installation like a pro. By the end, you’ll have a leak-free sprayer that retracts smoothly and lasts for years.
Spot Your Hose Connection Type Before Buying Parts
Choosing the wrong replacement hose causes 90% of DIY installation failures. You must identify your system before purchasing parts—otherwise, you’ll waste time and money on incompatible hardware. Under-sink connections fall into two distinct categories, and mixing them up guarantees leaks.
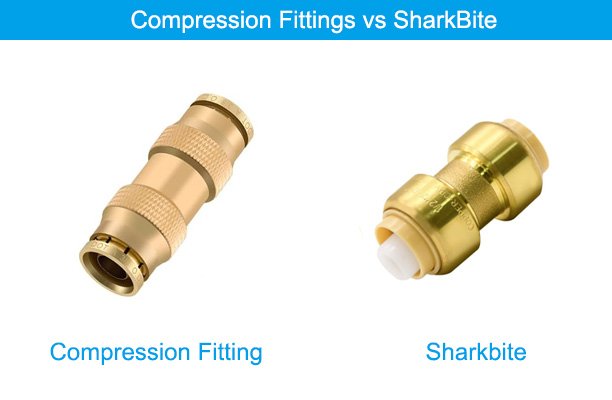
Quick-Connect vs Threaded Systems: Visual Identification Guide
Crawl under your sink with a flashlight and locate where the hose meets the water supply lines. Quick-connect systems feature white plastic fittings with visible tabs or collars—no tools needed for removal. Press the tabs inward while pulling the hose down; it should release with a soft click. Threaded/compression systems show a gold or brass-colored collar (about 1 inch wide) secured with a white rubber washer inside. You’ll need an adjustable wrench to loosen these.
Critical visual cue: If you see plastic tabs you can press with your thumb, it’s quick-connect. If you spot metal nuts requiring a wrench, it’s compression. Never assume based on the spray head appearance—always verify at the water supply connection point.
Brand-Specific Patterns That Determine Compatibility
Check your faucet handles for hidden clues. Moen faucets often display “H|C” stamped on the handle base and use universal quick-connect hoses regardless of model year. WaterRidge systems (sold exclusively at Costco over 10 years ago) have distinctive blue-tinted plastic connectors and require brand-specific replacements. Modern pull-out faucets from Kohler or Delta typically follow Moen’s quick-connect standard, but always measure your old hose first—lengths range from 54 to 68 inches.
Pro tip: If your faucet lacks visible branding, examine the hose weight. Moen uses a smooth cylindrical weight, while WaterRidge employs a ribbed design. Snap a photo of your connection point before heading to the store—Home Depot and Lowe’s staff can match it instantly.
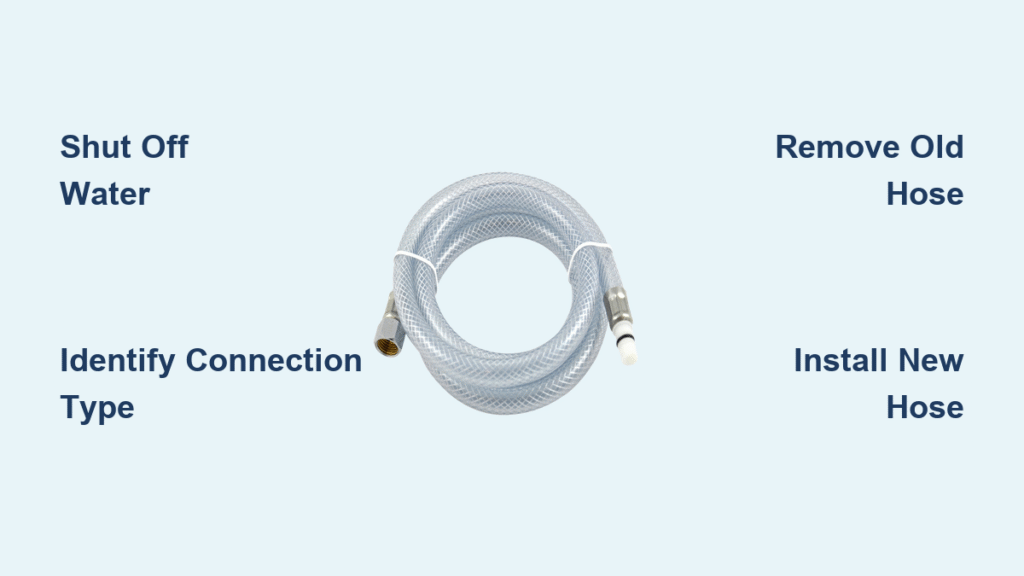
Shut Off Water Supply: The Non-Negotiable First Step
Skipping this risks flooding your cabinet in seconds. Locate the oval-shaped shutoff valves under your sink connected to copper or flexible supply lines. Turn both hot and cold valves clockwise until they stop—never force stiff valves. If they haven’t moved in years, wrap a rag around the stem and apply gentle pressure with pliers. Forcing them can shear the valve stem, creating a much bigger emergency.
Critical warning: Test that water is truly off by turning on your faucet briefly. If water still flows, you’ve shut off the wrong valves—common in older homes with shared supply lines. In that case, shut off your main house water valve before proceeding.
Remove Old Spray Head Assembly Safely
Starting at the spray head end gives you maximum workspace and prevents hose tangles. This method works universally for all connection types.
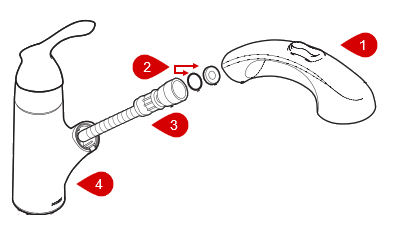
Detach Spray Head from Hose in 20 Seconds
Pull the sprayer fully out from the sink deck. Grip the spray head firmly and unscrew the bottom portion counterclockwise—you’ll expose a threaded silver collar with a white washer inside. Remove this washer and set it aside; it’s often reusable. Visual cue: If the washer is cracked or flattened, replace it immediately—it’s likely why your hose leaked.
Extract the C-Clip Without Losing It
Look for a tiny C-shaped metal clip sitting in a groove around the white plastic hose fitting. This clip locks the assembly together. Use a small flathead screwdriver (or even a butter knife) to gently pry one end of the C-clip upward until it clears the groove, then slide it completely off. Pro tip: Place a magnet nearby to catch the clip—it’s small enough to vanish into cabinet shadows instantly.
Slide Components Off for Clean Removal
With the C-clip removed, the threaded silver portion and plastic nut slide freely off the hose end. Feed the exposed hose down through the mounting hole in your sink deck. Common mistake: Forcing components—everything should move smoothly. If stuck, double-check that the C-clip is fully removed before applying pressure.
Disconnect Water Supply End Based on Your System
Your approach depends entirely on the connection type identified earlier. Never mix methods—applying pliers to a quick-connect fitting will shatter it.
Quick-Disconnect Method: Tool-Free Release
For Moen-style systems, locate the white plastic fitting where the hose meets the supply line. Press both tabs inward simultaneously while pulling the hose straight down—it releases with minimal force. Key indicator: You’ll hear a distinct click when disconnecting. If it resists, you’re either pressing only one tab or have a compression fitting misidentified as quick-connect.
Compression Fitting Removal: Wrench Technique That Prevents Damage
For gold-collar systems, position an adjustable wrench on the nut and turn counterclockwise (lefty-loosey). Apply steady pressure until loose, then pull the hose straight down. Critical step: Inspect the white rubber washer inside the collar. If it’s cracked, brittle, or distorted, replace it—this washer causes most “new hose” leaks. Keep the old washer as a template when buying spares.
Choose Correct Replacement Hose to Avoid Repeat Work
Measure your old hose from end-to-end before purchasing—standard lengths vary by 14 inches. Bring the old hose to the store if possible; digital photos often misrepresent connector types.
Compatibility Checklist for Flawless Fit
- Moen faucets: Any Moen replacement hose works universally—ignore model numbers
- WaterRidge (Costco) systems: Order exact replacements from WaterRidgeParts.com
- Generic faucets: Match connector type (quick-connect tabs must align perfectly)
- Hose weight: Transfer your old weight to the new hose—most replacements don’t include it
Money-saving secret: Moen honors lifetime warranties on hoses. If your faucet is Moen (check for “Moen” on the baseplate), call 1-800-289-6636 for a free replacement—no proof of purchase needed.
Install New Hose Correctly in 4 Critical Steps
Feed the new hose through your sink deck’s mounting hole following the old hose’s path. Route it away from sharp cabinet edges to prevent future abrasion leaks.
Attach Spray Head End: C-Clip Installation Made Foolproof
Slide the threaded silver portion onto the hose first, followed by the plastic nut. Position the C-clip into the groove around the white plastic fitting—it should snap in with firm finger pressure. Add the washer (replacing if damaged), then screw the spray head clockwise until snug. Pro tip: Hold the threaded portion steady with pliers while tightening the spray head to prevent internal damage.
Connect Water Supply: The Leak-Proof Method
For quick-connect systems, align the new hose fitting with the supply connector and push straight up until you hear a solid click. For compression fittings, insert the hose with a new washer (if needed), hand-tighten the gold collar, then give it a quarter-turn with your wrench—over-tightening cracks fittings. Visual test: A properly seated quick-connect shows no visible gaps between fittings.
Test and Troubleshoot Like a Professional
Turn water supply valves counterclockwise to restore flow. Pull out the sprayer and test both spray and stream functions. Check connections for 60 seconds—most leaks appear immediately.
Common Installation Issues and Instant Fixes
- Spray head wobbles: The C-clip isn’t fully seated—reinstall it with needle-nose pliers
- Dripping at supply connection: Tighten compression collar 1/8 turn or replace washer
- Hose won’t retract: Transfer the old hose weight to the new hose—position it 6 inches from the spray head
When to Call a Professional Immediately
If water sprays from the supply lines (not the spray hose), you likely have internal valve failure requiring full faucet replacement. Similarly, if shutoff valves leak after turning them off, stop work—this indicates corroded valve stems needing professional repair. Urgent sign: Water pooling under your sink cabinet after installation means a major connection failure—shut off main water immediately.
Maintain Your New Hose for 5+ Years of Trouble-Free Use
Extend your spray hose lifespan with these simple habits. Every three months, check connections for loosening by hand-tightening the spray head and supply collar. Clean mineral buildup by unscrewing the spray head and soaking it in white vinegar overnight—this prevents clogs that strain the hose.
Critical longevity tip: After heavy use, retract the hose slowly by hand rather than releasing it to snap back. This reduces stress on the C-clip and hose interior. Replace washers at the first sign of minor drips—you’ll avoid emergency replacements later. For Moen systems, register your faucet online to activate lifetime warranty coverage on future hose replacements.
Replacing your kitchen sink spray hose isn’t just about fixing a leak—it’s about regaining confidence in your DIY skills. By following these precise steps, you’ve transformed a frustrating problem into a satisfying victory. Now that your sprayer works like new, consider tackling that dripping faucet handle next—most require just two wrenches and 15 minutes. Your kitchen runs better when you understand its mechanics, and this repair proves you’ve got what it takes to keep it flowing smoothly.

