
Water suddenly pooling under your sink isn’t just a cleanup chore—it’s a ticking time bomb for your kitchen’s structural integrity. When moisture seeps into particle board cabinetry supporting stone countertops, the damage can escalate from swollen edges to complete structural failure within days. The terrifying reality? Stone countertops cannot be safely removed and reinstalled once placed, making traditional repair approaches impossible. This comprehensive guide reveals exactly how to fix kitchen countertop water damage while keeping your expensive countertop securely in position—saving you thousands in potential replacement costs and avoiding the nightmare of countertop removal.
Identify Your Particle Board Damage Stage Immediately
Spot Early Warning Signs Before Irreversible Damage
Water-damaged particle board progresses through predictable stages that determine your repair options. Within hours of exposure, moisture causes the compressed wood fibers to swell at edges and seams. At this initial stage, you might notice slight bubbling on cabinet surfaces or a soft spot when pressing on shelves. Act within 24-48 hours for the best chance of saving structural components. Delay beyond this window allows moisture to penetrate deeper, causing the board to lose cohesion and eventually disintegrate into mush-like material that can’t support your countertop’s weight.
Determine Which Water Damage Pattern You’re Facing
The water’s origin dictates your repair strategy—knowing which pattern applies to your situation saves critical time. Slow leaks from sink fittings typically damage only the lowest 3-6 inches of cabinet structure directly beneath plumbing connections. Household flooding events often dissolve entire cabinet bases while leaving vertical supports intact. Spray damage from burst pipes creates tall but narrow damage zones concentrated behind plumbing fixtures. Pinpointing your damage pattern helps you focus efforts where they matter most and prevents unnecessary work on unaffected areas.
Secure Your Countertop with Proper Temporary Supports
Install Load-Bearing Struts That Prevent Countertop Collapse
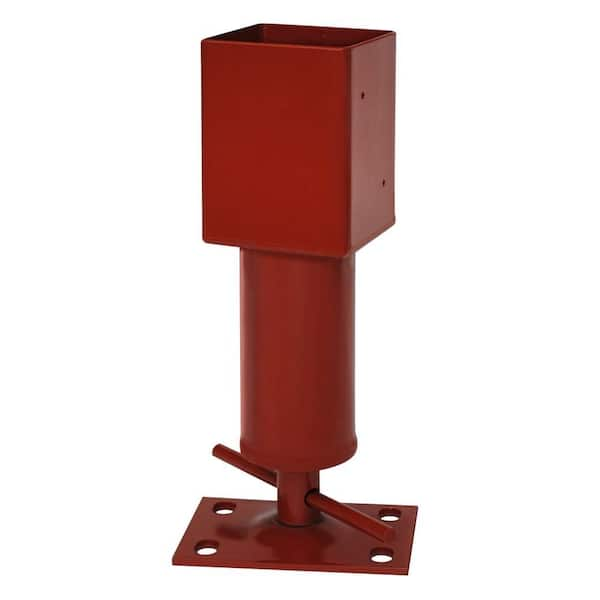
Before removing any damaged material, you must install temporary support that mirrors your cabinet’s original load-bearing capacity. Position 2×4 lumber vertically from floor to countertop underside at 12-inch intervals across the entire damaged section. Use adjustable jack posts for precise height adjustment—your stone countertop should show zero deflection when you press down firmly with moderate pressure. This step is non-negotiable; particle board loses strength rapidly when wet, and your countertop’s weight (often 15-20 pounds per square foot for stone) can cause catastrophic failure without proper support.
Validate Support System Strength Before Proceeding
Test your temporary support system by applying pressure across the countertop surface. Place heavy objects (like full water bottles) at various points to simulate normal use. Any flexing, creaking, or movement indicates insufficient support—add additional struts immediately. Remember that stone countertops have minimal flex tolerance; even slight movement during repair work can create hairline cracks that worsen over time. Professional carpenters often use laser levels to verify perfect countertop alignment before beginning cabinet work.
Extract Damaged Cabinetry Without Compromising Structure
Remove Mushy Particle Board Using Non-Damaging Techniques
Begin extraction using plastic putty knives and old credit cards to avoid scratching adjacent surfaces. Scoop out completely dissolved sections first, working from the cabinet’s interior toward the walls. For semi-solid pieces, score along healthy wood edges with a utility knife before gentle prying—some sections might retain enough integrity to dry and regain partial strength. Never use metal pry bars directly against stone surfaces; protect edges with cardboard padding during removal operations.
Save Every Salvageable Component for Potential Reuse
Set aside any boards that maintain structural integrity despite water exposure. These pieces can regain 70-80% of their original strength through proper drying techniques. Mark each piece with masking tape indicating “dry and reuse” or “replace” to avoid confusion during reconstruction. Pay special attention to vertical support pieces—they often remain intact even when horizontal shelves fail, providing critical reference points for rebuilding accurate dimensions.
Reconstruct Cabinet Structure with Water-Resistant Materials

Replace Components Using Proper Moisture-Resistant Alternatives
Cut new cabinet components from marine-grade plywood or moisture-resistant MDF—never reinstall standard particle board in water-prone areas. Measure precisely: horizontal shelves need 1/16-inch clearance on all sides for expansion, while vertical supports should fit snugly against existing cabinet walls. Pre-drill all screw holes to prevent splitting in replacement materials. When rebuilding, consider adding extra vertical supports at 8-inch intervals instead of the standard 12 inches for enhanced water damage resistance.
Apply Maximum Waterproof Protection to All New Wood
Seal every surface of new cabinet components with marine-grade polyurethane or epoxy resin before installation—standard wood sealers won’t withstand prolonged moisture exposure. Pay special attention to edges and joints where water typically penetrates. Apply three thin coats rather than one thick coat for maximum penetration and protection. Allow 24 hours drying time between coats, and wait 72 hours before reinstalling hardware to ensure complete curing.
Restore Full Cabinet Functionality with Professional Results
Reinstall Hardware Using Original Alignment Points
Position new cabinet components using the original cabinet as your template. Attach drawer slides, door hinges, and shelf supports exactly where they existed previously—this ensures doors align properly and drawers operate smoothly. Use stainless steel screws throughout to prevent future corrosion. When reinstalling doors, check alignment with a level; even minor misalignments become noticeable after installation and require difficult corrections.
Blend Repaired Areas with Existing Cabinet Finishes
Create seamless transitions between repaired and original surfaces by sanding affected areas lightly before refinishing. Apply matching stain or paint working from the repair area outward to create natural color blending. Water damage often extends up cabinet walls, creating visible stain lines—address these simultaneously with your repair work. For painted cabinets, consider upgrading to moisture-resistant cabinet paint during restoration for added protection against future incidents.
Prevent Future Water Damage with Proactive Measures
Install Early Warning Leak Detection Systems
Place battery-powered water sensors under sink areas and near dishwasher connections where leaks commonly occur. These devices emit loud alerts at the first sign of moisture, giving you critical response time before damage occurs. Check sensor batteries quarterly and replace units every 2-3 years as sensors degrade over time. For maximum protection, connect multiple sensors to a central monitoring system that alerts your smartphone when moisture is detected.
Establish a Monthly Cabinet Inspection Routine
Schedule cabinet interior inspections during your regular cleaning routine—look for condensation on pipes, slow drips from fittings, or musty odors indicating hidden leaks. Address any issues immediately; even small leaks can destroy particle board within days. Keep a flashlight and small mirror in your cleaning caddy to inspect hard-to-see areas behind plumbing connections. Consider placing moisture-absorbing packets in cabinet bases during humid seasons as an additional preventive measure.
Know When to Call Professionals for Countertop Water Damage
Recognize Critical Situations Requiring Expert Intervention
Call a professional carpenter immediately if damage extends beyond basic cabinet bases to structural support beams or electrical components. When more than 60% of your cabinet structure shows damage, professional assessment becomes essential—typically costing $150-300 but preventing costly mistakes that could compromise your entire kitchen. Professionals can accurately assess salvageable versus replaceable components, often saving significant replacement costs while ensuring temporary support systems meet load requirements for your specific countertop material.
Maximize Value from Professional Repair Services
Experienced carpenters bring specialized tools and techniques that dramatically improve repair outcomes. They’ll use moisture meters to precisely determine damage extent beyond visible signs, employ professional-grade structural adhesives that bond stronger than original construction, and apply commercial sealants that provide superior water resistance. Most importantly, they understand the critical load requirements for different countertop materials—granite requires different support than quartz or solid surface materials.
Your kitchen can fully recover from water damage without the nightmare of countertop removal. By following these precise steps—from immediate damage assessment through permanent structural repair—you’ll restore complete functionality while preserving your beautiful stone surfaces. Remember that timely action makes the difference between a manageable repair and catastrophic failure. Implement the prevention strategies outlined here to protect your investment, and don’t hesitate to consult professionals when facing extensive damage—they’ll ensure your repair lasts for years rather than months. With proper techniques, how to fix kitchen countertop water damage becomes a straightforward process that saves you thousands while maintaining your kitchen’s beauty and functionality.

