
Your kitchen waste disposal just stopped mid-grind. Water backs up into the sink while a faint hum or eerie silence greets every flip of the switch. You’re not alone—nearly every household faces this exact moment when taco night turns into a plumbing nightmare. This guide walks you through diagnosing and fixing the most common failures, from simple resets to leak repairs, without flooding your kitchen or voiding warranties. You’ll learn to identify why your disposal quit, clear jams safely, and prevent future breakdowns—all in under 30 minutes with basic tools.
Essential Safety Steps Before Any Repair
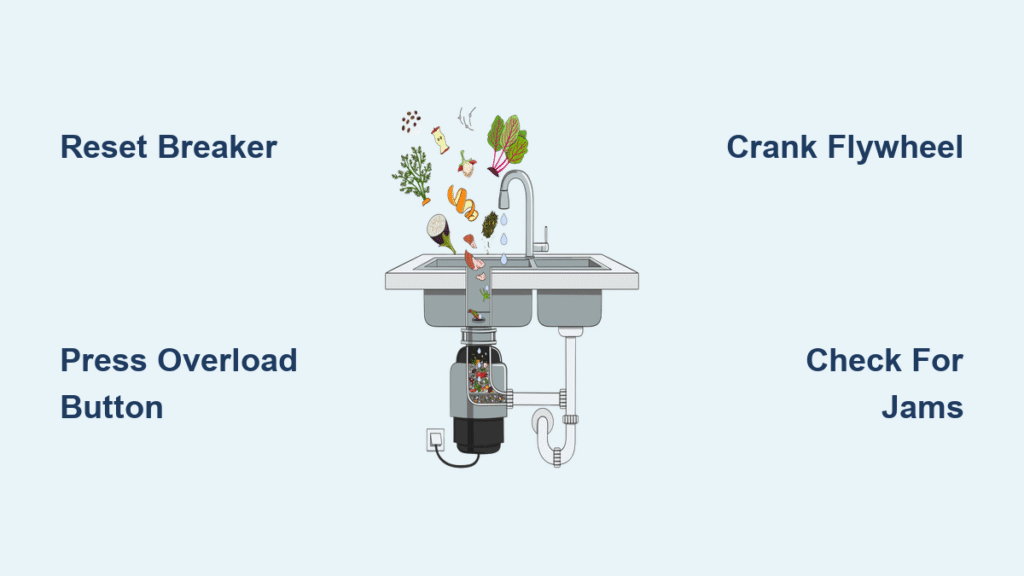
Flip the dedicated breaker for the disposal circuit immediately—don’t trust the wall switch alone. Confirm the unit has cooled for at least 15 minutes to avoid burns from hot components. Slip on safety glasses before peering under the sink; glass shards or bone fragments can fly when manually cranking the flywheel. Always keep a flashlight and 5-gallon bucket nearby to catch unexpected leaks during disassembly. Never reach into the disposal chamber with your hands, even when powered off—sharp impellers can cause severe lacerations.
Verify Power Sources First
Check the outlet by plugging in a phone charger or lamp to confirm live power. Test all GFCI outlets within 6 feet of the sink, as kitchen circuits often trip these safety devices—press “Reset” firmly until it clicks. Locate the disposal’s overload button (a small red or black square on the unit’s bottom) and press it until you feel a distinct click. If the unit remains dead after these steps, proceed to electrical diagnostics.
Recognize Dangerous Failure Signs
A steady humming motor with no grinding indicates a jammed flywheel—shut off power immediately to prevent motor burnout. Warm casing during operation signals the motor is fighting an obstruction. Persistent mildew odors under the sink often reveal hidden leaks you can’t see. If you smell burning plastic or see smoke, skip troubleshooting and call an electrician—this indicates serious internal damage.
Clear Jammed Disposals in 3 Critical Steps
Manual Crank Technique for Stuck Flywheels
Insert the correct ¼-inch Allen wrench into the center hex socket on the unit’s bottom. Turn the wrench back and forth in both directions until resistance eases—you’ll feel the flywheel break free with a sudden “clunk.” Remove debris with long-nose pliers, never fingers. For batch-feed models, remove the lid and invert the unit to shake out chunks trapped in the grinding chamber.
Identify and Remove Common Jam Culprits
Fibrous foods like celery and corn husks wrap tightly around impellers—cut these into 2-inch pieces before future grinding. Silverware, bottle caps, and fruit pits create metallic rattles; use a flashlight to spot these through the drain opening. Never grind potato peels, rice, or pasta—they expand when wet and cause severe clogs. If impellers show more than ⅛-inch play when wiggled, replace the assembly ($25-$60).
Prevent Repeat Jams with Proper Usage
Always run cold water for 30 seconds before and after grinding to flush debris. Cut hard items like bones into 1-inch pieces to avoid overloading. Replace torn splash guards immediately—these rubber components prevent food from escaping the grinding chamber. Start the disposal before adding food scraps, not after, to maintain proper grinding momentum.
Stop Leaks at Three Critical Points
Fix Flange Gasket Failures
Detach the disposal from the sink flange using the twist-lock ring. Scrape all old plumber’s putty from mating surfaces with a plastic putty knife and clean with rubbing alcohol. Roll fresh non-staining putty into a ½-inch rope and press evenly under the new flange before reassembly. Hand-tighten the mounting ring, then give one-quarter turn with pliers—overtightening cracks the sink flange.
Seal Dishwasher Inlet Leaks
Replace cracked plastic hose barbs with brass versions that resist vibration damage. Tighten stainless steel clamps with a ¼-inch nut driver until snug—overtightening cuts the rubber hose. Install an air gap device if local codes require it; this prevents backflow and reduces leak pressure during dishwasher cycles. Check connections after every major cleaning session.
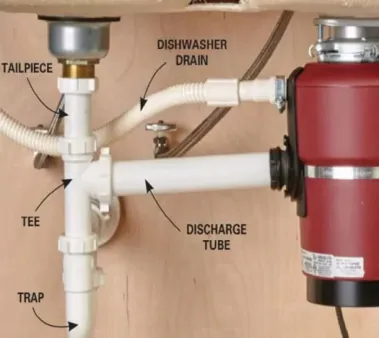
Secure Discharge Pipe Connections
Hand-tighten slip-nuts plus one-quarter turn with pliers to prevent cross-threading. Ensure tapered gaskets face downstream for proper compression. Replace cracked PVC discharge pipes with flexible rubber hoses in freeze-prone climates—they withstand temperature shifts without cracking. Test for leaks by running water for 2 minutes after reassembly.
Diagnose Motor Failures Beyond Simple Jams
Humming Motor Without Rotation
A swollen or leaking capacitor stops motor start-up—replace it with an identical microfarad rating. Spray electrical contact cleaner into the centrifugal switch if it’s sticking. If the flywheel spins freely by hand but the motor hums, suspect shorted windings requiring professional repair. Allow 30 minutes between overload resets to prevent thermal damage.
Grinding or Rattling Noises
Remove foreign objects like coins through the throat opening using needle-nose pliers. Deep growling noises indicate worn bearings—replacement motors cost $80-$200. Place rubber isolation pads under the mounting ring to dampen vibration from unbalanced impellers. Never add oil to modern disposal motors—sealed bearings require no lubrication, and oil gums internal components.
Thermal Cut-Off Cycling Fixes
Ensure side vents aren’t blocked by stored cleaners or insulation. Run cold water continuously when grinding high-load foods like coffee grounds. If the unit shuts off repeatedly, let it cool for 30 minutes before retrying—forcing operation causes permanent damage. Units over 12 years old often need replacement when thermal cycling begins.
Maintenance That Prevents 90% of Failures

Weekly Cleaning Routine
Fill the chamber with ice cubes and ½ cup rock salt; run for 30 seconds to scour grease buildup from walls. Drop small lemon or orange peels for natural deodorizing—avoid large peels that jam impellers. Use enzyme-based cleaners monthly to break down organic matter without damaging seals. Never use chemical drain cleaners—they corrode rubber components.
Annual Deep Clean Protocol
Power down at the breaker and remove the disposal from the sink. Soak the unit in warm vinegar for 15 minutes to dissolve mineral scale. Inspect all seals and gaskets for cracks or hardening—replace any showing wear. Check impeller play and replace assemblies exceeding ⅛-inch movement. Reassemble using food-grade grease only on O-rings, never motor parts.
Lifespan Extension Tactics
Light-use disposals (≤3 times/week) last 12-15 years with proper care. Daily users should replace splash guards annually and impellers every 3 years. Heavy-use units (multiple meals daily) need professional servicing every 18 months. Keep this guide taped inside your cabinet—most failures resolve in under 30 minutes when you follow the correct sequence.
Bottom line: 80% of disposal failures stem from jams, leaks, or simple electrical resets—not motor death. When leaks persist after resealing or circuit breakers trip repeatedly, call a pro to avoid code violations. For units over 12 years old, replacement often beats repair—new models start under $150. Keep cold water running during use, avoid fibrous foods, and reset properly after jams to make your disposal last through countless taco nights. Tackle that humming unit now using the reset sequence: flip the breaker, press the red button until it clicks, then test with running water. Your kitchen will be back in action before the guacamole browns.

