

Nothing ruins a beautiful kitchen quite like crooked or improperly hung curtains. Getting your kitchen window treatments right balances privacy needs with the natural light that makes cooking enjoyable. If you’ve ever wondered how to install kitchen curtains that look professionally done without hiring help, you’ve come to the right place. This guide delivers precise measurements, mounting techniques, and troubleshooting solutions that transform your kitchen windows from ordinary to outstanding in under an hour.
Kitchen windows present unique challenges—steam from cooking, frequent cleaning needs, and the constant battle between privacy and light. The good news? With proper installation techniques, you can solve all these problems while enhancing your kitchen’s aesthetic appeal. Whether you’re dealing with a window above your sink or a larger picture window, this step-by-step approach ensures perfect results every time.
Select the Perfect Kitchen Curtain Style
Cafe Curtains for Sink Area Privacy
Mounting cafe curtains at your window’s midpoint creates that classic kitchen look while keeping your workspace bright. These 24-36 inch panels cover just the lower half, perfect for windows above sinks where you need privacy during dishwashing but want light while prepping food. For traditional kitchens, choose cotton or linen blends that complement your cabinetry—these natural fibers resist steam damage better than synthetics and develop a lovely soft drape over time.
Short Drapes for Modern Kitchen Windows
When your kitchen features single-pane windows without architectural details, short drapes provide cleaner coverage than cafe styles. Install these inside your window frame, positioning the rod at the top inside edge for a custom appearance. Measure from the frame’s top to your desired length, typically ending just above the sill. This approach works especially well in contemporary kitchens where you want full privacy without blocking precious light during cooking hours.
Measure Your Kitchen Windows Precisely
Width Calculation for Proper Fullness
Grab your tape measure and record your window’s exact width—then double it. This 2:1 ratio ensures your curtains close completely without looking stretched or skimpy. For a standard 30-inch kitchen window, you’ll need 60 inches of total curtain fabric. If installing cafe curtains, remember this width applies to each side, so plan for two 30-inch panels to achieve that elegant gathered appearance when closed.
Length Determination Based on Mounting Position
For cafe curtains, measure from your intended mounting point (usually window center) to just above the sill. Standard lengths work for most kitchens, but don’t hesitate to order slightly longer panels you can hem yourself—this customization makes store-bought curtains look tailor-made. Always measure from the same reference point on both sides to avoid uneven hanging, a common mistake that makes even beautiful curtains look amateurish.
Rod Extension for Maximum Light Control
Choose rods extending 8-12 inches beyond your window width—4-6 inches per side creates visual width and ensures curtains clear the window completely when open. This extension is crucial in kitchens where you want to maximize light while cooking. For windows near cabinets, measure clearance to ensure rods don’t interfere with cabinet doors while maintaining enough extension for proper function.
Prepare Your Installation Toolkit
Essential Tools Checklist
Gather these tools before starting: tape measure, level, drill with appropriate bits, pencil, screws matching your wall type, wall anchors (always recommended for drywall), curtain rod with brackets, and curtain rings or clips. Having everything ready prevents mid-installation frustrations and ensures you don’t compromise quality by working with inadequate tools. For rental properties, include adhesive hooks or magnetic rods as non-damaging alternatives.
Critical Pre-Installation Steps
Wash and iron your curtain panels before measuring—natural fabrics shrink after their first wash, which can throw off your carefully calculated measurements. Verify pre-made curtain dimensions against your window, ordering slightly longer when possible for custom hemming. This small investment of time prevents the disappointment of curtains that no longer fit properly after their first cleaning.
Position Hardware for Professional Results
Mark Bracket Locations Accurately
Hold brackets in position to visualize final appearance before marking. For cafe curtains above sinks, ensure adequate clearance for faucet operation and cleaning access—typically 2-3 inches above the highest point of your faucet. Mark screw holes with pencil, measuring from consistent reference points like window edges or trim. Transfer exact measurements to the opposite side using your level to guarantee perfect alignment.
Test Layout Before Drilling
Step back and assess your bracket positions with the actual curtains in hand. Consider backsplash height interference, window trim details, and how the curtains will interact with your daily kitchen activities. Higher mounting increases privacy but reduces the classic cafe curtain aesthetic. Find your sweet spot by opening and closing the curtains in their intended position—this simple test prevents costly repositioning later.
Secure Brackets for Long-Lasting Installation
Drill Proper Pilot Holes
Drill pilot holes slightly smaller than your screw threads through your pencil marks—this prevents wall cracking and ensures straight screw insertion. For drywall installations, use wall anchors even if you think you’ve hit a stud; kitchen vibrations from appliances can loosen hardware over time. For heavy fabric or long spans, upgrade to toggle bolts for maximum security in high-traffic kitchen areas.
Level Installation Techniques
Install brackets using appropriate screws, checking level repeatedly as you tighten. Both sides must align perfectly—crooked brackets create obvious visual problems that ruin your professional appearance. For spans over 6 feet (common in kitchen picture windows), add a center support bracket to prevent rod sagging. Tighten screws gradually in a star pattern to distribute pressure evenly and avoid wall damage.
Choose Kitchen-Appropriate Hardware
Select finishes matching your kitchen fixtures—oil-rubbed bronze or matte black suit modern kitchens, while brass complements traditional spaces. Prioritize moisture-resistant materials that clean easily in steamy environments. Brushed finishes hide water spots better than polished ones, and larger diameter rods (1-1/4 inch) support heavier kitchen-appropriate fabrics without bending.
Hang Curtains for Perfect Draping

Prepare Panels for Optimal Hang
For rod pocket curtains, ensure the pocket runs smoothly along the entire rod length—stitch any loose sections before installation. If using rings, space them 6 inches apart for 42-inch wide curtains (7 rings total provides optimal support). Clip rings onto curtains before hanging for easier installation, and arrange gathers evenly across the panel for that professional pleated look.
Execute Flawless Hanging Technique
Thread curtain panels onto rods for rod pocket or grommet styles. For ring clips, attach curtains to rings first, then thread rings onto rods. Install the rod into brackets, tightening barrel ends securely but not so tight that you damage the rod. Adjust curtain positioning immediately after hanging—pull panels outward gently to create even folds and consistent coverage across your window.
Make Final Professional Adjustments
Stand back and evaluate your work from multiple angles and distances. Curtains should hang evenly with consistent spacing and no gaps when closed. Check operation—curtains should open and close smoothly without catching on window hardware. Make small tweaks to ring placement or bracket height now; these minor adjustments prevent major frustrations later when you’re using your kitchen daily.
Fix Common Installation Problems
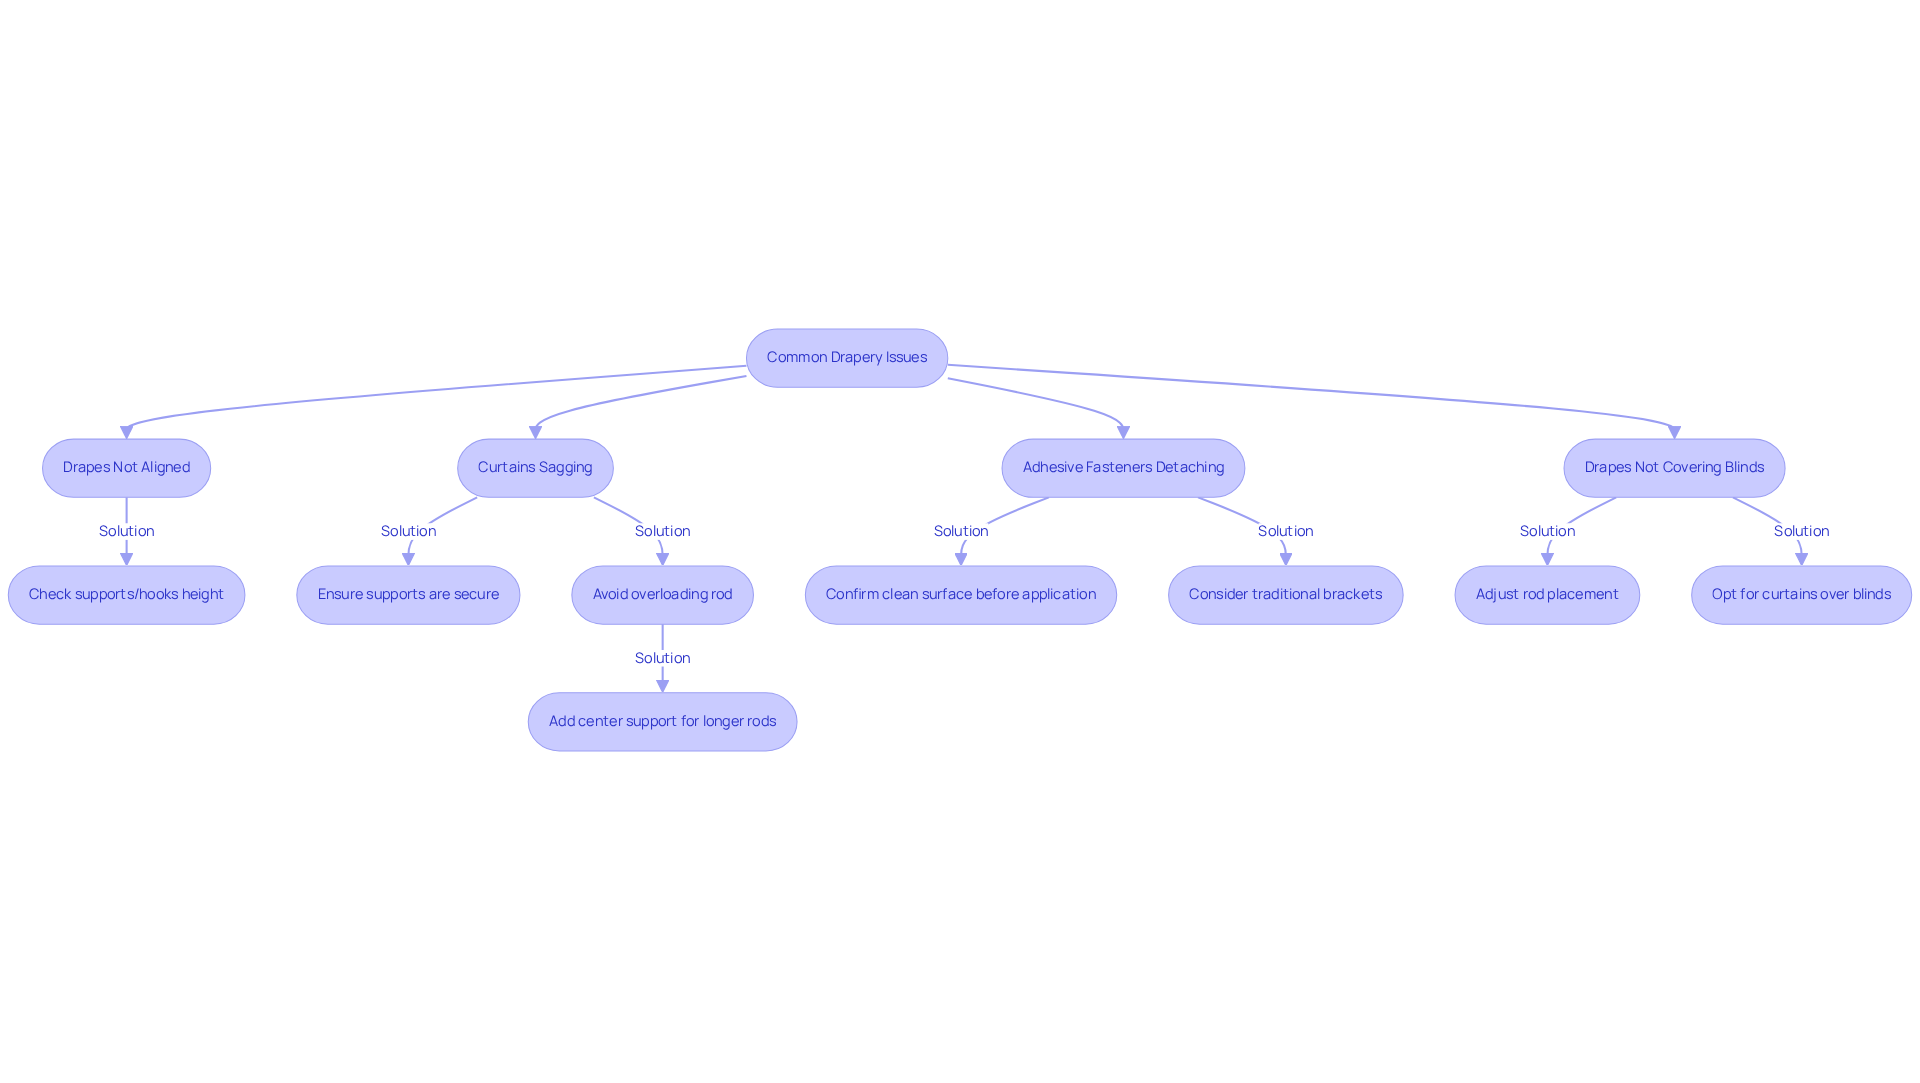
Correct Measurement Errors Immediately
Long curtains can be hemmed to exact specifications using iron-on hem tape—a quick fix that saves replacement costs. Short curtains require lower bracket mounting (if possible) or replacement with longer panels. Never force ill-fitting curtains—they’ll always look obviously store-bought and create uneven light gaps that compromise privacy during cooking.
Solve Alignment Challenges
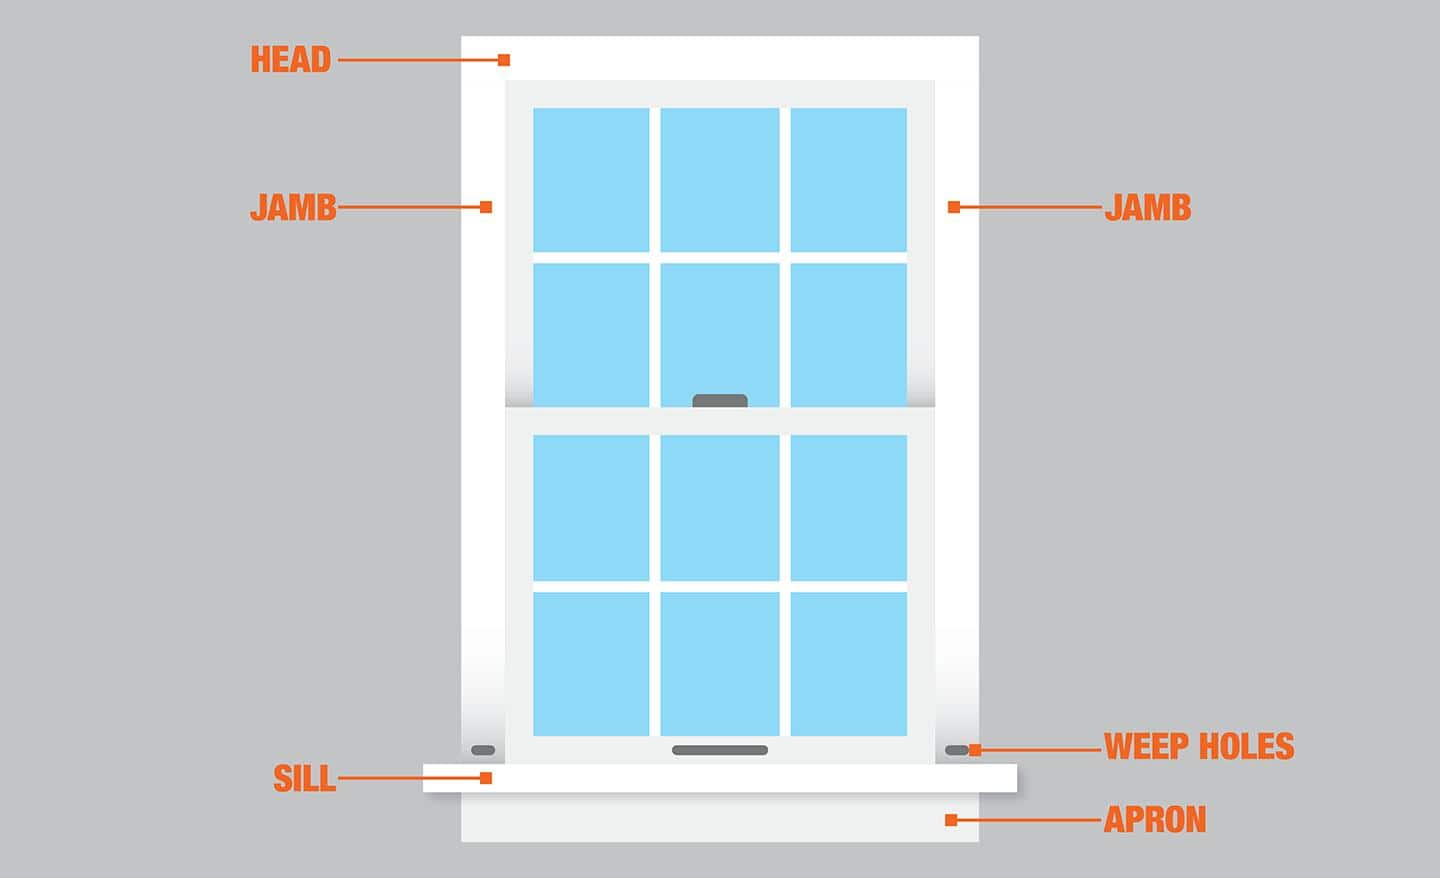
Windows without muntins challenge straight placement—use your level continuously during installation and mark reference points on adjacent cabinets or walls. For double-hung windows, align brackets with the horizontal rail between panes for visual harmony. Measure from the ceiling rather than the window sill if your window isn’t perfectly square, creating a more balanced appearance in your kitchen.
Minimize Hardware Visibility
Dark hardware competes with architectural elements—align brackets with window muntins to minimize visual impact. Lighter hardware should blend with curtain headers for integrated appearance. In kitchens with prominent trim, choose rod finials that complement your cabinet hardware for a cohesive look that elevates your entire space.
Maintain Your Kitchen Curtain Installation
Establish Simple Care Routine
Dust curtains weekly using vacuum brush attachments to prevent grease buildup common in kitchen environments. Natural fiber curtains need professional cleaning or careful hand washing—never machine wash linen blends as this destroys their beautiful drape. Inspect hardware monthly, tightening loose screws before minor wobbles become major problems that require complete reinstallation.
Seasonal Positioning Adjustments
Raise cafe curtains slightly higher in winter to maximize light capture during shorter days, lowering them in summer for increased privacy during longer daylight hours. This small seasonal adjustment optimizes both functionality and energy efficiency—allowing more natural light in winter reduces artificial lighting needs while strategic summer positioning keeps your kitchen cooler.
Your perfectly installed kitchen curtains should enhance both beauty and function—proper installation ensures they deliver on both promises while solving your privacy needs. Take time measuring, position hardware thoughtfully, and don’t rush the process. The result transforms your kitchen from basic to beautiful while making daily cooking and cleaning more enjoyable.

