
That frustrating corner space in your kitchen—where pots and pans get lost forever—is about to become your most valuable storage area. Properly installing corner kitchen cabinets transforms this dead zone into functional space, but blind corner base cabinets require precise techniques that differ from standard cabinet installation. Unlike regular cabinets, these specialized units need exact pull measurements and positioning to function correctly. One mismeasurement can leave you with doors that won’t open or precious storage space you can’t reach.
This comprehensive guide walks you through every critical step of corner cabinet installation, from calculating your exact pull requirements to final adjustments. You’ll learn the manufacturer-specific techniques that prevent common installation errors and maximize your corner space functionality. Whether you’re a DIY enthusiast tackling a kitchen remodel or a professional installer verifying best practices, these actionable steps ensure your corner cabinets work perfectly from day one.
Calculate Your Exact Blind Corner Cabinet Pull Measurement
Measure Your Corner Space Before Installation
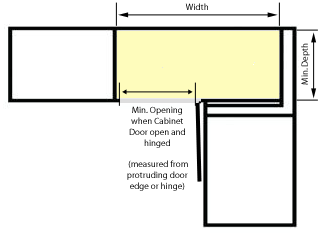
Before unpacking your corner kitchen cabinets, measure your corner dimensions with precision. Your blind corner cabinet requires a specific “pull” distance—the measurement from the wall to the cabinet’s outer edge—to create proper clearance for doors and drawers. This pull distance varies by cabinet collection and size, typically ranging from 0 to 12 inches depending on your model.
Critical measurements you need:
– Wall-to-wall diagonal corner dimension
– Cabinet face width (36″, 39″, 42″, or 45″)
– Minimum and maximum pull requirements for your specific model
– Baseboard thickness (often overlooked but critical)
Determine Your Dead Space Requirements
Dead space refers to the gap between your wall and the cabinet’s back edge after installation. This space varies significantly based on your cabinet collection. Traditional blind base cabinets create 3-12 inches of dead space depending on pull distance, while built-in clearance models like the Veyla Rose collection eliminate dead space entirely by installing directly against the wall.
Simple dead space calculation:
1. Measure your corner space diagonally from wall to wall
2. Subtract your cabinet’s minimum pull distance
3. The remainder equals your dead space measurement
4. Compare with manufacturer specifications to verify accuracy
Must-Have Tools for Flawless Corner Cabinet Installation
Essential Installation Equipment Checklist
Installing corner kitchen cabinets demands specialized tools beyond standard cabinet installation. The unique positioning requirements mean you can’t rely on basic carpentry tools alone. A cabinet jack or temporary supports are non-negotiable—you’ll need to hold your cabinet precisely in position while verifying clearances.
Non-negotiable tools:
– Laser level for perfect positioning
– Stud finder with deep-scan capability
– Drill with cabinet-specific bits
– Cabinet clamps for secure connections
– 3″ or 6″ filler strips (sold separately)
– Cabinet screws with appropriate wall anchors
Collection-Specific Supplies You’ll Need
Each cabinet collection has unique installation requirements that affect your supply list. The Allie Nicole BBC36 and BBC42 models require specific filler sizes for adjacent connections, while the frameless Breanna Madison collection eliminates stile measurements but demands precise door clearance calculations.
Collection-specific considerations:
– Allie Nicole: 3-6″ fillers for BBC36/BBC42 connections
– Breanna Madison: Full-height door clearance measurements
– Veyla Rose: Zero dead space models need no fillers against walls
– Bella Rain: Specific stile measurements between functional and blind sides
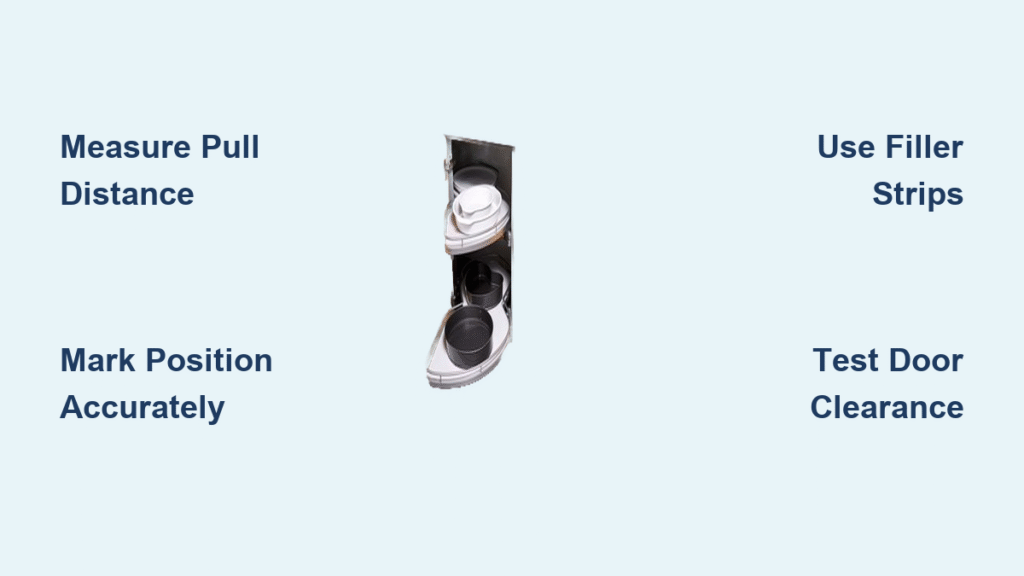
Position and Secure Your Corner Cabinet in 4 Critical Steps
Mark Your Precise Installation Position
Most corner cabinet installation failures begin with incorrect initial positioning. Start by marking your cabinet position on the floor using the manufacturer’s required pull distance. This measurement determines how far your cabinet sits from the corner wall.
Positioning sequence:
1. Measure and mark your exact pull distance from the corner wall
2. Verify floor levelness with a 4-foot level—use shims if needed
3. Locate and mark wall studs above your cabinet height
4. Dry-fit the cabinet to confirm door swing clearance
Connect to Adjacent Cabinets Properly
The connection between your corner cabinet and adjacent runs requires careful attention to filler strips. Position the 3-6″ filler strip against the corner cabinet’s stile (built-in filler), then pre-drill holes through the filler into the cabinet stile before securing with cabinet screws.
Pro connection tip: Your corner cabinet is reversible—doors can mount left or right based on your kitchen layout. Test door swing before final installation since blind corner doors are typically wider than standard doors and can create pinch points with appliances.
Avoid These 5 Costly Corner Cabinet Installation Mistakes
Measurement Errors That Cause Clearance Issues
The most common corner cabinet installation mistake involves incorrect pull calculations. Many DIYers measure from the finished wall instead of the drywall, forgetting to account for baseboard thickness. Others use face width instead of box dimensions, creating clearance disasters when doors won’t open fully.
Critical clearance oversights:
– Ignoring appliance handle interference with door swing
– Misjudging stile visibility based on pull distance
– Inadequate filler sizing for cabinet connections
– Forgetting to measure interior dimensions for organizers
Design Phase Pitfalls First-Timers Make
Poor planning during the design phase leads to functional failures after corner cabinet installation. Installing simple shelving without considering accessibility creates “black hole” storage where items disappear forever. Positioning the cabinet too far from the wall creates excessive dead space, while poor door swing arc calculations cause daily frustrations.
Prevention strategy: Always plan for pull-out solutions during installation—adding them later requires complete disassembly. Measure your appliance handles and calculate their clearance requirements before final positioning.
Optimize Blind Corner Storage with Pull-Out Solutions
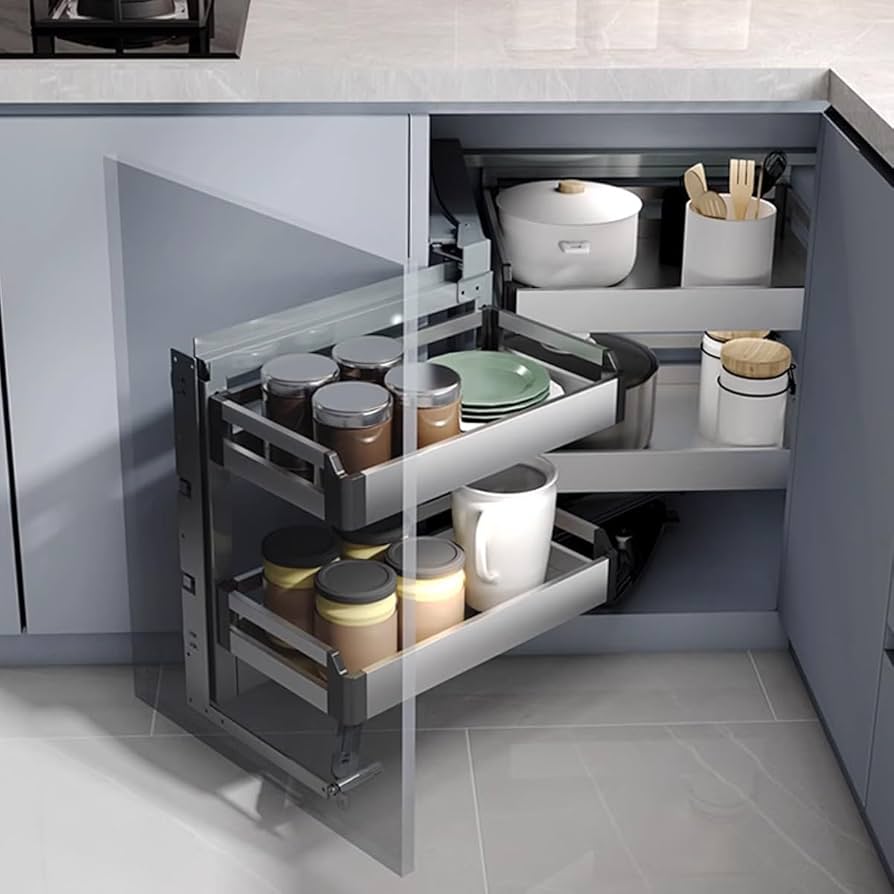
Install L-Shaped Pull-Out Organizers
After securing your corner kitchen cabinets, enhance accessibility with specialized hardware designed for corner navigation. L-shaped pull-outs glide smoothly around the corner angle, bringing hidden items within easy reach. Kidney-shaped shelves maximize space utilization in the blind section, while full-extension slides ensure complete access to every inch.
Installation advantage: These organizers transform previously unusable space into functional storage, eliminating the need to crawl on the floor to retrieve items from the back of your corner cabinet.
Upgrade to Deep Drawers for Maximum Access
Replace traditional corner cabinet shelving with deep drawers featuring soft-close slides. This upgrade converts wasted space into organized, accessible storage. Measure interior dimensions carefully—drawer slides require precise spacing for smooth operation in the unique corner configuration.
Pro tip: Deep drawers work particularly well in blind corner cabinets because they provide consistent access regardless of pull distance. The smooth glide mechanism makes reaching the back of the cabinet as easy as the front.
Test and Adjust Your Corner Cabinet for Perfect Operation
Verify All Door and Drawer Clearances
Before declaring your corner cabinet installation complete, conduct thorough clearance testing. Open and close doors fully, checking for interference with adjacent cabinets and appliances. Test drawer operation through complete extension to ensure no binding occurs in the corner configuration.
Critical clearance checks:
– Door swing clearance with refrigerator handles
– Drawer extension near adjacent cabinet faces
– Stile visibility matching your design preference
– Smooth operation through full range of motion
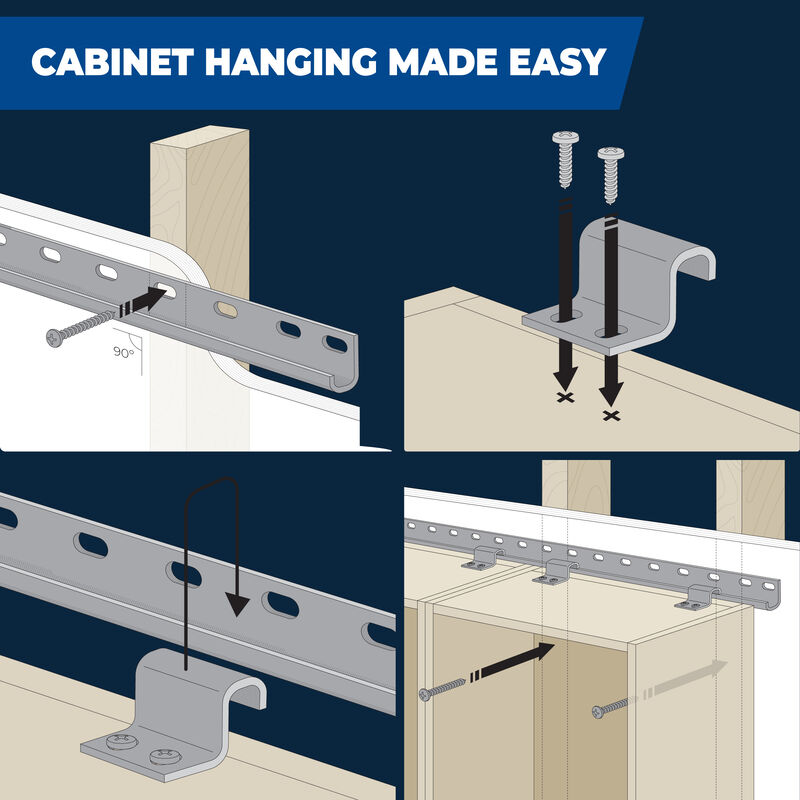
Make Final Leveling Adjustments
Secure your corner kitchen cabinets properly with these final steps: Drive screws through the cabinet back into wall studs, check level across the cabinet top and face, adjust legs or shims as needed, and install the toe kick after final positioning. Never skip the leveling check—corner cabinets magnify even minor imbalances.
Time-saving trick: Use temporary support blocks to hold the cabinet in position while making fine adjustments. This prevents frustrating slips when you’re nearly perfect but need that last 1/16-inch tweak.
Maintain Your Corner Cabinets for Long-Term Functionality
Annual Maintenance Checklist
Preserve your corner cabinet installation with simple annual maintenance: Tighten all screws and connections that may have loosened, lubricate drawer slides and hinges with silicone-based lubricant, and check for any settling or shifting that affects door operation.
Preventive care: Pay special attention to the connection points between your corner cabinet and adjacent runs—these experience the most stress during daily use and are most likely to develop gaps over time.
Future Layout Change Options
Your reversible door configuration provides valuable flexibility for future kitchen modifications. Most corner cabinets allow you to relocate hardware to the opposite side, accommodating layout changes without replacing the entire cabinet.
Design advantage: When properly installed, your corner kitchen cabinets can adapt to multiple kitchen configurations throughout their lifespan, maximizing your initial installation investment.
Collection Comparison: Which Corner Cabinet Fits Your Kitchen?
Traditional vs. Built-in Clearance Models
Traditional blind base cabinets require specific pull measurements that create dead space between the wall and cabinet. The Veyla Rose collection’s built-in clearance models eliminate this dead space by installing directly against the wall with zero pull requirement—ideal for kitchens where every inch counts.
Key differences:
– Traditional: 3-12″ pull required, creates dead space
– Built-in clearance: Installs flush against wall, no dead space
– Frameless collections: Require precise door clearance calculations
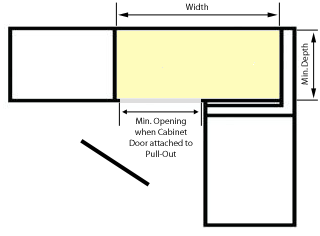
Choosing the Right Size for Your Space
Blind corner base cabinets come in standard face widths of 36″, 39″, 42″, and 45″, but the actual cabinet box width (including the blind portion) is significantly larger. A 36-inch blind corner cabinet, for example, requires a corner space of at least 36 inches by 36 inches.
Sizing tip: Always measure your corner space diagonally and compare with the manufacturer’s specifications—don’t rely solely on face width measurements when planning your corner cabinet installation.
Properly installed corner kitchen cabinets transform frustrating dead space into your kitchen’s most functional storage area. By following these precise installation techniques and avoiding common pitfalls, you’ll create accessible, durable storage that works perfectly for years. Remember that corner cabinet installation demands extra attention to measurements and clearance requirements—but the payoff in reclaimed space makes every careful step worthwhile. Measure twice, install once, and enjoy the satisfaction of a kitchen corner that finally works for you.

