
Granite transforms any kitchen island into a stunning centerpiece, but its substantial weight demands proper installation techniques. One unstable granite slab can cause thousands in damage—or worse, serious injury. Whether you’re upgrading your existing island or completing a new kitchen build, understanding the precise steps for how to install granite on kitchen island structures ensures both beauty and safety for decades to come.
This guide walks you through every critical phase, from initial measurements to final sealing, using proven methods that professional installers rely on daily. You’ll learn exactly how much overhang is safe, which thickness provides optimal durability, and the bracket system that prevents catastrophic failures. Skip any of these steps, and your dream kitchen upgrade could become a dangerous liability.
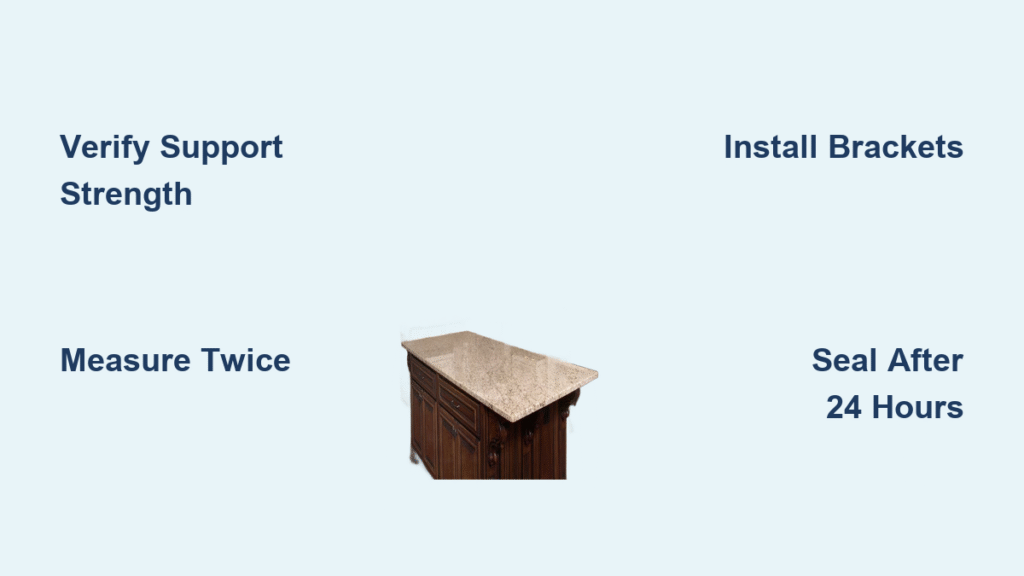
Verify Your Island Can Support Granite Weight
Kitchen islands must withstand 20-30 pounds per square foot before granite installation. Standard cabinetry works fine, but older or DIY islands often need structural reinforcement that many homeowners overlook. Begin by inspecting your cabinet frames for solid wood construction—particleboard fails under granite’s relentless pressure.
Check that your island base is securely anchored to the floor with no visible gaps between the cabinet and flooring. Any signs of existing sagging or warping indicate immediate reinforcement needs. Islands on wheels or casters present extreme hazards with granite and require complete conversion to stationary bases before proceeding.
Critical red flags requiring professional evaluation:
– Particleboard cabinet boxes showing any moisture damage
– Visible separation between cabinet components
– Previous repairs using temporary fixes like screws alone
– Any movement when applying gentle pressure to the countertop
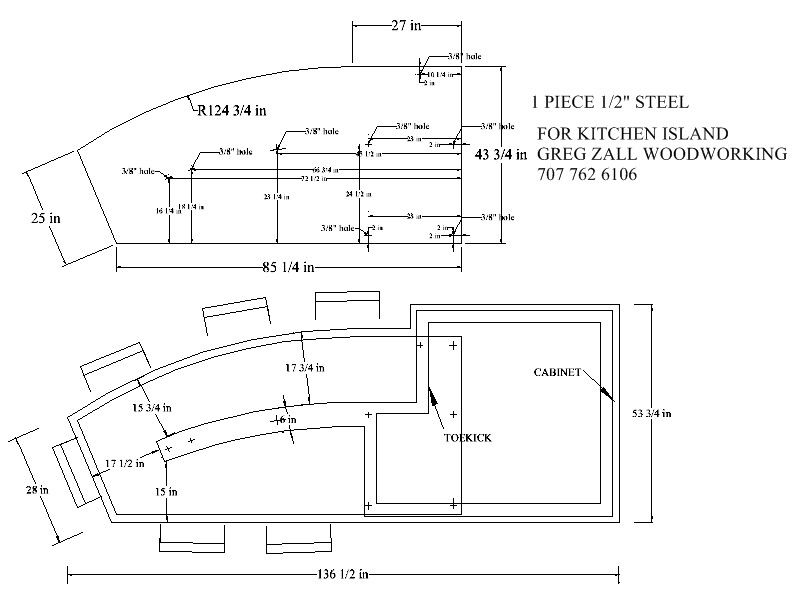
Take Precision Measurements Before Ordering
Measure twice, cut once applies double to granite installation. Unlike laminate, granite cannot be trimmed on-site after fabrication. Start by recording your exact cabinet footprint length and width, adding 1½ inches of clearance space between the island edges and surrounding walls.
Document all appliance cutout locations with exact dimensions—sink openings, cooktop spaces, and electrical outlet positions relative to the surface edge. Create a cardboard template matching your island shape to visualize final overhang positions and prevent costly fabrication errors. Professional installers always double-check measurements against templates before granite arrives.
Pro tip: Mark all critical measurements directly on your island structure with painter’s tape. Include notes about uneven floors or structural obstacles that affect bracket placement. This prevents confusion during the time-sensitive installation process.
Determine Maximum Safe Overhang Dimensions
Overhang limits depend entirely on granite thickness and support systems. For standard 3 cm (1¼ inch) granite, you can safely achieve 8-10 inches of overhang with proper bracket support underneath. Without brackets, the maximum safe overhang drops to just 6 inches—insufficient for comfortable seating.
When planning seating areas, you’ll need at least 10 inches of overhang to accommodate knees comfortably. This requires installing heavy-duty hidden brackets at maximum 24-inch intervals along the seating edge. The brackets must attach directly to your cabinet structure, not just the countertop surface.
Bracket spacing rules:
– Place brackets within 6 inches of all corners
– Reduce spacing to 18 inches for islands over 8 feet long
– Install additional brackets near sink cutouts
– Never exceed 24 inches between support points
Choose the Right Granite Thickness for Islands
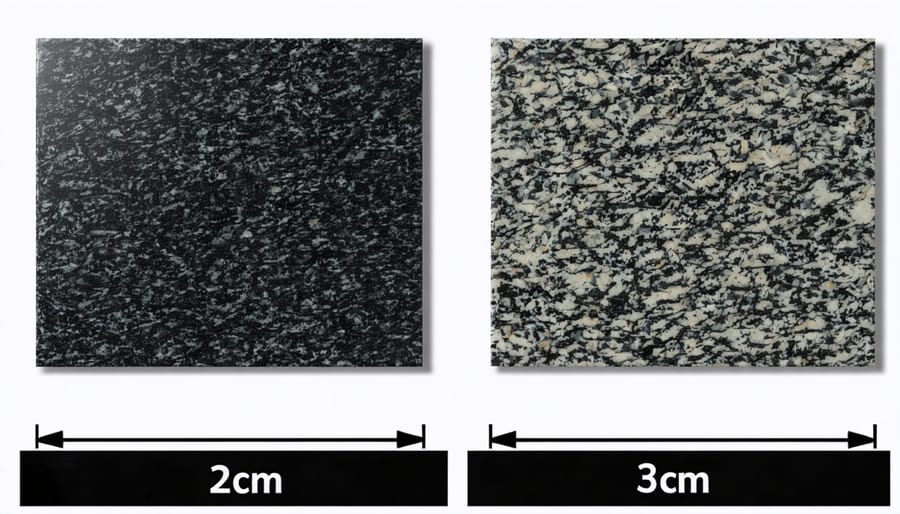
3 cm granite represents the professional standard for kitchen islands. This thickness provides superior strength without requiring plywood underlayment, creating cleaner sightlines underneath your island. While 2 cm granite costs less initially, its increased vulnerability to cracking often leads to higher long-term expenses.
The thinner 2 cm option requires additional support structures that frequently negate any material savings. Underlayment becomes necessary for ¾ inch granite, adding complexity and visible layers from below. Most homeowners discover these hidden costs after installation when repairs become necessary.
Thickness comparison chart:
– 3 cm granite: No underlayment needed, standard professional choice
– 2 cm granite: Requires additional support, prone to cracking
– ¾ inch granite: Mandatory plywood underlayment, visible from below
Remove Existing Countertops Without Damage
Empty everything first—no exceptions. Granite installation generates significant debris and requires complete cabinet access for bracket installation. Begin by disconnecting all plumbing and capping water lines before removing sinks and fixtures completely.
Systematically unscrew the existing countertop from cabinet bases using a power drill with appropriate bits. Protect cabinet faces with cardboard during removal to prevent accidental damage. Photograph all plumbing connections before disassembly—this saves hours of troubleshooting during reconnection.
Critical damage prevention steps:
– Save existing sink cutout measurements for granite template
– Check cabinet level and adjust feet if needed
– Remove all old adhesive residue from cabinet tops
– Verify cabinet structure integrity before proceeding
Install Hidden Support Brackets Correctly
Brackets must become permanent structural elements. These 90-degree steel supports carry the entire granite weight, making proper installation non-negotiable. Mark bracket positions at maximum 24-inch spacing along your island perimeter, adjusting for corners and structural elements.
Pre-drill cabinet walls using a 3/16 inch bit before securing brackets with 2½ inch cabinet screws. Verify level across all bracket tops using a 4-foot level—any variance creates dangerous stress points in the granite. Position brackets ½ inch below your final granite height to allow space for silicone adhesive.
Critical bracket specifications:
– Use heavy-duty models rated for granite weight
– Ensure perfect 90-degree angles—no compromises
– Attach directly to cabinet framing, not just face panels
– Test bracket strength by applying 50 pounds of pressure
Position Granite Slab Safely During Installation
Never attempt granite placement alone—minimum two strong helpers required. Inspect slabs thoroughly before signing delivery receipts—cracks or chips discovered later become your responsibility. Verify color and pattern match against your ordered samples before installation begins.
Test fit the granite without adhesive first, checking all overhang measurements and appliance clearances. Keep granite vertical during transport using suction cup handles for better grip—never carry it flat. Lower the slab slowly and evenly onto brackets in a single controlled motion.
Critical safety rules:
– Wear heavy-duty gloves and safety glasses
– Use proper lifting technique—bend knees, not back
– Keep fingers clear of bracket contact points
– Have a spotter monitor alignment during placement
Apply Permanent Adhesive Bonding System
Silicone creates the final immovable bond between granite and brackets. Clean the granite underside thoroughly with denatured alcohol before application—any debris compromises adhesion. Apply a ¼ inch bead of high-quality silicone along all bracket contact points and add additional beads 2 inches from each bracket.
Lower the granite evenly onto the brackets in a single motion, avoiding any twisting or shifting. Work quickly but carefully—silicone begins skinning over in 10-15 minutes, reducing bonding effectiveness. Professional installers always apply slight downward pressure during placement to ensure maximum contact.
Adhesive application pro tips:
– Use silicone specifically formulated for stone installation
– Maintain consistent bead thickness throughout
– Apply in one continuous motion without stopping
– Work in sections for larger islands to prevent drying
Level Granite Countertop During Final Placement
Leveling happens once—make it perfect. Granite’s weight settles into position immediately, leaving no room for adjustments after silicone cures. Check the island perimeter with a 4-foot level in multiple directions before the adhesive sets.
Adjust cabinet feet incrementally if any high or low spots are detected—never shim directly under granite as this creates dangerous stress points. Verify overhang consistency on all sides and confirm appliance clearances before silicone cures completely. Professional installers always recheck level after 30 minutes as weight distribution settles.
Common leveling mistakes to avoid:
– Forcing uneven placement with additional weight
– Ignoring slight cabinet movement during installation
– Failing to check level in multiple directions
– Rushing the process to meet deadlines
Complete Installation with Proper Sealing
Sealing protects your investment immediately after installation. Wait 24 hours for silicone to cure completely before cleaning the surface with a dedicated granite cleaner. Apply penetrating sealer using a lint-free cloth, working it into the stone’s surface in circular motions.
Allow sealer to penetrate for 10 minutes before buffing away excess with a clean cloth. Unsealed granite absorbs spills within hours, creating permanent stains that no cleaner can remove. Reseal annually for optimal protection, especially in high-traffic kitchen areas.
First week care instructions:
– Avoid placing heavy objects on overhang areas
– Clean spills immediately with pH-neutral cleaner
– Don’t use abrasive cleaners or acidic substances
– Check bracket connections from underneath weekly
Your granite island installation creates a lifetime centerpiece when done correctly. The combination of proper brackets, precise measurements, and quality materials delivers both stunning aesthetics and rock-solid stability. Remember: granite’s beauty lasts forever, but only if the installation does too. Schedule annual inspections of support brackets and maintain sealing schedules to protect this significant investment in your kitchen’s functionality and value.

